This is a prerelease version of this book. Feel free to check if out! I would greatly appreciate it if you left me some feedback. If something is wrong, feel free to leave a merge request on the repository.
Rust Project Primer
A Practical Guide on how to Structure and Maintain your Rust Projects
by
Patrick M. Elsen
CC BY-NC-SA 4.0 Licensed
Preface
This book exists because learning Rust and learning how to run a Rust project are two different things. There are excellent resources for the language itself: The Rust Book, Rust by Example, to name just a few. But once you know the syntax and the borrow checker, you still need to figure out how to structure a codebase, set up CI, manage dependencies across a workspace, write tests that actually catch bugs, and ship the result to users. There are established patterns in the Rust community, but that knowledge is scattered across blog posts, README files, and tribal experience. I wrote this book to bring it together in one place.
The book assumes you already know Rust. It is not a language tutorial. Instead, it focuses on the practical side of running a Rust project: how to organize code, which tools to use for formatting, linting, testing, and benchmarking, how to set up continuous integration, how to document and release your work, and how to make good choices when the ecosystem gives you several options. Where possible, I try to explain the tradeoffs rather than just prescribing a single answer.
Much of what is in here comes from years of working with Rust professionally and learning from open-source projects, and from studying how well-run projects in the ecosystem handle the same problems. I have tried to make it information-dense and practical: something you can read through once to get the lay of the land, and come back to later when you need to set up a specific tool or make a specific decision.
Rust is not perfect, but it is a language that rewards investment. The tooling is good, the ecosystem is maturing rapidly, and the community cares deeply about quality. I hope this book helps you build on that foundation, and helps give you the tools you need to structure your project well, so that you can focus on writing great code and get the most out of the ecosystem.
Introduction
Once you are comfortable with the Rust language, the next set of questions is about the ecosystem and the practices around it. How do you structure a project that will grow over time? Which libraries do you reach for when you need logging, serialization, or error handling? How do you set up CI so that formatting, linting, testing, and auditing happen automatically? How do you release your work — to crates.io, as a container image, as a system package?
This book is organized around those questions. Each chapter covers a different aspect of running a Rust project:
- Development Environment covers editor setup and toolchain configuration.
- Build System covers Cargo, Nix, Bazel, and other build tools, and how Rust code can fit into projects written in other languages.
- Organization explains how to structure a codebase as it grows: when to split into multiple crates, how to use workspaces, and how to lay out a repository.
- Ecosystem surveys popular Rust libraries for common problems: logging, errors, serialization, concurrency, and more. It explains the tradeoffs between competing options so you can pick the right one.
- Interop covers calling C, C++, Python, and other languages from Rust, including the FFI frameworks available and common hazards to watch for.
- Checks explains how to automatically verify properties of your code: formatting, linting, dependency auditing, semver correctness, and more. These are the tools that catch problems before they reach code review.
- Testing covers strategies for verifying correctness, from unit tests and property testing to fuzzing, mutation testing, and dynamic analysis with tools like Miri.
- Measure explains how to collect metrics about your codebase: test coverage, benchmarking, and memory profiling.
- Building covers what happens during
cargo build: reducing binary size, tuning compiler output for performance, cross-compiling for other platforms, and caching builds. - Documentation covers how to write and publish documentation, from API-level rustdoc to standalone books with mdBook and architecture decision records.
- Releasing explains the process of shipping your work to users: versioning, changelogs, publishing to crate registries, building container images, and creating system packages.
- Continuous Integration ties the preceding chapters together by showing how to run checks, tests, and builds automatically on every commit, with examples for GitHub Actions and GitLab CI.
- Tools covers general-purpose development tools that are useful across workflows: code search, task runners, macro expansion, and debuggers.
Not every chapter will be relevant to every project, and you do not need to adopt everything at once. Chapters are self-contained, so you can read the book cover to cover or use it as a reference: jump to whichever chapter addresses the problem you are facing now, and come back for others as the need arises. The Resources chapter lists books and courses for learning the Rust language itself.
Resources
The rest of this book assumes you are comfortable with Rust as a language. If you are still learning, or want to deepen your understanding of specific areas like async or atomics, the resources below are a good place to start.
Books
The Rust Programming Language, 2nd Edition by Steve Klabnik and Carol Nichols
The official book of the Rust programming language. Covers the language and toolchain from the ground up, with example projects that show how concepts fit together in practice. The starting point for most Rust developers. Also available in print.
Effective Rust by David Drysdale
Hands-on recommendations for writing idiomatic Rust code, organized as a series of actionable items covering types, traits, error handling, dependencies, and tooling. Particularly strong on the “why” behind Rust idioms. Also available in print.
Rust for Rustaceans by Jon Gjengset
A deep dive for developers who already know the basics. Covers designing interfaces, writing effective tests, unsafe code, async internals, and performance. Contains one of the clearest explanations of how async works under the hood.
Rust Atomics and Locks by Mara Bos
Covers low-level concurrency: atomics, memory ordering, and lock implementations. Essential reading if you need to implement custom synchronization primitives or understand why certain concurrent patterns are safe in Rust and others are not.
Rust Design Patterns (archived) by Rust Community
A community-maintained catalogue of design patterns, anti-patterns, and idioms specific to Rust. Each entry includes rationale explaining why a pattern works well or why an anti-pattern should be avoided.
The Rustonomicon by The Rust Project
The official guide to unsafe Rust. Covers raw pointers, transmutes, uninitialized memory, the Drop Check, and the exact rules for what constitutes undefined behavior. Essential reading if you work with FFI (see the Interop chapter) or need to implement data structures that require unsafe code.
Rust by Example by The Rust Community
A companion to The Rust Programming Language that teaches through annotated, runnable examples rather than long explanations. Each concept is demonstrated with code you can modify and run in the browser. A good option if you prefer learning by doing.
The Cargo Book by The Rust Project
The official reference for Cargo: dependency management, workspace configuration, build scripts, feature flags, publishing, and custom profiles. Since nearly every chapter in this book involves Cargo in some way, this is a useful reference to keep at hand.
For more Rust books, see The Little Book of Rust Books and The Rust Bookshelf.
Courses
Comprehensive Rust by Google
A multi-day Rust training course developed by Google’s Android team. Covers the language from basics through advanced topics like async and unsafe, with exercises throughout. A good option if you prefer structured, classroom-style learning.
Zero to Production in Rust by Luca Palmieri
A practical guide that walks through building a production-ready web application in Rust, covering project setup, database migrations, logging, error reporting, and deployment. Good for seeing how the tools and practices discussed in this book come together in a real project.
Articles
These articles cover similar ground to this book, approaching Rust project practices from different angles. Reading them alongside this book gives you a broader perspective on where the Rust community has converged and where opinions still differ.
One Hundred Thousand Lines of Rust by Alex Kladov
Lessons from maintaining several mid-sized Rust projects, including rust-analyzer. Covers documentation, testing strategies, build times, and project organization. Many of the recommendations align with what this book covers, but from the perspective of someone maintaining widely-used developer tools.
Basic Things by Alex Kladov
Argues that foundational infrastructure (documentation, code review, testing, reproducible builds, metrics) compounds over time and becomes a major multiplier as projects grow. A good companion to the Checks and Testing chapters of this book.
My Ideal Rust Workflow by Amos Wenger
A detailed walkthrough of one developer’s professional Rust setup, covering editor configuration, automated checks with Clippy and cargo-hack, CI pipelines, and private infrastructure. Useful for seeing how the individual tools discussed in this book fit together in a cohesive workflow.
Good Practices for Writing Rust Libraries by Pascal Hertleif
A practical checklist for publishing Rust libraries: code quality tools (rustfmt, Clippy, lints), project metadata, README conventions, CI setup, and documentation deployment. Written in 2015 but most of the advice remains relevant.
Describes the testing strategy for Sciagraph, a Python memory profiler built with Rust. Covers coverage marks (verifying specific code paths are hit), property-based testing with proptest, end-to-end tests in both debug and release modes, and panic injection testing. Also discusses choosing Rust for memory safety, wrapping unsafe APIs in safe interfaces, and environmental assertions at startup to catch configuration mismatches.
Videos
Setting up CI and Property Testing for a Rust Crate by Jon Gjengset
Jon walks through setting up a CI pipeline and property testing for one of his crates, explaining his reasoning at each step. A good complement to the Testing and CI chapters of this book, as it shows the process of making these decisions in real time.
Development Environment
This chapter explains what you need to get started writing a Rust project. It outlines how you can install a Rust toolchain, and what editors or IDEs you can use to write Rust code. If you already have a Rust toolchain installed and you have an editor or an IDE that you are comfortable using, you can safely skip this chapter.
Fundamentally, you need two pieces of software to get started with your Rust project:
- Rust toolchain: with the components needed for formatting, linting Rust code, in the correct version, and with the right targets.
- Code editor: with support for Rust through syntax highlighting and ideally
integration with
rust-analyzer.
This section outlines how you can set up your environment to be able to write Rust productively, by showing you ways to get a Rust toolchain installed and by examining some popular code editors used by the Rust community.
A lot of this book is very command-line centric and as such you may find the experience of using these tools slightly easier on UNIX-like operating systems such as Linux or macOS. This should not come as a surprise, as the majority of Rust developers work on and target Linux according to the 2023 survey. However, Rust loves Windows too, and most of the tools explained here should work on any platform. I try to point out any commands that either don’t work on natively on Windows or require special setup. You can always try WSL2 to run things if you run into any issues.
Rust Toolchain
The bare minimum you need to get started with to write and build Rust code is a
text editor and rustc. However, to do meaningful work, you will likely also
need Cargo and some way to manage it, for example to update your Rust toolchains
or install support for other targets like WebAssembly.
Rust toolchain consists of:
| Item | Description |
|---|---|
rustc | Rust compiler |
cargo | Rust package manager and build system |
rustfmt | Rust code formatter |
clippy | Rust linter, and automatically fix code issues |
rust-std | Rust standard library source code, used when requesting rustc to build it from source |
rust-docs | Documentation for Rust’s standard library |
There are different release channels. The stable channel tracks stable Rust
releases, such as 1.80, while the nightly channel tracks nightly releases
that come with more features, but which might be unstable. Generally, you want
to stick to the stable release channels, unless you have a specific reason to
use the nightly ones (for example, you need to use a feature that is
unstable).
Depending on what you are writing software for, you may also want to install
toolchains for different targets. For example, you may need the targets
x86_64-unknown-linux-gnu to build software for Linux, wasm32-unknown-unknown
to build software for WebAssembly targets, or thumbv6m-none-eabi to target
Cortex-M0 ARM microcontrollers.
Your operating system might have Rust available in its package manager, however you should be careful about using it. The version available might be outdated, or there might not be a way to use Rust nightly or install a different target. For some tasks, such as writing WebAssembly web frontends in Rust or doing embedded development, you will need to install additional targets so that Rust knows how to compile your code.
You will likely want some way to not only install Rust, but also manage the components and targets, update the toolchain and have the ability to install different versions of the toolchain side-by-side to work on your project.
Rustup
The recommended approach to install and manage Rust toolchains, components and targets is Rustup. It lets you install different versions of the toolchain side-by-side, switch between them either explicitly or with some configuration inside your project.
To install rustup on Linux, you can run the following command. If you are
using Windows, you can find installation instructions on the website.
curl --proto '=https' --tlsv1.2 -sSf https://sh.rustup.rs | sh
With Rustup installed, you should now have access to Cargo and you can use it to manage your Rust installation. Here are some useful commands for reference:
# install a different version of the toolchain (can also give a specific version)
rustup install nightly
rustup install 1.80.0

# install a target
rustup target add wasm32-unknown-unknown

# update your Rust toolchain
rustup update
When you use Cargo, Rustup will use your default toolchain. For most of your
development, this should be sufficient. However, you can always override this to
use a specific toolchain, for example to use nightly for a specific command by
adding +<version> to any command:
# build and run tests using the nightly toolchain
cargo +nightly test
If you have Rustup installed and Cargo works, then you are set up for using Rust.
Nix
While Rustup is the most popular and preferred way to manage Rust toolchains, it is not the only way you can use to install and manage Rust toolchains. Another popular tool used by Rustaceans to manage their toolchains is Nix, which is a declarative package manager and build system.
Todo
Editors and IDEs
Preferences for development environments amongst developers varies widely. Some developers prefer light-weight editors such as vim, neovim, or helix. These have the advantage of being fast and portable, tend to be easy to extend and rely on keyboard shortcuts to avoid being slowed down by using a mouse. Especially terminal-native developers tend to prefer enjoy these editors, because it means they can do all of their development in the terminal and can even use these editors remotely over SSH.
The other camp likes using IDEs, which are graphical tools for writing code. They tend to integrate very well into the programming languages and have compelling features such as jump-to-definition, show type information or have debugging support built-in. IDEs used to have a bad reputation for being rigid, but modern ones are just as extensible as command-line editors.

This survey shows that the two most popular editors for Rust are VS Code, and Vi-family editors (which I group together as Vim). The Zed editor is also popular, but did not appear in this survey, likely because it was not stable at the time the survey was run.
We can cluster the editors into two groups:
- Graphical IDEs: Includes VS Code, Rust Rover, Sublime Text, Visual Studio, Xcode, Atom.
- Terminal-based editors: Vim, Helix, Emacs
In general, Graphical IDEs are more friendly to beginners. For this reason, the editors discussed in this chapter focusses mainly on these. The Terminal-based editors have their own advantages, but they require more learning and unless you are already familiar with them, it likely does not make sense to pick them up.
In the subsections of this chapter, we take a look at three editors that yield a good developer experience:
- VS Code: Partially open-source editor developed by Microsoft, has extensive plugin functionality, basically a clone of the once-popular Atom editor.
- Zed: Open-source editor written in Rust, comes with Rust support out of the box. Not available for Windows currently.
- Rust Rover: Commercial, but free-to-use for noncommerical applications, developed by JetBrains.
Rust Analyzer
Language servers are tools that parse and understand programming languages, and expose this data to IDEs. Unlike compilers, which run once and produce a binary, language servers are designed to run continuously, generate metadata such as inferred types of values, and implement high-level operations such as refactoring code.
The original language server for Rust was called Rust Language Server, and it used rustc to parse projects. This approached worked initially, but there were issues with latency. Additionally, rustc is not great at handling incomplete or broken code, which is important for language servers as they run while you write code. As a result, RLS was deprecated in 2022.
- graph of rls architecture
As a result, a new approach was taken that used a custom parser to be more
error-resiliant than rustc, called
rust-analyzer.
- graph of rust-analyzer architecture
The core piece that makes Rust IDEs possible is thus rust-analyzer, which is a project that understands Rust projects and implements the Language Server Protocol, which is a way for IDEs to understand them too and display type annotations, warnings, errors, suggestions.
In general, any IDE that supports the LSP protocol can be used for Rust development using rust-analyzer. The only exception is Rust Rover, which implements it’s own parser for Rust projects.
In general, you don’t need to know much about Rust Analyzer to use it. In fact,
many Rust IDEs even bundle it, and will manage and update it for you. You will
not even be aware that it is running in the background. But there are some
situations where you might need to be aware of its existence. If you use build
systems other than Cargo to build your Rust project, for example, then Rust
Analyzer might not be able to analyze your project. There might also be cases
where it has bugs, because it uses a different parser for Rust than rustc has.
Reading
The Rustup Book by Rust Language
Book for the Rustup tool used by the Rust community to install and manage Rust toolchains. It explains core concepts such as channels, toolchains, components and profiles, how to configure Rustup to use specific versions of the toolchain on a per-project basis.
Rust Analyzer Manual by Rust Analyzer
Explains what rust-analyzer is, and how to use it. It has instructions for the
best way to install it for every editor it supports, and outlines ways you can
configure it for your project.
Why LSP? by Alex Kladov
Alex explains what problem LSPs solve.
LSP could have been better by Alex Kladov
This article discusses architectural aspects of LSPs, that Alex does not find as brilliant.
LSP: The good, the bad and the ugly by Michael Peyton Jones
Improving ‘Extract Function’ in Rust Analyzer by Dorian Scheidt
Zed
Zed is a code editor that comes with support for Rust out-of-the-box. It deserves a special mention because it itself is written in Rust. It is fairly minimalist, offering limited support for extensions (only themes, grammars and language servers can be extended). But the advantage is that it requires no setup, it understands and can work on Rust projects with no configuration.
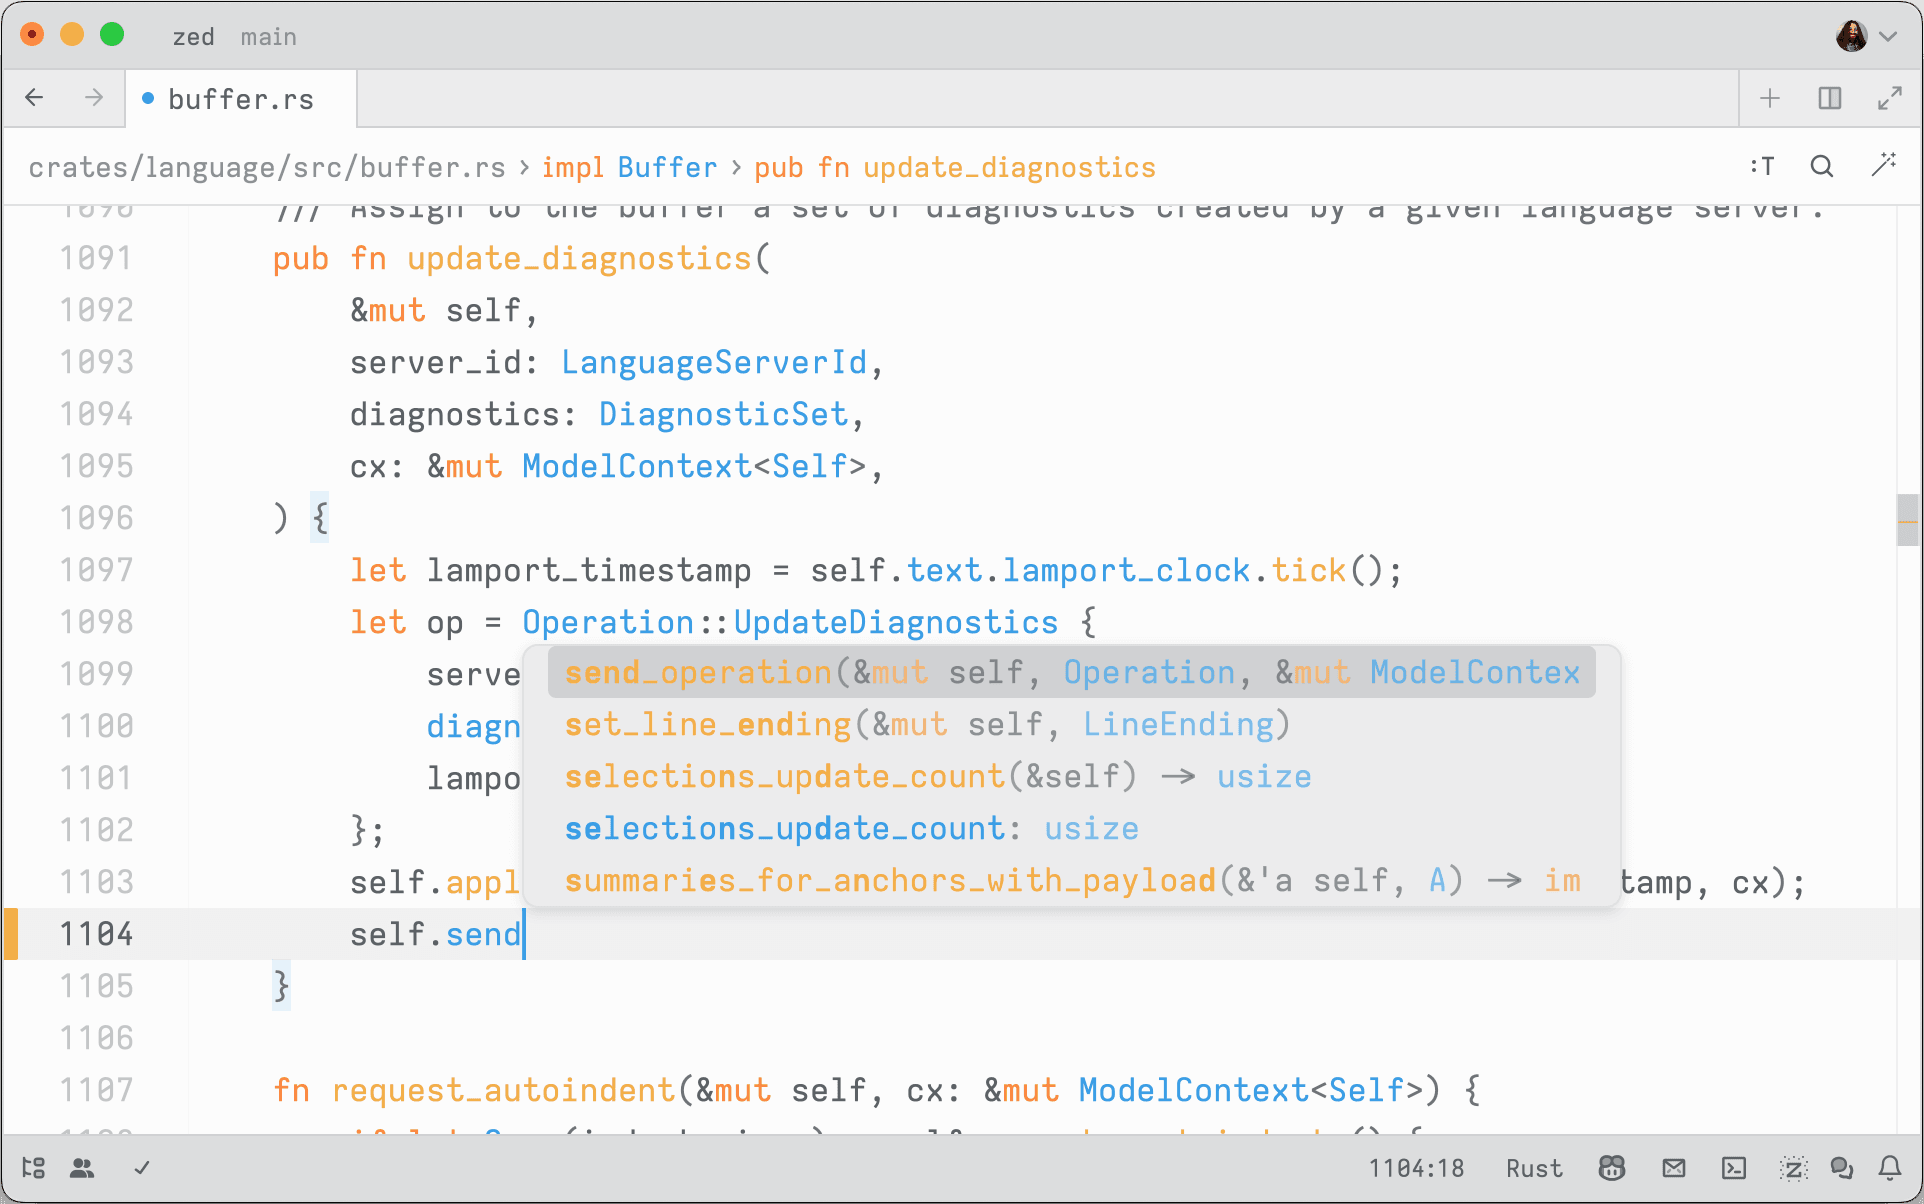
If you just want an editor that you can use to write Rust code, and you only
need features that rust-analyzer comes with out of the box, then it is a good
choice. It is also open-source.
- screenshots of all features zed has for Rust projects
Features
Notes
Notably, the team behind Zed runs a blog documenting their experience building a cross-platform code editor in Rust, with deep dives into challenges they have faced in doing so and how they managed to tackle them. A lot of the articles there are good reading for anyone who is interested in Rust, cross-platform development, real-world asynchronous applications and the like.
Visual Studio Code
- screenshot of vscode (light/dark mode)
Visual Studio Code is a clone of the previously popular Atom editor that is sponsored by Microsoft. Compared to Visual Studio, it is lightweight and relatively fast, and has the advantage of being easily extensible. It has a vast ecosystem of plugins for various programming languages, including Rust.
Plugins
rust-analyzer
https://code.visualstudio.com/docs/languages/rust
RustRover
RustRover is a commercial IDE offered by JetBrains. It has a deeper integration and more intelligent features than the other IDEs listed here, but is only free for personal use.
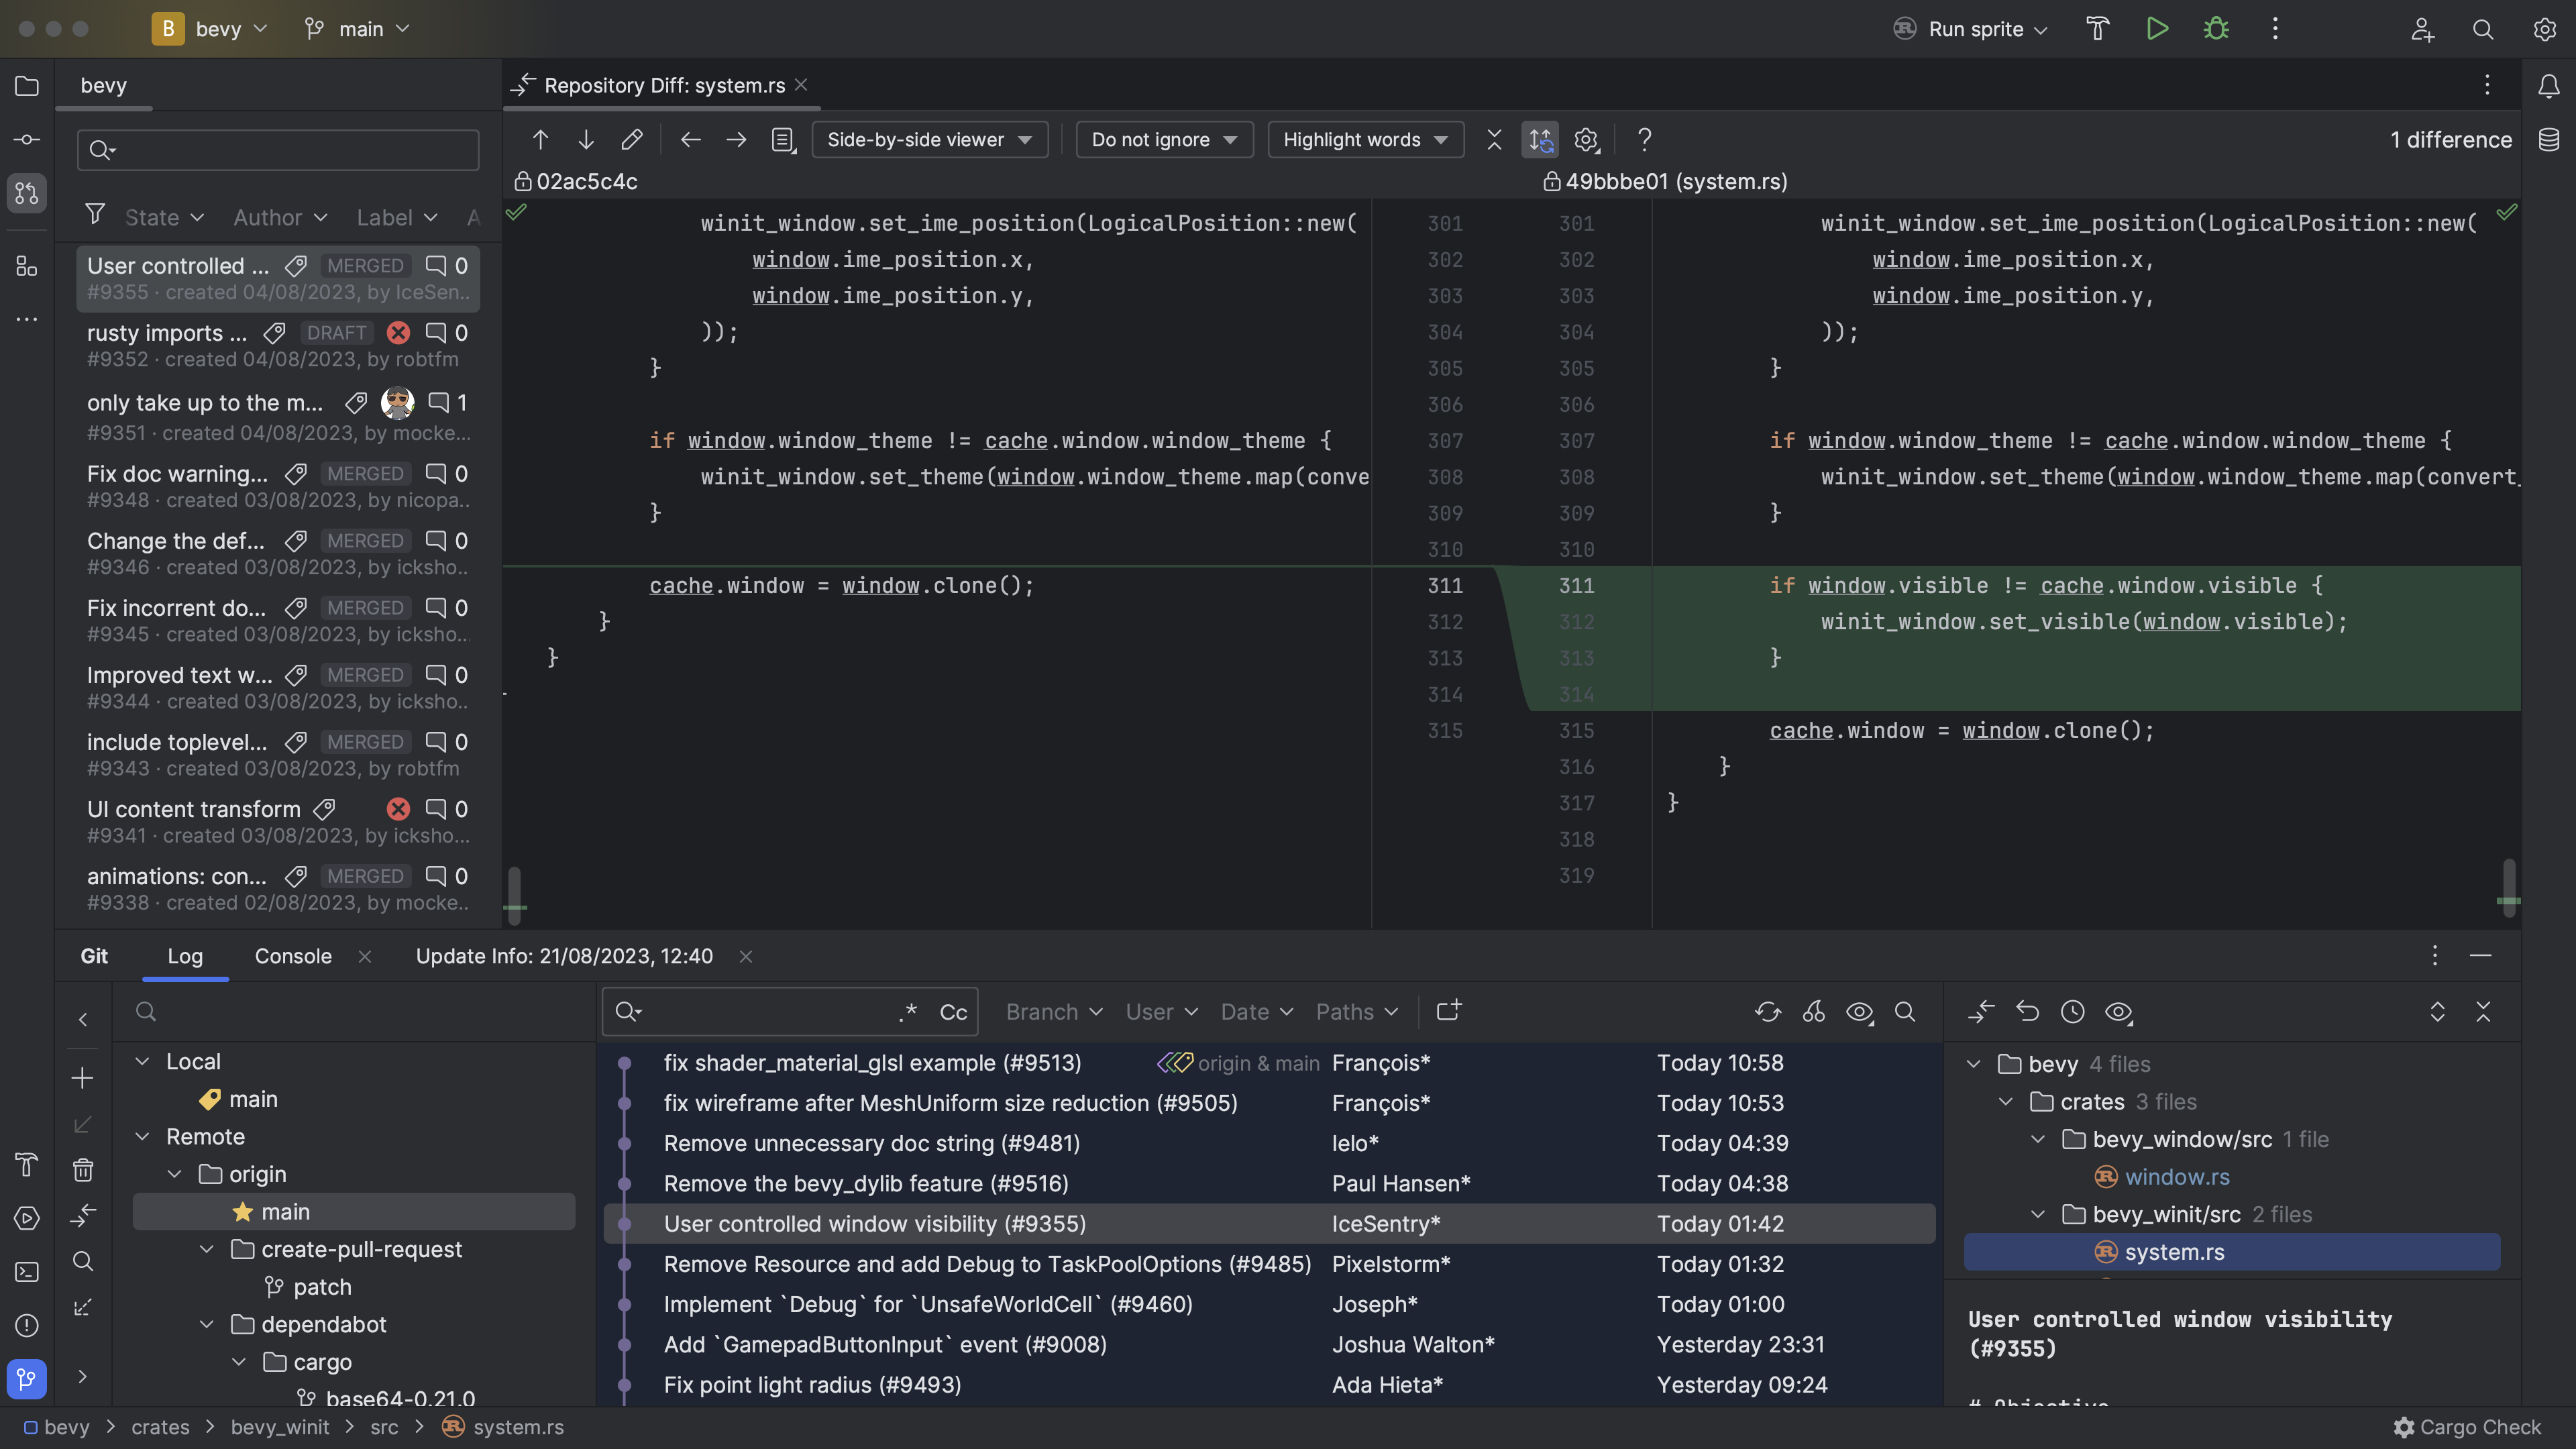
It is being actively developed, and new features that make writing Rust code and managing Rust projects are constantly added. The advantage is that it is all integrated and works out-of-the-box, unlike Visual Studio Code which needs some custom plugins that achieve what it can do.
The only downside of it is that it is commercial, meaning that it is not open-source.
Build system
Cargo is a great tool for building, cross-compiling and testing Rust software. It supports installing plugins that extend its functionality, many of which are discussed in this book. If your project consists only of Rust crates, then Cargo is all you need:

Things start to get tricky when you involve other languages (such as mixing Rust with C, C++, TypeScript) or when parts of your project need to be compiled for different targets (for example, compiling some crates to WebAssembly and embedding the output into other builds).
Example architectures
For example, some projects may need to interface with some legacy C/C++ code. In this case, building might involve compiling the library first:

Another common pattern when building full-stack web applications with Rust is that you might write the frontend in Rust and need to compile it to WebAssembly, and the backend in Rust. You want the Rust backend to serve the frontend, so it requires the WebAssembly output as a build input:

If you build a traditional web application with a TypeScript frontend and a Rust backend, you may need to run a TypeScript compiler for some part of your code and use the output as the input for your backend.

Other configurations are also possible, it depends on your particular need.
Build Systems
Build systems are high-level tools to orchestrate the build process. They track tasks and dependencies, and make sure that the build steps are run in the right order and rerun when any of the inputs have changed.
Good build systems will enforce hygiene by sandboxing build steps to make sure you do not accidentally depend on inputs you have not declared. This helps to avoid the “it works on my machine” syndrome, where your code accidentally depends on some system state that is present on your machine but not on others’.
However, build systems become interesting to your Rust project when one of three things happen:
- Inside your project, you have multi-language components. For example, a frontend written in TypeScript, a backend component written in Kotlin, a C library, some Python tooling.
- Inside your project, you have cross-target dependencies. For example, you
have a project fully written in Rust, and the backend wants to embed the
frontend compiled to WebAssembly using a tool such as
trunkfor ease of deployment. - You depend on some external dependency which is not written in Rust, and
you want to be sure you can use it reproducibly on all platforms. For example,
you depend on the presence of
sqlitein a specific version.
Many build systems also offer fully reproducible builds by requiring all build inputs and tools to be pinned down by hash, which enables distributed caching which is a big quality of life improvement for developers as it leads to faster development times.
This chapter discusses some build systems that play nice with Rust. Note that build systems are not necessarily mutually-exclusive: most of the time, even when using a build system that is not Cargo, you will still have the necessary Cargo manifests in the project that allows standard Cargo tooling to work.
Reading
The convergence of compilers, build systems and package managers by Edward Z. Yang
Edward explains how build systems, compilers and package managers seem to
converge. This is certainly the case for Rust, which has Cargo which acts as a
build system (cargo build) and package manager (cargo install). He explains
that this is not an isolated phenomenon, but inherent. It appears that we are
heading towards a more integrated approach.
Build Systems and Build Philosophy by Erik Kuefler
This chapter in the book discusses why build systems are vital in scaling software development, because they ensure that software can be built correctly on a number of different systems and architectures.
Chapter 4: Multi-language build system options by cxx crate
The CXX crate’s documentation discusses build system options for projects that mix Rust and C++. It recommends Cargo for projects without an existing C++ build system, Bazel for multi-language projects, and CMake for codebases already using it.
Build systems à la carte by Andrey Mokhov, Neil Mitchell and Simon Peyton-Jones
Paper which explain build systems, and how they work. It takes popular build systems apart and explains their properties. A useful paper for anyone trying to achieve a deep understanding of what build systems are and how they work.
Merkle trees and build systems by David Röthlisberger
David explores using Merkle trees to track build outputs. By storing build artifacts in OSTree (a content-addressable store where each directory’s hash is derived from its contents), any change to a file automatically propagates up through the tree. The build system can then use a single root hash to determine whether a rebuild is needed, enabling deduplication, automatic incremental rebuilds, and passing intermediate outputs between build steps without explicit naming.
Amazon’s Build System (archived) by Carl Meyers
Carl describes Brazil, Amazon’s internal build system. Brazil enforces reproducible builds through strict dependency isolation (only explicitly declared dependencies are available), uses “version sets” to manage compatible collections of package versions across hundreds of services, and separates interface versions from concrete build versions. The article argues that these properties are inevitable discoveries of any large engineering organization.
Build System Schism: The Curse of Meta Build Systems (archived) by Gavin D. Howard
Gavin gives a summary of the evolution of build systems, into the modern ones he calls meta build systems. He summarizes which features they have, and argues that Turing-completeness is a property that is required for a good build system.
Cargo
Cargo is the default build system for Rust projects. It makes it easy to create
build and test Rust code, manages dependencies from crates.io, and allows
you to publish your own crates there. It uses semantic versioning to resolve
dependency version from constraints you define and uses a lockfile to ensure you
are always building with the same dependency versions. Since rustc is
LLVM-based, it is also easy to cross-compile your Rust code for other targets,
see the list of supported Rust targets.
Cargo supports installing other tools that integrate into it and extend it with
new subcommands. This guide mentions several of such tools, such as cargo-hack
or cargo-llvm-cov.
One nice property of having Cargo as the default build system for all Rust
projects is that you can typically clone any repository that contains a Rust
crate and run cargo build to build it, or cargo test to run tests. This is
quite different to languages such as C, C++ or JavaScript that have a more
fragmented build ecosystem.
What Cargo Lacks
If you only use built-in commands and only build Rust code, then Cargo is a great build system for Rust projects. However, there are some features it does not have.
If you rely on plugins to build your project, such as trunk for building
WebAssembly-powered web frontend applications powered by Rust, Cargo will not
install it automatically. Rather, developers need to install it manually by
running cargo install trunk.
If you rely on native dependencies, such as OpenSSL or other libraries, Cargo
will not handle installing them on your behalf. There are some workarounds for
this, for example some crates like rusqlite ship the C code and have a feature
flag where Cargo will build the required library from source if you request it.
If you need to execute build steps, such as compiling C code or your have some parts of your project that use for example JavaScript, there is only rudimentary support for doing so with Cargo.
In short, Cargo is great at all things Rust, but it does not help you much if you mix other languages into your project. And that is by design: Cargo’s goal is not to reinvent the world. It does one thing, and it does it well, which is build Rust code.
The next sections discuss some approaches that you can use to use Cargo in situations that it is not designed for, but that yet seem to work.
Complex build steps
Cargo is great at building Rust code, but has few features for building projects that involve other languages. This makes sense, because such functionality is not needed by it.
Cargo does come with some support for running arbitrary steps at build time, through the use of build scripts. These are little Rust programs that you can write that are executed at build time and let you do anything you like, including building other code. It also supports linking with C/C++ libraries by having these build scripts emit some data that Cargo parses.
The other sections of this chapter are only relevant to you if your project
consists of a mixture of languages, and building it is sufficiently complex that
it cannot trivially be expressed or implemented in a build.rs file (such as:
it needs external dependencies).
build.rs to define custom build actions
If you have a few more complex steps that you need to do when building your code, you can always use a build script.
Build scripts in Cargo are little Rust programs defined in a build.rs in the
crate root which are compiled and run before your crate is compiled. They are
able to do some build steps (such as compile an external, vendored C library)
and they can emit some information to Cargo, for example to tell it to link
against a specific library.
Build scripts receive a number of environment variables as inputs, and output some metadata that controls Cargo’s behaviour.
A simple build script might look like this:
fn main() {
}
For common tasks such as building C code, generating bindings for native libraries there are crates that allow you to write build scripts easily, these are presented in the next sections.
Compiling C/C++ Code
If you have some C or C++ code that you want built with your crate, you can use
the cc crate to do so. It is a helper library that you can call inside
your build script to run the native C/C++ compiler to compile some code, link it
into a static archive and tell Cargo to link it when building your crate. It
also has support for compiling CUDA code.
A basic use of this crate looks by adding something like this to the main
function of your build script:
#![allow(unused)]
fn main() {
cc::Build::new()
    .file("foo.c")
    .file("bar.c")
    .compile("foo");
}
The crate will take care of the rest of finding a suitable compiler and
communicating to Cargo that you wish to link the foo library.
Here is an example of how this looks like. In this crate, a build script is used to compile and link some C code, and the unsafe C API is wrapped and exposed as a native Rust function.
- src/
/target
# This file is automatically @generated by Cargo.
# It is not intended for manual editing.
version = 3

[[package]]
name = "anstream"
version = "0.6.15"
source = "registry+https://github.com/rust-lang/crates.io-index"
checksum = "64e15c1ab1f89faffbf04a634d5e1962e9074f2741eef6d97f3c4e322426d526"
dependencies = [
 "anstyle",
 "anstyle-parse",
 "anstyle-query",
 "anstyle-wincon",
 "colorchoice",
 "is_terminal_polyfill",
 "utf8parse",
]

[[package]]
name = "anstyle"
version = "1.0.8"
source = "registry+https://github.com/rust-lang/crates.io-index"
checksum = "1bec1de6f59aedf83baf9ff929c98f2ad654b97c9510f4e70cf6f661d49fd5b1"

[[package]]
name = "anstyle-parse"
version = "0.2.5"
source = "registry+https://github.com/rust-lang/crates.io-index"
checksum = "eb47de1e80c2b463c735db5b217a0ddc39d612e7ac9e2e96a5aed1f57616c1cb"
dependencies = [
 "utf8parse",
]

[[package]]
name = "anstyle-query"
version = "1.1.1"
source = "registry+https://github.com/rust-lang/crates.io-index"
checksum = "6d36fc52c7f6c869915e99412912f22093507da8d9e942ceaf66fe4b7c14422a"
dependencies = [
 "windows-sys",
]

[[package]]
name = "anstyle-wincon"
version = "3.0.4"
source = "registry+https://github.com/rust-lang/crates.io-index"
checksum = "5bf74e1b6e971609db8ca7a9ce79fd5768ab6ae46441c572e46cf596f59e57f8"
dependencies = [
 "anstyle",
 "windows-sys",
]

[[package]]
name = "cc"
version = "1.1.15"
source = "registry+https://github.com/rust-lang/crates.io-index"
checksum = "57b6a275aa2903740dc87da01c62040406b8812552e97129a63ea8850a17c6e6"
dependencies = [
 "shlex",
]

[[package]]
name = "clap"
version = "4.5.16"
source = "registry+https://github.com/rust-lang/crates.io-index"
checksum = "ed6719fffa43d0d87e5fd8caeab59be1554fb028cd30edc88fc4369b17971019"
dependencies = [
 "clap_builder",
 "clap_derive",
]

[[package]]
name = "clap_builder"
version = "4.5.15"
source = "registry+https://github.com/rust-lang/crates.io-index"
checksum = "216aec2b177652e3846684cbfe25c9964d18ec45234f0f5da5157b207ed1aab6"
dependencies = [
 "anstream",
 "anstyle",
 "clap_lex",
 "strsim",
]

[[package]]
name = "clap_derive"
version = "4.5.13"
source = "registry+https://github.com/rust-lang/crates.io-index"
checksum = "501d359d5f3dcaf6ecdeee48833ae73ec6e42723a1e52419c79abf9507eec0a0"
dependencies = [
 "heck",
 "proc-macro2",
 "quote",
 "syn",
]

[[package]]
name = "clap_lex"
version = "0.7.2"
source = "registry+https://github.com/rust-lang/crates.io-index"
checksum = "1462739cb27611015575c0c11df5df7601141071f07518d56fcc1be504cbec97"

[[package]]
name = "colorchoice"
version = "1.0.2"
source = "registry+https://github.com/rust-lang/crates.io-index"
checksum = "d3fd119d74b830634cea2a0f58bbd0d54540518a14397557951e79340abc28c0"

[[package]]
name = "heck"
version = "0.5.0"
source = "registry+https://github.com/rust-lang/crates.io-index"
checksum = "2304e00983f87ffb38b55b444b5e3b60a884b5d30c0fca7d82fe33449bbe55ea"

[[package]]
name = "is_terminal_polyfill"
version = "1.70.1"
source = "registry+https://github.com/rust-lang/crates.io-index"
checksum = "7943c866cc5cd64cbc25b2e01621d07fa8eb2a1a23160ee81ce38704e97b8ecf"

[[package]]
name = "levenshtein"
version = "0.1.0"
dependencies = [
 "cc",
 "clap",
 "libc",
]

[[package]]
name = "libc"
version = "0.2.158"
source = "registry+https://github.com/rust-lang/crates.io-index"
checksum = "d8adc4bb1803a324070e64a98ae98f38934d91957a99cfb3a43dcbc01bc56439"

[[package]]
name = "proc-macro2"
version = "1.0.86"
source = "registry+https://github.com/rust-lang/crates.io-index"
checksum = "5e719e8df665df0d1c8fbfd238015744736151d4445ec0836b8e628aae103b77"
dependencies = [
 "unicode-ident",
]

[[package]]
name = "quote"
version = "1.0.37"
source = "registry+https://github.com/rust-lang/crates.io-index"
checksum = "b5b9d34b8991d19d98081b46eacdd8eb58c6f2b201139f7c5f643cc155a633af"
dependencies = [
 "proc-macro2",
]

[[package]]
name = "shlex"
version = "1.3.0"
source = "registry+https://github.com/rust-lang/crates.io-index"
checksum = "0fda2ff0d084019ba4d7c6f371c95d8fd75ce3524c3cb8fb653a3023f6323e64"

[[package]]
name = "strsim"
version = "0.11.1"
source = "registry+https://github.com/rust-lang/crates.io-index"
checksum = "7da8b5736845d9f2fcb837ea5d9e2628564b3b043a70948a3f0b778838c5fb4f"

[[package]]
name = "syn"
version = "2.0.77"
source = "registry+https://github.com/rust-lang/crates.io-index"
checksum = "9f35bcdf61fd8e7be6caf75f429fdca8beb3ed76584befb503b1569faee373ed"
dependencies = [
 "proc-macro2",
 "quote",
 "unicode-ident",
]

[[package]]
name = "unicode-ident"
version = "1.0.12"
source = "registry+https://github.com/rust-lang/crates.io-index"
checksum = "3354b9ac3fae1ff6755cb6db53683adb661634f67557942dea4facebec0fee4b"

[[package]]
name = "utf8parse"
version = "0.2.2"
source = "registry+https://github.com/rust-lang/crates.io-index"
checksum = "06abde3611657adf66d383f00b093d7faecc7fa57071cce2578660c9f1010821"

[[package]]
name = "windows-sys"
version = "0.52.0"
source = "registry+https://github.com/rust-lang/crates.io-index"
checksum = "282be5f36a8ce781fad8c8ae18fa3f9beff57ec1b52cb3de0789201425d9a33d"
dependencies = [
 "windows-targets",
]

[[package]]
name = "windows-targets"
version = "0.52.6"
source = "registry+https://github.com/rust-lang/crates.io-index"
checksum = "9b724f72796e036ab90c1021d4780d4d3d648aca59e491e6b98e725b84e99973"
dependencies = [
 "windows_aarch64_gnullvm",
 "windows_aarch64_msvc",
 "windows_i686_gnu",
 "windows_i686_gnullvm",
 "windows_i686_msvc",
 "windows_x86_64_gnu",
 "windows_x86_64_gnullvm",
 "windows_x86_64_msvc",
]

[[package]]
name = "windows_aarch64_gnullvm"
version = "0.52.6"
source = "registry+https://github.com/rust-lang/crates.io-index"
checksum = "32a4622180e7a0ec044bb555404c800bc9fd9ec262ec147edd5989ccd0c02cd3"

[[package]]
name = "windows_aarch64_msvc"
version = "0.52.6"
source = "registry+https://github.com/rust-lang/crates.io-index"
checksum = "09ec2a7bb152e2252b53fa7803150007879548bc709c039df7627cabbd05d469"

[[package]]
name = "windows_i686_gnu"
version = "0.52.6"
source = "registry+https://github.com/rust-lang/crates.io-index"
checksum = "8e9b5ad5ab802e97eb8e295ac6720e509ee4c243f69d781394014ebfe8bbfa0b"

[[package]]
name = "windows_i686_gnullvm"
version = "0.52.6"
source = "registry+https://github.com/rust-lang/crates.io-index"
checksum = "0eee52d38c090b3caa76c563b86c3a4bd71ef1a819287c19d586d7334ae8ed66"

[[package]]
name = "windows_i686_msvc"
version = "0.52.6"
source = "registry+https://github.com/rust-lang/crates.io-index"
checksum = "240948bc05c5e7c6dabba28bf89d89ffce3e303022809e73deaefe4f6ec56c66"

[[package]]
name = "windows_x86_64_gnu"
version = "0.52.6"
source = "registry+https://github.com/rust-lang/crates.io-index"
checksum = "147a5c80aabfbf0c7d901cb5895d1de30ef2907eb21fbbab29ca94c5b08b1a78"

[[package]]
name = "windows_x86_64_gnullvm"
version = "0.52.6"
source = "registry+https://github.com/rust-lang/crates.io-index"
checksum = "24d5b23dc417412679681396f2b49f3de8c1473deb516bd34410872eff51ed0d"

[[package]]
name = "windows_x86_64_msvc"
version = "0.52.6"
source = "registry+https://github.com/rust-lang/crates.io-index"
checksum = "589f6da84c646204747d1270a2a5661ea66ed1cced2631d546fdfb155959f9ec"
[package]
name = "levenshtein"
version = "0.1.0"
edition = "2021"

[dependencies]
# used to parse command-line arguments
clap = { version = "4.5.16", features = ["derive"] }
# used for FFI interface (defines size_t)
libc = "0.2.158"

[build-dependencies]
# used to build the levenshtein.c library
cc = "1.1.15"
# Levenshtein

Wrapper around [levenshtein.c][], a C library to compute the Levenshtein
distance between two strings. Also contains a command-line tool to compute the
distance for two strings passed as command-line parameters.

## Examples

You can build the library using Cargo. Ensure that you have a C compiler installed,
as this crate relies on the [cc][] crate to build the library.

```
$ cargo run -- "hello" "hello"
0
$ cargo run -- "kitten" "sitting"
3
```

[levenshtein.c]: https://github.com/wooorm/levenshtein.c
[cc]: https://docs.rs/cc/latest/cc/
/// Compiles the `levenshtein.c` library using the C compiler and instructs Cargo to link the
/// resulting archive.
fn main() {
    cc::Build::new().file("src/levenshtein.c").compile("levenshtein");
}
// `levenshtein.c` - levenshtein
// MIT licensed.
// Copyright (c) 2015 Titus Wormer <tituswormer@gmail.com>

#include <string.h>
#include <stdlib.h>
#include <stdint.h>
#include "levenshtein.h"

// Returns a size_t, depicting the difference between `a` and `b`.
// See <https://en.wikipedia.org/wiki/Levenshtein_distance> for more information.
size_t
levenshtein_n(const char *a, const size_t length, const char *b, const size_t bLength) {
  // Shortcut optimizations / degenerate cases.
  if (a == b) {
    return 0;
  }

  if (length == 0) {
    return bLength;
  }

  if (bLength == 0) {
    return length;
  }

  size_t *cache = calloc(length, sizeof(size_t));
  size_t index = 0;
  size_t bIndex = 0;
  size_t distance;
  size_t bDistance;
  size_t result;
  char code;

  // initialize the vector.
  while (index < length) {
    cache[index] = index + 1;
    index++;
  }

  // Loop.
  while (bIndex < bLength) {
    code = b[bIndex];
    result = distance = bIndex++;
    index = SIZE_MAX;

    while (++index < length) {
      bDistance = code == a[index] ? distance : distance + 1;
      distance = cache[index];

      cache[index] = result = distance > result
        ? bDistance > result
          ? result + 1
          : bDistance
        : bDistance > distance
          ? distance + 1
          : bDistance;
    }
  }

  free(cache);

  return result;
}

size_t
levenshtein(const char *a, const char *b) {
  const size_t length = strlen(a);
  const size_t bLength = strlen(b);

  return levenshtein_n(a, length, b, bLength);
}
#ifndef LEVENSHTEIN_H
#define LEVENSHTEIN_H

#include <stddef.h>

// `levenshtein.h` - levenshtein
// MIT licensed.
// Copyright (c) 2015 Titus Wormer <tituswormer@gmail.com>

// Returns a size_t, depicting the difference between `a` and `b`.
// See <https://en.wikipedia.org/wiki/Levenshtein_distance> for more information.
#ifdef __cplusplus
extern "C" {
#endif

size_t
levenshtein(const char *a, const char *b);

size_t
levenshtein_n (const char *a, const size_t length, const char *b, const size_t bLength);

#ifdef __cplusplus
}
#endif

#endif // LEVENSHTEIN_H
//! The Levenshtein distance measures how similar two words are, by how many substitutions are
//! needed to get from one word to the other. This Crate wraps a C library that implements this
//! algorithm in a safe Rust interface.

/// Raw access to the unsafe C API of the levenshtein library.
pub mod raw {
    use libc::size_t;
    use std::ffi::c_char;
    extern "C" {
        /// Raw binding to the C `levenshtein_n` function.
        ///
        /// `a` and `b` must be valid pointers to character arrays, and `a_length` and `b_length`
        /// their lengths respectively.
        pub fn levenshtein_n(
            a: *const c_char,
            a_length: size_t,
            b: *const c_char,
            b_length: size_t,
        ) -> size_t;
    }
}

/// Computes the Levenshtein distance between the strings `a` and `b`.
///
/// # Examples
///
/// The Levenshtein distance between two equal words is zero.
///
/// ```
/// # use levenshtein::levenshtein;
/// assert_eq!(levenshtein("hello", "hello"), 0);
/// ```
///
/// The Levenshtein distance between two words that have a single letter substituted is one.
///
/// ```
/// # use levenshtein::levenshtein;
/// assert_eq!(levenshtein("hello", "hallo"), 1);
/// ```
pub fn levenshtein(a: &str, b: &str) -> u64 {
    use std::ffi::c_char;
    let result = unsafe {
        raw::levenshtein_n(
            a.as_ptr() as *const c_char,
            a.len(),
            b.as_ptr() as *const c_char,
            b.len(),
        )
    };
    result as u64
}

#[test]
fn test_levenshtein() {
    macro_rules! assert_distance {
        ($a:expr, $b:expr, $d:expr) => {
            assert_eq!(levenshtein($a, $b), $d);
        };
    }

    assert_distance!("", "a", 1);
    assert_distance!("a", "", 1);
    assert_distance!("", "", 0);
    assert_distance!("levenshtein", "levenshtein", 0);
    assert_distance!("sitting", "kitten", 3);
    assert_distance!("gumbo", "gambol", 2);
    assert_distance!("saturday", "sunday", 3);

    // It should match case sensitive.
    assert_distance!("DwAyNE", "DUANE", 2);
    assert_distance!("dwayne", "DuAnE", 5);

    // It not care about parameter ordering.
    assert_distance!("aarrgh", "aargh", 1);
    assert_distance!("aargh", "aarrgh", 1);

    // Some tests form `hiddentao/fast-levenshtein`.
    assert_distance!("a", "b", 1);
    assert_distance!("ab", "ac", 1);
    assert_distance!("ac", "bc", 1);
    assert_distance!("abc", "axc", 1);
    assert_distance!("xabxcdxxefxgx", "1ab2cd34ef5g6", 6);
    assert_distance!("xabxcdxxefxgx", "abcdefg", 6);
    assert_distance!("javawasneat", "scalaisgreat", 7);
    assert_distance!("example", "samples", 3);
    assert_distance!("sturgeon", "urgently", 6);
    assert_distance!("levenshtein", "frankenstein", 6);
    assert_distance!("distance", "difference", 5);
}
use clap::Parser;

#[derive(Parser)]
struct Options {
    a: String,
    b: String,
}

fn main() {
    let options = Options::parse();
    let distance = levenshtein::levenshtein(&options.a, &options.b);
    println!("{distance}");
}
Note that in order to make the C function “visible” from Rust, you need to
declare it in an extern "C" block. It needs a function definition that matches
the one in the C header. Writing this by hand is error-prone, and can lead to
unsafety issues.
This example also shows how this unsafe C function is wrapped into a safe Rust function. Doing so involves dealing with raw pointers, and it is easy to get something wrong. It is important to write good Unit Tests, and often it can help to use Dynamic Analysis to make sure you did it correctly.
Compiling CMake Projects
If the native code you need to build uses CMake as its build system, the
cmake crate provides a build script
helper that invokes CMake and links the resulting library into your Rust binary.
It handles finding CMake, passing the right flags for the target platform, and
telling Cargo where the compiled library lives.
Generating Bindings for C/C++ Libraries
Writing extern "C" declarations by hand is tedious and error-prone.
bindgen automates this by parsing
C/C++ header files and generating the corresponding Rust FFI declarations. It is
typically used inside a build script to regenerate bindings whenever the headers
change. See the Interop chapter for more detail on
working with C and C++ from Rust.
Caching builds
You may find that Rust takes a long time to compile, which is certainly the
case. You can partially mitigate this by using a build cache, which is a service
that will cache the compiled artifacts and allow you to compile considerably
faster. One tool that lets you do this is sccache, which is discussed in
a future chapter.
Toolchain Pinning
If you depend on specific Cargo or Rust features, you may find that you can run into issues if people with older toolchain versions try to build your code. For this reason, it is sometimes useful to pin a specific version of the Rust toolchain in a project, to make sure everyone is using the same versions.
There are two mechanisms that you can use here, depending on where you want this pinning to work:
- You can use a
rust-toolchain.tomlfile to pin the Rust version for the current project. This file is picked up byrustup, which most people use to manage and update their Rust toolchain. When running any Cargo command in a project that has such a file,rustupwill ensure that the specified toolchain version is installed on the system and will only use that. - Conversely, if you are building a library and you want users of your library (as in, people that depend on your library as a dependency, but do not directly work on it) to use a specified minimum Rust toolchain version, you can set the MSRV in the Cargo metadata. This means that users of your library that are on older Rust versions will get an error or a warning when they try to add your library as a dependency.
Pinning the toolchain version for projects
The way you can solve this is by putting a
rust-toolchain.toml file into the repository. This will
instruct rustup to fetch the exact toolchain mentioned in this file whenever
you run any operations in the project.
A minimal rust-toolchain.toml that pins the stable toolchain and ensures
rustfmt and clippy are available looks like this:
[toolchain]
channel = "1.75"
components = ["rustfmt", "clippy"]
Keep in mind that this file is only picked up by people who use rustup to
manage their Rust toolchains. However, rustup is commonly used by Rust
developers to install and update their Rust toolchains, so this works well in
practise.
External tooling is also able to read and use these files. For example, when
using Nix to build Rust projects, the crane module can read this file and use
it to tell Nix which Rust toolchain to pick.
Specifying the minimum toolchain version for library crates
However, this rust-toolchain.toml file is only consulted when you are building
the current project. What if your crate is used as a dependency by other crates?
How can you communicate that it needs a certain version of the Rust compiler?
For this, Cargo has the option of specifying a MSRV for each crate. This is the minimum version of the Rust compiler that the crate will build with.
In a later chapter, we will show you how you can determine the MSRV programmatically and how you can test it to make sure that the version you put there actually works.
If you build library crates, you should specify the minimum version of the Rust toolchain that is needed to build your library. This helps other crate authors by telling them which version of Rust they need to use your library. You should always specify this.
Set the rust-version field in your Cargo.toml:
[package]
name = "my-library"
version = "0.1.0"
edition = "2021"
rust-version = "1.74"
Cargo will warn or error when someone tries to use your library with a toolchain older than this. See the MSRV chapter for how to verify this value is correct.
Common Commands
Cargo has a useful selection of built-in commands for managing Rust projects.
Initializing a Project
To quickly create a Cargo project, you can use cargo new. By default, it will
create a binary crate, but you can use the --lib flag to create a library
crate instead.
cargo new my-crate
Building and running Code and Examples
The main thing you likely use Cargo for is to build and run Rust code. Cargo has
two commands for this, cargo build and cargo run.
cargo build
cargo run
If you have multiple binaries and you want to build or run a specific one, you
can specify it using the --bin flag.
cargo build --bin my_binary
cargo run --bin my_binary
If you instead want to build or run an example, you can specify that using the
--example flag.
cargo build --example my_example
cargo run --example my_example
Running Tests and Benchmarks
Besides building and running Rust code, you will likely also use Cargo to run unit tests and benchmarks. It has built-in commands for this, too.
cargo test
cargo bench
As explained in the Unit testing section, you can
also use the external tool cargo-nextest to run tests faster.
Managing Dependencies
Cargo comes with built-in commands for managing dependencies. Originally, these commands were part of cargo-edit, but due to their popularity the Cargo team has decided to adopt them as first-class citizens and integrate them into Cargo.
cargo add serde
cargo remove serde
Recently, they also added support for Workspace dependencies. If you use
cargo-add to add a dependency to a crate, which already exists in the root
workspace as a dependency, it will do the right thing and add it as a workspace
dependency to your Cargo manifest.
You can also use Cargo to query the dependency tree. This lets you see a list of
all dependencies, and their child dependencies. It lets you find out if you have
duplicate dependencies (with different versions), and when that is the case, why
they get pulled in. For example, if you have one dependency that uses
uuid v1.0.0, but you depend on uuid v0.7.0, then you will end up with two
versions of the uuid crate that are being pulled in.
cargo tree
This command used to be a separate plugin called cargo-tree, but was incorporated into Cargo by the team due to it being useful.
Building Documentation
Cargo can generate API documentation from your doc comments using rustdoc. See
the Documentation chapter for more detail.
cargo doc
Installing Rust Tools
Besides just being a build system for Rust, Cargo also acts as a kind of package manager. Any binary Rust crates that are published on a registry can be compiled and installed using it. This is often used to install Cargo plugins or other supporting tools.
cargo install ripgrep
Compiling from source can be slow.
cargo-binstall is an
alternative that downloads pre-built binaries when available, falling back to
source compilation when not. Many popular tools publish pre-built binaries that
cargo-binstall can find automatically.
Profiling Builds
If you want to understand where Cargo is spending time during builds, you can use the built-in timing report. This generates an HTML page showing which crates took the longest to compile and how they overlapped:
cargo build --timings
Conclusion
If your project can get away with only using it to define and run all of the steps needed to build your project, then you should prefer it over using a third-party build system. Everyone who writes Rust code uses Cargo, it is very simple to use and comes with features that cover the majority of the use-cases you might run into.
If you do have a multi-language project, or a project with complicated build steps, you might soon find that build scripts are rather limited. Dependency tracking is possible with them, but it feels hacky. They are not hermetic, and there is no built-in caching that you can use. In this case, you may find it useful to take a look at the other popular build systems and determine if they might help you achieve what you want in a way that is more robust or more maintainable.
Do keep in mind that usually, using third-party build systems can be more pain than using Cargo itself, because they need to reimplement some functionality that you get for free when using Cargo. However, sometimes there are advantages that they bring that outweigh the additional complexity.
Reading
The Cargo Book by Rust Project
Reference guide for Cargo. This book discusses all features that Cargo has and how they can be used.
Build Scripts by The Cargo Book
Section in the Cargo Book that talks about using build scripts. It shows some examples for how they can be used and explains what can be achieved with them.
The Missing Parts in Cargo (archived) by Weihang Lo
Weihang, a Cargo team member, discusses features that Cargo lacks or that are still in development: pre/post-build hooks, better support for non-Rust code, build script sandboxing, and cross-compilation ergonomics. Useful context for understanding why some projects turn to external build systems.
Foreign Function Interface by The Rustonomicon
This chapter in The Rustonomicon explains how to interact with foreign functions, that is code written in C or C++, in Rust.
Bazel
Bazel is an open-source port of the Blaze build system used internally at Google. It is, in some ways, purpose built to solve the kinds of problems that Google faces: building large amounts of code in a giant monorepo with a very diverse set of client machines.
It excels at mixing and matching multiple programming languages, which makes it a great fit when you’re trying to integrate Rust into an existing C or C++ codebase, or build a web application that uses components written in different languages (such as TypeScript for the frontend, and Rust for the backend) but still want to have a simple build process.
It is also an artifact-centric rather than a task-centric build system.
Why Bazel?
It uses a high-level build language and supports multiple languages and platforms. One of Bazel’s key features is its ability to create reproducible builds, meaning that it ensures the output of a build is the same regardless of the environment it’s run in. This is achieved through strict dependency tracking and sandboxed execution environments. Bazel’s performance is enhanced by its advanced caching and parallel execution strategies, allowing it to only rebuild parts of the project that have changed since the last build, significantly reducing build times. It also scales seamlessly, facilitating its use in both small projects and massive codebases like those at Google. This makes Bazel particularly appealing for large, multi-language projects with complex dependencies, where build speed and consistency are critical.
How does Bazel work?
When you use Bazel, you declare how your project should be built in BUILD
files containing a description in the Starlark language, which is similar to
Python. In this language, you define all of the targets and dependencies. From
this, Bazel builds a graph of all targets and their dependencies.
Bazel will try to perform hygienic builds, meaning that you should not rely on native dependencies being available, but rather you tell Bazel how to build them itself. You can also have platform-specific targets and rules to ensure that your project can be built on any platform (that your developers use or deploy to).
Any external resources you rely on, you specify with a hash-sum to ensure that the compilation process is always deterministic.
Getting Started with Bazel
Bazel’s build configuration replaces or coexists with the typical Cargo metadata. This means that if you want to migrate a Rust project to use Bazel, you may need to duplicate some definitions.
Installing Bazel
While you can install Bazel, the recommended way to use it is to install bazelisk. Bazelisk is to Bazel as Rustup is to Rust: it manages multiple versions of Bazel and ensures that you are using the appropriate version in each project.
If you do use bazelisk, then you should add a file into your repository telling
it which version of Bazel your project should use. The simplest way to achieve
this is by creating a .bazelversion file containing the desired version of
Bazel:
7.3.1
The advantage of doing this is that you ensure all users will use exactly the same version of Bazel.
Project Setup
To use Bazel, you need to configure a Repository (used to be called a
Workspace). You can do this by creating a MODULE.bazel or REPO.bazel file in
the root of your repository.
Typically, if you work with Rust you will want to use [rules_rust][], which is a module that teaches Bazel how to build and interact with Rust projects. A sample Repository configuration might look like this
bazel_dep(name = "rules_rust", version = "0.48.0")
Examples
This sections shows off some example projects that showcase what using Bazel in
a Rust project looks like. Bazel comes with some
Rust examples
and the rules_rust comes with a more extensive
set of examples
that are also worth looking into.
Bazel Rust Hello World
- smallest possible bazel + rust project
Bazel Rust Workspace
- smallest possible bazel + rust workspace project
Mixing Rust and C
- smallest possible rust + native C code project
Full-stack Rust web application
- smallest possible backend + frontend project
Mixing Rust and JavaScript
- smallest possible rust + javascript (react) project
Integrating with Nix
It is possible to integrate Bazel with Nix. The idea is that Nix is a little bit better of a package manager, and that Bazel is a bit better as a build system. Nix is used to bootstrap the environment: the compiler, the native libraries. Bazel is then used as a build system.
If you don’t Nix, to get a true hermetic build environment you need to instruct it to build all native dependencies from source. You can avoid that when using Nix. And the fact that Nix has a public binary cache means that you rarely need to actually compile the thing you are using, most of the case Nix will be able to just pull it from the cache.
- https://nix-bazel.build/
- https://www.tweag.io/blog/2022-12-15-bazel-nix-migration-experience/
- https://www.tweag.io/blog/2018-03-15-bazel-nix/
- https://www.tweag.io/blog/2024-02-29-remote-execution-rules-nixpkgs/
- https://github.com/tweag/rules_nixpkgs
Reading
Scaling Rust builds with Bazel (archived) by Roman Kashitsyn
Roman explains how and why the Internet Computer project switched to using Bazel as it’s build system. He explains how Bazel is good at setting up builds that involve several languages or build targets, such as building some code for WebAssembly and using the resulting binaries as inputs to other builds. He walks you through the process they used to incrementally switch a large project to using Bazel and the implications it had. He considers the migration a success.
Using Bazel with Rust to Build and Deploy an Application (archived) by Enoch Chejieh
Enoch walks you through how to get started with a simple Rust project that uses Bazel to build. In particular, he shows to get get dependencies between several crates working, and unit tests running in Bazel.
Rewriting the Modern Web in Rust (archived) by Kevin King
Kevin shows how to set up a full-stack Rust application using Axum for the backend and Yew and the Tailwind CSS framework for the frontend. He shows how to use the Bazel build system to wrap it all together, including getting interactive rebuilds working. This is a good example to show how powerful Bazel is, as it involves building the frontend to WebAssembly and embedding it into the frontend.
Building Rust Workspace with Bazel (archived) by Ilya Polyakovskiy
Ilya shows you how you can make existing Rust Workspaces build with Bazel, by
taking the ripgrep crate, which is a popular search tool written in Rust and
converting it to use Bazel for building and testing.
Bazel rules_rust by rules_rust project
The rules_rust project is the official Rust bindings for Bazel. It lets you
tell Bazel about the crates you have, and how they depend on each other. If you
want to use Bazel to build Rust code, you should use this plugin.
Bazel: What It Is, How It Works, and Why Developers Need It by David Mavrodiev
This article is an overview of Bazel, it discusses the basics of hot it operates and what advantages it has for developers.
Birth of the Bazel (archived) by Han-Wen Nienhuys
Han-Wen explains how Bazel was born as an open source build system out of Google’s internal Blaze build system, and why the decision was made to open-source it.
Buck2
Buck2 (source) is written and maintained by Facebook, and is very similar to Bazel. What makes it interesting is that it is written in Rust, which makes it rather likely that it has good support for building Rust projects.
Interestingly, Buck2 uses the same language to write configuration as Bazel does, which is called Starlark. Both the syntax and the APIs are quite similar, but not close enough to say that they are compatible. Buck2 is quite new, having only been released in 2022.
What makes Buck2 exciting for us Rustaceans is that it itself is written in
Rust, and that it has good support for Rust out-of-the-box, without needing any
external plugins (as Bazel does with rules_rust).
Why Buck2?
As per their website, Buck2 is an extensible and performant build system written in Rust and designed to make your build experience faster and more efficient.
How does it work?
Examples
There are some examples using reindeer, which is used to translate Cargo dependencies into Buck2 configurations.
Building C/C++ code
Building JavaScript
Building WebAssembly
Reading
Build faster with Buck2: Our open source build system by Chris Hopman and Neil Mitchell
Introduction article of the Buck2 build system. Explains the features Buck2 has.
Buck2 build: Getting started by Buck2 Project
Getting started guide of the Buck2 build system.
Using Buck to build Rust Projects (archived) by Steve Klabnik
Steve explains how Buck2 can be used to build Rust projects.
Using Crates.io with Buck (archived) by Steve Klabnik
Steve shows how crates from [crates.io][] can be used in projects built by Buck2.
Updating Buck (archived) by Steve Klabnik
Steve shows how Buck2 can be updated.
Nix
Nix is a declarative package manager and build system. It lets you define dependencies and configurations in a functional language, and uses build isolation to ensure consistent and reproducible builds across machines.
The declarative nature of Nix makes it great at dealing with complex environments. It handles cross-platform builds correctly. Despite being over 20 years old, it has recently gained a lot of support. It is useful for providing consistent development setups between teams, ensuring that the code has the same environments between developers, CI machines and deployment machines.
Nix is quite versatile. It can be used to configure your system, set up a hygienic development shell containing only the dependencies you explicitly requested, build Docker images with the minimal set of runtime dependencies.
Nix Explainer
There are three main ways you can use Nix:
- Operating system: NixOS, which is built on top of Nix, is an entire operating system that you can use. It allows you to define everything on your work machine with the Nix language.
- Package manager: you can use Nix as a package manager. For example, you can use it to define (in your project) which dependencies it should make available (think libraries, frameworks, compilers). Nix will make these available, and it will make sure that no matter what machine or platform you build on, you always have exactly the same versions of those dependencies. On top of this, you can use a different build system, for example Buck or Bazel. In this configuration, Nix is only responsible for providing the dependencies your project needs to build.
- Build system: using something like Nix Flakes (we will discuss them later), you can define how every part of your project is built. Then Nix will build your project. Depending on what you are building, it can be a bit of work to get it building with Nix. The advantage you have if you do this is that you get reproducible builds, so no matter which machine you build on, you always get exactly the same output. You can also use caching, which makes builds faster for developers.
In this section, we will not take a look at NixOS. Mainly we will focus on using Nix as a build system, but we will also show how you could use it as a package manager in combination with another build system.
Nix Terminology
If you are new to Nix, it can be a bit confusing. Nix is both a language, and a package manager, and a build system. It uses Flakes and derivation. If you already know them, you can skip past the subheadings here, but it makes sense to explain how this all works together.
Derivations
At the very core of Nix is a derivation. This is how Nix tracks how to compile
things. It can take other derivations as input (via nativeBuildInputs,
buildInputs), some files (via src), and it has some shell scripts that
define how it is built, and how it is installed.

Here’s an example derivation (this is just a snippet, and not a full, working Nix config):
pkgs.stdenv.mkDerivation {
  src = {
    url = "https://github.com/xfbs/passgen/releases/v0.1.2/passgen-v0.1.2.tar.gz";
    hash = "sha256-0000000000000000000000000000000000";
  };
  nativeBuildInputs = [ pkgs.cmake pkgs.ruby pkgs.python3 ];
  buildPhase = ''
    mkdir build
    cd build
    cmake ..
    make -j
  '';
  installPhase = ''
    make install
  '';
};
Derivations are deterministic, which means that if you execute them again at a later date, or on a different machine, they are expected to produce exactly the same output. Nix uses some strategies to make that happen. For example, when your derivation is built, it runs in a sandbox where it only has access to the derivations it declared as inputs, nothing else. When it attempts to get the current time, it receives a timestamp of zero. Network access is blocked. Any external data the derivation uses must have a hashsum, and Nix checks it to make sure the data is still the same.
This allows Nix to use an aggressive caching strategy. It can use the hash of the derivation (this includes the hash of all transitive dependencies) as a key, and the output of it as values.
One of the important problems that Nix addresses here is that even Rust code has
implicit dependencies. For example, your Rust program is linked with some kind
of libc, typically glibc or musl. Which version you have depends on your
distribution, and how frequently you install updates. So if some code works on
your machine, it might not work on someone else’s machine, because you don’t use
the same versions. Similarly, if you use native dependencies like SQLite, it is
possible that you don’t have the same version as your coworker. What Nix ensures
is that, when you do build your code, everyone builds it with exactly the same
versions of all dependencies (compilers, libraries, headers).
Nixpkgs
When you build some code, you typically need a compiler. You might also need
some libraries, and you may want to use some tools (linters, maybe script
interpreters if your build process involves running scripts). Instead of having
to define derivations for each of these, Nix has a centralized repository called
nixpkgs, which contains Nix derivations for most popular packages. In the
derivation earlier, we showed that we used the nativeBuildInputs. The pkgs
that we wrote there refers to nixpkgs.
Nix Shell
Nix Shell is the feature that you can use if you want to use Nix as a package
manager. When you define a Nix Shell, you can tell Nix which dependencies you
need. When you launch it, Nix will open a new shell that has the dependencies
you specified available in its $PATH.
For example, this is what a simple shell might look like. Typically, you will
save this as shell.nix:
{
  # todo
}
You can launch the shell with nix-shell. It will recognize the shell.nix
file in your current directory, and create a shell that links the tools you
specified.
You can use this in combination with other build systems. For example, if you use Bazel, then you can use a simple definition that includes Bazel.
Here is an example:
# todo
Note that even if you only use the Nix Shell, you may still want to use Nix
Flakes, for reasons that we will explain later (it has to do with pinning the
version of nixpkgs that you are using).
Nix Flakes
We’ve explained what a derivation is. But how do you write one? Nix has an experimental feature called flakes, which is typically what you want to use. Nix Flakes make it easy for you to specify the version of nixpkgs (that is where all preexisting software is packaged) and import Nix definitions from other repositories.
When you write your Nix derivations to build your code components, you typically want to use existing code. For example, you might want to use a Rust compiler toolchain, the SQLite library, and some tools. Nix has a large repository called nixpkgs which contain Nix definitions for most packages that you would find in other package managers.
But you might also want to import derivations from another source. For example,
you might want to import some Nix code that helps you turn Rust’s build metadata
(your Cargo.toml) into something Nix can understand and build. Or you might
import derivations from another repository that you use.

Nix Flakes allow you to write Nix code that has two definitions: a set of
inputs, which are typically Git repositories. This can be nixpkgs, or
helpers, or other flakes (in which case you can access their exported
derivations). And you can export outputs, which can be packagess
(derivations), apps (which are commands you can run) and definitions for how
to spawn a development shell.
Here is an example for what a derivation looks like:
{
  description = "A very basic flake";

  inputs = {
    nixpkgs.url = "github:nixos/nixpkgs?ref=nixos-unstable";
  };

  outputs = { self, nixpkgs }: {
    packages.x86_64-linux.hello = nixpkgs.legacyPackages.x86_64-linux.hello;
    packages.x86_64-linux.default = self.packages.x86_64-linux.hello;
  };
}
Even if the syntax might be unfamiliar, you can see two things:
- The flake has a description, which is just an informative string.
- The flake has some inputs, which are specified by URL.
- The flake has some outputs. This is a function that takes the parsed input
flakes as input, and returns some kind of structure. In this example, we
define some keys in the
packagesfield of the output structure. - We have hard-coded only output packages for the
x86_64-linuxarchitecture. We could also hard-code outputs for other architectures, or use some Nix features to automatically make this work for a set of platforms we want to support.
With this simple configuration, we can run it if we save it as flake.nix and
run nix run:
$ nix run
Hello
Earlier, I mentioned that Nix is deterministic. But how does that work here?
We have referenced other Git repositories by their branches, but the branches
might change. However, when you run any Nix command, Nix will resolve the inputs
to a commit hash, and record that in the flake.lock file.
Nix Limitations
As explained earlier, Nix has a central repository called nixpkgs that contains definitions for how to build packages. Nix does not store each and every version for each package. Rather, it always points to the latest release of each package.
For example, you cannot tell Nix that you want SQLite version 3.12.1. Instead,
you can only tell Nix that you want SQLite version 3, which is the package
sqlite3. If for some reason you need to use an older version of SQLite (which
is not recommended), you need to use an earlier version of the entire nixpkgs
(which means you will also get older versions of other packages).
In general, this is a good thing. Because usually, you do want to use the latest versions of packages, in order to get the latest features, but most importantly, to get the latest security fixes. But if for some reason you don’t, then it can get in your way.
You can always manually write derivations for the packages where you need a specific version, and otherwise use the latest nixpkgs.
What can you use Nix for?
Nix is a bit of an oddball in this section because it is more than just a build system. You can use it, or even combine it with other build systems. Some common setups are:
- Using Nix to define a development environment
- Using Nix to define CI tasks that can be easily run locally
- Using Nix as a build system
- Using Nix to deploy your application
Nix has great support for caching. This is one of the principal reasons why it is useful as a build system.
Nix Development Environment
The Rust project comes with rustup, which you can use to manage your Rust
toolchains. It allows you to install multiple versions of Rust side-by-side,
update them, and select a toolchain version per-project. You can even put a
rust-toolchain.toml file in your project root, and have rustup pick this up
and select the appropriate toolchain for you. This is explained in the
Cargo chapter.
However, this doesn’t quite solve all of your environment needs. What if you need to have a specific C library in your environment? What if you need to have specific tooling in your environment? Rustup is great at managing Rust toolchains, that is the primary purpose it serves. But it will not manage all of your native dependencies.
This is where Nix comes in. With Nix, you can declaratively define an
environment, and you can use nix-shell to spawn a new shell with everything
declared in that environment accessible. That way, you can declare which native
dependencies you need once, and make sure that no matter what platform your
developers happen to use, Nix can make sure that all requirements are satisfied.
Example: Bazel and Rust
Example: Cargo and OpenSSL
Nix as a build system
You can use Nix as your primary build system. Doing so gives you reproducible builds, and caching for free. The downside is that you need to write (and maintain) the Nix configuration for building your project. You can’t just use Cargo directly, because Cargo defaults to downloading dependencies from the internet. Instead, you need to use some kind of wrapper that provides you with a Rust toolchain of your choice, parses your Cargo dependencies lock file and makes your Rust dependencies available in a Nix-native way.
There are some popular wrappers that make this easy:
{
  inputs = {
    flake-utils.url = "github:numtide/flake-utils";
    naersk.url = "github:nix-community/naersk";

    nixpkgs-mozilla = {
      url = "github:mozilla/nixpkgs-mozilla";
      flake = false;
    };
  };

  outputs = { self, flake-utils, naersk, nixpkgs, nixpkgs-mozilla }:
    flake-utils.lib.eachDefaultSystem (system:
      let
        pkgs = (import nixpkgs) {
          inherit system;

          overlays = [
            (import nixpkgs-mozilla)
          ];
        };

        toolchain = (pkgs.rustChannelOf {
          rustToolchain = ./rust-toolchain;
          sha256 = "";
          #        ^ After you run `nix build`, replace this with the actual
          #          hash from the error message
        }).rust;

        naersk' = pkgs.callPackage naersk {
          cargo = toolchain;
          rustc = toolchain;
        };

      in rec {
        # For `nix build` & `nix run`:
        defaultPackage = naersk'.buildPackage {
          src = ./.;
        };

        # For `nix develop` (optional, can be skipped):
        devShell = pkgs.mkShell {
          nativeBuildInputs = [ toolchain ];
        };
      }
    );
}
Building Rust code
Building C/C++ dependencies
Building TypeScript dependencies
Building WebAssembly component
https://jordankaye.dev/posts/rust-wasm-nix/
Nix for Continuous Integration
A common issue that developers have is that software works on one machine, but doesn’t work on another one. Usually, this is caused by differences in the environment.
It is very frustrating when tests work perfectly locally, but fail in CI. Often times, the CI system uses runner nodes that are not easily accessible, making it hard to debug or reproduce the issue.
Because Nix is deterministic, it can help alleviate this. It makes for a good development experience, where there is trust that when tests work locally, they also work in CI (and vice versa).
Nix has built-in support for running tests. Nix calls them checks. In your
flake.nix, you can define a set of commands to run when checking code:
{
  ..
  checks = {
    unit-tests {
      drv = utils.mkShellScript {
        run = ''
          cargo test
        '';
      };
    };
  };
}
When you define your tests this way, then you can run them with:
nix flake check
An added bonus is that if you do use some tools for checking crates, such as
cargo-hack, Nix is able to provide them for you.
There are even some CI systems that focus on running Nix checks:
| Name | Description |
|---|---|
| Hydra | Continuous Integration system built by the Nix community. |
| Nix CI | … |
| Hercules CI | … |
https://serokell.io/blog/continuous-delivery-with-nix
Nix for deployment
https://garnix.io/blog/hosting-nixos
https://x86.lol/generic/2024/08/28/systemd-sysupdate.html
Nix as a build cache
By default, Nix will cache build outputs on your local machine. But if many people work on a project, and tend to compile the same code frequently, then it makes sense to use a shared build cache.

In a typical configuration, the CI system has write access to the build cache. Any commits that are pushed and run through it, have their build outputs uploaded to the cache. Developer machines have read-only access to the cache. This ensures that builds that don’t change frequently (such as dependencies, tooling) are always in the build cache. New code is in the cache, as soon as it is pushed to the repository, and is available for example when other developers do code review.
You can use hosted solutions like Cachix for your build cache, or you can set up an S3 bucket on some provider (Hetzner, Wasabi, Backblaze, AWS) and configure it. You should take care that only trusted people or machines are able to write into it, because this can be a security issue.
Nix as distributed compiler
Finally, you can use Nix to speed up compilation by using it as a distributed compiler.
Todo
Summary
In this section, we’ve shown that Nix has a very strict determinism. This allows you to use it for reproducible builds, have confidence that software built on one machine behaves the same way on a different machine. It also allows it to use very aggressive caching, and to run compilation on different machines.
Reading
Nix Reference Manual by Nix Project
Reference manual for the Nix package manager.
Rust by NixOS Wiki
ipetkov/crane on GitHub
Building a Rust service with Nix by Amos Wenger
Amos shows how to build a Rust service in this article.
Ivan introduces Crane in this article, a Nix library for building Cargo projects. He explains how it works and how to use it to build Rust projects.
Building Nix Flakes from Rust Workspaces (archived) by Tor Hovland
Tor explains how to package your Rust code using Nix. He explains the
different options you have for doing so: the Nix built-in buildRustPackage,
Naersk, Crane and Cargo2Nix. He shows how to build a sample application that
consists of a Rust crate that is compiled into WebAssembly, a Rust library and
a Rust application that depends on both of these. He also discusses some
potential other options for building and packaging Rust code in Nix.
Zero to Nix by Determinate Systems
This is a guide on how to get started using Nix. It teaches you how to install it, how to use it for development, how to package your software with it, and how to manage your system with it.
What is Nix? by Alexander Bantyev
The Nix Thesis by Jonathan Lorimer
Some notes on NixOS by Julia Evans
Practical Nix flake anatomy: a guided tour of flake.nix by Vladimir Timofeenko
Vladimir explains how a flake.nix file is constructed. He explains the high-level
concepts (inputs, outputs) and shows syntax examples for how to write them.
https://jvns.ca/blog/2023/03/03/how-do-nix-builds-work-/
https://jvns.ca/blog/2023/02/28/some-notes-on-using-nix/
Alternative Nix implementations:
https://tvix.dev/ https://lix.systems/about/
Meson
Meson is a bit of an oddball to include here. It does not offer any of the interesting features that other build systems do, for example the ability to easily cache build artifacts.
The reason I am including it here is because it has some features that make it useful for the niche use-case of building GTK or FlatPak applications, which it has built-in support for. This is why you see a lot of GNOME developers that use Rust use it as their primary build system.
Reading
TODO
Organization
Rust organizes code through files, modules, crates, and workspaces. How you use these structures affects two things that matter as a project grows: development speed (how fast you can compile and iterate) and loose coupling (how easily you can change one part without breaking another).

Example of a Rust project’s organization, with a single workspace containing multiple crates.
Before we dive into this chapter, we should define what all of these terms mean.
| Name | Description |
|---|---|
| Module | Modules in Rust are used to hierarchically split code into logical units. Modules have a path, for example std::fs. Modules contain functions, structs, traits, impl blocks, and other modules. |
| File | A single source file, typically with a .rs extension. Every file is a module, but files can also contain inline (nested) modules. |
| Crate | Compilation unit in Rust. Can be a library crate or a binary crate, the latter require the presence of a main() function. They have an entrypoint, which is typically lib.rs or main.rs but can also be called something else. |
| Package | Collection of crates. Every package may contain at most one library crate, and may contain multiple binary crates. |
| Workspace | A collection of packages, which can share a build cache, dependencies and metadata. |
In this chapter, we will briefly cover how you can use these to structure your project.
Development Speed
Rust’s zero-cost abstractions produce fast binaries, but at the expense of compile times1. This tradeoff means that how you organize your project directly affects how fast you can iterate. A tight compile-test loop is essential for productive development, and the organizational choices in this chapter (splitting into crates, using workspaces, managing features) are the main levers you have to keep compile times under control as a project grows.
Loose Coupling
Large, monolithic codebases become difficult to change because everything depends on everything else. Splitting code into smaller, independent units with well-defined interfaces makes it easier to test components in isolation, assign ownership to different teams, and change implementations without cascading breakage. Rust’s module and crate system provides natural boundaries for achieving this[^coupling].
Reading
Chapter 7: Managing Growing Projects with Packages, Crates, and Modules by The Rust Programming Language
This chapter of The Rust Book shows you what facilities Rust has for structuring projects. It introduces the concepts of packages, crates and modules.
Chapter 2.5: Project Layout by The Cargo Book
This section in The Cargo Book explains the basic layout of a Rust project.
Rust at scale: packages, crates, modules (archived) by Roman Kashitsyn
Roman discusses how you can scale Rust projects, and what he has learned from participating in several large Rust projects. He gives some guidance on when to put things into modules versus into crates, and what implication this has on compile times. He also gives some advice on programming patterns, such as preferring run-time polymorphism over compile-time polymorphism. This article is a must-read for anyone dealing with a growing Rust project and it encodes a lot of wisdom that otherwise takes a long time to acquire.
Rust compile times by Matthias Endler
Matthias covers a wide range of strategies for reducing Rust compile times, from updating your toolchain and removing unused dependencies to splitting crates, using faster linkers, and optimizing CI with caching and cargo-nextest.
The Dark side of inlining and monomorphization by Nick Babcock
Nick explores how aggressive inlining and monomorphization can unexpectedly
bloat compiled artifacts. He demonstrates how a single #[inline(always)]
annotation on a large function caused massive code duplication across generic
instantiations, and shows how trait objects and removing inline hints reduced
binary size with negligible performance impact.
Delete Cargo Integration Tests by Alex Kladov
Alex argues for consolidating multiple integration test files into a single test crate. Each integration test file compiles into a separate binary that must be linked independently, and Cargo runs test binaries sequentially. When the Cargo project itself consolidated its integration tests, compile time dropped 3x and on-disk artifacts shrank 5x.
-
↩```` Procedural macros allow for eliminating a lot of repeated code, for example by automatically deriving traits on structures. However, they need to be built and executed and thus add to the compilation time. ```` [^coupling]: ```` See [Loose Coupling](https://en.wikipedia.org/wiki/Loose_coupling) (Wikipedia). ```` ````
Packages
When you start your project, the very first thing you will likely do is create a
new package. A package is a unit in which Rust organizes code, it consists of
metadata (such as a Cargo.toml) and crates. You can think of it like a Ruby
gem, a Python package, or a Node module. Packages allow you to use the Cargo
build system to compile it, run tests and manage dependencies.
A crate is a compilation unit. Unlike C, C++ or Java, which compile individual files, in Rust an entire crate is always compiled in one go. This means you don’t have to worry about the ordering of includes, and it means that all definitions are always visible. It also makes it easier for the compiler to implement certain optimizations, such as inlining code.
Contents of a Package
At the very minimum, a Rust package contains metadata (in the Cargo.toml file)
and a single library or binary crate, otherwise there is nothing to compile.
Generally, you do not need to configure Cargo to tell it where the crates are:
it automatically detects them based on their standard locations. You can,
however, override this and place your source files in non-standard locations,
but this is not recommended. For example, if you have a src/lib.rs file in
your package, Cargo recognizes this as your library crate.

Every package needs to have either a library crate or a binary crate. It may
also contain other, supporting crates, such as integration tests, benchmarks,
examples. Having first-class support for these is a big bonus, because it means
you can run cargo test in any Rust project and Cargo will know where the tests
are and is able to run them.
| File path | Autodetected crate type |
|---|---|
src/lib.rs | Library crate |
src/main.rs | Binary crate, named after name of package |
src/bin/*.rs | Binary crate, named after filename |
examples/*.rs | Example |
bench/*.rs | Benchmark |
tests/*.rs | Integration test |
build.rs | Build script |
Generally, the library crate of every package is where you want to keep all of
your logic. This is because this code is what all the other crates link to by
default. So, if you write an integration test, it cannot “see” what is inside
your binary crates. In many projects, the binary crate at src/main.rs is just
a small shell that parses command-line arguments, sets up logging and calls into
the library crate to do the hard work.
Metadata
Every crate contains some metadata, in the Cargo.toml file. This contains
everything cargo needs to know to build the crate, such as its name, and a list
of all dependencies it needs to build. It also contains metadata necessary for
publishing it on crates.io, Rust’s crate registry, such as its version, list
of authors, license, and description. Finally, this file can also contain
metadata for other tooling, some of which we will discuss in this book. An
example file might look like this:
[package]
name = "example-crate"
version = "0.1.0"
edition = "2021"

[dependencies]
anyhow = "1.0.86"
Dependencies can have optional features. This ensures a faster compilation, by only compiling them when they are explicitly enabled.
Cargo has built-in support for semantic versioning, so the versions
listed here are constraints. For example, when you specify version 1.0.12, it
really means that your crate will work with any version >=1.0.12 and <1.1.0,
because semver considers changes in the patch level (the third number) as
non-breaking changes.
This means that when you build your crate, Rust has to resolve the version
numbers. It stores those resolved version numbers in a separate file,
Cargo.lock. This is to ensure that you get reproducible builds: if two people
build the project, they always use exactly the same versions of dependencies.
You have to manually tell Cargo to go look if there are newer versions of
dependencies that are within the constraints, using cargo update. This and
some issues around it will be covered in later chapters.
Here is an example of what this looks like:
# This file is automatically @generated by Cargo.
# It is not intended for manual editing.
version = 4

[[package]]
name = "anyhow"
version = "1.0.86"
source = "registry+https://github.com/rust-lang/crates.io-index"
checksum = "b3d1d046238990b9cf5bcde22a3fb3584ee5cf65fb2765f454ed428c7a0063da"

[[package]]
name = "example-crate"
version = "0.1.0"
dependencies = [
 "anyhow",
]
Library and Binaries
Besides these two files, crates also contain Rust source code in various places. We will list the default locations for these here, but the locations can be configured and overridden in the metadata.
Every crate can define (at most) one library. The entrypoint for this is in
src/lib.rs. When you use a crate as a dependency, this is what other crates
can see. Even if your project is primarily an executable and not a library, you
should try to put most of the code into this library section, because this is
what is visible to example code and integration tests. I call this
library-first development.
- articles for library-first development
Besides a single library, crates can also define binaries. These must contain a
main() function, and are compiled into executables. The default location for
binaries is src/main.rs, and it will produce an executable with the same name
as the crate. You can create additional ones under src/bin/<name>.rs, which
will create executables with the same name.
- graphic: executables linking against library
While Rust supports writing unit tests directly in the code, sometimes you want
to write tests from the perspective of an external user using your library
(without visibility into private functions). For this reason, you can write
integration tests, in tests/<name>.rs. These are compiled as if they were an
external crate which links to your crate, and as such only have access to the
public API.
- graphic: tests linking against library
Finally, Rust has a large focus on making it easy to write documentation. In
fact, support for generating documentation is a built-in feature. In some cases,
writing code is the best kind of documentation. For this reason, Cargo has
first-class support for keeping code examples. If you put examples into
examples/<name>.rs, they can be built and run by cargo using
cargo build --examples and cargo run --example <name>. There is even a
feature in Rust’s built-in support for documentation, where it will pick up and
reference examples in the code documentation automatically.
- graphic: examples linking against library
See also: Package Layout.
Creating a crate
You can use cargo new to create an empty crate. You have the choice of
creating a library crate (using the --lib switch) or a binary crate. Using
cargo is recommended over creating a new crate manually, because it will
usually set useful defaults.
# create a binary-only crate
cargo new example-crate

# create a library crate
cargo new --lib example-crate
This is what an example crate layout looks like, after adding some dependencies. You can see what the metadata and the source code looks like.
- src/
target/
# This file is automatically @generated by Cargo.
# It is not intended for manual editing.
version = 4

[[package]]
name = "anyhow"
version = "1.0.86"
source = "registry+https://github.com/rust-lang/crates.io-index"
checksum = "b3d1d046238990b9cf5bcde22a3fb3584ee5cf65fb2765f454ed428c7a0063da"

[[package]]
name = "example-crate"
version = "0.1.0"
dependencies = [
 "anyhow",
]
[package]
name = "example-crate"
version = "0.1.0"
edition = "2021"

[dependencies]
anyhow = "1.0.86"
use anyhow::Result;

fn main() -> Result<()> {
    println!("Hello, world!");
    Ok(())
}
A more full-fledged example makes use of both the library and executables, has some documentation strings, tests and examples in it, along with complete crate metadata.
Cargo has some neat features besides being able to create new crates for you.
It can also manage dependencies for you. For example, if you are inside a crate
and you would like to add serde to the list of dependencies, you can use
cargo add to add it:
cargo add serde --features derive
This will edit your Cargo.toml to add the dependency, without touching
anything else. Comments and formatting is preserved. The Cargo team is quite
good at looking how people use it and extending it with functionality that is
commonly requested.
Crate Features
Rust crates can declare optional dependencies. These are additive, meaning that enabling them should not break anything. The reason for this is that Rust performs feature unification: if you have multiple dependencies in your dependency that depend on a single crate, it will only be built once with the features unified.
- dependency tree: feature unification
This is a good way to add additional, optional features to your crates while
keeping compilation times short for those who don’t use them. If you have a
dependency, you can enable them by setting the features key:
[dependencies]
serde = { version = "1.0.182", features = ["derive"] }
For your own crates, you can declare optional features using the features
section in the metadata. Using features, you can enable optional dependencies,
and inside your code you can disable parts (functions, structs, modules)
depending on them.
[features]
default = []
cool-feature = ["serde"]
Once you have declared a feature like this, you can use it to conditionally include code in your project, using the cfg attribute.
#![allow(unused)]
fn main() {
#[cfg(feature = "cool-feature")]
fn only_visible_when_cool_feature_enabled() {
    // ...
}
}
Doing this can have some advantages, for example it lets you keep compilation times short for developers because they can build a subset of the project for testing purposes. However, it also requires some care, because you often need to be careful to make sure features don’t conflict with each other, see Chapter 6.10: Crate Features.
Crate Size
As mentioned earlier, in Rust a crate is a compilation unit. When you make a change in one file, the entire crate needs to be rebuilt. While it makes sense initially to start a project out with one crate, as the project grows it may make sense to split it up into multiple, smaller crates. This allows for faster development cycles.
The next section discusses how this can be done, and what mechanisms Rust supports for doing so.
Reading
Chapter 3.2.1: Cargo Targets by The Cargo Book
In this section of the Cargo book, all of the possible targets that Cargo can build for a crate are defined.
Chapter 3.1: Specifying Dependencies by The Cargo Book
In this section of the book, it is explained how dependencies are specified in Cargo.
Default to Large Modules by Chris
In this article, Chris argues that it is best to default to large modules, because the cost of designing useful abstractions for the interaction is high, and it is possible to split larger modules into smaller ones later when the code is more stable.
Features by Cargo Project
In this chapter of the cargo book, features are discussed. Specifically, it explains how Cargo resolves crate features, and performs feature unification.
Workspace
As your project grows, you may feel the need to split it up into multiple crates. Maybe the compilation times are becoming a problem, and having multiple smaller crates means that most of the application does not need to be rebuilt when you make a change in one file. Or maybe you want to enforce more loose coupling between the application, and split the responsibility of various parts to separate teams.
Rust is designed to cope well with projects that contain a lot of crates. It even has a feature catered to exactly this use-case: the workspace. When you use a workspace, you tell Cargo that group of crates are related and should share the same build cache, and optionally some metadata.
Creating a Workspace
You can create a Cargo workspace by adding a [workspace] section in your
Cargo.toml:
[workspace]
resolver = "2"
members = ["crates/crate-a", "crates/crate-b"]
The main reasons why you would want to use workspaces rather than simply putting several crates into a repository is twofold:
- When you use a
workspace, then your entire project uses a singletargetfolder, meaning that every dependency is built exactly once. This speeds up the build time. - When you run operations, such as tests, then you can tell
cargoto run them for all crates in the workspace.
Workspaces have some other interesting properties. When you run cargo test in
a workspace, it defaults to running all tests for all crates. Some of the Rust
tooling has --workspace or --all flags which tell the tools to act on the
entire workspace instead of only the crate you are currently located in.
Examples
Here is an example of what a cargo workspace project looks like. You can see how
the root Cargo.toml only contains the workspace definition, and there are
several crates contained in it.
- crate-a/
- src/
- src/
- crate-b/
- src/
- src/
- crate-c/
- src/
- src/
/target
# This file is automatically @generated by Cargo.
# It is not intended for manual editing.
version = 3

[[package]]
name = "crate-a"
version = "0.1.0"

[[package]]
name = "crate-b"
version = "0.1.0"

[[package]]
name = "crate-c"
version = "0.1.0"
[workspace]
resolver = "2"
members = ["crate-a", "crate-b", "crate-c"]
[package]
name = "crate-a"
version = "0.1.0"
edition = "2021"

# See more keys and their definitions at https://doc.rust-lang.org/cargo/reference/manifest.html

[dependencies]
fn main() {
    println!("Hello, world!");
}
[package]
name = "crate-b"
version = "0.1.0"
edition = "2021"

# See more keys and their definitions at https://doc.rust-lang.org/cargo/reference/manifest.html

[dependencies]
fn main() {
    println!("Hello, world!");
}
[package]
name = "crate-c"
version = "0.1.0"
edition = "2021"

# See more keys and their definitions at https://doc.rust-lang.org/cargo/reference/manifest.html

[dependencies]
fn main() {
    println!("Hello, world!");
}
Dependencies
When you work in a large workspace, you often have a set of dependencies that all of the crates in the workspace use. In that case, typically you want to ensure that they all use the same version of the dependency.
For that use-case, Cargo Workspaces allows you to declare dependencies on a workspace level, and reference them in the daughter crates. This makes it easier to keep versions of dependencies in sync when they are used by a lot of crates.
To use this feature, you can simply set the workspaces.dependencies in the
same way that you would set dependencies in a regular crate.
[workspace.dependencies]
anyhow = "1"
In the child crates, you can then reference them like this:
[dependencies]
anyhow = { workspace = true }
It’s still possible to override it, for example to turn on additional features.
[dependencies]
anyhow = { workspace = true, features = ["abc"] }
Metadata
Another commonly used feature of Cargo Workspaces is the ability to set shared
metadata. For example, you can use it to set a license for all crates, or keep
the version of the crates in sync. To do this, you set metadata in the
workspace.package in the workspace config, like this:
[workspace.package]
license = "MIT"
authors = ["John Doe <john.doe@example.com>"]
To use this, you have to then reference it in the child crates.
[package]
name = "crate-a"
license.workspace = true
authors.workspace = true
Doing this makes sense if you want all child crates to share some amount of metadata, as is often the case with licenses or authors.
When to split crates
When is the right time to split crates? This is a question that is not so easy to answer. Splitting crates has a cost: it means you need to define the interface well. But if you do it well, it also has advantages. Maybe the code can be reused for future projects, because it is generic enough. Splitting crates out prematurely is probably not a good idea, but doing it too late risks that your code will depend on and use private interfaces that you don’t want it to use.
Reading
Chapter 7: Managing Growing Projects with Packages, Crates and Modules by The Rust Programming Language
This chapter in the Rust book explains the different organizational structures that Rust has, and how they can be used. It mentions the use of workspaces for managing related crates in a project.
Chapter 14.3: Cargo Workspaces by The Rust Programming Language
This section in the Rust book introduces the concept of the workspace, and gives some examples for how it can be used in a project.
Chapter 3.3: Workspaces by The Cargo Book
This section in the Cargo book explains the workspace feature, and all of the configuration options that are available for it in the Crate manifest.
An Opinionated Guide To Structuring Rust Projects by Ryan James Spencer
Ryan gives practical advice on organizing Rust projects as they grow, including when to split code into separate crates, using workspaces to manage them, naming conventions, and compilation optimization strategies like sccache and alternative linkers.
Prefer small crates by Rust Design Patterns
This article argues that Rust makes it easy to add dependencies, so there is no downside to having more of them. Additionally, smaller crates are easier to understand and lead to more modular code, therefore small crate sizes should be encouraged.
In this discussion, the upsides and downsides of having small crates is discussed.
Nick explains how Cargo unifies features across workspace members: when multiple crates depend on the same library with different features, Cargo enables the union of all requested features for every crate. This can cause unexpected build failures and binary bloat. The article discusses workarounds including Cargo’s resolver v2 and building packages separately.
Resolver by Cargo Project
This chapter in the Cargo Book explains how Cargo resolves crate features in workspaces.
Collapse Tokio sub crates into single tokio crate by Tokio Project
The Tokio project did the reverse of what this chapter recommends: they used to be composed of many small crates and merged them into a single crate. This discussion contains important context for why that decision was made, including the overhead of managing cross-crate dependencies, version coordination, and the confusion it caused for users. A useful counterpoint to the “prefer small crates” advice.
Why is my Rust build so slow: splitting into more crates by Amos Wenger
Section from a longer article on Rust build performance. Amos walks through splitting a project into multiple crates and measures the compile time impact, showing where it helps and where the overhead of additional linking and dependency resolution can offset the gains.
Split big crates into smaller ones using workspaces by Matthias Endler
Section from Matthias’ compile time tips article. Explains how to use workspaces to split large crates and the compile time benefits of doing so, including better incremental compilation and parallelism.
Repository
In software development, one of the longstanding questions is: should you use a monorepo, or should you split components into separate repositories?
Unless you work in a large company with resources to build custom solutions,
monorepos will likely run into scaling issues. Keeping an entire company in sync
on a single repository with standard technology like git can run into issues.
At the same time, dealing with multiple repositories is also a headache. How do you easily make a change in a library and test that it doesn’t break any of the repositories that depend on it?
Advantages and disadvantages of monorepos
Pro:
- easy to test changes to libraries upstream
- easy to refactor code
- no need to do proper versioning
Cons:
- all consumers of a library have to be refactored at the same time if interface changes, or backwards compatibility needs to be ensured (slows down development)
- complexity of rebasing as repository grows
Start out with a single repository
For your new Rust project, it probably makes sense to start out with a single repository, set up a single crate (or a Cargo Workspace) and start from there. Only when code is stabilized, you can start to factor out atomic pieces into their own crates. When functionality is useful enough, it can be put into it’s own repository, and versioned properly.
- bubble graph with big bubbge containing crates
Split out libraries only if they are stable
- git dependencies
- private registry (see Releasing Crates).
Examples
- tokio project
Reading
Ecosystem
Before you start your project, you may need to put some throughts towards what kind of project you want to build, and choose the right ecosystem.
Rust has a vibrant community of all kinds of projects, usually over time certain crates become more popular and establish themselves as the go-to. You should certainly make use of the ecosystem and the ease with which Cargo lets you add and manage dependencies.
Rust can also target a wide variety of platforms: whether you are writing code to run on GPUs, in the browser, on servers, in the terminal, inside your bootloder, on embedded devices or on unusual platforms, Rust typically has you covered.
Most of the time, it is relatively easy to switch between different crates. However, in some cases the crates you decide to use have an influence over the architecture of your project. For example, it is not always so easy to convert a blocking, threaded application into an async one, or to switch from one web framework to another.
It is usually better to put some thought into this before you start developing, because it might be difficult to switch once you’ve already invested in building your project with one ecosystem. This sections aims at showing you the Rust ecosystem for some common tasks, wherever the choices you make have a large impact on the architecture of your project.
Reading
On Dependency Usage in Rust (archived) by Lander Brandt
The C programming language is often critizied for not bringing a lot of foundational data structures out-of-the-box, leading many developers to reinvent the wheel. Adding and managing dependencies in C/C++ is difficult, because there is no standardized build system. On the other hand, in JavaScript it is so easy to add dependencies, that many small projects end up with gigabytes worth of trivial (transitive dependencies), which is criticized as a security risk. This article explains how dependencies work in Rust, and why it’s okay to use them.
Statistics on the Rust ecosystem by lib.rs
Lib.rs publishes some interesting graphics of the Rust ecosystem.
Logging
Logging is the process of recording significant events, actions, or errors within a software system. Typically, it involves recording them in a textual format as log messages, with the ability to designate each at different levels (such as error, warning, info, debug). This can be used to observe a system (such as flagging error logs) or to debug issues (such as deducing why a system is failing from debug or info logs).
Beyond plain text messages, structured logging adds metadata as key-value pairs (user ID, request ID, resource name) that can be used to filter and correlate log entries. Tracing goes further by associating log events with scoped spans that track the lifetime of operations — when a request handler starts, what database queries it makes, and when it finishes. This is particularly useful in async code where many tasks are interleaved on the same thread.
The Rust ecosystem has three main logging crates: log, tracing, and slog.
They can be mixed through interop libraries, so choosing one does not lock you
out of the others. Your choice depends on what you need: log for simple text
logging, tracing for async applications that need scoped structured logging,
and slog for structured logging in synchronous code. Many libraries and
frameworks (especially async HTTP frameworks) have built-in support for
tracing. If you are writing code for an embedded platform where code size
matters, defmt is your friend.
Log
The log crate is the most popular logging infrastructure. It uses the façade
pattern, which decouples the users of the logging facilities (which use the
log crate) from the implementation of the logging output (such as
env_logger).
Using it is therefore a two-step process:
- You use the
logcrate in your libraries and binaries, which exposes some macros that you can use for emitting log messages, such aslog::info!orlog::error!. - In your binaries, you import and initialize a log handler crate, such as
env_logger. This will subscribe to the logs that are sent to thelogcrate, and do with them whatever you configure it to (such as emit them on standard output).
The advantage of doing it this way is that the log crate itself is very
light-weight and is used in a lot of libraries. It does not pull in any code
related to emitting logs, and it does not prescribe how you output your logs. It
gives binary authors the flexibility to setup their logging subscriber in
whichever way best fits with the application.
The façade pattern is quite common for decoupling generic interfaces (logging, tracing, metrics collection, randomness generation, hashing) from the actual implementation. You will see it in multiple places.
In the case of the log crate, it is implemented by the log crate having a mutable global
which holds a reference to the currently used logger, and having all of the logging implementations
set this on initialization. This allows for decoupling the logging interface (which can be used
in a lot of crates) from the implementation.
#![allow(unused)]
fn main() {
static mut LOGGER: &dyn Log = &NopLogger;
}
In general, using mutable globals is discouraged. Care must be taken when updating them from multiple threads, because this can lead to race conditions. However, this façade pattern is one case where it makes sense. If you want to implement something similar, you can look into using OnceLock, which is thread-safe.
For example, you might have a function like this:
#![allow(unused)]
fn main() {
use log::*;
use std::time::Instant;

pub fn do_something() -> f64 {
    info!("started doing something");

    // run and measure runtime
    let now = Instant::now();
    let mut value = 1.0;
    for _ in 0..1000000 {
        value *= 1.00001;
    }
    let time = now.elapsed();
    debug!("took {time:?}");

    // log result
    info!("result is {value}");

    value
}
}
You can use this function after registering your logging implementation, in this
case env_logger:
use log_example::do_something;

fn main() {
    env_logger::init();
    do_something();
}
When you run this, for example with cargo run, then you will see this output
on the console:
[2025-06-14T13:53:08Z INFO  log_example] started doing something
[2025-06-14T13:53:08Z DEBUG log_example] took 12.642181ms
[2025-06-14T13:53:08Z INFO  log_example] result is 22025.36450783507
Many libraries in the Rust crate ecosystem either use log, or have an optional
feature that can be turned on to enable the use of the log crate, allowing you
to capture logs from them. Many logging subscribers let you filter not only by
log level, but also by the source. This allows you to filter out logs from other
crates that you are not interested in seeing.
Logging Backends
The simplest and most popular logging implementation is env_logger, which
simply prints log messages to standard error in a structured way. You can find a
full list of logging implementation in the documentation for the log crate.
These are some of the popular ones:
| Name | Description |
|---|---|
android_log | Log to the Android logging subsystem. Useful when building Android applications in Rust. |
console_log | Log to the browser’s console. Useful when building WASM applications in Rust. |
db_logger | Log to a database, supports Postgres and SQLite out-of-the-box. |
env_logger | Prints log messages on standard error. |
logcontrol_log | Control logging settings via DBUS. Does not do logging itself. |
syslog | Log to syslog, supports UNIX sockets and TCP/UDP remote servers. |
systemd_journal_logger | Log to the systemd journal. |
win_dbg_logger | Log to a Windows debugger. |
defmt
When building firmware for embedded applications in Rust, often authors want to
avoid using the Rust built-in formatting system. While the built-in formatting
system is useful, it takes up some code space. On embedded system, code size is
a constrained resource. For that reason, the defmt project consists of a
number of crates that allow one to implement logging without making use of
Rust’s formatting support, with the goal of producing smaller binaries.
It stands for deferred formatting. It supports println!()-style formatting,
multiple logging levels and compile-time filtering of logging statements, while
aiming for small binary size. It defers the formatting of log messages, which
means that the formatting itself is done on a secondary machine.
Unless you know you are targetting an embedded system, it does not make sense
to use the defmt crate. You’re better off starting with the log or tracing
crates, which are widely supported in the Rust ecosystem.
The book is a good resource to get started with it.
Tracing
The tracing crate implements
scoped, structured logging. It is maintained by the Tokio project and is the
standard choice for async Rust applications. Like log, it uses a facade
pattern: tracing defines the API, and a separate subscriber (typically
tracing-subscriber)
handles the output.
The key concept in tracing is the span. A span represents a period of time
during which some operation is happening. Events (log messages) that occur
inside a span are associated with it, so you can see which request or task
produced which log output — even when many tasks are interleaved on the same
thread. Spans can be nested, forming a tree that mirrors the call structure of
your application.
The #[instrument] attribute macro is the most common way to create spans. It
automatically creates a span for a function, recording its arguments:
#![allow(unused)]
fn main() {
use tracing::{info, instrument};

#[instrument]
async fn handle_request(user_id: u64) {
    info!("processing request");
    let data = fetch_data(user_id).await;
    info!("request complete");
}
}
Every event inside handle_request will be associated with a span that includes
the user_id, making it easy to filter logs for a specific user even when
hundreds of requests are being handled concurrently.
To see any output, you need to register a subscriber. A minimal setup using
tracing-subscriber:
fn main() {
    tracing_subscriber::fmt::init();
    // ...
}
tracing-subscriber supports filtering by level and module (similar to
env_logger), JSON output for log aggregation services, and composing multiple
layers (for example, logging to both stdout and a file). For production
services, JSON output combined with a log aggregation system (ELK, Loki,
Datadog) is a common pattern.
Slog
slog is a structured logging framework that
predates tracing. It is built around the concept of drains (output
destinations) that can be composed: you can chain a JSON formatter, an async
buffer, and a file writer together. Like tracing, it supports structured
key-value data on log messages, and like log, it works well in synchronous
code.
Slog’s ecosystem includes separate crates for different output formats and
destinations: slog-term for terminal output, slog-json for JSON,
slog-async for non-blocking logging, and many others. Loggers in slog carry
context, so you can create child loggers with additional key-value pairs that
are automatically included in all messages from that logger — useful for tagging
all logs within a request handler with a request ID.
The slog maintainers acknowledge that tracing has become the default choice
for async Rust, but note that slog remains a stable, battle-tested library that
is preferable when async support is not needed or when you want finer control
over the logging pipeline.
Interoperability
| Crate | Description |
|---|---|
tracing-slog | slog to tracing |
tracing-log | log to tracing |
slog-stdlog | slog to log, or log to slog |
Reading
Getting started with Tracing by Tokio Project
Official Tokio guide to the tracing crate. Covers creating spans,
recording events, using the #[instrument] macro, and setting up
tracing-subscriber with filtering. Good starting point if you are adding
tracing to a Tokio-based project.
defmt book by Ferrous Systems
Guide to the defmt crate for resource-constrained embedded logging.
Explains how deferred formatting works (binary encoding on the device, text
formatting on the host), how to set up defmt with probe-rs, and how to
use its println!-style macros with compile-time log level filtering.
Structured logging by Rust telemetry exercises
Hands-on exercise that progresses from basic log usage through tracing
with structured data, to collecting and exporting metrics to Prometheus.
Teaches by building a real telemetry pipeline incrementally.
What is the Difference Between Tracing and Logging? by Amanda Viescinski
Explains the conceptual difference between logging (recording discrete events)
and tracing (following the path of a request through a system). Not
Rust-specific, but useful background for understanding why the tracing crate
exists alongside the log crate.
Are we observable yet? — Zero to Production #4 by Luca Palmieri
Walks through building an observable Rust web service from scratch. Starts
with basic log + env_logger, then migrates to tracing with
tracing-subscriber and tracing-bunyan-formatter for JSON output. Shows
how to use #[tracing::instrument] to reduce boilerplate, how to protect
sensitive data with secrecy::Secret, and how to configure logging differently
for tests vs production.
Metrics
Metrics is the process of collecting numerical data from deployed software to measure how well it performs, to count how many errors occur, and to track the performance of individual components. You can use them to monitor the health of a system, identify performance bottlenecks, and detect anomalies. Sometimes you just want to plot that data so you have pretty graphs to look at. Other times you want to watch them closely, as you deploy a new version of a service, and you want to see if your latency or error rate increases.
Generally, you could say that metrics collection is, along with tracing, part of the observability stack, which allows you to gain insight over how a system is performing.
Whatever your reason is for collecting metrics, there are some crates in Rust that can help you achieve this. Before we look into them, let’s take a look at an overview of how metrics collection usually works, and what you usually do with that data.
Metrics collection
Metrics collection usually involves instrumenting your code to record data about the execution of your program. Data is collected by counters, gauges, histograms, and summaries inside your code. Just to make sure this terminology is clear:
| Name | Description |
|---|---|
| Counter | Counts occurrences of something happen. For example, you might have a counter that you increment each time a request is served. |
| Gauge | Represents a single numerical value that can go up or down. For example, you might have a gauge that represents the current number of active users. |
| Histogram | Measures the distribution of values in a stream of data. For example, you might have a histogram that measures the response time of your service. |
| Summary | Measures the distribution of values in a stream of data, but with a different approach than a histogram. For example, you might have a summary that measures the response time of your service. |
These metrics are then collected by a metrics aggregator, which can be a standalone service or part of a larger monitoring system. A common example of an aggregator is Prometheus. We’ll explain it later, but Prometheus will send a request to your service periodically to collect the metrics. There are aggregators that work in a different way, for example such that you send them, or you could even store them directly in a database.
Prometheus is more than just a metrics aggregator. It is a time-series database, in other words a database that is optimized for storing and querying data which is indexed by time. It can store such data more efficiently than a traditional database. That is why it is commonly used for monitoring and alerting purposes.
Once the metrics are collected, they can be used for various purposes, such as monitoring the health of a system, identifying performance bottlenecks, and detecting anomalies. They can also be used to generate alerts, trigger automated actions, or provide insights into the behavior of your system. As I mentioned earlier, you can also just use Grafana to plot them.
If you just want simple metrics, the metrics crate is a good bet. If you want a more integrated solution, you can use OpenTelemetry, which comes at a cost of complexity but has more features (such as including tracing). If you just want to use Prometheus, the prometheus crate is a good bet.
Metrics
The metrics crate (website) is a light-weight crate
that has implementations for various metrics counters and aggregations. It is
designed to be used by your application to record metrics, and have another
crate to export them to a monitoring system. It works similar to the log crate
with a façade pattern, allowing you to use any metrics implementation you want.
For the backend, it supports two implementations: Prometheus and TCP.
| Backend | Description |
|---|---|
| Prometheus | Exports metrics to prometheus |
| TCP | Streams metrics out over TCP |
| DogStatsD | Sends metrics to Datadog |
| HTTP | Sends metrics to HTTP endpoint |
There are also some crates that allow bridging the metrics facade with other
libraries:
- metrics-prometheus allows you to
bridge the
prometheuscrate with themetricsfacade. This can be useful if you use some Rust libraries that use theprometheuscrate internally, but you want to expose metrics using themetricsfacade.
Examples
Here’s an example of how to use metrics:
#![allow(unused)]
fn main() {
use metrics::{counter, histogram};

pub fn process(query: &str) -> u64 {
    let start = Instant::now();
    let row_count = run_query(query);
    let delta = start.elapsed();

    histogram!("process.query_time").record(delta);
    counter!("process.query_row_count").increment(row_count);

    row_count
}
}
OpenTelemetry
OpenTelemetry is an observability framework designed for collecting, processing, and exporting telemetry data—such as traces, metrics, and logs—from applications. It is a standard that works across programming languages and framworks
OpenTelemetry has a Rust crate, that you can use to export data to OTel-compatible observability systems.
Prometheus
There is a Rust crate for Prometheus called prometheus. It has built-in primitives for creating counters, gauges, histograms, and summaries. You declare them as global variables and use them to track performance data, and you define and endpoint that Prometheus can scrape periodically.
Examples
With the prometheus crate, you can define your metrics and register them with
a registry. If you don’t specify a specific one, it will register them with a
default, global registry. When you want to expose them to Prometheus, you can
use the prometheus::gather() function to gather all the metrics and then
encode them using the TextEncoder struct.
#![allow(unused)]
fn main() {
use prometheus::{self, IntCounter, TextEncoder, Encoder, register_int_counter};
use lazy_static::lazy_static;

lazy_static! {
    static ref HIGH_FIVE_COUNTER: IntCounter =
        register_int_counter!("highfives", "Number of high fives received").unwrap();
}

HIGH_FIVE_COUNTER.inc();
assert_eq!(HIGH_FIVE_COUNTER.get(), 1);

let mut buffer = Vec::new();
let encoder = TextEncoder::new();

// Gather the metrics.
let metric_families = prometheus::gather();
// Encode them to send.
encoder.encode(&metric_families, &mut buffer).unwrap();

let output = String::from_utf8(buffer.clone()).unwrap();
const EXPECTED_OUTPUT: &'static str = "# HELP highfives Number of high fives received\n# TYPE highfives counter\nhighfives 1\n";
assert!(output.starts_with(EXPECTED_OUTPUT));
}
Autometrics
https://crates.io/crates/autometrics/2.0.0
Reading
How to setup and use metrics in rust (archived) by Hamza Khchichine
Hamza walks through setting up metrics collection in a Rust application using the metrics-rs crate with a Prometheus exporter and Grafana for visualization. He covers defining counters, gauges, and histograms in a centralized module and integrating them throughout the application.
OpenTelemetry, time series, metrics and a bit of Rust (archived) by Elias Granja
Elias explains the concepts behind OpenTelemetry, including metrics, structured events, and distributed tracing. He demonstrates instrumenting an Actix-web service using the OpenTelemetry SDK to emit metrics via the OTLP protocol, highlighting the vendor-agnostic nature of the approach.
Error handling
Error handling is essential to writing robust software. Rust has chosen a model for error handling that emphasizes correctness.
Many programming languages use exceptions to communicate errors. In some way, exceptions are a kind of hidden return value: a function can either return the value it declares it will return, or it can throw an exception.
Rust deliberately chose not to do this, and rather uses return types. This
ensures that it is always clearly communicated which failure modes a function
has, and failure handling does not use a different channel. It also forces
programmers to handle errors, at least to some degree: a fallible function
returns a Result<T, E>, and you have to either handle the error (with a
match statement), or propagate it up with a ?.
In some ways, this is only partially true. Rust does have a kind of exception,
through the panic!() and .unwrap() mechanism. However, the difference is
that these are generally only used for unrecoverable errors.
Part of the reason that doing this is ergonomic in Rust is because Rust has great syntactical support for pattern matching. This is not the case for many other languages, which is partially why exceptions were created and remain in use.
Overview
Communicating Failures in Rust
Rust has three principal methods of communicating failures. In the order of utility, this is what they are:
- Missing data: Rust has the
Option<T>type, which can communicate if something is missing. Generally, this is not an error. For example, when you look up a value in a map, it will return eitherNoneorSome(T). - Recoverable errors: Rust has the
Result<T, E>type, which can either contain your data asOk(T), or contain an error asErr(E). - Unrecoverable errors: Panics are the Rust way to express an error that cannot be recovered from. This is perhaps the closest thing Rust has to exceptions. These are generated when invariants are invalid, or when memory cannot be allocated. When they are encountered, a backtrace is printed and your program is aborted, although there are some ways to catch them if need be.
Rust also has ways to convert between these types of errors. For example, if a missing key in a map is to be treated as an error, you can write:
#![allow(unused)]
fn main() {
// get user name, or else return a user missing error
let value = map.get("user").ok_or(Error::UserMissing)?;
}
If an error is unrecoverable (or perhaps, you are prototyping some code and
chose not to properly handle errors yet), then you can turn a Err(T) into a
panic using unwrap() or expect().
#![allow(unused)]
fn main() {
let file = std::fs::read_to_string("file.txt").unwrap();
}
Panics in Rust
We can’t talk about error handling in Rust without mentioning panicking. Panics are a way to signify failures that cannot reasonably be recovered from. Panics are not a general way to communicate errors, they are a method of last resort. Usually, when a panic is encountered, it means that something went wrong that the programmer did not anticipate or handle and the program should abort.
There are different ways to trigger panics in Rust. Commonly, panics are used when writing prototype code, because you want to focus on the code and defer implementing error handling when the code works.
For example, when you write some code which traverses a data structure, you
might defer implementing the functionality for all edge cases. You can do this
by using the todo!() macro, which will trigger a panic if called.
#![allow(unused)]
fn main() {
fn test_value(value: &Value) -> bool {
    match value {
        Value::String(string) => string.len() > 0,
        Value::Number(number) => number > 0,
        Value::Map(map) => todo!(),
        Value::Array(array) => todo!(),
    }
}
}
Using catch_unwind(), you can catch panics. This might be useful if you use libraries that might panic.
#![allow(unused)]
fn main() {
std::panic::catch_unwind(|| {
    panic!("oops!");
});
}
For example, the axum framework uses catch_unwind to catch panics in request
handlers, which makes it convenient to use it during development, because the
server will not crash when it encounters a panic. However, they warn that this
is not recommended for production usage because it has performance implications.
While it is possible to catch panics with
catch_unwind(),
this is not recommended, has a performance penalty and does not work across
an FFI boundary. Panics are considered unrecoverable errors, and catching them
only works on a best-effort basis, on supported platforms.
Catching panics can be useful for development. For example, when you implement
a backend with an API, it can be useful to use todo!() statements in the code
and catch panics in your request handler, so that your backend does not
terminate when you hit something that isn’t implemented yet.
Production applications should generally never panic, and if they do it should result in the default behaviour, which is the application aborting.
The Result type
In general, fallible functions in Rust use the Result return type to signify
this. It is an enumeration that represents either success with an expected
result value Ok(value) or failure with an error Err(error).
If you have a common error type that you use in your application, then it is
possible to make an alias of the Result type that defaults to your error type,
but allows you to override it with a different error type if needed:
#![allow(unused)]
fn main() {
type Result<T, E = MyError> = std::result::Result<T, E>;
}
When you do this, Result<String> will resolve to Result<String, MyError>.
However, you can still write Result<String, OtherError> to use a specific
error type. Your custom error type is only used as the default when you don’t
specify any other type.
The Error trait
In general, all error types in Rust implement the Error trait. This
trait allows for getting a simple textual description of an error and
information about the source of the error.
If you create custom error types, you should implement this trait on them. There are some common libraries that help with doing this.
Libraries for custom error types
Rust comes with some libraries, which can help you integrate into the Rust error system. On a high level, these libraries fall into one of two categories:
- Custom error types: these libraries allow you to define custom error
types, by implementing the
Errortrait and any necessary other traits. A common pattern is to define an error type, which is an enumeration of all possible errors your application (or this particular function) may produce. These libraries often also help you by implementing aFrom<T>implementation for errors that your error type wraps. - Dealing with arbitrary errors: In some cases, you want to be able to
handle arbitrary errors. If you are writing a crate which is to be used by
others, this is generally a bad idea, because you want to expose the raw
errors to consumers of your library. But if you are writing an application,
and all you want to do is to render the error at some point, it is usually
beneficial to use some library which has the equivalent of
Box<dyn Error>and lets you not worry about defining custom error types. These libraries often also contain functionality for pretty-printing error chains and stack traces. - Error reporting: Some libraries focus specifically on presenting errors to users in a readable way, often with rich formatting, source code snippets, and helpful hints. These libraries are particularly useful for developer tools, compilers, and applications that need to provide detailed error information.
In general, if you write a crate that is to be used as a library by other crates, you should be using a library which allows you to define custom error types. You want the users of your crate to be able to handle the different failure modes, and if the failure modes change (your error enums change), you want to force them to adjust their code. This makes the failure modes explicit.
If you write an application (such as a command-line application, a web application, or any other code where you are not exposing the errors in any kind of API), then using the latter kind of error-handling library is appropriate. In this case, all you care about is reporting errors and metadata (where they occurred) to an end-user.
When using error handling libraries, keep in mind the trade-offs:
- Libraries should generally avoid using
anyhow,eyre, or similar “opaque error” libraries in their public API, as this hides error details from consumers. - Adding too much context to errors can bloat binary size due to string literals.
- For applications with complex domain logic, consider custom error types even if you’re the only consumer.
- Be cautious about adding backtraces to all errors, as this can impact performance.
- If you re-export other crates’ error types in your custom error enum, then that crate version becomes part of your public API. This has implications for versioning, if you update the version of the dependency, this may be a breaking change requiring a major version bump.
If you’re writing a library, you should use a structured error library like thiserror to define custom error types, with useful metadata and context. This will allow downstream consumers to work with and handle the errors. If you write an application, you may want to consider using a more dynamic library like anyhow, which allows you to not worry about specific error types and simply propagate them. If you need a library that focuses on good error reporting, consider using miette or eyre.
Thiserror
The thiserror crate is a popular
crate for defining custom structured errors. It helps you to implement the
Error trait for your custom error types.
Imagine you have an application that uses an SQLite database to store data and properties. Every query to the database returns some custom error type of the database library. However, you want consumers of your crate to be able to differentiate between different error cases.
For example:
#![allow(unused)]
fn main() {
#[derive(thiserror::Error, Debug)]
pub enum MyError {
    #[error(transparent)]
    Io(#[from] std::io::Error),
    #[error("user {0:} not found")]
    UserNotFound(String),
}
}
The crate is specifically useful for implementing your own structured error types, or for composing multiple existing error types into a wrapper enum.
By writing wrapper enums, you are also able to refine errors, for example classifying errors you receive from an underlying database.
Anyhow
The anyhow crate gives you the ability
to work with dynamic and ad-hoc errors. It exports the anyhow::Error type,
which can capture any Rust error.
use anyhow::Error;

fn main() -> Result<(), Error> {
    let data = std::fs::read_to_string("file.txt")?;
    Ok(())
}
The anyhow crate also has a Result alias, which defaults to using its Error
type.
This library is very useful for when you are writing an application that uses multiple libraries, and you don’t want to inspect or handle the errors explicitly. Rather, you can use anyhow’s Error type to pass them around and render them to the user.
Eyre
Eyre is similar to anyhow but focuses more on customizable error reporting. It provides a context-aware error type that can capture information about where and why an error occurred.
use eyre::{eyre, Result};

fn main() -> Result<()> {
    let file = std::fs::read_to_string("config.toml")
        .wrap_err("failed to read configuration file")?;
    Ok(())
}
Eyre is particularly useful when you want to add additional context to errors as they propagate through your application.
The color-eyre crate extends Eyre with colorful, pretty error reports and even better panic messages with backtraces.
Miette
Miette is an error reporting library that focuses on providing detailed, human-readable diagnostic information. It excels at displaying code snippets with error spans and fancy formatting.
#![allow(unused)]
fn main() {
use miette::{Diagnostic, Result};
use thiserror::Error;

#[derive(Error, Diagnostic, Debug)]
#[error("invalid configuration")]
#[diagnostic(
    code(app::invalid_config),
    help("check the syntax in your config file")
)]
struct ConfigError {
    #[source_code]
    src: String,

    #[label("this part is invalid")]
    span: (usize, usize),
}
}
Miette is ideal for applications that need to provide detailed, contextual error information to users, such as compilers, linters, or configuration validators.
Other Error Libraries
Error-Stack
Error-stack is a more recent error handling library that provides an extended approach to error creation and propagation. It allows for attaching arbitrary context to errors as they bubble up through your program, creating a detailed “stack” of information.
#![allow(unused)]
fn main() {
use error_stack::{Report, ResultExt};

fn read_config(path: &str) -> error_stack::Result<String, ConfigError> {
    std::fs::read_to_string(path)
        .change_context(ConfigError::FileIO)
        .attach_printable(format!("while reading config file: {}", path))
}
}
Error-stack excels at creating rich error contexts without the overhead of capturing full backtraces.
SNAFU
SNAFU (Situation Normal: All Fouled Up) is another library for defining error types and context information. It uses a different approach than thiserror, relying on context selectors rather than derive macros.
#![allow(unused)]
fn main() {
use snafu::{prelude::*, Whatever};

#[derive(Debug, Snafu)]
enum Error {
    #[snafu(display("Could not open config file: {}", source))]
    OpenConfig { source: std::io::Error },
}

fn open_config() -> Result<(), Error> {
    std::fs::File::open("config.toml").context(OpenConfigSnafu)?;
    Ok(())
}
}
SNAFU is particularly useful for situations where you need fine-grained control over how context is attached to errors.
Ariadne
Ariadne is an alternative to miette that focuses on displaying source code diagnostics. It’s designed for parsers, compilers, and interpreters that need to report syntax errors or other issues in source code.
Conclusion
The rule of thumb is: libraries should expose structured error types (using
thiserror or snafu) so consumers can match on specific failures, while
applications can use opaque error types (using anyhow or eyre) since they
only need to report errors, not handle them programmatically. If your
application needs rich diagnostic output (source spans, help text), miette or
color-eyre add that on top.
Reading
The definitive guide to Rust error handling (archived) by Angus Morrison
Angus walks through the basics of error handling in Rust. He explains the
Error trait, and when to use boxed versions of it to pass error around. He
shows how it can be downcast into concrete error types, and how anyhow’s Error
type can be used instead. He explains structured error handling by implementing
custom types. The article provides excellent coverage of thiserror and anyhow,
with real-world examples from popular crates like Actix Web and wgpu. Special
attention is given to std::io::Error as a complex example and Hyrum’s Law’s
impact on error design.
Chapter 9: Error Handling by The Rust Programming Language
The official Rust Book’s chapter on error handling covers the fundamental concepts of recoverable and unrecoverable errors. It introduces Result<T, E> and the panic! macro, explaining when to use each approach. The chapter provides the foundational understanding needed before diving into more advanced error handling patterns and libraries.
Error handling in Rust: a comprehensive tutorial by Eze Sunday
A practical tutorial covering recoverable vs unrecoverable errors, with hands-on examples of various error handling methods like .unwrap_or(), .expect(), and the ? operator. Sunday provides a helpful comparison table of thiserror, anyhow, and color-eyre libraries, along with best practices for debugging and logging. The article emphasizes practical application over theory.
Rust Error Handling: thiserror, anyhow, and When to Use Each (archived) by Momori Nakano
A focused comparison of thiserror and anyhow with practical examples. Nakano demonstrates how to build custom error enums, implement required traits manually, then shows how thiserror simplifies the process. The article clearly explains when to use structured errors (thiserror) vs opaque errors (anyhow), with the rule of thumb that libraries should provide detailed error information while applications can hide internal details.
Error Handling in Rust: A Deep Dive by Luca Palmieri
An in-depth exploration of error handling patterns from a backend development perspective. Palmieri covers the dual purposes of errors (control flow and reporting), layering strategies, and avoiding “ball of mud” error enums. The article includes extensive examples from a newsletter application, showing how to implement proper error chains and logging. Particularly valuable for understanding error handling architecture in larger applications.
Error Handling in a Correctness-Critical Rust Project by Tyler Neely
A battle-tested perspective on error handling from the author of the sled database. Neely argues against global error enums based on real-world experience with catastrophic failures. The article demonstrates how nested Result types (Result<Result<T, LocalError>, FatalError>) can prevent improper error propagation. Includes practical advice on error injection testing using tools like PingCAP’s fail crate to catch bugs in error handling logic.
Three kinds of Unwrap by zk
An analysis of the semantic differences between various uses of .unwrap() in Rust applications. The author identifies three distinct categories: unwrap as panic!() (intentional termination), unwrap as unreachable!() (impossible error states), and unwrap as todo!() (temporary placeholder). The article proposes new standard library methods like .todo() and .unreachable() to better express intent and enable better tooling support.
Designing Error Types in Rust Libraries (archived) by Sven Kanoldt
A library author’s guide to designing error types that provide useful information to consumers. Kanoldt covers the trade-offs between different error type designs, including when to use enums vs structs, how to provide context without breaking encapsulation, and techniques for making errors actionable. The article emphasizes designing errors from the consumer’s perspective rather than the implementation’s convenience.
Why Use Structured Errors in Rust Applications? by Dmitrii Aleksandrov
Aleksandrov challenges the conventional wisdom that applications should use opaque errors like anyhow::Error. He argues that even applications can benefit from structured error types for better testing, debugging, and maintainability. The article provides practical examples of how structured errors can improve application robustness and developer experience, even when errors aren’t exposed in public APIs.
Error Handling in Rust (archived) by Andrew Gallant
A foundational article on Rust error handling from the author of ripgrep and many other popular Rust tools. Gallant provides a comprehensive overview of error handling patterns, from basic Result usage to advanced composition techniques. The article includes detailed examples of building custom error types and discusses the philosophy behind Rust’s approach to error handling compared to exceptions in other languages.
Designing error types in Rust (archived) by Roman Kashitsyn
Kashitsyn provides practical guidance on designing effective error types in Rust, with a focus on balancing expressiveness with usability. The article covers error composition patterns, the trade-offs between different error representations, and how to design errors that scale with your application’s complexity. Includes real-world examples and performance considerations for different error handling approaches.
Serialization
Serialization is the process of turning structured data into a flat format, usually textual (JSON, YAML, TOML) or binary (MessagePack, Bincode, Postcard). Typically this is done to save data (on disk, in a database) or exchange it (between processes, between services over a network). Deserialization is the inverse: turning a flat representation back into structured data.
For example:
- When you read a config file from disk and parse it, you are deserializing it.
- When you make an API request and send JSON-encoded data, you are serializing it.
One important distinction between serialization formats is whether they are self-describing or not. A self-describing format like JSON includes the field names in the serialized output, so a reader can understand the structure without knowing the schema ahead of time. A non-self-describing format like Bincode or Postcard omits this information and relies on both sides agreeing on the schema, which makes the output smaller and faster to parse but less flexible.
Rust has several popular crates for serialization. The dominant one is serde,
which most of the ecosystem is built around. There are also alternatives that
make different tradeoffs.
| Crate | Description |
|---|---|
| serde | General-purpose serialization framework with broad format support |
| facet | Reflection-based approach that avoids monomorphization |
| miniserde | Lightweight serde alternative with smaller code size |
| bincode | Binary serialization for inter-process communication |
Serde
Serde (short for serialize/deserialize) is the standard
serialization framework in Rust. It works through two traits, Serialize and
Deserialize, which you derive on your types. Format-specific crates then
provide serializers and deserializers that work with any type implementing these
traits.
#![allow(unused)]
fn main() {
use serde::{Serialize, Deserialize};

#[derive(Serialize, Deserialize)]
struct Config {
    name: String,
    timeout: u64,
    verbose: bool,
}
}
This single derive gives you access to every format that serde supports. You can serialize this struct to JSON, YAML, TOML, MessagePack, or any other format by choosing the appropriate crate:
| Crate | Format | Self-describing |
|---|---|---|
| serde_json | JSON | Yes |
| serde_yaml | YAML | Yes |
| toml | TOML | Yes |
| postcard | Postcard | No |
| bincode | Bincode | No |
| csv | CSV | Partially |
| rmp-serde | MessagePack | Yes |
| ciborium | CBOR | Yes |
You can find a more complete list of supported formats on the serde website.
Default Values
When deserializing, you can provide default values for fields that may be missing from the input. This is useful for configuration files where you want sensible defaults:
#![allow(unused)]
fn main() {
#[derive(Deserialize)]
struct Config {
    name: String,
    #[serde(default = "default_timeout")]
    timeout: u64,
    #[serde(default)]
    verbose: bool,
}

fn default_timeout() -> u64 {
    30
}
}
The #[serde(default)] attribute uses the type’s Default implementation,
while #[serde(default = "...")] calls a specific function.
Renaming Fields
Rust conventions use snake_case for field names, but many formats use
camelCase or PascalCase. Serde lets you rename fields in the serialized
output without changing your Rust code:
#![allow(unused)]
fn main() {
#[derive(Serialize, Deserialize)]
#[serde(rename_all = "camelCase")]
struct ApiResponse {
    user_name: String,      // serialized as "userName"
    created_at: String,     // serialized as "createdAt"
}
}
You can also rename individual fields:
#![allow(unused)]
fn main() {
#[derive(Serialize, Deserialize)]
struct Config {
    #[serde(rename = "type")]
    kind: String,  // "type" is a reserved keyword in Rust
}
}
Versioned Structs
As your application evolves, the shape of your serialized data may change. Serde provides several tools for handling this gracefully:
#[serde(default)]on fields lets you add new fields without breaking existing data, since missing fields get their default value.#[serde(deny_unknown_fields)]on the struct rejects input that contains fields your struct doesn’t know about, which is useful for catching typos in configuration files.#[serde(alias = "old_name")]lets you accept both old and new field names during a migration period.
For more complex schema migrations, you may need to deserialize into an
intermediate representation (such as serde_json::Value) and transform it
before deserializing into the final struct.
One pattern is to version your structs by using an internally tagged enum. Each variant is a newtype containing a version-specific struct:
#![allow(unused)]
fn main() {
#[derive(Serialize, Deserialize)]
struct ConfigV1 {
    name: String,
    age: usize,
}

#[derive(Serialize, Deserialize)]
struct ConfigV2 {
    full_name: String,
    age: usize,
    address: String,
    zip_code: String,
}

#[derive(Serialize, Deserialize)]
#[serde(tag = "version")]
enum Config {
    #[serde(rename = "1")]
    V1(ConfigV1),
    #[serde(rename = "2")]
    V2(ConfigV2),
}
}
The #[serde(tag = "version")] attribute tells serde to use the version field
to determine which variant to deserialize into. This works with newtype variants
containing structs, so the inner struct’s fields are merged into the JSON
object. With this setup, both of these JSON inputs would be accepted:
{
  "version": "1",
  "name": "John Doe",
  "age": 42
}
{
  "version": "2",
  "full_name": "John Doe",
  "age": 62,
  "address": "1042 Sweeny Drive",
  "zip_code": "18831"
}
But what if you previously did not use versioned structs, and you want to start
using them? You can combine #[serde(untagged)] with a tagged inner enum to
also accept legacy data that has no version field:
#![allow(unused)]
fn main() {
#[derive(Serialize, Deserialize)]
struct ConfigLegacy {
    name: String,
    id: u64,
}

#[derive(Serialize, Deserialize)]
struct ConfigV1 {
    name: String,
    age: usize,
}

#[derive(Serialize, Deserialize)]
struct ConfigV2 {
    full_name: String,
    age: usize,
    address: String,
    zip_code: String,
}

#[derive(Serialize, Deserialize)]
#[serde(tag = "version")]
enum ConfigVersioned {
    #[serde(rename = "1")]
    V1(ConfigV1),
    #[serde(rename = "2")]
    V2(ConfigV2),
}

#[derive(Serialize, Deserialize)]
#[serde(untagged)]
enum Config {
    Versioned(ConfigVersioned),
    Legacy(ConfigLegacy),
}
}
The #[serde(untagged)] attribute means serde will try decoding the variants
one by one. Since legacy values don’t have a version field, they will fail to
decode as ConfigVersioned and fall back to being decoded as ConfigLegacy.
Preserving Unknown Fields
The #[serde(flatten)] attribute merges the fields of a nested struct into the
parent. One useful application of this is preserving unknown fields during
round-tripping. If you are parsing data from an API response that may gain new
fields in the future, and you want to make sure that deserializing and
re-serializing does not lose anything, you can capture the unknown fields into a
map:
#![allow(unused)]
fn main() {
use std::collections::HashMap;
use serde_json::Value;

#[derive(Serialize, Deserialize)]
pub struct ApiResponse {
    foo: String,
    bar: String,

    #[serde(flatten)]
    other: HashMap<String, Value>,
}
}
Any JSON keys that don’t match foo or bar are collected into other, and
when you serialize the struct back, those keys are included in the output.
Custom Implementations
For most types, the derived Serialize and Deserialize implementations are
sufficient. When they are not, you can implement the traits manually. Common
reasons include:
- Serializing a type in a format that doesn’t match its Rust structure (for
example, serializing a
Durationas a human-readable string like"30s"). - Enforcing validation during deserialization (rejecting values that are syntactically valid but semantically wrong).
- Working with external types that don’t implement serde traits.
Manual implementations use serde’s Serializer and Deserializer visitor
pattern. This is more involved than deriving, but the
serde documentation covers it well.
Companion Crates
Several crates extend serde’s functionality:
serde_with provides custom field-level serialization helpers
through attributes. For example, serializing a Duration as seconds, a Vec as
a comma-separated string, or skipping serialization of Option::None values. It
saves you from writing manual trait implementations for common patterns.
serde_transcode allows converting between serde formats
without an intermediate Rust type. For example, you can transcode JSON to YAML
directly, which is useful for format conversion tools.
If you manually implement Serialize and Deserialize, the serde_test crate can
be very helpful in testing that these work correctly.
Protocol Buffers
Protocol Buffers (protobuf) is Google’s language-neutral
serialization format, widely used for RPC and inter-service communication.
Unlike serde, protobuf uses a separate schema definition (.proto files) that
is compiled into Rust code.
The two main Rust crates for protobuf are:
prost: Generates idiomatic Rust structs from.protofiles. This is the most popular choice and integrates well with thetonicgRPC framework.protobuf: The official Google-maintained Rust implementation.
Protobuf is a good choice when you need cross-language interoperability with a well-defined schema, especially if you are already using gRPC.
Bincode
Bincode is a binary serialization format designed for inter-process communication and storage. It is compact and fast, but not self-describing: both the serializer and deserializer must agree on the schema.
Bincode is serde-compatible, so you can use it with any type that derives
Serialize and Deserialize. It also provides its own Encode and Decode
traits for cases where you want more control over the binary layout.
Bincode is a good choice when you need fast, compact serialization between Rust processes and don’t need human-readable output or cross-language compatibility.
Facet
Facet takes a fundamentally different approach to serialization than
serde. Where serde generates specialized serialization code for each type
through monomorphization, facet uses compile-time reflection: the derive macro
generates metadata (a Shape) describing each type’s structure, and generic
serialization code operates on this metadata at runtime.
#![allow(unused)]
fn main() {
use facet::Facet;

#[derive(Facet)]
struct Config {
    name: String,
    timeout: u64,
    verbose: bool,
}
}
The key tradeoff is explicit: facet trades some runtime performance (roughly 3-6x slower than serde for serialization) for significantly reduced compile times. Because the serialization logic is not monomorphized per type, adding new types or changing existing ones does not cause cascading recompilation of serialization code. For large projects where compile times are a bottleneck, this can be a meaningful improvement.
Facet is more than a serialization library. Because it provides runtime type
information, it can also be used for pretty-printing, diffing, CLI argument
parsing, and code generation for other languages. The facet ecosystem includes
crates like facet-json, facet-toml, facet-yaml, facet-pretty, and
facet-diff.
Facet is backed by AWS and the Zed editor team, and is under active development. It is newer than serde and its ecosystem is smaller, but it represents an interesting architectural alternative for projects where compile time matters more than serialization throughput.
Miniserde
Miniserde is a minimal serialization library by the same author as serde (David Tolnay). It deliberately supports only a subset of what serde can do: JSON serialization and deserialization with no support for other formats, no custom field attributes, and no generic type parameters.
In exchange, miniserde produces significantly less code through monomorphization, resulting in smaller binaries and faster compile times. It is a good choice for small tools or WebAssembly targets where binary size is a primary concern and you only need JSON support.
Conclusion
For most projects, serde is the right choice. It has the broadest format support, the largest ecosystem, and most Rust crates that expose serializable types already use it. The other crates are worth considering when you have specific constraints:
- Bincode or Postcard: When you need compact binary serialization between Rust processes.
- Protocol Buffers: When you need cross-language interoperability with a schema-first approach, especially with gRPC.
- Facet: When compile times are a significant concern and you can accept slower runtime serialization.
- Miniserde: When binary size matters and you only need JSON.
Reading
Serde by David Tolnay
The serde book is a reference guide for how to use serde, lists the various formats that serde can serialize and deserialize, and gives advice on using advanced features.
Rust serialization: What’s ready for production today? by Andre Bogus
In this article, Andre goes through several serialization frameworks in Rust and explains which ones are stable and reliable and fit for use in production Rust applications.
Introducing facet: Reflection for Rust by Amos Wenger
Amos explains the motivation behind facet: serde’s monomorphization causes significant compile-time costs in large projects. Facet takes a different approach by generating metadata rather than specialized code, trading runtime performance for faster builds and additional capabilities like reflection.
Parsing
Parsing is a fundamental task in many applications, from configuration files to
domain-specific languages (although, configuration files are better parsed with
a deserialization library such as serde).
Rust has several popular parsing libraries, each with different approaches and strengths. This section covers the most popular parsing libraries in the Rust ecosystem.
In general, if you want to parse binary data, the nom crate seems to
be the most popular. For parsing text, both Chomsky and
Pest are popular. But the choice of parsing library really boils down
to the question of how you want to write your grammar: do you prefer a
declarative approach or a procedural one?
nom
nom is a parser combinator library that enables you to build parsers by combining smaller parsing functions. It focuses on performance and low memory usage, making it ideal for binary formats, network protocols, and other performance-critical parsing tasks. nom uses macros and functions to create composable parsers and is particularly well-suited for byte-level parsing where you need fine-grained control over the parsing process.
Chumsky
Chumsky is a parser combinator library designed with ergonomics and error recovery in mind. It offers a friendly, declarative API that makes it easy to build complex parsers. Chumsky excels at parsing programming languages and other text formats where good error messages are important. It features strong typing, excellent error reporting, and the ability to create parsers that can recover from errors and continue parsing.
Pest
Pest is a parsing library for Rust that consumes a PEG grammar and generates a parser, complete with error reporting and recovery. Unlike nom and Chumsky, which build parsers through code, Pest uses separate grammar files with a specialized syntax similar to other PEG (Parsing Expression Grammar) tools.
lalrpop
LALRPOP is a parser generator that turns grammar files into Rust code. It uses LR(1) parsing techniques, making it powerful for parsing context-free grammars like programming languages. LALRPOP is particularly well-suited for creating parsers for statically-defined languages where you need precise control over grammar precedence and associativity. It integrates well with the Rust build system through a build script, automatically regenerating parser code when your grammar changes.
Reading
LALRPOP book by LALRPOP Team
The official book for LALRPOP, a parser generator for Rust that aims to be easy to use. It covers how to define grammars, generate parsers, and integrate them into Rust projects.
Concurrency
One of Rust’s themes is fearless concurrency, and due to the focus on this, Rust has many safeguards built-in to the language that enable you to easily write correct concurrent (and parallel) code. Because of these safeguards, Rust is one of the most pleasant languages to write heavily concurrent (and parallel) code in. In this section, we will discuss some high-level concepts, strategies and libraries that you can use in your code to make use of this capability. Some of these involve choices that you have to make which affect how you should structure your project.
Before we launch into this section, we should clarify what concurrency and parallelism actually mean.
- Concurrency is your program’s ability to track and execute multiple things at the same time, but not neccessarily in parallel. One example is a single-threaded asynchronous runtime, which can execute multiple futures by switching between them.
- Parallelism is when your program executes multiple tasks at the same time, for example using a multi-threaded model. It implies concurrency.
There are different methods in Rust to write concurrent or parallel programs, depending on the kind of workload you have. Your choice of these impacts the shape of the Rust code you write, so it is important to figure out which model suits your particular project. However, it is possible, to some extent, to mix the two models.
The building blocks that Rust give you to write concurrent applications are:
- Multi-threading with synchronous code
- Asynchronous concurrency or parallelism
Primer on Multithreading
The main difference between async and blocking programming paradigms is the introduction of futures, which represent a computation. While in blocking code, when you run some code, your thread will do only that:
#![allow(unused)]
fn main() {
std::time::sleep(Duration::from_secs(1));
}
In async code, you split the definition of a computation from its execution. Every async function returns a future that you need to await.
#![allow(unused)]
fn main() {
tokio::time::sleep(Duration::from_secs(1)).await;
}
The advantage of this is that it lets you perform high-level operations on computations. It lets you compose them. For example, you can execute multiple futures at once:
#![allow(unused)]
fn main() {
let future_1 = tokio::time::sleep(Duration::from_secs(1));
let future_1 = tokio::time::sleep(Duration::from_secs(1));
futures::join(future_1, future_2).await;
}
You can also wrap your futures into something else, for example adding a timeout to some computation that will cancel it when the time runs out:
#![allow(unused)]
fn main() {
tokio::time::timeout(Duration::from_secs(1), handle_request()).await;
}
Async
When should you use async?
When should you consider async code:
- You’re writing something that is heavily I/O bound, such as a web server, and you want it to be able to scale to a lot of requests and still stay efficient.
- You’re writing firmware for a microcontroller, and you want it to perform multiple things simultaneously.
- You want to be able to compose computation in a high-level way, for example wrapping some computation in a timeout.
When should you stick so synchronous code (see also When not to use Tokio):
- You’re writing a command-line application that only does one thing.
- You’re writing an application that mainly performes computation and not I/O, such as cryptographic libraries, data structures.
- Most of the I/O your applications performs is file I/O.
If your crate performs mainly computations, then Rayon is most likely what you want to use. The Rust standard library also comes with code to let you easily and safely create and manage threads.
The caveate around file I/O comes from the fact that in many operating systems
there are no asynchronous interfaces for reading from and writing to files.
While there is
a crate that lets Tokio use io_uring,
this only works on Linux and is experimental. For that reason, Tokio spawns a
dedicated thread for file I/O and uses blocking calls.
What even is async?
In short, async programming is a paradigm that lets you write scalable applications that have to do a lot of waiting.
If you have some code that is computation-heavy, it will generally not do a lot waiting but rather utilise the CPU efficiently. It might look something like this:
- graphic of compute-bound thread
However, if you think of a typical request handler, it involves a lot of waiting. It has to accept requests, parse headers, wait for the full request, make some queries to the database, and finally send a response. In terms of CPU utilisation, it means that it will spend the majority of it’s time waiting for things from the network (from client or responses from the database).
- graphic of network request thread
In traditional applications, you would spawn a thread per connection. Waiting for responses would be handled by the kernel, which would schedule other threads to run while it is waiting. However, the issue with this approach is that switching between threads is a relatively expensive operation, so this approach does not scale well. This means you can run into the C10k problem.
A better approach here is an event-driven one, where you handle multiple connections in a single thread, asking the operating system to notify you if any of them can progress. This lets you use a thread-per-core model, where you don’t spawn one thread per request, but you spawn as many threads as you have CPU cores, and distribute the requests amongs them.
- graphic of thread-per-core
If you were to implement this in C, you would be using an event-loop library like libuv, which lets you register callbacks when certain operations complete. In Rust, the async runtimes handle all of this for you, letting you write your code “as if” it were running on a thread by itself.
The async runtimes have wrappers for any operations that are “blocking”, meaning that they cause your thread to stall until some event happens. Examples of these are:
- Waiting for new network connection to come in
- Waiting for data on a network connection (receiving or sending)
- Waiting for a write or a read from disk
- Waiting for a timer to expire
What runtimes are recommended?
Although support for async-await style programming was only added in Rust 1.39, it has caught on and the Rust community has seen a large number of frameworks being built for async, and a lot of crates that support it.
In general, there are three runtimes that are recommended:
- Tokio is the go-to runtime for all things async. With over 200 million downloads, it is by far the most popular. At the time of writing, 20,000 crates depend on it (as of August 2024), meaning that it enjoys a very broad support by other libraries.
- Smol is a small and fast async runtime. It does not have the same amount of features as Tokio does, but due to it’s simplicity it is good for resource-constrained environments or if you want to be able to understand all of the code.
- async-std is the main competitor to Tokio. It was a project that aimed at making writing async code as simple as using the standard library. It is not as actively developed as Tokio, and in general is not recommended to be used for new projects. A lot of the ideas it came with have been incorporated into Tokio.
Thread-per-Core vs Shared-Nothing
Epoll vs io_uring
How does aysnc work in Rust?
There is the Async Book that goes into much greater depth. But in general, async in Rust
What are some common pitfalls with async in Rust?
Function coloring: design “sync core, async shell”
https://www.thecodedmessage.com/posts/async-colors/
Reading
Why Async Rust by David Lee Aronson
In this article, David explains the history of the development of async Rust.
Sans-IO by Thomas Eizinger
This article expalains an approach to architecting asynchronous applications that stricly separate IO code from business logic. This concept helps you design applications that can be easily tested, but can run with an asynchronous executor. While this article is written with Python in mind, the lessons are equally valid for Rust: good software design keeps a synchronous core (without I/O) and wraps it in a thin, asynchronous shell. That way, your business logic is decoupled from your runtime strategy.
That Windows has some odd design choices and cruft is has accumulated over the years is not news to any developers that have had to interact with it. This article explains the dark magic that needs to be performed to make async work on Windows for Rust.
Thread-per-core by David Lee Aronson
Todo
Linux AIO by Kornilios Kourtis
Async Rust Complexity by Chris Krycho
Chris argues that one of the reasons why doing async is difficult in Rust is because of the sheer amount of choice. Various async runtimes and libraries exist, and for a beginner it is difficult to pick one without investigating all of the options. This is less true today, as most of the Rust community has centered around the Tokio ecosystem for async.
Rust Stream Visualized by Alex Pushinsky
Visually explains how the Rust asynx stream API works, using diagrams to illustrate the behaviour.
Rust Async Bench by Justin Karneges
Async Book by Rust Lang
Stats on blocking vs async:
How to deadlock a Tokio application in Rust with just a single Mutex by Piotr Jastrzebski
Asynchronous I/O: The next billion dollar mistake? by Yorick Peterse
Measuring Context switching and memory overheads for Linux threads by Eli Bendersky
Eli measures the overhead of using threads in Linux. While Linux threads have a relatively low overhead, the requirement to do a context switch to switch between threads has a mimimum overhead of about 1.2 to 1.5 µs when using CPU core pinning, and 2.2 µs without. This limits how many requests can be served when using a thread-per-request architecture.
Confusing or misunderstood topics in systems programming: Part 0 by Preston Thorpe
Preston explains processes, threads, context switches and communication between threads. This article provides a good background explainer to be able to understand how asynchronouns programming works behind the scenes.
Rust Tokio task cancellations patterns by Milos Gajdos
In this article, Milos explains different patterns used in asynchronous, Tokio-powered Rust software to cancel tasks.
Async-Task explained by John Nunley
John explains the internals of the async-task crate from the grounds up in
this article. It gives a good background on how async works behind the scenes.
Async Rust in Three Parts by Jack O’Connor
Async Rust is not safe with io_uring by Tzu Gwo
Notes on io_uring by David Lee Aronson
Waiting for many things at once with io_uring by Francesco Mazzoli
Threads beat async/await by Armin Ronacher
Async/Await Is Real And Can Hurt You by @trouble
Async: What is blocking? by Kristoffer Ryhl
Async Rust is about concurrency, not (just) performance by Jakub Beránek
Jacub argues that the primary benefit of async/await is that it lets us concisely express complex concurrency; any (potential) performance improvements are just a second-order effect. He suggests that we should thus judge async primarily based on how it simplifies our code, not how (or if) it makes the code faster.
Async From Scratch by Teo Klestrup Röijezon
Tree-Structured Concurrency (archived) by Yoshua Wuyts
Tasks are the wrong abstraction (archived) by Yoshua Wuyts
Automatic interleaving of high-level concurrent operations (archived) by Yoshua Wuyts
Web Backend
A common use-case of Rust is building backends for web applications. Rust is particularily suited for this, because it offers great performance and a strong async ecosystem that allows you to scale to many concurrent requests easily.
While you can build a web backend manually by using crates such as hyper for HTTP and h3 for HTTP/3, generally you will want to use a framework to implement the backend. Web backend frameworks handle things such as request routing, route authentication, parameter deserialization and building responses for you to make sure your application stays maintainable.
But the important question is then: which framework do you use? The rust crate ecosystem has come up with a large amount of web framework crates with varying levels of popularity.
In general, the two most popular frameworks are Axum and Actix-Web, and they should be your go-to frameworks of choice if you have no specific requirements. Axum is nice because it integrates into the Tower ecosystem of middleware, meaning that you will easily find some existing middleware implementations for whatever you are trying to do, such as adaptive rate limiting. Actix-Web is known for being easy to get started with, and for being very fast.
On a reasonably powerful system, either one of these can handle up to one million requests per second, meaning that most likely your database will be the bottleneck in scaling Rust web backends.
Template engines in Rust
TODO
https://blog.logrocket.com/top-3-templating-libraries-for-rust/
https://lib.rs/template-engine
Routing
- macro-based vs dynamic
Query Parsing
Middleware
- tower ecosystem
WebSockets
- websocket support
Tracing
Metrics
State
Testing
Axum
Axum is currently the most popular web framework in the Rust ecosystem. It is developed by the same people that wrote Tokio, and uses hyper as the underlying HTTP implementation. It supports WebSockets, has built-in routing and parameter decoding. It also integrates with the tracing ecosystem and uses tower to build middleware.
use axum::{
    routing::get,
    Router,
};

#[tokio::main]
async fn main() {
    // build our application with a single route
    let app = Router::new().route("/", get(|| async { "Hello, World!" }));

    // run our app with hyper, listening globally on port 3000
    let listener = tokio::net::TcpListener::bind("0.0.0.0:3000").await.unwrap();
    axum::serve(listener, app).await.unwrap();
}
One thing that is nice about Axum is that it does not use custom proc-macros to implement routing or request handling, which makes it easier to use it with IDEs that might not understand the syntax. The downside is that it’s generics approach sometimes leads to difficult-to-understand error messages.
Actix-Web
Actix started out as a framework implementing the actor model for message-passing concurrency. Actix-Web, a framework for building web application on top of it gained quite a lot of popularity. It remains the second-most popular framework for building web backend application.
use actix_web::{get, web, App, HttpServer, Responder};

#[get("/hello/{name}")]
async fn greet(name: web::Path<String>) -> impl Responder {
    format!("Hello {}!", name)
}

#[actix_web::main] // or #[tokio::main]
async fn main() -> std::io::Result<()> {
    HttpServer::new(|| {
        App::new().service(greet)
    })
    .bind(("127.0.0.1", 8080))?
    .run()
    .await
}
Actix-Web is quite fast
Rocket
Rocket was an early framework for building web backends. Initially, it only supported blocking code and used threads, but since version 0.5.0 it supports async as well.
#![allow(unused)]
fn main() {
extern crate rocket;

#[get("/")]
fn hello() -> &'static str {
    "Hello, world!"
}

#[launch]
fn rocket() -> _ {
    rocket::build().mount("/", routes![hello])
}
}
Salvo
Salvo is a web framework for Rust.
Warp
https://github.com/seanmonstar/warp
Tide
https://github.com/http-rs/tide
Poem
https://github.com/poem-web/poem
Deploying
Shuttle
https://www.shuttle.rs/
AWS Lambda
Reading
Are We Web Yet: Web Frameworks by Are We Web Yet
List of web frameworks along with some stats on them.
Web Frameworks Benchmark: Rust by The Benchmarker
Compares the performance (as measured by requests-per-second) of various web frameworks.
Rusts Axum style magic function params example by Alex Puschinsky
In this article, Alex explains how Axum’s magic function parameter handling is implemented in Rust.
Web Frontend
This section discusses the frameworks you can use in Rust to build web frontends that run in the browser. If you are already familiar with the architecture of single-page web applications, you can skip down to the frameworks for a discussion of how they work.
Background
Websites use HTML for both content and structure. CSS is used to style how the website looks. The browser reads the HTML to get the content and layout, then applies CSS to style it, and finally renders it to the screen. When writing web applications, the first question is where and when this HTML is generated.
In traditional web applications, the HTML is created on the server. When the backend gets a request, it processes it and generates an HTML response. This response is then sent to the browser. On any interaction, such as a click on a link, press of a button or submission of a form, a new request is made to the browser, and a new HTML response is sent.

The Rust web backend frameworks have good support for writing web applications this way, often combined with templating crates such as handlebars or tera. The downside to this traditional approach is higher latencies. Since the entire page needs to be regenerated, transmitted and rendered on every interaction, there is a noticeable delay. When structing a web application this way, it is difficult to implement interactive widgets on pages, or update information in real-time.
Modern web frontend applications are often single-page applications (SPAs), written in languages like JavaScript or TypeScript and run in the browser. They are called “single-page” because the entire app is loaded in the initial request. After that, the frontend reacts to interactions and dynamically updates the content, without needing to realod the page. Communication with the backend typically happens through an API. This keeps the app responsive while waiting for server responses and allows for real-time events from the server using technologies like WebSockets.

Since the standardization of WebAssembly and the broad browser support it has gained, it has been possible to write frontend web applications languages other than JavaScript. This section explores Rust frameworks that allow you to write single-page web applications for full-stack Rust projects.
Using Rust for web frontends has some benefits. It allows you to write performant frontends, make use of the Rust crate ecosystem, and share type definitions between your backend and frontend easily. However, the availability of this is a relatively new and JavaScript-based frameworks tend to be more mature. Finding frontend engineers that are familiar with JavaScript-based frameworks is also a lot easier. If you want to build a prototype frontend for an existing Rust project, it may be worth exploring these as it allows you use a single language across the project.
The Component Model
All Rust web frontend frameworks discussed here use the component model to implement applications. In web frontend development, the component model is a way to build applications using reusable and self-contained pieces called components. Each component has its own logic and can manage its own state and appearance. Components can be nested within other components to build complex user interfaces. If you are familiar with React or similar JavaScript frontend libraries, then you should already be familiar with the component model.

Typically, web frameworks use a HTML-like domain-specific language to represent the outputs of components. For example, the root component of this example application might look like this:
#![allow(unused)]
fn main() {
html! {
    <main>
        <Header />
        <div class="content">
            <SideBar />
            <Content />
        </div>
    </main>
}
}
Like functions can have arguments, components can have properties. These are
inputs to the component. In this example, the HTML div element has the
property class="content". In the same way, Rust components can have
properties, which can be any Rust type.
As a convention, HTML native components are usually lowercased (such as main,
div, p) whereas Rust components are uppercased (such as Header, SideBar,
Content).
Components can also have state.
Finally, many frameworks also support context. Unlike properties, which a parent explicitly passes down to its child components, context is implicitly passed down to all child components (even children-of-children). This is often useful to pass global state such as whether the user is logged in down to all components in the tree, or utilities such as data caches.
The the web frameworks do is they handle changing of data. If any of the inputs to a component changes, whether that be properties, state or context, the component is re-rendered.

The way frameworks can track these changes depend on the framework itself, but generally they are able to do so because they have hooks that allow them to track what is changed and when.
- animation of changes propagating
In this section, we will not cover all available frontend frameworks, only a few of the post popular. As this is a relatively new development, there is a lot of activity in the various frameworks and you should expect some volatility in which frameworks are the most popular.
Raw Web APIs with web-sys
While most of the Rust web frameworks handle all of the interactions with the
underlying web APIs, sometimes you may find the need to go “deeper” and interact
with the raw APIs. The way you do this is by using the web-sys crate, which
has safe Rust wrappers for all of the APIs the browser exposes.
One quirk of the web-sys crate is that it puts every single API behind a
feature flag. In doing so, it has over 1,500 features, and as such needs an
exception to bypass the crates.io crate features
limit.
If you use it, don’t be surprised if you get compiler errors, make sure that
you have enabled the correct set of features. The crate documentation shows you
for every interface, which feature it requires.
Most frontend libraries will allow you to get raw access to the underlying DOM
nodes and perform raw operations on them. One example is when you want to use a
<canvas> element, you can use this to draw on it. Here is an example of what
this looks like in Yew:
#![allow(unused)]
fn main() {
// todo
}
You must keep in mind how the framework renders, to make sure that your raw access is not broken by components refreshing.
Compiling and Deploying Frontend Applications
Deploying a Rust frontend web application in the browser is a bit more complex
than just running cargo build, since the resulting WebAssembly blob still
needs to be packaged in a way that a browser can consume, and it needs some
JavaScript glue to make it usable. For this, a lot of frameworks use
Trunk to bundle and ship the raw Rust WebAssembly binaries into
something the browser can understand. The Trunk section below explains
how that works and how you can configure it.
Some Rust web frontend frameworks also support server-side rendering, where it can fallback to a traditional web application style where the HTML is generated server-side. This can also help search engines index the websites better by not needing WebAssembly support to render the website. The frameworks support partial hydration, where parts of the website are rendered server-side, or full hydration where every page can be fully rendered server-side.
If you use this feature, you also need to integrate your frontend application with your backend.
Rendering Methods
Browsers represent a loaded website (with HTML and styling) in their Document Object Model. Web frontend frameworks have to update this DOM whenever components change their outputs. One important difference between frameworks is in how they do this.
Some frameworks have a shadow DOM (sometimes also called virtual DOM), which is a copy of the DOM that is in the browser, that components modify. The framework then synchronizes this copy with the real DOM.
Other frameworks modify the DOM directly, which can have some performance benefits.
WebAssembly Support in the Ecosystem
Thanks to Rust’s use of LLVM, a compiler infrastructure that makes it easy to write new backends for different targets, it gained support for targetting WebAssembly relatively early. This means you can write entire applications that live and run in the browser in Rust, and make use of Rust’s extensive ecosystem.
Not all of Rust crates will work on WebAssembly out-of-the-box, for example because they access native operating system APIs that do not exist in WebAssembly, but many will work out-of-the-box or have feature flags that can be enabled to add support for it.
All of the low-level APIs that are relevant for running in the browser are exposed by the web_sys crate. This is a large crate that is automatically generated, and you need to enable features to enable it’s various APIs. Ergonomic wrappers for a lot of functionality are exposed by the gloo crate, and you should use this if you can.
Async Support
Thanks to the hard work of the community, it is even possible to use Rust async code in a WebAssembly environment through the use of wasm-bindgen-futures. These map the interface of Rust’s Futures to JavaScript Promises.
For example, you can use this to spawn a future in the background to make a network request and get the body of some web resource using the reqwest library:
#![allow(unused)]
fn main() {
wasm_bindgen_futures::spawn_local(async {
    let test = reqwest::get("https://www.rust-lang.org")
        .await?
        .text()
        .await?;
});
}
Most frameworks have some kind of wrapper around these raw futures to be able to use them in the applications.
Server-Side Rendering
Differences between frameworks
The rest of this section discusses some frameworks for Rust-based frontend programming. Generally, the conceptual model of these frameworks is very similar, because they used the same component model.
Differences between the frameworks exist between:
- The language they use to describe the output of a component. Usually, this is some kind of macro that allows you to specify a tree of components (HTML or native), their properties and children.
- The method in which they render the output of the components into the browser (using direct rendering or a shadow DOM). Either rendering methods can have advantages, it depends on what you are doing. Unless you are rendering a large amount of data or update frequently, it likely does not make a difference.
- The ecosystem of premade components and hooks. Some frameworks are more established and have third-part support for premade hooks and component libraries. These make your life easier.
- The degree to which they allow you to access raw browser APIs. Frameworks that have multiple rendering backends might be more limited in their support for raw browser APIs for compatibility.
- The syntax they use for defining components, properties and create and access hooks.
- The build system they use and support (either Trunk or a custom build system)
- Support for server-side rendering, for example having plugins for popular web
backend crates such as
axumoractix-web.
In the next sections, we will showcase some popular frameworks and attempt to give an overview of their features.
Yew
Yew is currently the most popular framework for web frontend
development in Rust. It uses a reactive component model, has a useful ecosystem
of plugins, supports server-side rendering, routing, and has a html! macro
that makes it relatively easy to get started.
To define a component, you can either implement the
Component trait, or use the
function_component derive macro. In
general, the latter leads to more concise code, and is the recommended way.
Functional components return Html, using the html macro. This macro can
output raw HTML, or other child components.
#![allow(unused)]
fn main() {
#[function_component]
fn app() -> Html {
    html! {
        <h1>{ "Hello World" }</h1>
    }
}
}
You can think of this function as always being run whenever your component needs to re-render, for example if any of the inputs (props or state) have changed. To declare state in your component, you use hooks. Here is an example:
#![allow(unused)]
fn main() {
#[function_component]
fn App() -> Html {
    let state = use_state(|| 0);

    let increment_counter = {
        let state = state.clone();
        Callback::from(move |_| state.set(*state + 1))
    };

    let decrement_counter = {
        let state = state.clone();
        Callback::from(move |_| state.set(*state - 1))
    };

    html! {
        <>
            <p> {"current count: "} {*state} </p>
            <button onclick={increment_counter}> {"+"} </button>
            <button onclick={decrement_counter}> {"-"} </button>
        </>
    }
}
}
Simple hooks come built-in, but there are also external crates offering more hooks.
The idea is that you can compose these small components into bigger applications. Yew also comes with a plugin for routing.
One thing that is nice about Yew is that the html! macro it uses very closely
resembles HTML. There is not a steep learning curve if you are familiar with it.
The only downside with it is that values require quoting, you can see that to
have text inside a paragraph element, you need to write <p>{"Text here"}</p>.
Another downside of it is that the state handles it uses require cloning, which
adds some clutter to the code.
Example: Yew Todo App
Here is an example of a todo-list application written in Yew. It showcases
props, child components, raw HTML rendering, the use_state hook and how to
package it with trunk.
- src/
/target
/dist
stages:
  - publish

# build application with trunk, use pinned versions for reproducible build.
pages:
  stage: publish
  image: rust:1.80
  variables:
    TRUNK_VERSION: 0.20.3
    TRUNK_BUILD_PUBLIC_URL: "/$CI_PROJECT_NAME"
  before_script:
    - rustup target add wasm32-unknown-unknown
    - wget -qO- https://github.com/thedodd/trunk/releases/download/v${TRUNK_VERSION}/trunk-x86_64-unknown-linux-gnu.tar.gz | tar -xzf- -C /usr/local/bin
  script:
    - trunk build --release
    - mv dist public
  artifacts:
    paths:
      - public
  only:
    - master
# This file is automatically @generated by Cargo.
# It is not intended for manual editing.
version = 3

[[package]]
name = "addr2line"
version = "0.22.0"
source = "registry+https://github.com/rust-lang/crates.io-index"
checksum = "6e4503c46a5c0c7844e948c9a4d6acd9f50cccb4de1c48eb9e291ea17470c678"
dependencies = [
 "gimli",
]

[[package]]
name = "adler"
version = "1.0.2"
source = "registry+https://github.com/rust-lang/crates.io-index"
checksum = "f26201604c87b1e01bd3d98f8d5d9a8fcbb815e8cedb41ffccbeb4bf593a35fe"

[[package]]
name = "anymap2"
version = "0.13.0"
source = "registry+https://github.com/rust-lang/crates.io-index"
checksum = "d301b3b94cb4b2f23d7917810addbbaff90738e0ca2be692bd027e70d7e0330c"

[[package]]
name = "autocfg"
version = "1.3.0"
source = "registry+https://github.com/rust-lang/crates.io-index"
checksum = "0c4b4d0bd25bd0b74681c0ad21497610ce1b7c91b1022cd21c80c6fbdd9476b0"

[[package]]
name = "backtrace"
version = "0.3.73"
source = "registry+https://github.com/rust-lang/crates.io-index"
checksum = "5cc23269a4f8976d0a4d2e7109211a419fe30e8d88d677cd60b6bc79c5732e0a"
dependencies = [
 "addr2line",
 "cc",
 "cfg-if",
 "libc",
 "miniz_oxide",
 "object",
 "rustc-demangle",
]

[[package]]
name = "bincode"
version = "1.3.3"
source = "registry+https://github.com/rust-lang/crates.io-index"
checksum = "b1f45e9417d87227c7a56d22e471c6206462cba514c7590c09aff4cf6d1ddcad"
dependencies = [
 "serde",
]

[[package]]
name = "boolinator"
version = "2.4.0"
source = "registry+https://github.com/rust-lang/crates.io-index"
checksum = "cfa8873f51c92e232f9bac4065cddef41b714152812bfc5f7672ba16d6ef8cd9"

[[package]]
name = "bumpalo"
version = "3.16.0"
source = "registry+https://github.com/rust-lang/crates.io-index"
checksum = "79296716171880943b8470b5f8d03aa55eb2e645a4874bdbb28adb49162e012c"

[[package]]
name = "bytes"
version = "1.7.1"
source = "registry+https://github.com/rust-lang/crates.io-index"
checksum = "8318a53db07bb3f8dca91a600466bdb3f2eaadeedfdbcf02e1accbad9271ba50"

[[package]]
name = "cc"
version = "1.1.18"
source = "registry+https://github.com/rust-lang/crates.io-index"
checksum = "b62ac837cdb5cb22e10a256099b4fc502b1dfe560cb282963a974d7abd80e476"
dependencies = [
 "shlex",
]

[[package]]
name = "cfg-if"
version = "1.0.0"
source = "registry+https://github.com/rust-lang/crates.io-index"
checksum = "baf1de4339761588bc0619e3cbc0120ee582ebb74b53b4efbf79117bd2da40fd"

[[package]]
name = "console_error_panic_hook"
version = "0.1.7"
source = "registry+https://github.com/rust-lang/crates.io-index"
checksum = "a06aeb73f470f66dcdbf7223caeebb85984942f22f1adb2a088cf9668146bbbc"
dependencies = [
 "cfg-if",
 "wasm-bindgen",
]

[[package]]
name = "equivalent"
version = "1.0.1"
source = "registry+https://github.com/rust-lang/crates.io-index"
checksum = "5443807d6dff69373d433ab9ef5378ad8df50ca6298caf15de6e52e24aaf54d5"

[[package]]
name = "fnv"
version = "1.0.7"
source = "registry+https://github.com/rust-lang/crates.io-index"
checksum = "3f9eec918d3f24069decb9af1554cad7c880e2da24a9afd88aca000531ab82c1"

[[package]]
name = "form_urlencoded"
version = "1.2.1"
source = "registry+https://github.com/rust-lang/crates.io-index"
checksum = "e13624c2627564efccf4934284bdd98cbaa14e79b0b5a141218e507b3a823456"
dependencies = [
 "percent-encoding",
]

[[package]]
name = "futures"
version = "0.3.30"
source = "registry+https://github.com/rust-lang/crates.io-index"
checksum = "645c6916888f6cb6350d2550b80fb63e734897a8498abe35cfb732b6487804b0"
dependencies = [
 "futures-channel",
 "futures-core",
 "futures-io",
 "futures-sink",
 "futures-task",
 "futures-util",
]

[[package]]
name = "futures-channel"
version = "0.3.30"
source = "registry+https://github.com/rust-lang/crates.io-index"
checksum = "eac8f7d7865dcb88bd4373ab671c8cf4508703796caa2b1985a9ca867b3fcb78"
dependencies = [
 "futures-core",
 "futures-sink",
]

[[package]]
name = "futures-core"
version = "0.3.30"
source = "registry+https://github.com/rust-lang/crates.io-index"
checksum = "dfc6580bb841c5a68e9ef15c77ccc837b40a7504914d52e47b8b0e9bbda25a1d"

[[package]]
name = "futures-io"
version = "0.3.30"
source = "registry+https://github.com/rust-lang/crates.io-index"
checksum = "a44623e20b9681a318efdd71c299b6b222ed6f231972bfe2f224ebad6311f0c1"

[[package]]
name = "futures-macro"
version = "0.3.30"
source = "registry+https://github.com/rust-lang/crates.io-index"
checksum = "87750cf4b7a4c0625b1529e4c543c2182106e4dedc60a2a6455e00d212c489ac"
dependencies = [
 "proc-macro2",
 "quote",
 "syn 2.0.77",
]

[[package]]
name = "futures-sink"
version = "0.3.30"
source = "registry+https://github.com/rust-lang/crates.io-index"
checksum = "9fb8e00e87438d937621c1c6269e53f536c14d3fbd6a042bb24879e57d474fb5"

[[package]]
name = "futures-task"
version = "0.3.30"
source = "registry+https://github.com/rust-lang/crates.io-index"
checksum = "38d84fa142264698cdce1a9f9172cf383a0c82de1bddcf3092901442c4097004"

[[package]]
name = "futures-util"
version = "0.3.30"
source = "registry+https://github.com/rust-lang/crates.io-index"
checksum = "3d6401deb83407ab3da39eba7e33987a73c3df0c82b4bb5813ee871c19c41d48"
dependencies = [
 "futures-channel",
 "futures-core",
 "futures-io",
 "futures-macro",
 "futures-sink",
 "futures-task",
 "memchr",
 "pin-project-lite",
 "pin-utils",
 "slab",
]

[[package]]
name = "getrandom"
version = "0.2.15"
source = "registry+https://github.com/rust-lang/crates.io-index"
checksum = "c4567c8db10ae91089c99af84c68c38da3ec2f087c3f82960bcdbf3656b6f4d7"
dependencies = [
 "cfg-if",
 "js-sys",
 "libc",
 "wasi",
 "wasm-bindgen",
]

[[package]]
name = "gimli"
version = "0.29.0"
source = "registry+https://github.com/rust-lang/crates.io-index"
checksum = "40ecd4077b5ae9fd2e9e169b102c6c330d0605168eb0e8bf79952b256dbefffd"

[[package]]
name = "gloo"
version = "0.8.1"
source = "registry+https://github.com/rust-lang/crates.io-index"
checksum = "28999cda5ef6916ffd33fb4a7b87e1de633c47c0dc6d97905fee1cdaa142b94d"
dependencies = [
 "gloo-console 0.2.3",
 "gloo-dialogs 0.1.1",
 "gloo-events 0.1.2",
 "gloo-file 0.2.3",
 "gloo-history 0.1.5",
 "gloo-net 0.3.1",
 "gloo-render 0.1.1",
 "gloo-storage 0.2.2",
 "gloo-timers 0.2.6",
 "gloo-utils 0.1.7",
 "gloo-worker 0.2.1",
]

[[package]]
name = "gloo"
version = "0.10.0"
source = "registry+https://github.com/rust-lang/crates.io-index"
checksum = "cd35526c28cc55c1db77aed6296de58677dbab863b118483a27845631d870249"
dependencies = [
 "gloo-console 0.3.0",
 "gloo-dialogs 0.2.0",
 "gloo-events 0.2.0",
 "gloo-file 0.3.0",
 "gloo-history 0.2.2",
 "gloo-net 0.4.0",
 "gloo-render 0.2.0",
 "gloo-storage 0.3.0",
 "gloo-timers 0.3.0",
 "gloo-utils 0.2.0",
 "gloo-worker 0.4.0",
]

[[package]]
name = "gloo-console"
version = "0.2.3"
source = "registry+https://github.com/rust-lang/crates.io-index"
checksum = "82b7ce3c05debe147233596904981848862b068862e9ec3e34be446077190d3f"
dependencies = [
 "gloo-utils 0.1.7",
 "js-sys",
 "serde",
 "wasm-bindgen",
 "web-sys",
]

[[package]]
name = "gloo-console"
version = "0.3.0"
source = "registry+https://github.com/rust-lang/crates.io-index"
checksum = "2a17868f56b4a24f677b17c8cb69958385102fa879418052d60b50bc1727e261"
dependencies = [
 "gloo-utils 0.2.0",
 "js-sys",
 "serde",
 "wasm-bindgen",
 "web-sys",
]

[[package]]
name = "gloo-dialogs"
version = "0.1.1"
source = "registry+https://github.com/rust-lang/crates.io-index"
checksum = "67062364ac72d27f08445a46cab428188e2e224ec9e37efdba48ae8c289002e6"
dependencies = [
 "wasm-bindgen",
 "web-sys",
]

[[package]]
name = "gloo-dialogs"
version = "0.2.0"
source = "registry+https://github.com/rust-lang/crates.io-index"
checksum = "bf4748e10122b01435750ff530095b1217cf6546173459448b83913ebe7815df"
dependencies = [
 "wasm-bindgen",
 "web-sys",
]

[[package]]
name = "gloo-events"
version = "0.1.2"
source = "registry+https://github.com/rust-lang/crates.io-index"
checksum = "68b107f8abed8105e4182de63845afcc7b69c098b7852a813ea7462a320992fc"
dependencies = [
 "wasm-bindgen",
 "web-sys",
]

[[package]]
name = "gloo-events"
version = "0.2.0"
source = "registry+https://github.com/rust-lang/crates.io-index"
checksum = "27c26fb45f7c385ba980f5fa87ac677e363949e065a083722697ef1b2cc91e41"
dependencies = [
 "wasm-bindgen",
 "web-sys",
]

[[package]]
name = "gloo-file"
version = "0.2.3"
source = "registry+https://github.com/rust-lang/crates.io-index"
checksum = "a8d5564e570a38b43d78bdc063374a0c3098c4f0d64005b12f9bbe87e869b6d7"
dependencies = [
 "gloo-events 0.1.2",
 "js-sys",
 "wasm-bindgen",
 "web-sys",
]

[[package]]
name = "gloo-file"
version = "0.3.0"
source = "registry+https://github.com/rust-lang/crates.io-index"
checksum = "97563d71863fb2824b2e974e754a81d19c4a7ec47b09ced8a0e6656b6d54bd1f"
dependencies = [
 "gloo-events 0.2.0",
 "js-sys",
 "wasm-bindgen",
 "web-sys",
]

[[package]]
name = "gloo-history"
version = "0.1.5"
source = "registry+https://github.com/rust-lang/crates.io-index"
checksum = "85725d90bf0ed47063b3930ef28e863658a7905989e9929a8708aab74a1d5e7f"
dependencies = [
 "gloo-events 0.1.2",
 "gloo-utils 0.1.7",
 "serde",
 "serde-wasm-bindgen 0.5.0",
 "serde_urlencoded",
 "thiserror",
 "wasm-bindgen",
 "web-sys",
]

[[package]]
name = "gloo-history"
version = "0.2.2"
source = "registry+https://github.com/rust-lang/crates.io-index"
checksum = "903f432be5ba34427eac5e16048ef65604a82061fe93789f2212afc73d8617d6"
dependencies = [
 "getrandom",
 "gloo-events 0.2.0",
 "gloo-utils 0.2.0",
 "serde",
 "serde-wasm-bindgen 0.6.5",
 "serde_urlencoded",
 "thiserror",
 "wasm-bindgen",
 "web-sys",
]

[[package]]
name = "gloo-net"
version = "0.3.1"
source = "registry+https://github.com/rust-lang/crates.io-index"
checksum = "a66b4e3c7d9ed8d315fd6b97c8b1f74a7c6ecbbc2320e65ae7ed38b7068cc620"
dependencies = [
 "futures-channel",
 "futures-core",
 "futures-sink",
 "gloo-utils 0.1.7",
 "http",
 "js-sys",
 "pin-project",
 "serde",
 "serde_json",
 "thiserror",
 "wasm-bindgen",
 "wasm-bindgen-futures",
 "web-sys",
]

[[package]]
name = "gloo-net"
version = "0.4.0"
source = "registry+https://github.com/rust-lang/crates.io-index"
checksum = "8ac9e8288ae2c632fa9f8657ac70bfe38a1530f345282d7ba66a1f70b72b7dc4"
dependencies = [
 "futures-channel",
 "futures-core",
 "futures-sink",
 "gloo-utils 0.2.0",
 "http",
 "js-sys",
 "pin-project",
 "serde",
 "serde_json",
 "thiserror",
 "wasm-bindgen",
 "wasm-bindgen-futures",
 "web-sys",
]

[[package]]
name = "gloo-render"
version = "0.1.1"
source = "registry+https://github.com/rust-lang/crates.io-index"
checksum = "2fd9306aef67cfd4449823aadcd14e3958e0800aa2183955a309112a84ec7764"
dependencies = [
 "wasm-bindgen",
 "web-sys",
]

[[package]]
name = "gloo-render"
version = "0.2.0"
source = "registry+https://github.com/rust-lang/crates.io-index"
checksum = "56008b6744713a8e8d98ac3dcb7d06543d5662358c9c805b4ce2167ad4649833"
dependencies = [
 "wasm-bindgen",
 "web-sys",
]

[[package]]
name = "gloo-storage"
version = "0.2.2"
source = "registry+https://github.com/rust-lang/crates.io-index"
checksum = "5d6ab60bf5dbfd6f0ed1f7843da31b41010515c745735c970e821945ca91e480"
dependencies = [
 "gloo-utils 0.1.7",
 "js-sys",
 "serde",
 "serde_json",
 "thiserror",
 "wasm-bindgen",
 "web-sys",
]

[[package]]
name = "gloo-storage"
version = "0.3.0"
source = "registry+https://github.com/rust-lang/crates.io-index"
checksum = "fbc8031e8c92758af912f9bc08fbbadd3c6f3cfcbf6b64cdf3d6a81f0139277a"
dependencies = [
 "gloo-utils 0.2.0",
 "js-sys",
 "serde",
 "serde_json",
 "thiserror",
 "wasm-bindgen",
 "web-sys",
]

[[package]]
name = "gloo-timers"
version = "0.2.6"
source = "registry+https://github.com/rust-lang/crates.io-index"
checksum = "9b995a66bb87bebce9a0f4a95aed01daca4872c050bfcb21653361c03bc35e5c"
dependencies = [
 "js-sys",
 "wasm-bindgen",
]

[[package]]
name = "gloo-timers"
version = "0.3.0"
source = "registry+https://github.com/rust-lang/crates.io-index"
checksum = "bbb143cf96099802033e0d4f4963b19fd2e0b728bcf076cd9cf7f6634f092994"
dependencies = [
 "js-sys",
 "wasm-bindgen",
]

[[package]]
name = "gloo-utils"
version = "0.1.7"
source = "registry+https://github.com/rust-lang/crates.io-index"
checksum = "037fcb07216cb3a30f7292bd0176b050b7b9a052ba830ef7d5d65f6dc64ba58e"
dependencies = [
 "js-sys",
 "serde",
 "serde_json",
 "wasm-bindgen",
 "web-sys",
]

[[package]]
name = "gloo-utils"
version = "0.2.0"
source = "registry+https://github.com/rust-lang/crates.io-index"
checksum = "0b5555354113b18c547c1d3a98fbf7fb32a9ff4f6fa112ce823a21641a0ba3aa"
dependencies = [
 "js-sys",
 "serde",
 "serde_json",
 "wasm-bindgen",
 "web-sys",
]

[[package]]
name = "gloo-worker"
version = "0.2.1"
source = "registry+https://github.com/rust-lang/crates.io-index"
checksum = "13471584da78061a28306d1359dd0178d8d6fc1c7c80e5e35d27260346e0516a"
dependencies = [
 "anymap2",
 "bincode",
 "gloo-console 0.2.3",
 "gloo-utils 0.1.7",
 "js-sys",
 "serde",
 "wasm-bindgen",
 "wasm-bindgen-futures",
 "web-sys",
]

[[package]]
name = "gloo-worker"
version = "0.4.0"
source = "registry+https://github.com/rust-lang/crates.io-index"
checksum = "76495d3dd87de51da268fa3a593da118ab43eb7f8809e17eb38d3319b424e400"
dependencies = [
 "bincode",
 "futures",
 "gloo-utils 0.2.0",
 "gloo-worker-macros",
 "js-sys",
 "pinned",
 "serde",
 "thiserror",
 "wasm-bindgen",
 "wasm-bindgen-futures",
 "web-sys",
]

[[package]]
name = "gloo-worker-macros"
version = "0.1.0"
source = "registry+https://github.com/rust-lang/crates.io-index"
checksum = "956caa58d4857bc9941749d55e4bd3000032d8212762586fa5705632967140e7"
dependencies = [
 "proc-macro-crate",
 "proc-macro2",
 "quote",
 "syn 2.0.77",
]

[[package]]
name = "hashbrown"
version = "0.14.5"
source = "registry+https://github.com/rust-lang/crates.io-index"
checksum = "e5274423e17b7c9fc20b6e7e208532f9b19825d82dfd615708b70edd83df41f1"

[[package]]
name = "hermit-abi"
version = "0.3.9"
source = "registry+https://github.com/rust-lang/crates.io-index"
checksum = "d231dfb89cfffdbc30e7fc41579ed6066ad03abda9e567ccafae602b97ec5024"

[[package]]
name = "http"
version = "0.2.12"
source = "registry+https://github.com/rust-lang/crates.io-index"
checksum = "601cbb57e577e2f5ef5be8e7b83f0f63994f25aa94d673e54a92d5c516d101f1"
dependencies = [
 "bytes",
 "fnv",
 "itoa",
]

[[package]]
name = "implicit-clone"
version = "0.4.9"
source = "registry+https://github.com/rust-lang/crates.io-index"
checksum = "f8a9aa791c7b5a71b636b7a68207fdebf171ddfc593d9c8506ec4cbc527b6a84"
dependencies = [
 "implicit-clone-derive",
 "indexmap",
]

[[package]]
name = "implicit-clone-derive"
version = "0.1.1"
source = "registry+https://github.com/rust-lang/crates.io-index"
checksum = "9311685eb9a34808bbb0608ad2fcab9ae216266beca5848613e95553ac914e3b"
dependencies = [
 "quote",
 "syn 2.0.77",
]

[[package]]
name = "indexmap"
version = "2.5.0"
source = "registry+https://github.com/rust-lang/crates.io-index"
checksum = "68b900aa2f7301e21c36462b170ee99994de34dff39a4a6a528e80e7376d07e5"
dependencies = [
 "equivalent",
 "hashbrown",
]

[[package]]
name = "itoa"
version = "1.0.11"
source = "registry+https://github.com/rust-lang/crates.io-index"
checksum = "49f1f14873335454500d59611f1cf4a4b0f786f9ac11f4312a78e4cf2566695b"

[[package]]
name = "js-sys"
version = "0.3.70"
source = "registry+https://github.com/rust-lang/crates.io-index"
checksum = "1868808506b929d7b0cfa8f75951347aa71bb21144b7791bae35d9bccfcfe37a"
dependencies = [
 "wasm-bindgen",
]

[[package]]
name = "libc"
version = "0.2.158"
source = "registry+https://github.com/rust-lang/crates.io-index"
checksum = "d8adc4bb1803a324070e64a98ae98f38934d91957a99cfb3a43dcbc01bc56439"

[[package]]
name = "log"
version = "0.4.22"
source = "registry+https://github.com/rust-lang/crates.io-index"
checksum = "a7a70ba024b9dc04c27ea2f0c0548feb474ec5c54bba33a7f72f873a39d07b24"

[[package]]
name = "memchr"
version = "2.7.4"
source = "registry+https://github.com/rust-lang/crates.io-index"
checksum = "78ca9ab1a0babb1e7d5695e3530886289c18cf2f87ec19a575a0abdce112e3a3"

[[package]]
name = "miniz_oxide"
version = "0.7.4"
source = "registry+https://github.com/rust-lang/crates.io-index"
checksum = "b8a240ddb74feaf34a79a7add65a741f3167852fba007066dcac1ca548d89c08"
dependencies = [
 "adler",
]

[[package]]
name = "num_cpus"
version = "1.16.0"
source = "registry+https://github.com/rust-lang/crates.io-index"
checksum = "4161fcb6d602d4d2081af7c3a45852d875a03dd337a6bfdd6e06407b61342a43"
dependencies = [
 "hermit-abi",
 "libc",
]

[[package]]
name = "object"
version = "0.36.4"
source = "registry+https://github.com/rust-lang/crates.io-index"
checksum = "084f1a5821ac4c651660a94a7153d27ac9d8a53736203f58b31945ded098070a"
dependencies = [
 "memchr",
]

[[package]]
name = "once_cell"
version = "1.19.0"
source = "registry+https://github.com/rust-lang/crates.io-index"
checksum = "3fdb12b2476b595f9358c5161aa467c2438859caa136dec86c26fdd2efe17b92"

[[package]]
name = "percent-encoding"
version = "2.3.1"
source = "registry+https://github.com/rust-lang/crates.io-index"
checksum = "e3148f5046208a5d56bcfc03053e3ca6334e51da8dfb19b6cdc8b306fae3283e"

[[package]]
name = "pin-project"
version = "1.1.5"
source = "registry+https://github.com/rust-lang/crates.io-index"
checksum = "b6bf43b791c5b9e34c3d182969b4abb522f9343702850a2e57f460d00d09b4b3"
dependencies = [
 "pin-project-internal",
]

[[package]]
name = "pin-project-internal"
version = "1.1.5"
source = "registry+https://github.com/rust-lang/crates.io-index"
checksum = "2f38a4412a78282e09a2cf38d195ea5420d15ba0602cb375210efbc877243965"
dependencies = [
 "proc-macro2",
 "quote",
 "syn 2.0.77",
]

[[package]]
name = "pin-project-lite"
version = "0.2.14"
source = "registry+https://github.com/rust-lang/crates.io-index"
checksum = "bda66fc9667c18cb2758a2ac84d1167245054bcf85d5d1aaa6923f45801bdd02"

[[package]]
name = "pin-utils"
version = "0.1.0"
source = "registry+https://github.com/rust-lang/crates.io-index"
checksum = "8b870d8c151b6f2fb93e84a13146138f05d02ed11c7e7c54f8826aaaf7c9f184"

[[package]]
name = "pinned"
version = "0.1.0"
source = "registry+https://github.com/rust-lang/crates.io-index"
checksum = "a829027bd95e54cfe13e3e258a1ae7b645960553fb82b75ff852c29688ee595b"
dependencies = [
 "futures",
 "rustversion",
 "thiserror",
]

[[package]]
name = "prettyplease"
version = "0.2.22"
source = "registry+https://github.com/rust-lang/crates.io-index"
checksum = "479cf940fbbb3426c32c5d5176f62ad57549a0bb84773423ba8be9d089f5faba"
dependencies = [
 "proc-macro2",
 "syn 2.0.77",
]

[[package]]
name = "proc-macro-crate"
version = "1.3.1"
source = "registry+https://github.com/rust-lang/crates.io-index"
checksum = "7f4c021e1093a56626774e81216a4ce732a735e5bad4868a03f3ed65ca0c3919"
dependencies = [
 "once_cell",
 "toml_edit",
]

[[package]]
name = "proc-macro-error"
version = "1.0.4"
source = "registry+https://github.com/rust-lang/crates.io-index"
checksum = "da25490ff9892aab3fcf7c36f08cfb902dd3e71ca0f9f9517bea02a73a5ce38c"
dependencies = [
 "proc-macro-error-attr",
 "proc-macro2",
 "quote",
 "syn 1.0.109",
 "version_check",
]

[[package]]
name = "proc-macro-error-attr"
version = "1.0.4"
source = "registry+https://github.com/rust-lang/crates.io-index"
checksum = "a1be40180e52ecc98ad80b184934baf3d0d29f979574e439af5a55274b35f869"
dependencies = [
 "proc-macro2",
 "quote",
 "version_check",
]

[[package]]
name = "proc-macro2"
version = "1.0.86"
source = "registry+https://github.com/rust-lang/crates.io-index"
checksum = "5e719e8df665df0d1c8fbfd238015744736151d4445ec0836b8e628aae103b77"
dependencies = [
 "unicode-ident",
]

[[package]]
name = "prokio"
version = "0.1.0"
source = "registry+https://github.com/rust-lang/crates.io-index"
checksum = "03b55e106e5791fa5a13abd13c85d6127312e8e09098059ca2bc9b03ca4cf488"
dependencies = [
 "futures",
 "gloo 0.8.1",
 "num_cpus",
 "once_cell",
 "pin-project",
 "pinned",
 "tokio",
 "tokio-stream",
 "wasm-bindgen-futures",
]

[[package]]
name = "quote"
version = "1.0.37"
source = "registry+https://github.com/rust-lang/crates.io-index"
checksum = "b5b9d34b8991d19d98081b46eacdd8eb58c6f2b201139f7c5f643cc155a633af"
dependencies = [
 "proc-macro2",
]

[[package]]
name = "rustc-demangle"
version = "0.1.24"
source = "registry+https://github.com/rust-lang/crates.io-index"
checksum = "719b953e2095829ee67db738b3bfa9fa368c94900df327b3f07fe6e794d2fe1f"

[[package]]
name = "rustversion"
version = "1.0.17"
source = "registry+https://github.com/rust-lang/crates.io-index"
checksum = "955d28af4278de8121b7ebeb796b6a45735dc01436d898801014aced2773a3d6"

[[package]]
name = "ryu"
version = "1.0.18"
source = "registry+https://github.com/rust-lang/crates.io-index"
checksum = "f3cb5ba0dc43242ce17de99c180e96db90b235b8a9fdc9543c96d2209116bd9f"

[[package]]
name = "serde"
version = "1.0.210"
source = "registry+https://github.com/rust-lang/crates.io-index"
checksum = "c8e3592472072e6e22e0a54d5904d9febf8508f65fb8552499a1abc7d1078c3a"
dependencies = [
 "serde_derive",
]

[[package]]
name = "serde-wasm-bindgen"
version = "0.5.0"
source = "registry+https://github.com/rust-lang/crates.io-index"
checksum = "f3b143e2833c57ab9ad3ea280d21fd34e285a42837aeb0ee301f4f41890fa00e"
dependencies = [
 "js-sys",
 "serde",
 "wasm-bindgen",
]

[[package]]
name = "serde-wasm-bindgen"
version = "0.6.5"
source = "registry+https://github.com/rust-lang/crates.io-index"
checksum = "8302e169f0eddcc139c70f139d19d6467353af16f9fce27e8c30158036a1e16b"
dependencies = [
 "js-sys",
 "serde",
 "wasm-bindgen",
]

[[package]]
name = "serde_derive"
version = "1.0.210"
source = "registry+https://github.com/rust-lang/crates.io-index"
checksum = "243902eda00fad750862fc144cea25caca5e20d615af0a81bee94ca738f1df1f"
dependencies = [
 "proc-macro2",
 "quote",
 "syn 2.0.77",
]

[[package]]
name = "serde_json"
version = "1.0.128"
source = "registry+https://github.com/rust-lang/crates.io-index"
checksum = "6ff5456707a1de34e7e37f2a6fd3d3f808c318259cbd01ab6377795054b483d8"
dependencies = [
 "itoa",
 "memchr",
 "ryu",
 "serde",
]

[[package]]
name = "serde_urlencoded"
version = "0.7.1"
source = "registry+https://github.com/rust-lang/crates.io-index"
checksum = "d3491c14715ca2294c4d6a88f15e84739788c1d030eed8c110436aafdaa2f3fd"
dependencies = [
 "form_urlencoded",
 "itoa",
 "ryu",
 "serde",
]

[[package]]
name = "shlex"
version = "1.3.0"
source = "registry+https://github.com/rust-lang/crates.io-index"
checksum = "0fda2ff0d084019ba4d7c6f371c95d8fd75ce3524c3cb8fb653a3023f6323e64"

[[package]]
name = "slab"
version = "0.4.9"
source = "registry+https://github.com/rust-lang/crates.io-index"
checksum = "8f92a496fb766b417c996b9c5e57daf2f7ad3b0bebe1ccfca4856390e3d3bb67"
dependencies = [
 "autocfg",
]

[[package]]
name = "syn"
version = "1.0.109"
source = "registry+https://github.com/rust-lang/crates.io-index"
checksum = "72b64191b275b66ffe2469e8af2c1cfe3bafa67b529ead792a6d0160888b4237"
dependencies = [
 "proc-macro2",
 "unicode-ident",
]

[[package]]
name = "syn"
version = "2.0.77"
source = "registry+https://github.com/rust-lang/crates.io-index"
checksum = "9f35bcdf61fd8e7be6caf75f429fdca8beb3ed76584befb503b1569faee373ed"
dependencies = [
 "proc-macro2",
 "quote",
 "unicode-ident",
]

[[package]]
name = "thiserror"
version = "1.0.63"
source = "registry+https://github.com/rust-lang/crates.io-index"
checksum = "c0342370b38b6a11b6cc11d6a805569958d54cfa061a29969c3b5ce2ea405724"
dependencies = [
 "thiserror-impl",
]

[[package]]
name = "thiserror-impl"
version = "1.0.63"
source = "registry+https://github.com/rust-lang/crates.io-index"
checksum = "a4558b58466b9ad7ca0f102865eccc95938dca1a74a856f2b57b6629050da261"
dependencies = [
 "proc-macro2",
 "quote",
 "syn 2.0.77",
]

[[package]]
name = "todo-yew"
version = "0.1.0"
dependencies = [
 "web-sys",
 "yew",
]

[[package]]
name = "tokio"
version = "1.40.0"
source = "registry+https://github.com/rust-lang/crates.io-index"
checksum = "e2b070231665d27ad9ec9b8df639893f46727666c6767db40317fbe920a5d998"
dependencies = [
 "backtrace",
 "pin-project-lite",
]

[[package]]
name = "tokio-stream"
version = "0.1.16"
source = "registry+https://github.com/rust-lang/crates.io-index"
checksum = "4f4e6ce100d0eb49a2734f8c0812bcd324cf357d21810932c5df6b96ef2b86f1"
dependencies = [
 "futures-core",
 "pin-project-lite",
 "tokio",
]

[[package]]
name = "toml_datetime"
version = "0.6.8"
source = "registry+https://github.com/rust-lang/crates.io-index"
checksum = "0dd7358ecb8fc2f8d014bf86f6f638ce72ba252a2c3a2572f2a795f1d23efb41"

[[package]]
name = "toml_edit"
version = "0.19.15"
source = "registry+https://github.com/rust-lang/crates.io-index"
checksum = "1b5bb770da30e5cbfde35a2d7b9b8a2c4b8ef89548a7a6aeab5c9a576e3e7421"
dependencies = [
 "indexmap",
 "toml_datetime",
 "winnow",
]

[[package]]
name = "tracing"
version = "0.1.40"
source = "registry+https://github.com/rust-lang/crates.io-index"
checksum = "c3523ab5a71916ccf420eebdf5521fcef02141234bbc0b8a49f2fdc4544364ef"
dependencies = [
 "pin-project-lite",
 "tracing-attributes",
 "tracing-core",
]

[[package]]
name = "tracing-attributes"
version = "0.1.27"
source = "registry+https://github.com/rust-lang/crates.io-index"
checksum = "34704c8d6ebcbc939824180af020566b01a7c01f80641264eba0999f6c2b6be7"
dependencies = [
 "proc-macro2",
 "quote",
 "syn 2.0.77",
]

[[package]]
name = "tracing-core"
version = "0.1.32"
source = "registry+https://github.com/rust-lang/crates.io-index"
checksum = "c06d3da6113f116aaee68e4d601191614c9053067f9ab7f6edbcb161237daa54"
dependencies = [
 "once_cell",
]

[[package]]
name = "unicode-ident"
version = "1.0.12"
source = "registry+https://github.com/rust-lang/crates.io-index"
checksum = "3354b9ac3fae1ff6755cb6db53683adb661634f67557942dea4facebec0fee4b"

[[package]]
name = "version_check"
version = "0.9.5"
source = "registry+https://github.com/rust-lang/crates.io-index"
checksum = "0b928f33d975fc6ad9f86c8f283853ad26bdd5b10b7f1542aa2fa15e2289105a"

[[package]]
name = "wasi"
version = "0.11.0+wasi-snapshot-preview1"
source = "registry+https://github.com/rust-lang/crates.io-index"
checksum = "9c8d87e72b64a3b4db28d11ce29237c246188f4f51057d65a7eab63b7987e423"

[[package]]
name = "wasm-bindgen"
version = "0.2.93"
source = "registry+https://github.com/rust-lang/crates.io-index"
checksum = "a82edfc16a6c469f5f44dc7b571814045d60404b55a0ee849f9bcfa2e63dd9b5"
dependencies = [
 "cfg-if",
 "once_cell",
 "wasm-bindgen-macro",
]

[[package]]
name = "wasm-bindgen-backend"
version = "0.2.93"
source = "registry+https://github.com/rust-lang/crates.io-index"
checksum = "9de396da306523044d3302746f1208fa71d7532227f15e347e2d93e4145dd77b"
dependencies = [
 "bumpalo",
 "log",
 "once_cell",
 "proc-macro2",
 "quote",
 "syn 2.0.77",
 "wasm-bindgen-shared",
]

[[package]]
name = "wasm-bindgen-futures"
version = "0.4.43"
source = "registry+https://github.com/rust-lang/crates.io-index"
checksum = "61e9300f63a621e96ed275155c108eb6f843b6a26d053f122ab69724559dc8ed"
dependencies = [
 "cfg-if",
 "js-sys",
 "wasm-bindgen",
 "web-sys",
]

[[package]]
name = "wasm-bindgen-macro"
version = "0.2.93"
source = "registry+https://github.com/rust-lang/crates.io-index"
checksum = "585c4c91a46b072c92e908d99cb1dcdf95c5218eeb6f3bf1efa991ee7a68cccf"
dependencies = [
 "quote",
 "wasm-bindgen-macro-support",
]

[[package]]
name = "wasm-bindgen-macro-support"
version = "0.2.93"
source = "registry+https://github.com/rust-lang/crates.io-index"
checksum = "afc340c74d9005395cf9dd098506f7f44e38f2b4a21c6aaacf9a105ea5e1e836"
dependencies = [
 "proc-macro2",
 "quote",
 "syn 2.0.77",
 "wasm-bindgen-backend",
 "wasm-bindgen-shared",
]

[[package]]
name = "wasm-bindgen-shared"
version = "0.2.93"
source = "registry+https://github.com/rust-lang/crates.io-index"
checksum = "c62a0a307cb4a311d3a07867860911ca130c3494e8c2719593806c08bc5d0484"

[[package]]
name = "web-sys"
version = "0.3.70"
source = "registry+https://github.com/rust-lang/crates.io-index"
checksum = "26fdeaafd9bd129f65e7c031593c24d62186301e0c72c8978fa1678be7d532c0"
dependencies = [
 "js-sys",
 "wasm-bindgen",
]

[[package]]
name = "winnow"
version = "0.5.40"
source = "registry+https://github.com/rust-lang/crates.io-index"
checksum = "f593a95398737aeed53e489c785df13f3618e41dbcd6718c6addbf1395aa6876"
dependencies = [
 "memchr",
]

[[package]]
name = "yew"
version = "0.21.0"
source = "registry+https://github.com/rust-lang/crates.io-index"
checksum = "5f1a03f255c70c7aa3e9c62e15292f142ede0564123543c1cc0c7a4f31660cac"
dependencies = [
 "console_error_panic_hook",
 "futures",
 "gloo 0.10.0",
 "implicit-clone",
 "indexmap",
 "js-sys",
 "prokio",
 "rustversion",
 "serde",
 "slab",
 "thiserror",
 "tokio",
 "tracing",
 "wasm-bindgen",
 "wasm-bindgen-futures",
 "web-sys",
 "yew-macro",
]

[[package]]
name = "yew-macro"
version = "0.21.0"
source = "registry+https://github.com/rust-lang/crates.io-index"
checksum = "02fd8ca5166d69e59f796500a2ce432ff751edecbbb308ca59fd3fe4d0343de2"
dependencies = [
 "boolinator",
 "once_cell",
 "prettyplease",
 "proc-macro-error",
 "proc-macro2",
 "quote",
 "syn 2.0.77",
]
[package]
name = "todo-yew"
version = "0.1.0"
edition = "2021"

[dependencies]
web-sys = { version = "0.3.70", features = ["HtmlInputElement"] }
yew = { version = "0.21.0", features = ["csr"] }
# Yew Todo App

A port of a [React Todo
App](https://www.digitalocean.com/community/tutorials/how-to-build-a-react-to-do-app-with-react-hooks)
to use the [Yew](https://yew.rs) framework.

This is an example project for the [Web
Frontend](https://rustprojectprimer.com/ecosystem/web-frontend.html) section of
the [Rust Project Primer](https://rustprojectprimer.com/) book.

## Prerequisites

You need two prerequisites to build this:

- Rust 1.80 with support for `wasm32-unknown-unknown` target
- Trunk build tool

### Setup

You can install Rust using [Rustup](https://rustup.rs):

    curl --proto '=https' --tlsv1.2 -sSf https://sh.rustup.rs | sh

You need to tell Rustup to add the WebAssembly target:

    rustup target add wasm32-unknown-unknown

You need to install [Trunk](https://trunkrs.dev) to build and serve it:

    cargo install trunk

## Running it

You can run it locally with Trunk:

    trunk serve

This will build and serve it, and watch the project for any changes. When you
edit the code, it will recompile and cause your browser to refresh.
<!DOCTYPE html>
<html>
    <head>
        <meta name="viewport" content="width=device-width, initial-scale=1.0">
        <link data-trunk rel="rust" />
        <link data-trunk data-inline rel="css" href="src/style.css" />
        <title>Todo Yew</title>
    </head>
    <body>
    </body>
</html>
use web_sys::HtmlInputElement;
use yew::prelude::*;

/// Represents a single Todo item.
#[derive(PartialEq, Clone)]
pub struct Todo {
    pub text: String,
    pub completed: bool,
}

impl Todo {
    /// Create a new todo item that is not completed.
    fn new<S: Into<String>>(text: S) -> Self {
        Self {
            text: text.into(),
            completed: false,
        }
    }

    fn complete(&mut self) {
        self.completed = !self.completed;
    }
}

#[function_component]
pub fn App() -> Html {
    // list of default todos to show
    let items = use_state(|| {
        vec![
            Todo::new("Buy milk"),
            Todo::new("Learn Rust"),
            Todo::new("Drink enough water"),
            Todo::new("Spend time with family"),
        ]
    });

    // submit a new todo item to the list
    let submit = {
        let items = items.clone();
        move |entry: String| {
            let mut current = (*items).clone();
            current.push(Todo::new(entry));
            items.set(current);
        }
    };

    html! {
        <div class="app">
            <div class="heading">
                {"Todo List"}
            </div>
            <div class="todo-list">
                {
                    items.iter().enumerate().map(|(index, item)| {
                        // mark current todo entry as completed
                        let complete = {
                            let items = items.clone();
                            move |()| {
                                let mut current = (*items).clone();
                                current[index].complete();
                                items.set(current);
                            }
                        };

                        // remove current todo entry
                        let remove = {
                            let items = items.clone();
                            move |()| {
                                let mut current = (*items).clone();
                                current.remove(index);
                                items.set(current);
                            }
                        };

                        html! {
                            <TodoRow key={index} item={item.clone()} {complete} {remove} />
                        }
                    }).collect::<Html>()
                }
            </div>
            <div class="footer">
                <TodoForm {submit} />
            </div>
        </div>
    }
}

/// Props for the todo row. Takes a todo item, and callbacks for what happens when the complete and
/// remove buttons are clicked.
#[derive(PartialEq, Properties, Clone)]
struct TodoRowProps {
    item: Todo,
    #[prop_or_default]
    complete: Callback<()>,
    #[prop_or_default]
    remove: Callback<()>,
}

/// Represents a single todo line, with buttons to mark it as complete and a button to delete it.
#[function_component]
fn TodoRow(props: &TodoRowProps) -> Html {
    let props = props.clone();
    html! {
        <div class={classes!("todo", props.item.completed.then_some("completed"))}>
            { &props.item.text }
            <div>
                <button class="complete" onclick={move |_| props.complete.emit(())}>{"✓"}</button>
                <button class="remove" onclick={move |_| props.remove.emit(())}>{"⨯"}</button>
            </div>
        </div>
    }
}

#[derive(PartialEq, Properties)]
struct TodoFormProps {
    #[prop_or_default]
    submit: Callback<String>,
}

/// Represents a form for adding iodos, as a text-input field.
#[function_component]
fn TodoForm(props: &TodoFormProps) -> Html {
    let value = use_state(String::default);

    let onsubmit = {
        let value = value.clone();
        let submit = props.submit.clone();
        move |event: SubmitEvent| {
            event.prevent_default();
            if !value.is_empty() {
                submit.emit((*value).clone());
            }
            value.set(String::default());
        }
    };

    let onchange = {
        let value = value.clone();
        move |event: Event| {
            let target: HtmlInputElement = event.target_dyn_into().unwrap();
            value.set(target.value());
        }
    };

    html! {
        <form {onsubmit}>
            <input r#type="text" class="input" value={value.as_str().to_string()} {onchange} />
        </form>
    }
}
use todo_yew::App;

fn main() {
    yew::Renderer::<App>::new().render();
}
body {
  background: #209cee;
  font-family: -apple-system, BlinkMacSystemFont, "Segoe UI", Roboto, Oxygen-Sans, Ubuntu, Cantarell, "Helvetica Neue", sans-serif;
}

.app {
  height: 100vh;
  padding: 10px;
  padding-top: 20px;
  padding-bottom: 20px;
  max-width: 600px;
  margin-left: auto;
  margin-right: auto;
}

.app .heading {
  padding: 5px;
  padding-top: 10px;
  padding-bottom: 10px;
  text-align: center;
  font-size: 20px;
  font-weight: 600;
  border-radius: 7px 7px 0px 0px;

  background: #e8e8e8;

  border: 1px solid #d8d8d8;
  border-bottom: 1px solid #b4b4b4;

  background: linear-gradient(to bottom,  #f6f6f6 0%,#dadada 100%);
}

.app .todo-list {
  padding: 5px;
  background: #ffffff;

  /*border-top: 1px solid #b4b4b4;*/
  border-left: 1px solid #d8d8d8;
  border-right: 1px solid #d8d8d8;
}

.app .footer {
  padding: 5px;
  border-radius: 0px 0px 7px 7px;
  background: #ffffff;
  padding-bottom: 10px;

  border-left: 1px solid #d8d8d8;
  border-right: 1px solid #d8d8d8;
  border-bottom: 1px solid #d8d8d8;
}

.app .footer form * {
  box-sizing: border-box;
  width: 100%;
}

.todo-list .todo {
  align-items: center;
  background: #f0f0f0;
  border-radius: 3px;
  box-shadow: 1px 1px 1px rgba(0, 0, 0, 0.15);
  display: flex;
  font-size: 14px;
  justify-content: space-between;
  margin-bottom: 6px;
  padding: 3px 10px;
}

.todo-list .todo button {
  width: 20px;
  height: 20px;
  font-size: 10px;
  background: #f9f9f9;
  border-radius: 50%;
  margin: 0 4px 0 0;
  opacity: 20%;
  text-align: center;

  background: #e9e9e9;
  border: 1px solid #e0e0e0;
}

.todo-list .todo button:hover {
  opacity: 100%;
  transition: 100ms;
}

.todo-list .todo button.complete {
  background: #27C93F;
  border: 1px solid #1DAD2B;
  transition: 100ms;
}

.todo-list .todo button.remove {
  background: #FF6057;
  border: 1px solid #E14640;
  transition: 100ms;
}

.todo.completed {
  text-decoration: line-through;
}
You can see this application in action here. In this example, you
can see how properties in Yew are structs that derive the Properties trait.
You can also see how state is represented with the use_state() hook, and how
Callback is used to pass callbacks down to child components. The html! macro
is used to output HTML elements and child components, and the classes! macro
is used to create a list of classes.
Leptos
Leptos is a web frontend framework for Rust that is quite similar to Yew. The primary difference is in how it renders: Yew renders to a shadow DOM, and then synchronizes it to the real DOM, while Leptos directly updates the DOM. This has some implications in terms of speed.
#![allow(unused)]
fn main() {
#[component]
pub fn SimpleCounter(initial_value: i32) -> impl IntoView {
    // create a reactive signal with the initial value
    let (value, set_value) = create_signal(initial_value);

    // create event handlers for our buttons
    // note that `value` and `set_value` are `Copy`, so it's super easy to move them into closures
    let clear = move |_| set_value(0);
    let decrement = move |_| set_value.update(|value| *value -= 1);
    let increment = move |_| set_value.update(|value| *value += 1);

    // create user interfaces with the declarative `view!` macro
    view! {
        <div>
            <button on:click=clear>Clear</button>
            <button on:click=decrement>-1</button>
            // text nodes can be quoted or unquoted
            <span>"Value: " {value} "!"</span>
            <button on:click=increment>+1</button>
        </div>
    }
}
}
One thing to note is that the view! macro it uses to create the component
output tree has some slightly different syntax from regular HTML. For example,
it uses on:click=value instead of onclick=value. An upside is that values do
not require being put into braces, so <span>"Hello"</span> is valid. Also, the
state handles it uses do not require cloning as they do in Yew.
Example: Todo App
Here is an example of a todo-list application written using Leptos. It showcases defining components, rendering child components, passing down properties, handling state and passing callbacks to child components.
- src/
/target
/dist
stages:
  - publish

# build application with trunk, use pinned versions for reproducible build.
pages:
  stage: publish
  image: rust:1.80
  variables:
    TRUNK_VERSION: 0.20.3
    TRUNK_BUILD_PUBLIC_URL: "/$CI_PROJECT_NAME"
  before_script:
    - rustup target add wasm32-unknown-unknown
    - wget -qO- https://github.com/thedodd/trunk/releases/download/v${TRUNK_VERSION}/trunk-x86_64-unknown-linux-gnu.tar.gz | tar -xzf- -C /usr/local/bin
  script:
    - trunk build --release
    - mv dist public
  artifacts:
    paths:
      - public
  only:
    - master
# This file is automatically @generated by Cargo.
# It is not intended for manual editing.
version = 3

[[package]]
name = "aho-corasick"
version = "1.1.3"
source = "registry+https://github.com/rust-lang/crates.io-index"
checksum = "8e60d3430d3a69478ad0993f19238d2df97c507009a52b3c10addcd7f6bcb916"
dependencies = [
 "memchr",
]

[[package]]
name = "anyhow"
version = "1.0.86"
source = "registry+https://github.com/rust-lang/crates.io-index"
checksum = "b3d1d046238990b9cf5bcde22a3fb3584ee5cf65fb2765f454ed428c7a0063da"

[[package]]
name = "async-recursion"
version = "1.1.1"
source = "registry+https://github.com/rust-lang/crates.io-index"
checksum = "3b43422f69d8ff38f95f1b2bb76517c91589a924d1559a0e935d7c8ce0274c11"
dependencies = [
 "proc-macro2",
 "quote",
 "syn",
]

[[package]]
name = "attribute-derive"
version = "0.9.2"
source = "registry+https://github.com/rust-lang/crates.io-index"
checksum = "1f1ee502851995027b06f99f5ffbeffa1406b38d0b318a1ebfa469332c6cbafd"
dependencies = [
 "attribute-derive-macro",
 "derive-where",
 "manyhow",
 "proc-macro2",
 "quote",
 "syn",
]

[[package]]
name = "attribute-derive-macro"
version = "0.9.2"
source = "registry+https://github.com/rust-lang/crates.io-index"
checksum = "3601467f634cfe36c4780ca9c75dea9a5b34529c1f2810676a337e7e0997f954"
dependencies = [
 "collection_literals",
 "interpolator",
 "manyhow",
 "proc-macro-utils",
 "proc-macro2",
 "quote",
 "quote-use",
 "syn",
]

[[package]]
name = "autocfg"
version = "1.3.0"
source = "registry+https://github.com/rust-lang/crates.io-index"
checksum = "0c4b4d0bd25bd0b74681c0ad21497610ce1b7c91b1022cd21c80c6fbdd9476b0"

[[package]]
name = "base64"
version = "0.22.1"
source = "registry+https://github.com/rust-lang/crates.io-index"
checksum = "72b3254f16251a8381aa12e40e3c4d2f0199f8c6508fbecb9d91f575e0fbb8c6"

[[package]]
name = "bitflags"
version = "2.6.0"
source = "registry+https://github.com/rust-lang/crates.io-index"
checksum = "b048fb63fd8b5923fc5aa7b340d8e156aec7ec02f0c78fa8a6ddc2613f6f71de"

[[package]]
name = "bumpalo"
version = "3.16.0"
source = "registry+https://github.com/rust-lang/crates.io-index"
checksum = "79296716171880943b8470b5f8d03aa55eb2e645a4874bdbb28adb49162e012c"

[[package]]
name = "bytes"
version = "1.7.1"
source = "registry+https://github.com/rust-lang/crates.io-index"
checksum = "8318a53db07bb3f8dca91a600466bdb3f2eaadeedfdbcf02e1accbad9271ba50"

[[package]]
name = "camino"
version = "1.1.9"
source = "registry+https://github.com/rust-lang/crates.io-index"
checksum = "8b96ec4966b5813e2c0507c1f86115c8c5abaadc3980879c3424042a02fd1ad3"

[[package]]
name = "cfg-if"
version = "1.0.0"
source = "registry+https://github.com/rust-lang/crates.io-index"
checksum = "baf1de4339761588bc0619e3cbc0120ee582ebb74b53b4efbf79117bd2da40fd"

[[package]]
name = "ciborium"
version = "0.2.2"
source = "registry+https://github.com/rust-lang/crates.io-index"
checksum = "42e69ffd6f0917f5c029256a24d0161db17cea3997d185db0d35926308770f0e"
dependencies = [
 "ciborium-io",
 "ciborium-ll",
 "serde",
]

[[package]]
name = "ciborium-io"
version = "0.2.2"
source = "registry+https://github.com/rust-lang/crates.io-index"
checksum = "05afea1e0a06c9be33d539b876f1ce3692f4afea2cb41f740e7743225ed1c757"

[[package]]
name = "ciborium-ll"
version = "0.2.2"
source = "registry+https://github.com/rust-lang/crates.io-index"
checksum = "57663b653d948a338bfb3eeba9bb2fd5fcfaecb9e199e87e1eda4d9e8b240fd9"
dependencies = [
 "ciborium-io",
 "half",
]

[[package]]
name = "collection_literals"
version = "1.0.1"
source = "registry+https://github.com/rust-lang/crates.io-index"
checksum = "186dce98367766de751c42c4f03970fc60fc012296e706ccbb9d5df9b6c1e271"

[[package]]
name = "config"
version = "0.14.0"
source = "registry+https://github.com/rust-lang/crates.io-index"
checksum = "7328b20597b53c2454f0b1919720c25c7339051c02b72b7e05409e00b14132be"
dependencies = [
 "convert_case",
 "lazy_static",
 "nom",
 "pathdiff",
 "serde",
 "toml",
]

[[package]]
name = "const_format"
version = "0.2.32"
source = "registry+https://github.com/rust-lang/crates.io-index"
checksum = "e3a214c7af3d04997541b18d432afaff4c455e79e2029079647e72fc2bd27673"
dependencies = [
 "const_format_proc_macros",
]

[[package]]
name = "const_format_proc_macros"
version = "0.2.32"
source = "registry+https://github.com/rust-lang/crates.io-index"
checksum = "c7f6ff08fd20f4f299298a28e2dfa8a8ba1036e6cd2460ac1de7b425d76f2500"
dependencies = [
 "proc-macro2",
 "quote",
 "unicode-xid",
]

[[package]]
name = "convert_case"
version = "0.6.0"
source = "registry+https://github.com/rust-lang/crates.io-index"
checksum = "ec182b0ca2f35d8fc196cf3404988fd8b8c739a4d270ff118a398feb0cbec1ca"
dependencies = [
 "unicode-segmentation",
]

[[package]]
name = "crunchy"
version = "0.2.2"
source = "registry+https://github.com/rust-lang/crates.io-index"
checksum = "7a81dae078cea95a014a339291cec439d2f232ebe854a9d672b796c6afafa9b7"

[[package]]
name = "dashmap"
version = "5.5.3"
source = "registry+https://github.com/rust-lang/crates.io-index"
checksum = "978747c1d849a7d2ee5e8adc0159961c48fb7e5db2f06af6723b80123bb53856"
dependencies = [
 "cfg-if",
 "hashbrown",
 "lock_api",
 "once_cell",
 "parking_lot_core",
]

[[package]]
name = "derive-where"
version = "1.2.7"
source = "registry+https://github.com/rust-lang/crates.io-index"
checksum = "62d671cc41a825ebabc75757b62d3d168c577f9149b2d49ece1dad1f72119d25"
dependencies = [
 "proc-macro2",
 "quote",
 "syn",
]

[[package]]
name = "drain_filter_polyfill"
version = "0.1.3"
source = "registry+https://github.com/rust-lang/crates.io-index"
checksum = "669a445ee724c5c69b1b06fe0b63e70a1c84bc9bb7d9696cd4f4e3ec45050408"

[[package]]
name = "either"
version = "1.13.0"
source = "registry+https://github.com/rust-lang/crates.io-index"
checksum = "60b1af1c220855b6ceac025d3f6ecdd2b7c4894bfe9cd9bda4fbb4bc7c0d4cf0"

[[package]]
name = "equivalent"
version = "1.0.1"
source = "registry+https://github.com/rust-lang/crates.io-index"
checksum = "5443807d6dff69373d433ab9ef5378ad8df50ca6298caf15de6e52e24aaf54d5"

[[package]]
name = "fnv"
version = "1.0.7"
source = "registry+https://github.com/rust-lang/crates.io-index"
checksum = "3f9eec918d3f24069decb9af1554cad7c880e2da24a9afd88aca000531ab82c1"

[[package]]
name = "form_urlencoded"
version = "1.2.1"
source = "registry+https://github.com/rust-lang/crates.io-index"
checksum = "e13624c2627564efccf4934284bdd98cbaa14e79b0b5a141218e507b3a823456"
dependencies = [
 "percent-encoding",
]

[[package]]
name = "futures"
version = "0.3.30"
source = "registry+https://github.com/rust-lang/crates.io-index"
checksum = "645c6916888f6cb6350d2550b80fb63e734897a8498abe35cfb732b6487804b0"
dependencies = [
 "futures-channel",
 "futures-core",
 "futures-executor",
 "futures-io",
 "futures-sink",
 "futures-task",
 "futures-util",
]

[[package]]
name = "futures-channel"
version = "0.3.30"
source = "registry+https://github.com/rust-lang/crates.io-index"
checksum = "eac8f7d7865dcb88bd4373ab671c8cf4508703796caa2b1985a9ca867b3fcb78"
dependencies = [
 "futures-core",
 "futures-sink",
]

[[package]]
name = "futures-core"
version = "0.3.30"
source = "registry+https://github.com/rust-lang/crates.io-index"
checksum = "dfc6580bb841c5a68e9ef15c77ccc837b40a7504914d52e47b8b0e9bbda25a1d"

[[package]]
name = "futures-executor"
version = "0.3.30"
source = "registry+https://github.com/rust-lang/crates.io-index"
checksum = "a576fc72ae164fca6b9db127eaa9a9dda0d61316034f33a0a0d4eda41f02b01d"
dependencies = [
 "futures-core",
 "futures-task",
 "futures-util",
]

[[package]]
name = "futures-io"
version = "0.3.30"
source = "registry+https://github.com/rust-lang/crates.io-index"
checksum = "a44623e20b9681a318efdd71c299b6b222ed6f231972bfe2f224ebad6311f0c1"

[[package]]
name = "futures-macro"
version = "0.3.30"
source = "registry+https://github.com/rust-lang/crates.io-index"
checksum = "87750cf4b7a4c0625b1529e4c543c2182106e4dedc60a2a6455e00d212c489ac"
dependencies = [
 "proc-macro2",
 "quote",
 "syn",
]

[[package]]
name = "futures-sink"
version = "0.3.30"
source = "registry+https://github.com/rust-lang/crates.io-index"
checksum = "9fb8e00e87438d937621c1c6269e53f536c14d3fbd6a042bb24879e57d474fb5"

[[package]]
name = "futures-task"
version = "0.3.30"
source = "registry+https://github.com/rust-lang/crates.io-index"
checksum = "38d84fa142264698cdce1a9f9172cf383a0c82de1bddcf3092901442c4097004"

[[package]]
name = "futures-util"
version = "0.3.30"
source = "registry+https://github.com/rust-lang/crates.io-index"
checksum = "3d6401deb83407ab3da39eba7e33987a73c3df0c82b4bb5813ee871c19c41d48"
dependencies = [
 "futures-channel",
 "futures-core",
 "futures-io",
 "futures-macro",
 "futures-sink",
 "futures-task",
 "memchr",
 "pin-project-lite",
 "pin-utils",
 "slab",
]

[[package]]
name = "getrandom"
version = "0.2.15"
source = "registry+https://github.com/rust-lang/crates.io-index"
checksum = "c4567c8db10ae91089c99af84c68c38da3ec2f087c3f82960bcdbf3656b6f4d7"
dependencies = [
 "cfg-if",
 "js-sys",
 "libc",
 "wasi",
 "wasm-bindgen",
]

[[package]]
name = "gloo-net"
version = "0.6.0"
source = "registry+https://github.com/rust-lang/crates.io-index"
checksum = "c06f627b1a58ca3d42b45d6104bf1e1a03799df472df00988b6ba21accc10580"
dependencies = [
 "futures-channel",
 "futures-core",
 "futures-sink",
 "gloo-utils",
 "http",
 "js-sys",
 "pin-project",
 "serde",
 "serde_json",
 "thiserror",
 "wasm-bindgen",
 "wasm-bindgen-futures",
 "web-sys",
]

[[package]]
name = "gloo-utils"
version = "0.2.0"
source = "registry+https://github.com/rust-lang/crates.io-index"
checksum = "0b5555354113b18c547c1d3a98fbf7fb32a9ff4f6fa112ce823a21641a0ba3aa"
dependencies = [
 "js-sys",
 "serde",
 "serde_json",
 "wasm-bindgen",
 "web-sys",
]

[[package]]
name = "half"
version = "2.4.1"
source = "registry+https://github.com/rust-lang/crates.io-index"
checksum = "6dd08c532ae367adf81c312a4580bc67f1d0fe8bc9c460520283f4c0ff277888"
dependencies = [
 "cfg-if",
 "crunchy",
]

[[package]]
name = "hashbrown"
version = "0.14.5"
source = "registry+https://github.com/rust-lang/crates.io-index"
checksum = "e5274423e17b7c9fc20b6e7e208532f9b19825d82dfd615708b70edd83df41f1"

[[package]]
name = "html-escape"
version = "0.2.13"
source = "registry+https://github.com/rust-lang/crates.io-index"
checksum = "6d1ad449764d627e22bfd7cd5e8868264fc9236e07c752972b4080cd351cb476"
dependencies = [
 "utf8-width",
]

[[package]]
name = "http"
version = "1.1.0"
source = "registry+https://github.com/rust-lang/crates.io-index"
checksum = "21b9ddb458710bc376481b842f5da65cdf31522de232c1ca8146abce2a358258"
dependencies = [
 "bytes",
 "fnv",
 "itoa",
]

[[package]]
name = "idna"
version = "0.5.0"
source = "registry+https://github.com/rust-lang/crates.io-index"
checksum = "634d9b1461af396cad843f47fdba5597a4f9e6ddd4bfb6ff5d85028c25cb12f6"
dependencies = [
 "unicode-bidi",
 "unicode-normalization",
]

[[package]]
name = "indexmap"
version = "2.4.0"
source = "registry+https://github.com/rust-lang/crates.io-index"
checksum = "93ead53efc7ea8ed3cfb0c79fc8023fbb782a5432b52830b6518941cebe6505c"
dependencies = [
 "equivalent",
 "hashbrown",
]

[[package]]
name = "interpolator"
version = "0.5.0"
source = "registry+https://github.com/rust-lang/crates.io-index"
checksum = "71dd52191aae121e8611f1e8dc3e324dd0dd1dee1e6dd91d10ee07a3cfb4d9d8"

[[package]]
name = "inventory"
version = "0.3.15"
source = "registry+https://github.com/rust-lang/crates.io-index"
checksum = "f958d3d68f4167080a18141e10381e7634563984a537f2a49a30fd8e53ac5767"

[[package]]
name = "itertools"
version = "0.12.1"
source = "registry+https://github.com/rust-lang/crates.io-index"
checksum = "ba291022dbbd398a455acf126c1e341954079855bc60dfdda641363bd6922569"
dependencies = [
 "either",
]

[[package]]
name = "itoa"
version = "1.0.11"
source = "registry+https://github.com/rust-lang/crates.io-index"
checksum = "49f1f14873335454500d59611f1cf4a4b0f786f9ac11f4312a78e4cf2566695b"

[[package]]
name = "js-sys"
version = "0.3.70"
source = "registry+https://github.com/rust-lang/crates.io-index"
checksum = "1868808506b929d7b0cfa8f75951347aa71bb21144b7791bae35d9bccfcfe37a"
dependencies = [
 "wasm-bindgen",
]

[[package]]
name = "lazy_static"
version = "1.5.0"
source = "registry+https://github.com/rust-lang/crates.io-index"
checksum = "bbd2bcb4c963f2ddae06a2efc7e9f3591312473c50c6685e1f298068316e66fe"

[[package]]
name = "leptos"
version = "0.6.14"
source = "registry+https://github.com/rust-lang/crates.io-index"
checksum = "a15911b4e53bb6e1b033d717eadb39924418a4a288279128122e5a65c70ba3e6"
dependencies = [
 "cfg-if",
 "leptos_config",
 "leptos_dom",
 "leptos_macro",
 "leptos_reactive",
 "leptos_server",
 "server_fn",
 "tracing",
 "typed-builder",
 "typed-builder-macro",
 "wasm-bindgen",
 "web-sys",
]

[[package]]
name = "leptos_config"
version = "0.6.14"
source = "registry+https://github.com/rust-lang/crates.io-index"
checksum = "dbc4d78fba18c1ccab48ffc9f3d35b39821f896b0a28bdd616a846b6241036c9"
dependencies = [
 "config",
 "regex",
 "serde",
 "thiserror",
 "typed-builder",
]

[[package]]
name = "leptos_dom"
version = "0.6.14"
source = "registry+https://github.com/rust-lang/crates.io-index"
checksum = "1ccb04d4763603bb665fa35cb9642d0bd75313117d10efda9b79243c023e69df"
dependencies = [
 "async-recursion",
 "cfg-if",
 "drain_filter_polyfill",
 "futures",
 "getrandom",
 "html-escape",
 "indexmap",
 "itertools",
 "js-sys",
 "leptos_reactive",
 "once_cell",
 "pad-adapter",
 "paste",
 "rustc-hash",
 "serde",
 "serde_json",
 "server_fn",
 "smallvec",
 "tracing",
 "wasm-bindgen",
 "wasm-bindgen-futures",
 "web-sys",
]

[[package]]
name = "leptos_hot_reload"
version = "0.6.14"
source = "registry+https://github.com/rust-lang/crates.io-index"
checksum = "2cc61e5cce26761562cd3332630b3fbaddb1c4f77744e41474c7212ad279c5d9"
dependencies = [
 "anyhow",
 "camino",
 "indexmap",
 "parking_lot",
 "proc-macro2",
 "quote",
 "rstml",
 "serde",
 "syn",
 "walkdir",
]

[[package]]
name = "leptos_macro"
version = "0.6.14"
source = "registry+https://github.com/rust-lang/crates.io-index"
checksum = "90eaea005cabb879c091c84cfec604687ececfd540469e5a30a60c93489a2f23"
dependencies = [
 "attribute-derive",
 "cfg-if",
 "convert_case",
 "html-escape",
 "itertools",
 "leptos_hot_reload",
 "prettyplease",
 "proc-macro-error",
 "proc-macro2",
 "quote",
 "rstml",
 "server_fn_macro",
 "syn",
 "tracing",
 "uuid",
]

[[package]]
name = "leptos_reactive"
version = "0.6.14"
source = "registry+https://github.com/rust-lang/crates.io-index"
checksum = "0ef2f99f377472459b0d320b46e9a9516b0e68dee5ed8c9eeb7e8eb9fefec5d2"
dependencies = [
 "base64",
 "cfg-if",
 "futures",
 "indexmap",
 "js-sys",
 "oco_ref",
 "paste",
 "pin-project",
 "rustc-hash",
 "self_cell",
 "serde",
 "serde-wasm-bindgen",
 "serde_json",
 "slotmap",
 "thiserror",
 "tracing",
 "wasm-bindgen",
 "wasm-bindgen-futures",
 "web-sys",
]

[[package]]
name = "leptos_server"
version = "0.6.14"
source = "registry+https://github.com/rust-lang/crates.io-index"
checksum = "9f07be202a433baa8c50050de4f9c116efccffc57208bcda7bd1bb9b8e87dca9"
dependencies = [
 "inventory",
 "lazy_static",
 "leptos_macro",
 "leptos_reactive",
 "serde",
 "server_fn",
 "thiserror",
 "tracing",
]

[[package]]
name = "libc"
version = "0.2.158"
source = "registry+https://github.com/rust-lang/crates.io-index"
checksum = "d8adc4bb1803a324070e64a98ae98f38934d91957a99cfb3a43dcbc01bc56439"

[[package]]
name = "lock_api"
version = "0.4.12"
source = "registry+https://github.com/rust-lang/crates.io-index"
checksum = "07af8b9cdd281b7915f413fa73f29ebd5d55d0d3f0155584dade1ff18cea1b17"
dependencies = [
 "autocfg",
 "scopeguard",
]

[[package]]
name = "log"
version = "0.4.22"
source = "registry+https://github.com/rust-lang/crates.io-index"
checksum = "a7a70ba024b9dc04c27ea2f0c0548feb474ec5c54bba33a7f72f873a39d07b24"

[[package]]
name = "manyhow"
version = "0.10.4"
source = "registry+https://github.com/rust-lang/crates.io-index"
checksum = "f91ea592d76c0b6471965708ccff7e6a5d277f676b90ab31f4d3f3fc77fade64"
dependencies = [
 "manyhow-macros",
 "proc-macro2",
 "quote",
 "syn",
]

[[package]]
name = "manyhow-macros"
version = "0.10.4"
source = "registry+https://github.com/rust-lang/crates.io-index"
checksum = "c64621e2c08f2576e4194ea8be11daf24ac01249a4f53cd8befcbb7077120ead"
dependencies = [
 "proc-macro-utils",
 "proc-macro2",
 "quote",
]

[[package]]
name = "memchr"
version = "2.7.4"
source = "registry+https://github.com/rust-lang/crates.io-index"
checksum = "78ca9ab1a0babb1e7d5695e3530886289c18cf2f87ec19a575a0abdce112e3a3"

[[package]]
name = "minimal-lexical"
version = "0.2.1"
source = "registry+https://github.com/rust-lang/crates.io-index"
checksum = "68354c5c6bd36d73ff3feceb05efa59b6acb7626617f4962be322a825e61f79a"

[[package]]
name = "nom"
version = "7.1.3"
source = "registry+https://github.com/rust-lang/crates.io-index"
checksum = "d273983c5a657a70a3e8f2a01329822f3b8c8172b73826411a55751e404a0a4a"
dependencies = [
 "memchr",
 "minimal-lexical",
]

[[package]]
name = "oco_ref"
version = "0.1.1"
source = "registry+https://github.com/rust-lang/crates.io-index"
checksum = "c51ebcefb2f0b9a5e0bea115532c8ae4215d1b01eff176d0f4ba4192895c2708"
dependencies = [
 "serde",
 "thiserror",
]

[[package]]
name = "once_cell"
version = "1.19.0"
source = "registry+https://github.com/rust-lang/crates.io-index"
checksum = "3fdb12b2476b595f9358c5161aa467c2438859caa136dec86c26fdd2efe17b92"

[[package]]
name = "pad-adapter"
version = "0.1.1"
source = "registry+https://github.com/rust-lang/crates.io-index"
checksum = "56d80efc4b6721e8be2a10a5df21a30fa0b470f1539e53d8b4e6e75faf938b63"

[[package]]
name = "parking_lot"
version = "0.12.3"
source = "registry+https://github.com/rust-lang/crates.io-index"
checksum = "f1bf18183cf54e8d6059647fc3063646a1801cf30896933ec2311622cc4b9a27"
dependencies = [
 "lock_api",
 "parking_lot_core",
]

[[package]]
name = "parking_lot_core"
version = "0.9.10"
source = "registry+https://github.com/rust-lang/crates.io-index"
checksum = "1e401f977ab385c9e4e3ab30627d6f26d00e2c73eef317493c4ec6d468726cf8"
dependencies = [
 "cfg-if",
 "libc",
 "redox_syscall",
 "smallvec",
 "windows-targets",
]

[[package]]
name = "paste"
version = "1.0.15"
source = "registry+https://github.com/rust-lang/crates.io-index"
checksum = "57c0d7b74b563b49d38dae00a0c37d4d6de9b432382b2892f0574ddcae73fd0a"

[[package]]
name = "pathdiff"
version = "0.2.1"
source = "registry+https://github.com/rust-lang/crates.io-index"
checksum = "8835116a5c179084a830efb3adc117ab007512b535bc1a21c991d3b32a6b44dd"

[[package]]
name = "percent-encoding"
version = "2.3.1"
source = "registry+https://github.com/rust-lang/crates.io-index"
checksum = "e3148f5046208a5d56bcfc03053e3ca6334e51da8dfb19b6cdc8b306fae3283e"

[[package]]
name = "pin-project"
version = "1.1.5"
source = "registry+https://github.com/rust-lang/crates.io-index"
checksum = "b6bf43b791c5b9e34c3d182969b4abb522f9343702850a2e57f460d00d09b4b3"
dependencies = [
 "pin-project-internal",
]

[[package]]
name = "pin-project-internal"
version = "1.1.5"
source = "registry+https://github.com/rust-lang/crates.io-index"
checksum = "2f38a4412a78282e09a2cf38d195ea5420d15ba0602cb375210efbc877243965"
dependencies = [
 "proc-macro2",
 "quote",
 "syn",
]

[[package]]
name = "pin-project-lite"
version = "0.2.14"
source = "registry+https://github.com/rust-lang/crates.io-index"
checksum = "bda66fc9667c18cb2758a2ac84d1167245054bcf85d5d1aaa6923f45801bdd02"

[[package]]
name = "pin-utils"
version = "0.1.0"
source = "registry+https://github.com/rust-lang/crates.io-index"
checksum = "8b870d8c151b6f2fb93e84a13146138f05d02ed11c7e7c54f8826aaaf7c9f184"

[[package]]
name = "prettyplease"
version = "0.2.20"
source = "registry+https://github.com/rust-lang/crates.io-index"
checksum = "5f12335488a2f3b0a83b14edad48dca9879ce89b2edd10e80237e4e852dd645e"
dependencies = [
 "proc-macro2",
 "syn",
]

[[package]]
name = "proc-macro-error"
version = "1.0.4"
source = "registry+https://github.com/rust-lang/crates.io-index"
checksum = "da25490ff9892aab3fcf7c36f08cfb902dd3e71ca0f9f9517bea02a73a5ce38c"
dependencies = [
 "proc-macro-error-attr",
 "proc-macro2",
 "quote",
 "version_check",
]

[[package]]
name = "proc-macro-error-attr"
version = "1.0.4"
source = "registry+https://github.com/rust-lang/crates.io-index"
checksum = "a1be40180e52ecc98ad80b184934baf3d0d29f979574e439af5a55274b35f869"
dependencies = [
 "proc-macro2",
 "quote",
 "version_check",
]

[[package]]
name = "proc-macro-utils"
version = "0.8.0"
source = "registry+https://github.com/rust-lang/crates.io-index"
checksum = "3f59e109e2f795a5070e69578c4dc101068139f74616778025ae1011d4cd41a8"
dependencies = [
 "proc-macro2",
 "quote",
 "smallvec",
]

[[package]]
name = "proc-macro2"
version = "1.0.86"
source = "registry+https://github.com/rust-lang/crates.io-index"
checksum = "5e719e8df665df0d1c8fbfd238015744736151d4445ec0836b8e628aae103b77"
dependencies = [
 "unicode-ident",
]

[[package]]
name = "proc-macro2-diagnostics"
version = "0.10.1"
source = "registry+https://github.com/rust-lang/crates.io-index"
checksum = "af066a9c399a26e020ada66a034357a868728e72cd426f3adcd35f80d88d88c8"
dependencies = [
 "proc-macro2",
 "quote",
 "syn",
 "version_check",
 "yansi",
]

[[package]]
name = "quote"
version = "1.0.36"
source = "registry+https://github.com/rust-lang/crates.io-index"
checksum = "0fa76aaf39101c457836aec0ce2316dbdc3ab723cdda1c6bd4e6ad4208acaca7"
dependencies = [
 "proc-macro2",
]

[[package]]
name = "quote-use"
version = "0.8.3"
source = "registry+https://github.com/rust-lang/crates.io-index"
checksum = "48e96ac59974192a2fa6ee55a41211cf1385c5b2a8636a4c3068b3b3dd599ece"
dependencies = [
 "quote",
 "quote-use-macros",
]

[[package]]
name = "quote-use-macros"
version = "0.8.3"
source = "registry+https://github.com/rust-lang/crates.io-index"
checksum = "b4c57308e9dde4d7be9af804f6deeaa9951e1de1d5ffce6142eb964750109f7e"
dependencies = [
 "derive-where",
 "proc-macro-utils",
 "proc-macro2",
 "quote",
 "syn",
]

[[package]]
name = "redox_syscall"
version = "0.5.3"
source = "registry+https://github.com/rust-lang/crates.io-index"
checksum = "2a908a6e00f1fdd0dfd9c0eb08ce85126f6d8bbda50017e74bc4a4b7d4a926a4"
dependencies = [
 "bitflags",
]

[[package]]
name = "regex"
version = "1.10.6"
source = "registry+https://github.com/rust-lang/crates.io-index"
checksum = "4219d74c6b67a3654a9fbebc4b419e22126d13d2f3c4a07ee0cb61ff79a79619"
dependencies = [
 "aho-corasick",
 "memchr",
 "regex-automata",
 "regex-syntax",
]

[[package]]
name = "regex-automata"
version = "0.4.7"
source = "registry+https://github.com/rust-lang/crates.io-index"
checksum = "38caf58cc5ef2fed281f89292ef23f6365465ed9a41b7a7754eb4e26496c92df"
dependencies = [
 "aho-corasick",
 "memchr",
 "regex-syntax",
]

[[package]]
name = "regex-syntax"
version = "0.8.4"
source = "registry+https://github.com/rust-lang/crates.io-index"
checksum = "7a66a03ae7c801facd77a29370b4faec201768915ac14a721ba36f20bc9c209b"

[[package]]
name = "rstml"
version = "0.11.2"
source = "registry+https://github.com/rust-lang/crates.io-index"
checksum = "fe542870b8f59dd45ad11d382e5339c9a1047cde059be136a7016095bbdefa77"
dependencies = [
 "proc-macro2",
 "proc-macro2-diagnostics",
 "quote",
 "syn",
 "syn_derive",
 "thiserror",
]

[[package]]
name = "rustc-hash"
version = "1.1.0"
source = "registry+https://github.com/rust-lang/crates.io-index"
checksum = "08d43f7aa6b08d49f382cde6a7982047c3426db949b1424bc4b7ec9ae12c6ce2"

[[package]]
name = "ryu"
version = "1.0.18"
source = "registry+https://github.com/rust-lang/crates.io-index"
checksum = "f3cb5ba0dc43242ce17de99c180e96db90b235b8a9fdc9543c96d2209116bd9f"

[[package]]
name = "same-file"
version = "1.0.6"
source = "registry+https://github.com/rust-lang/crates.io-index"
checksum = "93fc1dc3aaa9bfed95e02e6eadabb4baf7e3078b0bd1b4d7b6b0b68378900502"
dependencies = [
 "winapi-util",
]

[[package]]
name = "scopeguard"
version = "1.2.0"
source = "registry+https://github.com/rust-lang/crates.io-index"
checksum = "94143f37725109f92c262ed2cf5e59bce7498c01bcc1502d7b9afe439a4e9f49"

[[package]]
name = "self_cell"
version = "1.0.4"
source = "registry+https://github.com/rust-lang/crates.io-index"
checksum = "d369a96f978623eb3dc28807c4852d6cc617fed53da5d3c400feff1ef34a714a"

[[package]]
name = "send_wrapper"
version = "0.6.0"
source = "registry+https://github.com/rust-lang/crates.io-index"
checksum = "cd0b0ec5f1c1ca621c432a25813d8d60c88abe6d3e08a3eb9cf37d97a0fe3d73"
dependencies = [
 "futures-core",
]

[[package]]
name = "serde"
version = "1.0.208"
source = "registry+https://github.com/rust-lang/crates.io-index"
checksum = "cff085d2cb684faa248efb494c39b68e522822ac0de72ccf08109abde717cfb2"
dependencies = [
 "serde_derive",
]

[[package]]
name = "serde-wasm-bindgen"
version = "0.6.5"
source = "registry+https://github.com/rust-lang/crates.io-index"
checksum = "8302e169f0eddcc139c70f139d19d6467353af16f9fce27e8c30158036a1e16b"
dependencies = [
 "js-sys",
 "serde",
 "wasm-bindgen",
]

[[package]]
name = "serde_derive"
version = "1.0.208"
source = "registry+https://github.com/rust-lang/crates.io-index"
checksum = "24008e81ff7613ed8e5ba0cfaf24e2c2f1e5b8a0495711e44fcd4882fca62bcf"
dependencies = [
 "proc-macro2",
 "quote",
 "syn",
]

[[package]]
name = "serde_json"
version = "1.0.125"
source = "registry+https://github.com/rust-lang/crates.io-index"
checksum = "83c8e735a073ccf5be70aa8066aa984eaf2fa000db6c8d0100ae605b366d31ed"
dependencies = [
 "itoa",
 "memchr",
 "ryu",
 "serde",
]

[[package]]
name = "serde_qs"
version = "0.12.0"
source = "registry+https://github.com/rust-lang/crates.io-index"
checksum = "0431a35568651e363364210c91983c1da5eb29404d9f0928b67d4ebcfa7d330c"
dependencies = [
 "percent-encoding",
 "serde",
 "thiserror",
]

[[package]]
name = "serde_spanned"
version = "0.6.7"
source = "registry+https://github.com/rust-lang/crates.io-index"
checksum = "eb5b1b31579f3811bf615c144393417496f152e12ac8b7663bf664f4a815306d"
dependencies = [
 "serde",
]

[[package]]
name = "server_fn"
version = "0.6.14"
source = "registry+https://github.com/rust-lang/crates.io-index"
checksum = "024b400db1aca5bd4188714f7bbbf7a2e1962b9a12a80b2a21e937e509086963"
dependencies = [
 "bytes",
 "ciborium",
 "const_format",
 "dashmap",
 "futures",
 "gloo-net",
 "http",
 "js-sys",
 "once_cell",
 "send_wrapper",
 "serde",
 "serde_json",
 "serde_qs",
 "server_fn_macro_default",
 "thiserror",
 "url",
 "wasm-bindgen",
 "wasm-bindgen-futures",
 "wasm-streams",
 "web-sys",
 "xxhash-rust",
]

[[package]]
name = "server_fn_macro"
version = "0.6.14"
source = "registry+https://github.com/rust-lang/crates.io-index"
checksum = "9cf0e6f71fc924df36e87f27dfbd447f0bedd092d365db3a5396878256d9f00c"
dependencies = [
 "const_format",
 "convert_case",
 "proc-macro2",
 "quote",
 "syn",
 "xxhash-rust",
]

[[package]]
name = "server_fn_macro_default"
version = "0.6.14"
source = "registry+https://github.com/rust-lang/crates.io-index"
checksum = "556e4fd51eb9ee3e7d9fb0febec6cef486dcbc8f7f427591dfcfebee1abe1ad4"
dependencies = [
 "server_fn_macro",
 "syn",
]

[[package]]
name = "slab"
version = "0.4.9"
source = "registry+https://github.com/rust-lang/crates.io-index"
checksum = "8f92a496fb766b417c996b9c5e57daf2f7ad3b0bebe1ccfca4856390e3d3bb67"
dependencies = [
 "autocfg",
]

[[package]]
name = "slotmap"
version = "1.0.7"
source = "registry+https://github.com/rust-lang/crates.io-index"
checksum = "dbff4acf519f630b3a3ddcfaea6c06b42174d9a44bc70c620e9ed1649d58b82a"
dependencies = [
 "serde",
 "version_check",
]

[[package]]
name = "smallvec"
version = "1.13.2"
source = "registry+https://github.com/rust-lang/crates.io-index"
checksum = "3c5e1a9a646d36c3599cd173a41282daf47c44583ad367b8e6837255952e5c67"

[[package]]
name = "syn"
version = "2.0.75"
source = "registry+https://github.com/rust-lang/crates.io-index"
checksum = "f6af063034fc1935ede7be0122941bafa9bacb949334d090b77ca98b5817c7d9"
dependencies = [
 "proc-macro2",
 "quote",
 "unicode-ident",
]

[[package]]
name = "syn_derive"
version = "0.1.8"
source = "registry+https://github.com/rust-lang/crates.io-index"
checksum = "1329189c02ff984e9736652b1631330da25eaa6bc639089ed4915d25446cbe7b"
dependencies = [
 "proc-macro-error",
 "proc-macro2",
 "quote",
 "syn",
]

[[package]]
name = "thiserror"
version = "1.0.63"
source = "registry+https://github.com/rust-lang/crates.io-index"
checksum = "c0342370b38b6a11b6cc11d6a805569958d54cfa061a29969c3b5ce2ea405724"
dependencies = [
 "thiserror-impl",
]

[[package]]
name = "thiserror-impl"
version = "1.0.63"
source = "registry+https://github.com/rust-lang/crates.io-index"
checksum = "a4558b58466b9ad7ca0f102865eccc95938dca1a74a856f2b57b6629050da261"
dependencies = [
 "proc-macro2",
 "quote",
 "syn",
]

[[package]]
name = "tinyvec"
version = "1.8.0"
source = "registry+https://github.com/rust-lang/crates.io-index"
checksum = "445e881f4f6d382d5f27c034e25eb92edd7c784ceab92a0937db7f2e9471b938"
dependencies = [
 "tinyvec_macros",
]

[[package]]
name = "tinyvec_macros"
version = "0.1.1"
source = "registry+https://github.com/rust-lang/crates.io-index"
checksum = "1f3ccbac311fea05f86f61904b462b55fb3df8837a366dfc601a0161d0532f20"

[[package]]
name = "todo-leptos"
version = "0.1.0"
dependencies = [
 "leptos",
]

[[package]]
name = "toml"
version = "0.8.19"
source = "registry+https://github.com/rust-lang/crates.io-index"
checksum = "a1ed1f98e3fdc28d6d910e6737ae6ab1a93bf1985935a1193e68f93eeb68d24e"
dependencies = [
 "serde",
 "serde_spanned",
 "toml_datetime",
 "toml_edit",
]

[[package]]
name = "toml_datetime"
version = "0.6.8"
source = "registry+https://github.com/rust-lang/crates.io-index"
checksum = "0dd7358ecb8fc2f8d014bf86f6f638ce72ba252a2c3a2572f2a795f1d23efb41"
dependencies = [
 "serde",
]

[[package]]
name = "toml_edit"
version = "0.22.20"
source = "registry+https://github.com/rust-lang/crates.io-index"
checksum = "583c44c02ad26b0c3f3066fe629275e50627026c51ac2e595cca4c230ce1ce1d"
dependencies = [
 "indexmap",
 "serde",
 "serde_spanned",
 "toml_datetime",
 "winnow",
]

[[package]]
name = "tracing"
version = "0.1.40"
source = "registry+https://github.com/rust-lang/crates.io-index"
checksum = "c3523ab5a71916ccf420eebdf5521fcef02141234bbc0b8a49f2fdc4544364ef"
dependencies = [
 "pin-project-lite",
 "tracing-attributes",
 "tracing-core",
]

[[package]]
name = "tracing-attributes"
version = "0.1.27"
source = "registry+https://github.com/rust-lang/crates.io-index"
checksum = "34704c8d6ebcbc939824180af020566b01a7c01f80641264eba0999f6c2b6be7"
dependencies = [
 "proc-macro2",
 "quote",
 "syn",
]

[[package]]
name = "tracing-core"
version = "0.1.32"
source = "registry+https://github.com/rust-lang/crates.io-index"
checksum = "c06d3da6113f116aaee68e4d601191614c9053067f9ab7f6edbcb161237daa54"
dependencies = [
 "once_cell",
]

[[package]]
name = "typed-builder"
version = "0.18.2"
source = "registry+https://github.com/rust-lang/crates.io-index"
checksum = "77739c880e00693faef3d65ea3aad725f196da38b22fdc7ea6ded6e1ce4d3add"
dependencies = [
 "typed-builder-macro",
]

[[package]]
name = "typed-builder-macro"
version = "0.18.2"
source = "registry+https://github.com/rust-lang/crates.io-index"
checksum = "1f718dfaf347dcb5b983bfc87608144b0bad87970aebcbea5ce44d2a30c08e63"
dependencies = [
 "proc-macro2",
 "quote",
 "syn",
]

[[package]]
name = "unicode-bidi"
version = "0.3.15"
source = "registry+https://github.com/rust-lang/crates.io-index"
checksum = "08f95100a766bf4f8f28f90d77e0a5461bbdb219042e7679bebe79004fed8d75"

[[package]]
name = "unicode-ident"
version = "1.0.12"
source = "registry+https://github.com/rust-lang/crates.io-index"
checksum = "3354b9ac3fae1ff6755cb6db53683adb661634f67557942dea4facebec0fee4b"

[[package]]
name = "unicode-normalization"
version = "0.1.23"
source = "registry+https://github.com/rust-lang/crates.io-index"
checksum = "a56d1686db2308d901306f92a263857ef59ea39678a5458e7cb17f01415101f5"
dependencies = [
 "tinyvec",
]

[[package]]
name = "unicode-segmentation"
version = "1.11.0"
source = "registry+https://github.com/rust-lang/crates.io-index"
checksum = "d4c87d22b6e3f4a18d4d40ef354e97c90fcb14dd91d7dc0aa9d8a1172ebf7202"

[[package]]
name = "unicode-xid"
version = "0.2.5"
source = "registry+https://github.com/rust-lang/crates.io-index"
checksum = "229730647fbc343e3a80e463c1db7f78f3855d3f3739bee0dda773c9a037c90a"

[[package]]
name = "url"
version = "2.5.2"
source = "registry+https://github.com/rust-lang/crates.io-index"
checksum = "22784dbdf76fdde8af1aeda5622b546b422b6fc585325248a2bf9f5e41e94d6c"
dependencies = [
 "form_urlencoded",
 "idna",
 "percent-encoding",
]

[[package]]
name = "utf8-width"
version = "0.1.7"
source = "registry+https://github.com/rust-lang/crates.io-index"
checksum = "86bd8d4e895da8537e5315b8254664e6b769c4ff3db18321b297a1e7004392e3"

[[package]]
name = "uuid"
version = "1.10.0"
source = "registry+https://github.com/rust-lang/crates.io-index"
checksum = "81dfa00651efa65069b0b6b651f4aaa31ba9e3c3ce0137aaad053604ee7e0314"
dependencies = [
 "getrandom",
]

[[package]]
name = "version_check"
version = "0.9.5"
source = "registry+https://github.com/rust-lang/crates.io-index"
checksum = "0b928f33d975fc6ad9f86c8f283853ad26bdd5b10b7f1542aa2fa15e2289105a"

[[package]]
name = "walkdir"
version = "2.5.0"
source = "registry+https://github.com/rust-lang/crates.io-index"
checksum = "29790946404f91d9c5d06f9874efddea1dc06c5efe94541a7d6863108e3a5e4b"
dependencies = [
 "same-file",
 "winapi-util",
]

[[package]]
name = "wasi"
version = "0.11.0+wasi-snapshot-preview1"
source = "registry+https://github.com/rust-lang/crates.io-index"
checksum = "9c8d87e72b64a3b4db28d11ce29237c246188f4f51057d65a7eab63b7987e423"

[[package]]
name = "wasm-bindgen"
version = "0.2.93"
source = "registry+https://github.com/rust-lang/crates.io-index"
checksum = "a82edfc16a6c469f5f44dc7b571814045d60404b55a0ee849f9bcfa2e63dd9b5"
dependencies = [
 "cfg-if",
 "once_cell",
 "wasm-bindgen-macro",
]

[[package]]
name = "wasm-bindgen-backend"
version = "0.2.93"
source = "registry+https://github.com/rust-lang/crates.io-index"
checksum = "9de396da306523044d3302746f1208fa71d7532227f15e347e2d93e4145dd77b"
dependencies = [
 "bumpalo",
 "log",
 "once_cell",
 "proc-macro2",
 "quote",
 "syn",
 "wasm-bindgen-shared",
]

[[package]]
name = "wasm-bindgen-futures"
version = "0.4.43"
source = "registry+https://github.com/rust-lang/crates.io-index"
checksum = "61e9300f63a621e96ed275155c108eb6f843b6a26d053f122ab69724559dc8ed"
dependencies = [
 "cfg-if",
 "js-sys",
 "wasm-bindgen",
 "web-sys",
]

[[package]]
name = "wasm-bindgen-macro"
version = "0.2.93"
source = "registry+https://github.com/rust-lang/crates.io-index"
checksum = "585c4c91a46b072c92e908d99cb1dcdf95c5218eeb6f3bf1efa991ee7a68cccf"
dependencies = [
 "quote",
 "wasm-bindgen-macro-support",
]

[[package]]
name = "wasm-bindgen-macro-support"
version = "0.2.93"
source = "registry+https://github.com/rust-lang/crates.io-index"
checksum = "afc340c74d9005395cf9dd098506f7f44e38f2b4a21c6aaacf9a105ea5e1e836"
dependencies = [
 "proc-macro2",
 "quote",
 "syn",
 "wasm-bindgen-backend",
 "wasm-bindgen-shared",
]

[[package]]
name = "wasm-bindgen-shared"
version = "0.2.93"
source = "registry+https://github.com/rust-lang/crates.io-index"
checksum = "c62a0a307cb4a311d3a07867860911ca130c3494e8c2719593806c08bc5d0484"

[[package]]
name = "wasm-streams"
version = "0.4.0"
source = "registry+https://github.com/rust-lang/crates.io-index"
checksum = "b65dc4c90b63b118468cf747d8bf3566c1913ef60be765b5730ead9e0a3ba129"
dependencies = [
 "futures-util",
 "js-sys",
 "wasm-bindgen",
 "wasm-bindgen-futures",
 "web-sys",
]

[[package]]
name = "web-sys"
version = "0.3.70"
source = "registry+https://github.com/rust-lang/crates.io-index"
checksum = "26fdeaafd9bd129f65e7c031593c24d62186301e0c72c8978fa1678be7d532c0"
dependencies = [
 "js-sys",
 "wasm-bindgen",
]

[[package]]
name = "winapi-util"
version = "0.1.9"
source = "registry+https://github.com/rust-lang/crates.io-index"
checksum = "cf221c93e13a30d793f7645a0e7762c55d169dbb0a49671918a2319d289b10bb"
dependencies = [
 "windows-sys",
]

[[package]]
name = "windows-sys"
version = "0.59.0"
source = "registry+https://github.com/rust-lang/crates.io-index"
checksum = "1e38bc4d79ed67fd075bcc251a1c39b32a1776bbe92e5bef1f0bf1f8c531853b"
dependencies = [
 "windows-targets",
]

[[package]]
name = "windows-targets"
version = "0.52.6"
source = "registry+https://github.com/rust-lang/crates.io-index"
checksum = "9b724f72796e036ab90c1021d4780d4d3d648aca59e491e6b98e725b84e99973"
dependencies = [
 "windows_aarch64_gnullvm",
 "windows_aarch64_msvc",
 "windows_i686_gnu",
 "windows_i686_gnullvm",
 "windows_i686_msvc",
 "windows_x86_64_gnu",
 "windows_x86_64_gnullvm",
 "windows_x86_64_msvc",
]

[[package]]
name = "windows_aarch64_gnullvm"
version = "0.52.6"
source = "registry+https://github.com/rust-lang/crates.io-index"
checksum = "32a4622180e7a0ec044bb555404c800bc9fd9ec262ec147edd5989ccd0c02cd3"

[[package]]
name = "windows_aarch64_msvc"
version = "0.52.6"
source = "registry+https://github.com/rust-lang/crates.io-index"
checksum = "09ec2a7bb152e2252b53fa7803150007879548bc709c039df7627cabbd05d469"

[[package]]
name = "windows_i686_gnu"
version = "0.52.6"
source = "registry+https://github.com/rust-lang/crates.io-index"
checksum = "8e9b5ad5ab802e97eb8e295ac6720e509ee4c243f69d781394014ebfe8bbfa0b"

[[package]]
name = "windows_i686_gnullvm"
version = "0.52.6"
source = "registry+https://github.com/rust-lang/crates.io-index"
checksum = "0eee52d38c090b3caa76c563b86c3a4bd71ef1a819287c19d586d7334ae8ed66"

[[package]]
name = "windows_i686_msvc"
version = "0.52.6"
source = "registry+https://github.com/rust-lang/crates.io-index"
checksum = "240948bc05c5e7c6dabba28bf89d89ffce3e303022809e73deaefe4f6ec56c66"

[[package]]
name = "windows_x86_64_gnu"
version = "0.52.6"
source = "registry+https://github.com/rust-lang/crates.io-index"
checksum = "147a5c80aabfbf0c7d901cb5895d1de30ef2907eb21fbbab29ca94c5b08b1a78"

[[package]]
name = "windows_x86_64_gnullvm"
version = "0.52.6"
source = "registry+https://github.com/rust-lang/crates.io-index"
checksum = "24d5b23dc417412679681396f2b49f3de8c1473deb516bd34410872eff51ed0d"

[[package]]
name = "windows_x86_64_msvc"
version = "0.52.6"
source = "registry+https://github.com/rust-lang/crates.io-index"
checksum = "589f6da84c646204747d1270a2a5661ea66ed1cced2631d546fdfb155959f9ec"

[[package]]
name = "winnow"
version = "0.6.18"
source = "registry+https://github.com/rust-lang/crates.io-index"
checksum = "68a9bda4691f099d435ad181000724da8e5899daa10713c2d432552b9ccd3a6f"
dependencies = [
 "memchr",
]

[[package]]
name = "xxhash-rust"
version = "0.8.12"
source = "registry+https://github.com/rust-lang/crates.io-index"
checksum = "6a5cbf750400958819fb6178eaa83bee5cd9c29a26a40cc241df8c70fdd46984"

[[package]]
name = "yansi"
version = "1.0.1"
source = "registry+https://github.com/rust-lang/crates.io-index"
checksum = "cfe53a6657fd280eaa890a3bc59152892ffa3e30101319d168b781ed6529b049"
[package]
name = "todo-leptos"
version = "0.1.0"
edition = "2021"

[dependencies]
leptos = { version = "0.6.14", features = ["csr"] }
# Todo App Leptos

A port of a [React Todo
App](https://www.digitalocean.com/community/tutorials/how-to-build-a-react-to-do-app-with-react-hooks)
to use the [Leptos](https://leptos.dev) framework.

This is an example project for the [Web
Frontend](https://rustprojectprimer.com/ecosystem/web-frontend.html) section of
the [Rust Project Primer](https://rustprojectprimer.com/) book.

## Prerequisites

You need two prerequisites to build this:

- Rust 1.80 with support for `wasm32-unknown-unknown` target
- Trunk build tool

### Setup

You can install Rust using [Rustup](https://rustup.rs):

    curl --proto '=https' --tlsv1.2 -sSf https://sh.rustup.rs | sh

You need to tell Rustup to add the WebAssembly target:

    rustup target add wasm32-unknown-unknown

You need to install [Trunk](https://trunkrs.dev) to build and serve it:

    cargo install trunk

## Running it

You can run it locally with Trunk:

    trunk serve

This will build and serve it, and watch the project for any changes. When you
edit the code, it will recompile and cause your browser to refresh.
<!DOCTYPE html>
<html>
  <head>
    <meta name="viewport" content="width=device-width, initial-scale=1.0">
    <link data-trunk rel="rust" />
    <link data-trunk data-inline rel="css" href="src/style.css" />
    <title>Todo Leptos</title>
  </head>
  <body></body>
</html>
use leptos::*;

/// Represents a single Todo item.
#[derive(PartialEq, Clone)]
pub struct Todo {
    pub text: String,
    pub completed: bool,
}

impl Todo {
    /// Create a new todo item that is not completed.
    fn new<S: Into<String>>(text: S) -> Self {
        Self {
            text: text.into(),
            completed: false,
        }
    }

    fn complete(&mut self) {
        self.completed = !self.completed;
    }
}

/// Main application, consists of title, todo list and entry form.
#[component]
pub fn App() -> impl IntoView {
    // signal that holds all of the todo entries.
    let (todos, set_todos) = create_signal(vec![
        Todo::new("Buy milk"),
        Todo::new("Learn Rust"),
        Todo::new("Drink enough water"),
        Todo::new("Spend time with family"),
    ]);

    let submit = move |string| {
        let mut todos = todos.get().clone();
        todos.push(Todo::new(string));
        set_todos.set(todos);
    };

    view! {
        <div class="app">
            <div class="heading">
                "Todo List"
            </div>
            <div class="todo-list">
                {
                    move || {
                        todos.get().iter().enumerate().map(|(index, todo)| {
                            let complete = move |()| {
                                let mut todos = todos.get().clone();
                                todos[index].complete();
                                set_todos.set(todos);
                            };
                            let remove = move |()| {
                                let mut todos = todos.get().clone();
                                todos.remove(index);
                                set_todos.set(todos);
                            };
                            view! {
                                <TodoRow item={todo.clone()} complete remove />
                            }
                        }).collect_view()
                    }
                }
            </div>
            <div class="footer">
                <TodoForm submit />
            </div>
        </div>
    }
}

/// Contains the todo text and buttons to mark as complete and delete.
#[component]
pub fn TodoRow(
    item: Todo,
    #[prop(into)] complete: Callback<()>,
    #[prop(into)] remove: Callback<()>,
) -> impl IntoView {
    view! {
        <div class:todo=true class:completed=item.completed>
            <div class:text=true>
                {&item.text}
            </div>
            <div>
                <button class:complete=true on:click={move |_| complete.call(())}>{"✓"}</button>
                <button class:remove=true on:click={move |_| remove.call(())}>{"⨯"}</button>
            </div>
        </div>
    }
}

/// Entry form to add new todo item to list.
#[component]
pub fn TodoForm(#[prop(into)] submit: Callback<String>) -> impl IntoView {
    let (input, set_input) = create_signal(String::new());

    let submit_form = move |event: ev::SubmitEvent| {
        submit.call(input.get().clone());
        set_input.set(String::new());
        event.prevent_default();
    };

    view! {
        <form on:submit=submit_form>
            <input
                type="text"
                class="input"
                on:input=move |ev| set_input.set(event_target_value(&ev))
                prop:value=input
            />
        </form>
    }
}
use leptos::*;
use todo_leptos::App;

fn main() {
    mount_to_body(|| view! { <App /> })
}
body {
  background: #209cee;
  font-family: -apple-system, BlinkMacSystemFont, "Segoe UI", Roboto, Oxygen-Sans, Ubuntu, Cantarell, "Helvetica Neue", sans-serif;
}

.app {
  height: 100vh;
  padding: 10px;
  padding-top: 20px;
  padding-bottom: 20px;
  max-width: 600px;
  margin-left: auto;
  margin-right: auto;
}

.app .heading {
  padding: 5px;
  padding-top: 10px;
  padding-bottom: 10px;
  text-align: center;
  font-size: 20px;
  font-weight: 600;
  border-radius: 7px 7px 0px 0px;

  background: #e8e8e8;

  border: 1px solid #d8d8d8;
  border-bottom: 1px solid #b4b4b4;

  background: linear-gradient(to bottom,  #f6f6f6 0%,#dadada 100%);
}

.app .todo-list {
  padding: 5px;
  background: #ffffff;

  /*border-top: 1px solid #b4b4b4;*/
  border-left: 1px solid #d8d8d8;
  border-right: 1px solid #d8d8d8;
}

.app .footer {
  padding: 5px;
  border-radius: 0px 0px 7px 7px;
  background: #ffffff;
  padding-bottom: 10px;

  border-left: 1px solid #d8d8d8;
  border-right: 1px solid #d8d8d8;
  border-bottom: 1px solid #d8d8d8;
}

.app .footer form * {
  box-sizing: border-box;
  width: 100%;
}

.todo-list .todo {
  align-items: center;
  background: #f0f0f0;
  border-radius: 3px;
  box-shadow: 1px 1px 1px rgba(0, 0, 0, 0.15);
  display: flex;
  font-size: 14px;
  justify-content: space-between;
  margin-bottom: 6px;
  padding: 3px 10px;
}

.todo-list .todo button {
  width: 20px;
  height: 20px;
  font-size: 10px;
  background: #f9f9f9;
  border-radius: 50%;
  margin: 0 4px 0 0;
  opacity: 20%;
  text-align: center;

  background: #e9e9e9;
  border: 1px solid #e0e0e0;
}

.todo-list .todo button:hover {
  opacity: 100%;
  transition: 100ms;
}

.todo-list .todo button.complete {
  background: #27C93F;
  border: 1px solid #1DAD2B;
  transition: 100ms;
}

.todo-list .todo button.remove {
  background: #FF6057;
  border: 1px solid #E14640;
  transition: 100ms;
}

.todo.completed {
  text-decoration: line-through;
}
You can see this app in action here. You can see how Leptos
represents properties using function parameters when defining components. You
can also see how Leptos manages state using create_signal(), which returns a
getter and a setter for the signal value. It further showcases how the view!
macro is used to construct a tree of HTML elements and child components, and how
Callback can be used to pass callbacks down to child components.
Dioxus
Dioxus is another frontend framework. Like Yew and Leptos, it also uses the component model, hooks and has a domain-specific language for describing the graph of HTML elements and components that a component renders into.
What makes Dioxus interesting is that it is easy to build Desktop and Mobile
applications with it. The Dioxus team is also working on
Blitz, a minimal web renderer for use
with writing Desktop applications with Dioxus but without the need for a full
browser engine. Dioxus also used to support rendering to the Terminal, but it
appears as if the support for this has been dropped since 0.4.3.
The domain-specific language of Dioxus uses the rsx! macro and is distinct
from the XML-style that the other frameworks use.
#![allow(unused)]
fn main() {
fn app() -> Element {
    rsx! {
        div { "Hello, world!" }
    }
}
}
Dioxus comes with its own CLI to use for initializing, building and serving Dioxus applications. I was not able to get it working with Trunk.
Example: Todo App
This is an example todo application written using Dioxus. It looks and functions similar to the example applications written with Yew and Leptos.
- assets/
- src/
# Generated by Cargo
# will have compiled files and executables
/target/
/dist/
/static/
/.dioxus/

# this file will generate by tailwind:
/assets/tailwind.css

# These are backup files generated by rustfmt
**/*.rs.bk
stages:
  - publish

# build application with trunk, use pinned versions for reproducible build.
pages:
  stage: publish
  image: rust:1.80
  before_script:
    - rustup target add wasm32-unknown-unknown
    - cargo install dioxus-cli
  script:
    - dx build --release
    - mv dist public
  artifacts:
    paths:
      - public
  only:
    - master
# This file is automatically @generated by Cargo.
# It is not intended for manual editing.
version = 3

[[package]]
name = "ahash"
version = "0.8.11"
source = "registry+https://github.com/rust-lang/crates.io-index"
checksum = "e89da841a80418a9b391ebaea17f5c112ffaaa96f621d2c285b5174da76b9011"
dependencies = [
 "cfg-if",
 "once_cell",
 "version_check",
 "zerocopy",
]

[[package]]
name = "allocator-api2"
version = "0.2.18"
source = "registry+https://github.com/rust-lang/crates.io-index"
checksum = "5c6cb57a04249c6480766f7f7cef5467412af1490f8d1e243141daddada3264f"

[[package]]
name = "anymap2"
version = "0.13.0"
source = "registry+https://github.com/rust-lang/crates.io-index"
checksum = "d301b3b94cb4b2f23d7917810addbbaff90738e0ca2be692bd027e70d7e0330c"

[[package]]
name = "async-channel"
version = "2.3.1"
source = "registry+https://github.com/rust-lang/crates.io-index"
checksum = "89b47800b0be77592da0afd425cc03468052844aff33b84e33cc696f64e77b6a"
dependencies = [
 "concurrent-queue",
 "event-listener-strategy",
 "futures-core",
 "pin-project-lite",
]

[[package]]
name = "async-task"
version = "4.7.1"
source = "registry+https://github.com/rust-lang/crates.io-index"
checksum = "8b75356056920673b02621b35afd0f7dda9306d03c79a30f5c56c44cf256e3de"

[[package]]
name = "async-trait"
version = "0.1.82"
source = "registry+https://github.com/rust-lang/crates.io-index"
checksum = "a27b8a3a6e1a44fa4c8baf1f653e4172e81486d4941f2237e20dc2d0cf4ddff1"
dependencies = [
 "proc-macro2",
 "quote",
 "syn",
]

[[package]]
name = "atomic-waker"
version = "1.1.2"
source = "registry+https://github.com/rust-lang/crates.io-index"
checksum = "1505bd5d3d116872e7271a6d4e16d81d0c8570876c8de68093a09ac269d8aac0"

[[package]]
name = "autocfg"
version = "1.3.0"
source = "registry+https://github.com/rust-lang/crates.io-index"
checksum = "0c4b4d0bd25bd0b74681c0ad21497610ce1b7c91b1022cd21c80c6fbdd9476b0"

[[package]]
name = "base64"
version = "0.21.7"
source = "registry+https://github.com/rust-lang/crates.io-index"
checksum = "9d297deb1925b89f2ccc13d7635fa0714f12c87adce1c75356b39ca9b7178567"

[[package]]
name = "bincode"
version = "1.3.3"
source = "registry+https://github.com/rust-lang/crates.io-index"
checksum = "b1f45e9417d87227c7a56d22e471c6206462cba514c7590c09aff4cf6d1ddcad"
dependencies = [
 "serde",
]

[[package]]
name = "bitflags"
version = "2.6.0"
source = "registry+https://github.com/rust-lang/crates.io-index"
checksum = "b048fb63fd8b5923fc5aa7b340d8e156aec7ec02f0c78fa8a6ddc2613f6f71de"
dependencies = [
 "serde",
]

[[package]]
name = "blocking"
version = "1.6.1"
source = "registry+https://github.com/rust-lang/crates.io-index"
checksum = "703f41c54fc768e63e091340b424302bb1c29ef4aa0c7f10fe849dfb114d29ea"
dependencies = [
 "async-channel",
 "async-task",
 "futures-io",
 "futures-lite",
 "piper",
]

[[package]]
name = "bumpalo"
version = "3.16.0"
source = "registry+https://github.com/rust-lang/crates.io-index"
checksum = "79296716171880943b8470b5f8d03aa55eb2e645a4874bdbb28adb49162e012c"

[[package]]
name = "bytes"
version = "1.7.1"
source = "registry+https://github.com/rust-lang/crates.io-index"
checksum = "8318a53db07bb3f8dca91a600466bdb3f2eaadeedfdbcf02e1accbad9271ba50"

[[package]]
name = "camino"
version = "1.1.9"
source = "registry+https://github.com/rust-lang/crates.io-index"
checksum = "8b96ec4966b5813e2c0507c1f86115c8c5abaadc3980879c3424042a02fd1ad3"
dependencies = [
 "serde",
]

[[package]]
name = "cargo-platform"
version = "0.1.8"
source = "registry+https://github.com/rust-lang/crates.io-index"
checksum = "24b1f0365a6c6bb4020cd05806fd0d33c44d38046b8bd7f0e40814b9763cabfc"
dependencies = [
 "serde",
]

[[package]]
name = "cargo_metadata"
version = "0.18.1"
source = "registry+https://github.com/rust-lang/crates.io-index"
checksum = "2d886547e41f740c616ae73108f6eb70afe6d940c7bc697cb30f13daec073037"
dependencies = [
 "camino",
 "cargo-platform",
 "semver",
 "serde",
 "serde_json",
 "thiserror",
]

[[package]]
name = "cfg-expr"
version = "0.15.8"
source = "registry+https://github.com/rust-lang/crates.io-index"
checksum = "d067ad48b8650848b989a59a86c6c36a995d02d2bf778d45c3c5d57bc2718f02"
dependencies = [
 "smallvec",
]

[[package]]
name = "cfg-if"
version = "1.0.0"
source = "registry+https://github.com/rust-lang/crates.io-index"
checksum = "baf1de4339761588bc0619e3cbc0120ee582ebb74b53b4efbf79117bd2da40fd"

[[package]]
name = "ciborium"
version = "0.2.2"
source = "registry+https://github.com/rust-lang/crates.io-index"
checksum = "42e69ffd6f0917f5c029256a24d0161db17cea3997d185db0d35926308770f0e"
dependencies = [
 "ciborium-io",
 "ciborium-ll",
 "serde",
]

[[package]]
name = "ciborium-io"
version = "0.2.2"
source = "registry+https://github.com/rust-lang/crates.io-index"
checksum = "05afea1e0a06c9be33d539b876f1ce3692f4afea2cb41f740e7743225ed1c757"

[[package]]
name = "ciborium-ll"
version = "0.2.2"
source = "registry+https://github.com/rust-lang/crates.io-index"
checksum = "57663b653d948a338bfb3eeba9bb2fd5fcfaecb9e199e87e1eda4d9e8b240fd9"
dependencies = [
 "ciborium-io",
 "half",
]

[[package]]
name = "concurrent-queue"
version = "2.5.0"
source = "registry+https://github.com/rust-lang/crates.io-index"
checksum = "4ca0197aee26d1ae37445ee532fefce43251d24cc7c166799f4d46817f1d3973"
dependencies = [
 "crossbeam-utils",
]

[[package]]
name = "console_error_panic_hook"
version = "0.1.7"
source = "registry+https://github.com/rust-lang/crates.io-index"
checksum = "a06aeb73f470f66dcdbf7223caeebb85984942f22f1adb2a088cf9668146bbbc"
dependencies = [
 "cfg-if",
 "wasm-bindgen",
]

[[package]]
name = "const_format"
version = "0.2.33"
source = "registry+https://github.com/rust-lang/crates.io-index"
checksum = "50c655d81ff1114fb0dcdea9225ea9f0cc712a6f8d189378e82bdf62a473a64b"
dependencies = [
 "const_format_proc_macros",
]

[[package]]
name = "const_format_proc_macros"
version = "0.2.33"
source = "registry+https://github.com/rust-lang/crates.io-index"
checksum = "eff1a44b93f47b1bac19a27932f5c591e43d1ba357ee4f61526c8a25603f0eb1"
dependencies = [
 "proc-macro2",
 "quote",
 "unicode-xid",
]

[[package]]
name = "constcat"
version = "0.3.1"
source = "registry+https://github.com/rust-lang/crates.io-index"
checksum = "cd7e35aee659887cbfb97aaf227ac12cad1a9d7c71e55ff3376839ed4e282d08"

[[package]]
name = "convert_case"
version = "0.6.0"
source = "registry+https://github.com/rust-lang/crates.io-index"
checksum = "ec182b0ca2f35d8fc196cf3404988fd8b8c739a4d270ff118a398feb0cbec1ca"
dependencies = [
 "unicode-segmentation",
]

[[package]]
name = "crossbeam-utils"
version = "0.8.20"
source = "registry+https://github.com/rust-lang/crates.io-index"
checksum = "22ec99545bb0ed0ea7bb9b8e1e9122ea386ff8a48c0922e43f36d45ab09e0e80"

[[package]]
name = "crunchy"
version = "0.2.2"
source = "registry+https://github.com/rust-lang/crates.io-index"
checksum = "7a81dae078cea95a014a339291cec439d2f232ebe854a9d672b796c6afafa9b7"

[[package]]
name = "darling"
version = "0.20.10"
source = "registry+https://github.com/rust-lang/crates.io-index"
checksum = "6f63b86c8a8826a49b8c21f08a2d07338eec8d900540f8630dc76284be802989"
dependencies = [
 "darling_core",
 "darling_macro",
]

[[package]]
name = "darling_core"
version = "0.20.10"
source = "registry+https://github.com/rust-lang/crates.io-index"
checksum = "95133861a8032aaea082871032f5815eb9e98cef03fa916ab4500513994df9e5"
dependencies = [
 "fnv",
 "ident_case",
 "proc-macro2",
 "quote",
 "syn",
]

[[package]]
name = "darling_macro"
version = "0.20.10"
source = "registry+https://github.com/rust-lang/crates.io-index"
checksum = "d336a2a514f6ccccaa3e09b02d41d35330c07ddf03a62165fcec10bb561c7806"
dependencies = [
 "darling_core",
 "quote",
 "syn",
]

[[package]]
name = "dashmap"
version = "5.5.3"
source = "registry+https://github.com/rust-lang/crates.io-index"
checksum = "978747c1d849a7d2ee5e8adc0159961c48fb7e5db2f06af6723b80123bb53856"
dependencies = [
 "cfg-if",
 "hashbrown",
 "lock_api",
 "once_cell",
 "parking_lot_core",
]

[[package]]
name = "dioxus"
version = "0.5.6"
source = "registry+https://github.com/rust-lang/crates.io-index"
checksum = "b8e7fe217b50d43b27528b0f24c89b411f742a3e7564d1cfbf85253f967954db"
dependencies = [
 "dioxus-config-macro",
 "dioxus-core",
 "dioxus-core-macro",
 "dioxus-fullstack",
 "dioxus-hooks",
 "dioxus-hot-reload",
 "dioxus-html",
 "dioxus-router",
 "dioxus-signals",
 "dioxus-web",
]

[[package]]
name = "dioxus-cli-config"
version = "0.5.6"
source = "registry+https://github.com/rust-lang/crates.io-index"
checksum = "c7dffc452ed91af6ef772b0d9a5899573f6785314e97c533733ec55413c01df3"
dependencies = [
 "once_cell",
 "serde",
 "serde_json",
 "tracing",
]

[[package]]
name = "dioxus-config-macro"
version = "0.5.6"
source = "registry+https://github.com/rust-lang/crates.io-index"
checksum = "cb1a1aa34cc04c1f7fcbb7a10791ba773cc02d834fe3ec1fe05647699f3b101f"
dependencies = [
 "proc-macro2",
 "quote",
]

[[package]]
name = "dioxus-core"
version = "0.5.6"
source = "registry+https://github.com/rust-lang/crates.io-index"
checksum = "3730d2459ab66951cedf10b09eb84141a6eda7f403c28057cbe010495be156b7"
dependencies = [
 "futures-channel",
 "futures-util",
 "generational-box",
 "longest-increasing-subsequence",
 "rustc-hash",
 "serde",
 "slab",
 "slotmap",
 "tracing",
 "tracing-subscriber",
]

[[package]]
name = "dioxus-core-macro"
version = "0.5.6"
source = "registry+https://github.com/rust-lang/crates.io-index"
checksum = "0d9c0dfe0e6a46626fa716c4aa1d2ccb273441337909cfeacad5bb6fcfb947d2"
dependencies = [
 "constcat",
 "convert_case",
 "dioxus-rsx",
 "prettyplease",
 "proc-macro2",
 "quote",
 "syn",
]

[[package]]
name = "dioxus-debug-cell"
version = "0.1.1"
source = "registry+https://github.com/rust-lang/crates.io-index"
checksum = "2ea539174bb236e0e7dc9c12b19b88eae3cb574dedbd0252a2d43ea7e6de13e2"

[[package]]
name = "dioxus-fullstack"
version = "0.5.6"
source = "registry+https://github.com/rust-lang/crates.io-index"
checksum = "b80f0ac18166302341164e681322e0385131c08a11c3cc1c51ee8df799ab0d3d"
dependencies = [
 "async-trait",
 "base64",
 "bytes",
 "ciborium",
 "dioxus-hot-reload",
 "dioxus-lib",
 "dioxus-web",
 "dioxus_server_macro",
 "futures-util",
 "once_cell",
 "serde",
 "serde_json",
 "server_fn",
 "tracing",
 "web-sys",
]

[[package]]
name = "dioxus-hooks"
version = "0.5.6"
source = "registry+https://github.com/rust-lang/crates.io-index"
checksum = "fa8f9c661eea82295219d25555d5c0b597e74186b029038ceb5e3700ccbd4380"
dependencies = [
 "dioxus-core",
 "dioxus-debug-cell",
 "dioxus-signals",
 "futures-channel",
 "futures-util",
 "generational-box",
 "slab",
 "thiserror",
 "tracing",
]

[[package]]
name = "dioxus-hot-reload"
version = "0.5.6"
source = "registry+https://github.com/rust-lang/crates.io-index"
checksum = "77d01246cb1b93437fb0bbd0dd11cfc66342d86b4311819e76654f2017ce1473"
dependencies = [
 "dioxus-core",
 "dioxus-html",
 "dioxus-rsx",
 "interprocess-docfix",
 "serde",
 "serde_json",
]

[[package]]
name = "dioxus-html"
version = "0.5.6"
source = "registry+https://github.com/rust-lang/crates.io-index"
checksum = "f01a0826f179adad6ea8d6586746e8edde0c602cc86f4eb8e5df7a3b204c4018"
dependencies = [
 "async-trait",
 "dioxus-core",
 "dioxus-html-internal-macro",
 "enumset",
 "euclid",
 "futures-channel",
 "generational-box",
 "keyboard-types",
 "serde",
 "serde-value",
 "serde_json",
 "serde_repr",
 "tracing",
 "wasm-bindgen",
 "web-sys",
]

[[package]]
name = "dioxus-html-internal-macro"
version = "0.5.6"
source = "registry+https://github.com/rust-lang/crates.io-index"
checksum = "0b96f35a608d0ab8f4ca6f66ce1828354e4ebd41580b12454f490221a11da93c"
dependencies = [
 "convert_case",
 "proc-macro2",
 "quote",
 "syn",
]

[[package]]
name = "dioxus-interpreter-js"
version = "0.5.6"
source = "registry+https://github.com/rust-lang/crates.io-index"
checksum = "351fad098c657d14f3ac2900362d2b86e83c22c4c620a404839e1ab628f3395b"
dependencies = [
 "js-sys",
 "md5",
 "sledgehammer_bindgen",
 "sledgehammer_utils",
 "wasm-bindgen",
 "wasm-bindgen-futures",
 "web-sys",
]

[[package]]
name = "dioxus-lib"
version = "0.5.6"
source = "registry+https://github.com/rust-lang/crates.io-index"
checksum = "8bd39b2c41dd1915dcb91d914ea72d8b646f1f8995aaeff82816b862ec586ecd"
dependencies = [
 "dioxus-core",
 "dioxus-core-macro",
 "dioxus-hooks",
 "dioxus-html",
 "dioxus-rsx",
 "dioxus-signals",
]

[[package]]
name = "dioxus-logger"
version = "0.5.1"
source = "registry+https://github.com/rust-lang/crates.io-index"
checksum = "81fe09dc9773dc1f1bb0d38529203d6555d08f67aadca5cf955ac3d1a9e69880"
dependencies = [
 "console_error_panic_hook",
 "tracing",
 "tracing-subscriber",
 "tracing-wasm",
]

[[package]]
name = "dioxus-router"
version = "0.5.6"
source = "registry+https://github.com/rust-lang/crates.io-index"
checksum = "c235c5dbeb528c0c2b0424763da812e7500df69b82eddac54db6f4975e065c5f"
dependencies = [
 "dioxus-cli-config",
 "dioxus-lib",
 "dioxus-router-macro",
 "gloo",
 "gloo-utils 0.1.7",
 "js-sys",
 "tracing",
 "url",
 "urlencoding",
 "wasm-bindgen",
 "web-sys",
]

[[package]]
name = "dioxus-router-macro"
version = "0.5.6"
source = "registry+https://github.com/rust-lang/crates.io-index"
checksum = "2e7cd1c5137ba361f2150cdea6b3bc9ddda7b1af84b22c9ee6b5499bf43e1381"
dependencies = [
 "proc-macro2",
 "quote",
 "slab",
 "syn",
]

[[package]]
name = "dioxus-rsx"
version = "0.5.6"
source = "registry+https://github.com/rust-lang/crates.io-index"
checksum = "15c400bc8a779107d8f3a67b14375db07dbd2bc31163bf085a8e9097f36f7179"
dependencies = [
 "dioxus-core",
 "internment",
 "krates",
 "proc-macro2",
 "quote",
 "syn",
 "tracing",
]

[[package]]
name = "dioxus-signals"
version = "0.5.7"
source = "registry+https://github.com/rust-lang/crates.io-index"
checksum = "7e3e224cd3d3713f159f0199fc088c292a0f4adb94996b48120157f6a8f8342d"
dependencies = [
 "dioxus-core",
 "futures-channel",
 "futures-util",
 "generational-box",
 "once_cell",
 "parking_lot",
 "rustc-hash",
 "tracing",
]

[[package]]
name = "dioxus-web"
version = "0.5.6"
source = "registry+https://github.com/rust-lang/crates.io-index"
checksum = "e0855ac81fcc9252a0863930a7a7cbb2504fc1b6efe893489c8d0e23aaeb2cb9"
dependencies = [
 "async-trait",
 "console_error_panic_hook",
 "dioxus-core",
 "dioxus-html",
 "dioxus-interpreter-js",
 "futures-channel",
 "futures-util",
 "generational-box",
 "js-sys",
 "rustc-hash",
 "serde",
 "serde-wasm-bindgen",
 "serde_json",
 "tracing",
 "wasm-bindgen",
 "wasm-bindgen-futures",
 "web-sys",
]

[[package]]
name = "dioxus_server_macro"
version = "0.5.6"
source = "registry+https://github.com/rust-lang/crates.io-index"
checksum = "b5ef2cad17001c1155f019cb69adbacd620644566d78a77d0778807bb106a337"
dependencies = [
 "convert_case",
 "proc-macro2",
 "quote",
 "server_fn_macro",
 "syn",
]

[[package]]
name = "enumset"
version = "1.1.5"
source = "registry+https://github.com/rust-lang/crates.io-index"
checksum = "d07a4b049558765cef5f0c1a273c3fc57084d768b44d2f98127aef4cceb17293"
dependencies = [
 "enumset_derive",
]

[[package]]
name = "enumset_derive"
version = "0.10.0"
source = "registry+https://github.com/rust-lang/crates.io-index"
checksum = "59c3b24c345d8c314966bdc1832f6c2635bfcce8e7cf363bd115987bba2ee242"
dependencies = [
 "darling",
 "proc-macro2",
 "quote",
 "syn",
]

[[package]]
name = "equivalent"
version = "1.0.1"
source = "registry+https://github.com/rust-lang/crates.io-index"
checksum = "5443807d6dff69373d433ab9ef5378ad8df50ca6298caf15de6e52e24aaf54d5"

[[package]]
name = "euclid"
version = "0.22.11"
source = "registry+https://github.com/rust-lang/crates.io-index"
checksum = "ad9cdb4b747e485a12abb0e6566612956c7a1bafa3bdb8d682c5b6d403589e48"
dependencies = [
 "num-traits",
 "serde",
]

[[package]]
name = "event-listener"
version = "5.3.1"
source = "registry+https://github.com/rust-lang/crates.io-index"
checksum = "6032be9bd27023a771701cc49f9f053c751055f71efb2e0ae5c15809093675ba"
dependencies = [
 "concurrent-queue",
 "parking",
 "pin-project-lite",
]

[[package]]
name = "event-listener-strategy"
version = "0.5.2"
source = "registry+https://github.com/rust-lang/crates.io-index"
checksum = "0f214dc438f977e6d4e3500aaa277f5ad94ca83fbbd9b1a15713ce2344ccc5a1"
dependencies = [
 "event-listener",
 "pin-project-lite",
]

[[package]]
name = "fastrand"
version = "2.1.1"
source = "registry+https://github.com/rust-lang/crates.io-index"
checksum = "e8c02a5121d4ea3eb16a80748c74f5549a5665e4c21333c6098f283870fbdea6"

[[package]]
name = "fixedbitset"
version = "0.4.2"
source = "registry+https://github.com/rust-lang/crates.io-index"
checksum = "0ce7134b9999ecaf8bcd65542e436736ef32ddca1b3e06094cb6ec5755203b80"

[[package]]
name = "fnv"
version = "1.0.7"
source = "registry+https://github.com/rust-lang/crates.io-index"
checksum = "3f9eec918d3f24069decb9af1554cad7c880e2da24a9afd88aca000531ab82c1"

[[package]]
name = "form_urlencoded"
version = "1.2.1"
source = "registry+https://github.com/rust-lang/crates.io-index"
checksum = "e13624c2627564efccf4934284bdd98cbaa14e79b0b5a141218e507b3a823456"
dependencies = [
 "percent-encoding",
]

[[package]]
name = "futures"
version = "0.3.30"
source = "registry+https://github.com/rust-lang/crates.io-index"
checksum = "645c6916888f6cb6350d2550b80fb63e734897a8498abe35cfb732b6487804b0"
dependencies = [
 "futures-channel",
 "futures-core",
 "futures-executor",
 "futures-io",
 "futures-sink",
 "futures-task",
 "futures-util",
]

[[package]]
name = "futures-channel"
version = "0.3.30"
source = "registry+https://github.com/rust-lang/crates.io-index"
checksum = "eac8f7d7865dcb88bd4373ab671c8cf4508703796caa2b1985a9ca867b3fcb78"
dependencies = [
 "futures-core",
 "futures-sink",
]

[[package]]
name = "futures-core"
version = "0.3.30"
source = "registry+https://github.com/rust-lang/crates.io-index"
checksum = "dfc6580bb841c5a68e9ef15c77ccc837b40a7504914d52e47b8b0e9bbda25a1d"

[[package]]
name = "futures-executor"
version = "0.3.30"
source = "registry+https://github.com/rust-lang/crates.io-index"
checksum = "a576fc72ae164fca6b9db127eaa9a9dda0d61316034f33a0a0d4eda41f02b01d"
dependencies = [
 "futures-core",
 "futures-task",
 "futures-util",
]

[[package]]
name = "futures-io"
version = "0.3.30"
source = "registry+https://github.com/rust-lang/crates.io-index"
checksum = "a44623e20b9681a318efdd71c299b6b222ed6f231972bfe2f224ebad6311f0c1"

[[package]]
name = "futures-lite"
version = "2.3.0"
source = "registry+https://github.com/rust-lang/crates.io-index"
checksum = "52527eb5074e35e9339c6b4e8d12600c7128b68fb25dcb9fa9dec18f7c25f3a5"
dependencies = [
 "futures-core",
 "pin-project-lite",
]

[[package]]
name = "futures-macro"
version = "0.3.30"
source = "registry+https://github.com/rust-lang/crates.io-index"
checksum = "87750cf4b7a4c0625b1529e4c543c2182106e4dedc60a2a6455e00d212c489ac"
dependencies = [
 "proc-macro2",
 "quote",
 "syn",
]

[[package]]
name = "futures-sink"
version = "0.3.30"
source = "registry+https://github.com/rust-lang/crates.io-index"
checksum = "9fb8e00e87438d937621c1c6269e53f536c14d3fbd6a042bb24879e57d474fb5"

[[package]]
name = "futures-task"
version = "0.3.30"
source = "registry+https://github.com/rust-lang/crates.io-index"
checksum = "38d84fa142264698cdce1a9f9172cf383a0c82de1bddcf3092901442c4097004"

[[package]]
name = "futures-util"
version = "0.3.30"
source = "registry+https://github.com/rust-lang/crates.io-index"
checksum = "3d6401deb83407ab3da39eba7e33987a73c3df0c82b4bb5813ee871c19c41d48"
dependencies = [
 "futures-channel",
 "futures-core",
 "futures-io",
 "futures-macro",
 "futures-sink",
 "futures-task",
 "memchr",
 "pin-project-lite",
 "pin-utils",
 "slab",
]

[[package]]
name = "generational-box"
version = "0.5.6"
source = "registry+https://github.com/rust-lang/crates.io-index"
checksum = "557cf2cbacd0504c6bf8c29f52f8071e0de1d9783346713dc6121d7fa1e5d0e0"
dependencies = [
 "parking_lot",
]

[[package]]
name = "gloo"
version = "0.8.1"
source = "registry+https://github.com/rust-lang/crates.io-index"
checksum = "28999cda5ef6916ffd33fb4a7b87e1de633c47c0dc6d97905fee1cdaa142b94d"
dependencies = [
 "gloo-console",
 "gloo-dialogs",
 "gloo-events",
 "gloo-file",
 "gloo-history",
 "gloo-net 0.3.1",
 "gloo-render",
 "gloo-storage",
 "gloo-timers",
 "gloo-utils 0.1.7",
 "gloo-worker",
]

[[package]]
name = "gloo-console"
version = "0.2.3"
source = "registry+https://github.com/rust-lang/crates.io-index"
checksum = "82b7ce3c05debe147233596904981848862b068862e9ec3e34be446077190d3f"
dependencies = [
 "gloo-utils 0.1.7",
 "js-sys",
 "serde",
 "wasm-bindgen",
 "web-sys",
]

[[package]]
name = "gloo-dialogs"
version = "0.1.1"
source = "registry+https://github.com/rust-lang/crates.io-index"
checksum = "67062364ac72d27f08445a46cab428188e2e224ec9e37efdba48ae8c289002e6"
dependencies = [
 "wasm-bindgen",
 "web-sys",
]

[[package]]
name = "gloo-events"
version = "0.1.2"
source = "registry+https://github.com/rust-lang/crates.io-index"
checksum = "68b107f8abed8105e4182de63845afcc7b69c098b7852a813ea7462a320992fc"
dependencies = [
 "wasm-bindgen",
 "web-sys",
]

[[package]]
name = "gloo-file"
version = "0.2.3"
source = "registry+https://github.com/rust-lang/crates.io-index"
checksum = "a8d5564e570a38b43d78bdc063374a0c3098c4f0d64005b12f9bbe87e869b6d7"
dependencies = [
 "gloo-events",
 "js-sys",
 "wasm-bindgen",
 "web-sys",
]

[[package]]
name = "gloo-history"
version = "0.1.5"
source = "registry+https://github.com/rust-lang/crates.io-index"
checksum = "85725d90bf0ed47063b3930ef28e863658a7905989e9929a8708aab74a1d5e7f"
dependencies = [
 "gloo-events",
 "gloo-utils 0.1.7",
 "serde",
 "serde-wasm-bindgen",
 "serde_urlencoded",
 "thiserror",
 "wasm-bindgen",
 "web-sys",
]

[[package]]
name = "gloo-net"
version = "0.3.1"
source = "registry+https://github.com/rust-lang/crates.io-index"
checksum = "a66b4e3c7d9ed8d315fd6b97c8b1f74a7c6ecbbc2320e65ae7ed38b7068cc620"
dependencies = [
 "futures-channel",
 "futures-core",
 "futures-sink",
 "gloo-utils 0.1.7",
 "http 0.2.12",
 "js-sys",
 "pin-project",
 "serde",
 "serde_json",
 "thiserror",
 "wasm-bindgen",
 "wasm-bindgen-futures",
 "web-sys",
]

[[package]]
name = "gloo-net"
version = "0.6.0"
source = "registry+https://github.com/rust-lang/crates.io-index"
checksum = "c06f627b1a58ca3d42b45d6104bf1e1a03799df472df00988b6ba21accc10580"
dependencies = [
 "futures-channel",
 "futures-core",
 "futures-sink",
 "gloo-utils 0.2.0",
 "http 1.1.0",
 "js-sys",
 "pin-project",
 "serde",
 "serde_json",
 "thiserror",
 "wasm-bindgen",
 "wasm-bindgen-futures",
 "web-sys",
]

[[package]]
name = "gloo-render"
version = "0.1.1"
source = "registry+https://github.com/rust-lang/crates.io-index"
checksum = "2fd9306aef67cfd4449823aadcd14e3958e0800aa2183955a309112a84ec7764"
dependencies = [
 "wasm-bindgen",
 "web-sys",
]

[[package]]
name = "gloo-storage"
version = "0.2.2"
source = "registry+https://github.com/rust-lang/crates.io-index"
checksum = "5d6ab60bf5dbfd6f0ed1f7843da31b41010515c745735c970e821945ca91e480"
dependencies = [
 "gloo-utils 0.1.7",
 "js-sys",
 "serde",
 "serde_json",
 "thiserror",
 "wasm-bindgen",
 "web-sys",
]

[[package]]
name = "gloo-timers"
version = "0.2.6"
source = "registry+https://github.com/rust-lang/crates.io-index"
checksum = "9b995a66bb87bebce9a0f4a95aed01daca4872c050bfcb21653361c03bc35e5c"
dependencies = [
 "js-sys",
 "wasm-bindgen",
]

[[package]]
name = "gloo-utils"
version = "0.1.7"
source = "registry+https://github.com/rust-lang/crates.io-index"
checksum = "037fcb07216cb3a30f7292bd0176b050b7b9a052ba830ef7d5d65f6dc64ba58e"
dependencies = [
 "js-sys",
 "serde",
 "serde_json",
 "wasm-bindgen",
 "web-sys",
]

[[package]]
name = "gloo-utils"
version = "0.2.0"
source = "registry+https://github.com/rust-lang/crates.io-index"
checksum = "0b5555354113b18c547c1d3a98fbf7fb32a9ff4f6fa112ce823a21641a0ba3aa"
dependencies = [
 "js-sys",
 "serde",
 "serde_json",
 "wasm-bindgen",
 "web-sys",
]

[[package]]
name = "gloo-worker"
version = "0.2.1"
source = "registry+https://github.com/rust-lang/crates.io-index"
checksum = "13471584da78061a28306d1359dd0178d8d6fc1c7c80e5e35d27260346e0516a"
dependencies = [
 "anymap2",
 "bincode",
 "gloo-console",
 "gloo-utils 0.1.7",
 "js-sys",
 "serde",
 "wasm-bindgen",
 "wasm-bindgen-futures",
 "web-sys",
]

[[package]]
name = "half"
version = "2.4.1"
source = "registry+https://github.com/rust-lang/crates.io-index"
checksum = "6dd08c532ae367adf81c312a4580bc67f1d0fe8bc9c460520283f4c0ff277888"
dependencies = [
 "cfg-if",
 "crunchy",
]

[[package]]
name = "hashbrown"
version = "0.14.5"
source = "registry+https://github.com/rust-lang/crates.io-index"
checksum = "e5274423e17b7c9fc20b6e7e208532f9b19825d82dfd615708b70edd83df41f1"
dependencies = [
 "ahash",
 "allocator-api2",
]

[[package]]
name = "http"
version = "0.2.12"
source = "registry+https://github.com/rust-lang/crates.io-index"
checksum = "601cbb57e577e2f5ef5be8e7b83f0f63994f25aa94d673e54a92d5c516d101f1"
dependencies = [
 "bytes",
 "fnv",
 "itoa",
]

[[package]]
name = "http"
version = "1.1.0"
source = "registry+https://github.com/rust-lang/crates.io-index"
checksum = "21b9ddb458710bc376481b842f5da65cdf31522de232c1ca8146abce2a358258"
dependencies = [
 "bytes",
 "fnv",
 "itoa",
]

[[package]]
name = "ident_case"
version = "1.0.1"
source = "registry+https://github.com/rust-lang/crates.io-index"
checksum = "b9e0384b61958566e926dc50660321d12159025e767c18e043daf26b70104c39"

[[package]]
name = "idna"
version = "0.5.0"
source = "registry+https://github.com/rust-lang/crates.io-index"
checksum = "634d9b1461af396cad843f47fdba5597a4f9e6ddd4bfb6ff5d85028c25cb12f6"
dependencies = [
 "unicode-bidi",
 "unicode-normalization",
]

[[package]]
name = "indexmap"
version = "2.5.0"
source = "registry+https://github.com/rust-lang/crates.io-index"
checksum = "68b900aa2f7301e21c36462b170ee99994de34dff39a4a6a528e80e7376d07e5"
dependencies = [
 "equivalent",
 "hashbrown",
]

[[package]]
name = "internment"
version = "0.7.5"
source = "registry+https://github.com/rust-lang/crates.io-index"
checksum = "04e8e537b529b8674e97e9fb82c10ff168a290ac3867a0295f112061ffbca1ef"
dependencies = [
 "hashbrown",
 "parking_lot",
]

[[package]]
name = "interprocess-docfix"
version = "1.2.2"
source = "registry+https://github.com/rust-lang/crates.io-index"
checksum = "4b84ee245c606aeb0841649a9288e3eae8c61b853a8cd5c0e14450e96d53d28f"
dependencies = [
 "blocking",
 "cfg-if",
 "futures-core",
 "futures-io",
 "intmap",
 "libc",
 "once_cell",
 "rustc_version",
 "spinning",
 "thiserror",
 "to_method",
 "winapi",
]

[[package]]
name = "intmap"
version = "0.7.1"
source = "registry+https://github.com/rust-lang/crates.io-index"
checksum = "ae52f28f45ac2bc96edb7714de995cffc174a395fb0abf5bff453587c980d7b9"

[[package]]
name = "itoa"
version = "1.0.11"
source = "registry+https://github.com/rust-lang/crates.io-index"
checksum = "49f1f14873335454500d59611f1cf4a4b0f786f9ac11f4312a78e4cf2566695b"

[[package]]
name = "js-sys"
version = "0.3.70"
source = "registry+https://github.com/rust-lang/crates.io-index"
checksum = "1868808506b929d7b0cfa8f75951347aa71bb21144b7791bae35d9bccfcfe37a"
dependencies = [
 "wasm-bindgen",
]

[[package]]
name = "keyboard-types"
version = "0.7.0"
source = "registry+https://github.com/rust-lang/crates.io-index"
checksum = "b750dcadc39a09dbadd74e118f6dd6598df77fa01df0cfcdc52c28dece74528a"
dependencies = [
 "bitflags",
 "serde",
 "unicode-segmentation",
]

[[package]]
name = "krates"
version = "0.16.10"
source = "registry+https://github.com/rust-lang/crates.io-index"
checksum = "7fcb3baf2360eb25ad31f0ada3add63927ada6db457791979b82ac199f835cb9"
dependencies = [
 "cargo-platform",
 "cargo_metadata",
 "cfg-expr",
 "petgraph",
 "semver",
]

[[package]]
name = "lazy_static"
version = "1.5.0"
source = "registry+https://github.com/rust-lang/crates.io-index"
checksum = "bbd2bcb4c963f2ddae06a2efc7e9f3591312473c50c6685e1f298068316e66fe"

[[package]]
name = "libc"
version = "0.2.158"
source = "registry+https://github.com/rust-lang/crates.io-index"
checksum = "d8adc4bb1803a324070e64a98ae98f38934d91957a99cfb3a43dcbc01bc56439"

[[package]]
name = "lock_api"
version = "0.4.12"
source = "registry+https://github.com/rust-lang/crates.io-index"
checksum = "07af8b9cdd281b7915f413fa73f29ebd5d55d0d3f0155584dade1ff18cea1b17"
dependencies = [
 "autocfg",
 "scopeguard",
]

[[package]]
name = "log"
version = "0.4.22"
source = "registry+https://github.com/rust-lang/crates.io-index"
checksum = "a7a70ba024b9dc04c27ea2f0c0548feb474ec5c54bba33a7f72f873a39d07b24"

[[package]]
name = "longest-increasing-subsequence"
version = "0.1.0"
source = "registry+https://github.com/rust-lang/crates.io-index"
checksum = "b3bd0dd2cd90571056fdb71f6275fada10131182f84899f4b2a916e565d81d86"

[[package]]
name = "lru"
version = "0.12.4"
source = "registry+https://github.com/rust-lang/crates.io-index"
checksum = "37ee39891760e7d94734f6f63fedc29a2e4a152f836120753a72503f09fcf904"
dependencies = [
 "hashbrown",
]

[[package]]
name = "md5"
version = "0.7.0"
source = "registry+https://github.com/rust-lang/crates.io-index"
checksum = "490cc448043f947bae3cbee9c203358d62dbee0db12107a74be5c30ccfd09771"

[[package]]
name = "memchr"
version = "2.7.4"
source = "registry+https://github.com/rust-lang/crates.io-index"
checksum = "78ca9ab1a0babb1e7d5695e3530886289c18cf2f87ec19a575a0abdce112e3a3"

[[package]]
name = "nu-ansi-term"
version = "0.46.0"
source = "registry+https://github.com/rust-lang/crates.io-index"
checksum = "77a8165726e8236064dbb45459242600304b42a5ea24ee2948e18e023bf7ba84"
dependencies = [
 "overload",
 "winapi",
]

[[package]]
name = "num-traits"
version = "0.2.19"
source = "registry+https://github.com/rust-lang/crates.io-index"
checksum = "071dfc062690e90b734c0b2273ce72ad0ffa95f0c74596bc250dcfd960262841"
dependencies = [
 "autocfg",
]

[[package]]
name = "once_cell"
version = "1.20.0"
source = "registry+https://github.com/rust-lang/crates.io-index"
checksum = "33ea5043e58958ee56f3e15a90aee535795cd7dfd319846288d93c5b57d85cbe"

[[package]]
name = "ordered-float"
version = "2.10.1"
source = "registry+https://github.com/rust-lang/crates.io-index"
checksum = "68f19d67e5a2795c94e73e0bb1cc1a7edeb2e28efd39e2e1c9b7a40c1108b11c"
dependencies = [
 "num-traits",
]

[[package]]
name = "overload"
version = "0.1.1"
source = "registry+https://github.com/rust-lang/crates.io-index"
checksum = "b15813163c1d831bf4a13c3610c05c0d03b39feb07f7e09fa234dac9b15aaf39"

[[package]]
name = "parking"
version = "2.2.1"
source = "registry+https://github.com/rust-lang/crates.io-index"
checksum = "f38d5652c16fde515bb1ecef450ab0f6a219d619a7274976324d5e377f7dceba"

[[package]]
name = "parking_lot"
version = "0.12.3"
source = "registry+https://github.com/rust-lang/crates.io-index"
checksum = "f1bf18183cf54e8d6059647fc3063646a1801cf30896933ec2311622cc4b9a27"
dependencies = [
 "lock_api",
 "parking_lot_core",
]

[[package]]
name = "parking_lot_core"
version = "0.9.10"
source = "registry+https://github.com/rust-lang/crates.io-index"
checksum = "1e401f977ab385c9e4e3ab30627d6f26d00e2c73eef317493c4ec6d468726cf8"
dependencies = [
 "cfg-if",
 "libc",
 "redox_syscall",
 "smallvec",
 "windows-targets",
]

[[package]]
name = "percent-encoding"
version = "2.3.1"
source = "registry+https://github.com/rust-lang/crates.io-index"
checksum = "e3148f5046208a5d56bcfc03053e3ca6334e51da8dfb19b6cdc8b306fae3283e"

[[package]]
name = "petgraph"
version = "0.6.5"
source = "registry+https://github.com/rust-lang/crates.io-index"
checksum = "b4c5cc86750666a3ed20bdaf5ca2a0344f9c67674cae0515bec2da16fbaa47db"
dependencies = [
 "fixedbitset",
 "indexmap",
]

[[package]]
name = "pin-project"
version = "1.1.5"
source = "registry+https://github.com/rust-lang/crates.io-index"
checksum = "b6bf43b791c5b9e34c3d182969b4abb522f9343702850a2e57f460d00d09b4b3"
dependencies = [
 "pin-project-internal",
]

[[package]]
name = "pin-project-internal"
version = "1.1.5"
source = "registry+https://github.com/rust-lang/crates.io-index"
checksum = "2f38a4412a78282e09a2cf38d195ea5420d15ba0602cb375210efbc877243965"
dependencies = [
 "proc-macro2",
 "quote",
 "syn",
]

[[package]]
name = "pin-project-lite"
version = "0.2.14"
source = "registry+https://github.com/rust-lang/crates.io-index"
checksum = "bda66fc9667c18cb2758a2ac84d1167245054bcf85d5d1aaa6923f45801bdd02"

[[package]]
name = "pin-utils"
version = "0.1.0"
source = "registry+https://github.com/rust-lang/crates.io-index"
checksum = "8b870d8c151b6f2fb93e84a13146138f05d02ed11c7e7c54f8826aaaf7c9f184"

[[package]]
name = "piper"
version = "0.2.4"
source = "registry+https://github.com/rust-lang/crates.io-index"
checksum = "96c8c490f422ef9a4efd2cb5b42b76c8613d7e7dfc1caf667b8a3350a5acc066"
dependencies = [
 "atomic-waker",
 "fastrand",
 "futures-io",
]

[[package]]
name = "prettyplease"
version = "0.2.22"
source = "registry+https://github.com/rust-lang/crates.io-index"
checksum = "479cf940fbbb3426c32c5d5176f62ad57549a0bb84773423ba8be9d089f5faba"
dependencies = [
 "proc-macro2",
 "syn",
]

[[package]]
name = "proc-macro2"
version = "1.0.86"
source = "registry+https://github.com/rust-lang/crates.io-index"
checksum = "5e719e8df665df0d1c8fbfd238015744736151d4445ec0836b8e628aae103b77"
dependencies = [
 "unicode-ident",
]

[[package]]
name = "quote"
version = "1.0.37"
source = "registry+https://github.com/rust-lang/crates.io-index"
checksum = "b5b9d34b8991d19d98081b46eacdd8eb58c6f2b201139f7c5f643cc155a633af"
dependencies = [
 "proc-macro2",
]

[[package]]
name = "redox_syscall"
version = "0.5.4"
source = "registry+https://github.com/rust-lang/crates.io-index"
checksum = "0884ad60e090bf1345b93da0a5de8923c93884cd03f40dfcfddd3b4bee661853"
dependencies = [
 "bitflags",
]

[[package]]
name = "rustc-hash"
version = "1.1.0"
source = "registry+https://github.com/rust-lang/crates.io-index"
checksum = "08d43f7aa6b08d49f382cde6a7982047c3426db949b1424bc4b7ec9ae12c6ce2"

[[package]]
name = "rustc_version"
version = "0.4.1"
source = "registry+https://github.com/rust-lang/crates.io-index"
checksum = "cfcb3a22ef46e85b45de6ee7e79d063319ebb6594faafcf1c225ea92ab6e9b92"
dependencies = [
 "semver",
]

[[package]]
name = "ryu"
version = "1.0.18"
source = "registry+https://github.com/rust-lang/crates.io-index"
checksum = "f3cb5ba0dc43242ce17de99c180e96db90b235b8a9fdc9543c96d2209116bd9f"

[[package]]
name = "scopeguard"
version = "1.2.0"
source = "registry+https://github.com/rust-lang/crates.io-index"
checksum = "94143f37725109f92c262ed2cf5e59bce7498c01bcc1502d7b9afe439a4e9f49"

[[package]]
name = "semver"
version = "1.0.23"
source = "registry+https://github.com/rust-lang/crates.io-index"
checksum = "61697e0a1c7e512e84a621326239844a24d8207b4669b41bc18b32ea5cbf988b"
dependencies = [
 "serde",
]

[[package]]
name = "send_wrapper"
version = "0.6.0"
source = "registry+https://github.com/rust-lang/crates.io-index"
checksum = "cd0b0ec5f1c1ca621c432a25813d8d60c88abe6d3e08a3eb9cf37d97a0fe3d73"
dependencies = [
 "futures-core",
]

[[package]]
name = "serde"
version = "1.0.210"
source = "registry+https://github.com/rust-lang/crates.io-index"
checksum = "c8e3592472072e6e22e0a54d5904d9febf8508f65fb8552499a1abc7d1078c3a"
dependencies = [
 "serde_derive",
]

[[package]]
name = "serde-value"
version = "0.7.0"
source = "registry+https://github.com/rust-lang/crates.io-index"
checksum = "f3a1a3341211875ef120e117ea7fd5228530ae7e7036a779fdc9117be6b3282c"
dependencies = [
 "ordered-float",
 "serde",
]

[[package]]
name = "serde-wasm-bindgen"
version = "0.5.0"
source = "registry+https://github.com/rust-lang/crates.io-index"
checksum = "f3b143e2833c57ab9ad3ea280d21fd34e285a42837aeb0ee301f4f41890fa00e"
dependencies = [
 "js-sys",
 "serde",
 "wasm-bindgen",
]

[[package]]
name = "serde_derive"
version = "1.0.210"
source = "registry+https://github.com/rust-lang/crates.io-index"
checksum = "243902eda00fad750862fc144cea25caca5e20d615af0a81bee94ca738f1df1f"
dependencies = [
 "proc-macro2",
 "quote",
 "syn",
]

[[package]]
name = "serde_json"
version = "1.0.128"
source = "registry+https://github.com/rust-lang/crates.io-index"
checksum = "6ff5456707a1de34e7e37f2a6fd3d3f808c318259cbd01ab6377795054b483d8"
dependencies = [
 "itoa",
 "memchr",
 "ryu",
 "serde",
]

[[package]]
name = "serde_qs"
version = "0.12.0"
source = "registry+https://github.com/rust-lang/crates.io-index"
checksum = "0431a35568651e363364210c91983c1da5eb29404d9f0928b67d4ebcfa7d330c"
dependencies = [
 "percent-encoding",
 "serde",
 "thiserror",
]

[[package]]
name = "serde_repr"
version = "0.1.19"
source = "registry+https://github.com/rust-lang/crates.io-index"
checksum = "6c64451ba24fc7a6a2d60fc75dd9c83c90903b19028d4eff35e88fc1e86564e9"
dependencies = [
 "proc-macro2",
 "quote",
 "syn",
]

[[package]]
name = "serde_urlencoded"
version = "0.7.1"
source = "registry+https://github.com/rust-lang/crates.io-index"
checksum = "d3491c14715ca2294c4d6a88f15e84739788c1d030eed8c110436aafdaa2f3fd"
dependencies = [
 "form_urlencoded",
 "itoa",
 "ryu",
 "serde",
]

[[package]]
name = "server_fn"
version = "0.6.15"
source = "registry+https://github.com/rust-lang/crates.io-index"
checksum = "4fae7a3038a32e5a34ba32c6c45eb4852f8affaf8b794ebfcd4b1099e2d62ebe"
dependencies = [
 "bytes",
 "const_format",
 "dashmap",
 "futures",
 "gloo-net 0.6.0",
 "http 1.1.0",
 "js-sys",
 "once_cell",
 "send_wrapper",
 "serde",
 "serde_json",
 "serde_qs",
 "server_fn_macro_default",
 "thiserror",
 "url",
 "wasm-bindgen",
 "wasm-bindgen-futures",
 "wasm-streams",
 "web-sys",
 "xxhash-rust",
]

[[package]]
name = "server_fn_macro"
version = "0.6.15"
source = "registry+https://github.com/rust-lang/crates.io-index"
checksum = "faaaf648c6967aef78177c0610478abb5a3455811f401f3c62d10ae9bd3901a1"
dependencies = [
 "const_format",
 "convert_case",
 "proc-macro2",
 "quote",
 "syn",
 "xxhash-rust",
]

[[package]]
name = "server_fn_macro_default"
version = "0.6.15"
source = "registry+https://github.com/rust-lang/crates.io-index"
checksum = "7f2aa8119b558a17992e0ac1fd07f080099564f24532858811ce04f742542440"
dependencies = [
 "server_fn_macro",
 "syn",
]

[[package]]
name = "sharded-slab"
version = "0.1.7"
source = "registry+https://github.com/rust-lang/crates.io-index"
checksum = "f40ca3c46823713e0d4209592e8d6e826aa57e928f09752619fc696c499637f6"
dependencies = [
 "lazy_static",
]

[[package]]
name = "slab"
version = "0.4.9"
source = "registry+https://github.com/rust-lang/crates.io-index"
checksum = "8f92a496fb766b417c996b9c5e57daf2f7ad3b0bebe1ccfca4856390e3d3bb67"
dependencies = [
 "autocfg",
]

[[package]]
name = "sledgehammer_bindgen"
version = "0.5.0"
source = "registry+https://github.com/rust-lang/crates.io-index"
checksum = "fcfaf791ff02f48f3518ce825d32cf419c13a43c1d8b1232f74ac89f339c46d2"
dependencies = [
 "sledgehammer_bindgen_macro",
 "wasm-bindgen",
]

[[package]]
name = "sledgehammer_bindgen_macro"
version = "0.5.1"
source = "registry+https://github.com/rust-lang/crates.io-index"
checksum = "edc90d3e8623d29a664cd8dba5078b600dd203444f00b9739f744e4c6e7aeaf2"
dependencies = [
 "quote",
 "syn",
]

[[package]]
name = "sledgehammer_utils"
version = "0.2.1"
source = "registry+https://github.com/rust-lang/crates.io-index"
checksum = "f20798defa0e9d4eff9ca451c7f84774c7378a9c3b5a40112cfa2b3eadb97ae2"
dependencies = [
 "lru",
 "once_cell",
 "rustc-hash",
]

[[package]]
name = "slotmap"
version = "1.0.7"
source = "registry+https://github.com/rust-lang/crates.io-index"
checksum = "dbff4acf519f630b3a3ddcfaea6c06b42174d9a44bc70c620e9ed1649d58b82a"
dependencies = [
 "serde",
 "version_check",
]

[[package]]
name = "smallvec"
version = "1.13.2"
source = "registry+https://github.com/rust-lang/crates.io-index"
checksum = "3c5e1a9a646d36c3599cd173a41282daf47c44583ad367b8e6837255952e5c67"

[[package]]
name = "spinning"
version = "0.1.0"
source = "registry+https://github.com/rust-lang/crates.io-index"
checksum = "2d4f0e86297cad2658d92a707320d87bf4e6ae1050287f51d19b67ef3f153a7b"
dependencies = [
 "lock_api",
]

[[package]]
name = "syn"
version = "2.0.77"
source = "registry+https://github.com/rust-lang/crates.io-index"
checksum = "9f35bcdf61fd8e7be6caf75f429fdca8beb3ed76584befb503b1569faee373ed"
dependencies = [
 "proc-macro2",
 "quote",
 "unicode-ident",
]

[[package]]
name = "thiserror"
version = "1.0.63"
source = "registry+https://github.com/rust-lang/crates.io-index"
checksum = "c0342370b38b6a11b6cc11d6a805569958d54cfa061a29969c3b5ce2ea405724"
dependencies = [
 "thiserror-impl",
]

[[package]]
name = "thiserror-impl"
version = "1.0.63"
source = "registry+https://github.com/rust-lang/crates.io-index"
checksum = "a4558b58466b9ad7ca0f102865eccc95938dca1a74a856f2b57b6629050da261"
dependencies = [
 "proc-macro2",
 "quote",
 "syn",
]

[[package]]
name = "thread_local"
version = "1.1.8"
source = "registry+https://github.com/rust-lang/crates.io-index"
checksum = "8b9ef9bad013ada3808854ceac7b46812a6465ba368859a37e2100283d2d719c"
dependencies = [
 "cfg-if",
 "once_cell",
]

[[package]]
name = "tinyvec"
version = "1.8.0"
source = "registry+https://github.com/rust-lang/crates.io-index"
checksum = "445e881f4f6d382d5f27c034e25eb92edd7c784ceab92a0937db7f2e9471b938"
dependencies = [
 "tinyvec_macros",
]

[[package]]
name = "tinyvec_macros"
version = "0.1.1"
source = "registry+https://github.com/rust-lang/crates.io-index"
checksum = "1f3ccbac311fea05f86f61904b462b55fb3df8837a366dfc601a0161d0532f20"

[[package]]
name = "to_method"
version = "1.1.0"
source = "registry+https://github.com/rust-lang/crates.io-index"
checksum = "c7c4ceeeca15c8384bbc3e011dbd8fccb7f068a440b752b7d9b32ceb0ca0e2e8"

[[package]]
name = "todo-dioxus"
version = "0.1.0"
dependencies = [
 "dioxus",
 "dioxus-logger",
]

[[package]]
name = "tracing"
version = "0.1.40"
source = "registry+https://github.com/rust-lang/crates.io-index"
checksum = "c3523ab5a71916ccf420eebdf5521fcef02141234bbc0b8a49f2fdc4544364ef"
dependencies = [
 "pin-project-lite",
 "tracing-attributes",
 "tracing-core",
]

[[package]]
name = "tracing-attributes"
version = "0.1.27"
source = "registry+https://github.com/rust-lang/crates.io-index"
checksum = "34704c8d6ebcbc939824180af020566b01a7c01f80641264eba0999f6c2b6be7"
dependencies = [
 "proc-macro2",
 "quote",
 "syn",
]

[[package]]
name = "tracing-core"
version = "0.1.32"
source = "registry+https://github.com/rust-lang/crates.io-index"
checksum = "c06d3da6113f116aaee68e4d601191614c9053067f9ab7f6edbcb161237daa54"
dependencies = [
 "once_cell",
 "valuable",
]

[[package]]
name = "tracing-log"
version = "0.2.0"
source = "registry+https://github.com/rust-lang/crates.io-index"
checksum = "ee855f1f400bd0e5c02d150ae5de3840039a3f54b025156404e34c23c03f47c3"
dependencies = [
 "log",
 "once_cell",
 "tracing-core",
]

[[package]]
name = "tracing-subscriber"
version = "0.3.18"
source = "registry+https://github.com/rust-lang/crates.io-index"
checksum = "ad0f048c97dbd9faa9b7df56362b8ebcaa52adb06b498c050d2f4e32f90a7a8b"
dependencies = [
 "nu-ansi-term",
 "sharded-slab",
 "smallvec",
 "thread_local",
 "tracing-core",
 "tracing-log",
]

[[package]]
name = "tracing-wasm"
version = "0.2.1"
source = "registry+https://github.com/rust-lang/crates.io-index"
checksum = "4575c663a174420fa2d78f4108ff68f65bf2fbb7dd89f33749b6e826b3626e07"
dependencies = [
 "tracing",
 "tracing-subscriber",
 "wasm-bindgen",
]

[[package]]
name = "unicode-bidi"
version = "0.3.15"
source = "registry+https://github.com/rust-lang/crates.io-index"
checksum = "08f95100a766bf4f8f28f90d77e0a5461bbdb219042e7679bebe79004fed8d75"

[[package]]
name = "unicode-ident"
version = "1.0.13"
source = "registry+https://github.com/rust-lang/crates.io-index"
checksum = "e91b56cd4cadaeb79bbf1a5645f6b4f8dc5bde8834ad5894a8db35fda9efa1fe"

[[package]]
name = "unicode-normalization"
version = "0.1.23"
source = "registry+https://github.com/rust-lang/crates.io-index"
checksum = "a56d1686db2308d901306f92a263857ef59ea39678a5458e7cb17f01415101f5"
dependencies = [
 "tinyvec",
]

[[package]]
name = "unicode-segmentation"
version = "1.12.0"
source = "registry+https://github.com/rust-lang/crates.io-index"
checksum = "f6ccf251212114b54433ec949fd6a7841275f9ada20dddd2f29e9ceea4501493"

[[package]]
name = "unicode-xid"
version = "0.2.5"
source = "registry+https://github.com/rust-lang/crates.io-index"
checksum = "229730647fbc343e3a80e463c1db7f78f3855d3f3739bee0dda773c9a037c90a"

[[package]]
name = "url"
version = "2.5.2"
source = "registry+https://github.com/rust-lang/crates.io-index"
checksum = "22784dbdf76fdde8af1aeda5622b546b422b6fc585325248a2bf9f5e41e94d6c"
dependencies = [
 "form_urlencoded",
 "idna",
 "percent-encoding",
]

[[package]]
name = "urlencoding"
version = "2.1.3"
source = "registry+https://github.com/rust-lang/crates.io-index"
checksum = "daf8dba3b7eb870caf1ddeed7bc9d2a049f3cfdfae7cb521b087cc33ae4c49da"

[[package]]
name = "valuable"
version = "0.1.0"
source = "registry+https://github.com/rust-lang/crates.io-index"
checksum = "830b7e5d4d90034032940e4ace0d9a9a057e7a45cd94e6c007832e39edb82f6d"

[[package]]
name = "version_check"
version = "0.9.5"
source = "registry+https://github.com/rust-lang/crates.io-index"
checksum = "0b928f33d975fc6ad9f86c8f283853ad26bdd5b10b7f1542aa2fa15e2289105a"

[[package]]
name = "wasm-bindgen"
version = "0.2.93"
source = "registry+https://github.com/rust-lang/crates.io-index"
checksum = "a82edfc16a6c469f5f44dc7b571814045d60404b55a0ee849f9bcfa2e63dd9b5"
dependencies = [
 "cfg-if",
 "once_cell",
 "wasm-bindgen-macro",
]

[[package]]
name = "wasm-bindgen-backend"
version = "0.2.93"
source = "registry+https://github.com/rust-lang/crates.io-index"
checksum = "9de396da306523044d3302746f1208fa71d7532227f15e347e2d93e4145dd77b"
dependencies = [
 "bumpalo",
 "log",
 "once_cell",
 "proc-macro2",
 "quote",
 "syn",
 "wasm-bindgen-shared",
]

[[package]]
name = "wasm-bindgen-futures"
version = "0.4.43"
source = "registry+https://github.com/rust-lang/crates.io-index"
checksum = "61e9300f63a621e96ed275155c108eb6f843b6a26d053f122ab69724559dc8ed"
dependencies = [
 "cfg-if",
 "js-sys",
 "wasm-bindgen",
 "web-sys",
]

[[package]]
name = "wasm-bindgen-macro"
version = "0.2.93"
source = "registry+https://github.com/rust-lang/crates.io-index"
checksum = "585c4c91a46b072c92e908d99cb1dcdf95c5218eeb6f3bf1efa991ee7a68cccf"
dependencies = [
 "quote",
 "wasm-bindgen-macro-support",
]

[[package]]
name = "wasm-bindgen-macro-support"
version = "0.2.93"
source = "registry+https://github.com/rust-lang/crates.io-index"
checksum = "afc340c74d9005395cf9dd098506f7f44e38f2b4a21c6aaacf9a105ea5e1e836"
dependencies = [
 "proc-macro2",
 "quote",
 "syn",
 "wasm-bindgen-backend",
 "wasm-bindgen-shared",
]

[[package]]
name = "wasm-bindgen-shared"
version = "0.2.93"
source = "registry+https://github.com/rust-lang/crates.io-index"
checksum = "c62a0a307cb4a311d3a07867860911ca130c3494e8c2719593806c08bc5d0484"

[[package]]
name = "wasm-streams"
version = "0.4.0"
source = "registry+https://github.com/rust-lang/crates.io-index"
checksum = "b65dc4c90b63b118468cf747d8bf3566c1913ef60be765b5730ead9e0a3ba129"
dependencies = [
 "futures-util",
 "js-sys",
 "wasm-bindgen",
 "wasm-bindgen-futures",
 "web-sys",
]

[[package]]
name = "web-sys"
version = "0.3.70"
source = "registry+https://github.com/rust-lang/crates.io-index"
checksum = "26fdeaafd9bd129f65e7c031593c24d62186301e0c72c8978fa1678be7d532c0"
dependencies = [
 "js-sys",
 "wasm-bindgen",
]

[[package]]
name = "winapi"
version = "0.3.9"
source = "registry+https://github.com/rust-lang/crates.io-index"
checksum = "5c839a674fcd7a98952e593242ea400abe93992746761e38641405d28b00f419"
dependencies = [
 "winapi-i686-pc-windows-gnu",
 "winapi-x86_64-pc-windows-gnu",
]

[[package]]
name = "winapi-i686-pc-windows-gnu"
version = "0.4.0"
source = "registry+https://github.com/rust-lang/crates.io-index"
checksum = "ac3b87c63620426dd9b991e5ce0329eff545bccbbb34f3be09ff6fb6ab51b7b6"

[[package]]
name = "winapi-x86_64-pc-windows-gnu"
version = "0.4.0"
source = "registry+https://github.com/rust-lang/crates.io-index"
checksum = "712e227841d057c1ee1cd2fb22fa7e5a5461ae8e48fa2ca79ec42cfc1931183f"

[[package]]
name = "windows-targets"
version = "0.52.6"
source = "registry+https://github.com/rust-lang/crates.io-index"
checksum = "9b724f72796e036ab90c1021d4780d4d3d648aca59e491e6b98e725b84e99973"
dependencies = [
 "windows_aarch64_gnullvm",
 "windows_aarch64_msvc",
 "windows_i686_gnu",
 "windows_i686_gnullvm",
 "windows_i686_msvc",
 "windows_x86_64_gnu",
 "windows_x86_64_gnullvm",
 "windows_x86_64_msvc",
]

[[package]]
name = "windows_aarch64_gnullvm"
version = "0.52.6"
source = "registry+https://github.com/rust-lang/crates.io-index"
checksum = "32a4622180e7a0ec044bb555404c800bc9fd9ec262ec147edd5989ccd0c02cd3"

[[package]]
name = "windows_aarch64_msvc"
version = "0.52.6"
source = "registry+https://github.com/rust-lang/crates.io-index"
checksum = "09ec2a7bb152e2252b53fa7803150007879548bc709c039df7627cabbd05d469"

[[package]]
name = "windows_i686_gnu"
version = "0.52.6"
source = "registry+https://github.com/rust-lang/crates.io-index"
checksum = "8e9b5ad5ab802e97eb8e295ac6720e509ee4c243f69d781394014ebfe8bbfa0b"

[[package]]
name = "windows_i686_gnullvm"
version = "0.52.6"
source = "registry+https://github.com/rust-lang/crates.io-index"
checksum = "0eee52d38c090b3caa76c563b86c3a4bd71ef1a819287c19d586d7334ae8ed66"

[[package]]
name = "windows_i686_msvc"
version = "0.52.6"
source = "registry+https://github.com/rust-lang/crates.io-index"
checksum = "240948bc05c5e7c6dabba28bf89d89ffce3e303022809e73deaefe4f6ec56c66"

[[package]]
name = "windows_x86_64_gnu"
version = "0.52.6"
source = "registry+https://github.com/rust-lang/crates.io-index"
checksum = "147a5c80aabfbf0c7d901cb5895d1de30ef2907eb21fbbab29ca94c5b08b1a78"

[[package]]
name = "windows_x86_64_gnullvm"
version = "0.52.6"
source = "registry+https://github.com/rust-lang/crates.io-index"
checksum = "24d5b23dc417412679681396f2b49f3de8c1473deb516bd34410872eff51ed0d"

[[package]]
name = "windows_x86_64_msvc"
version = "0.52.6"
source = "registry+https://github.com/rust-lang/crates.io-index"
checksum = "589f6da84c646204747d1270a2a5661ea66ed1cced2631d546fdfb155959f9ec"

[[package]]
name = "xxhash-rust"
version = "0.8.12"
source = "registry+https://github.com/rust-lang/crates.io-index"
checksum = "6a5cbf750400958819fb6178eaa83bee5cd9c29a26a40cc241df8c70fdd46984"

[[package]]
name = "zerocopy"
version = "0.7.35"
source = "registry+https://github.com/rust-lang/crates.io-index"
checksum = "1b9b4fd18abc82b8136838da5d50bae7bdea537c574d8dc1a34ed098d6c166f0"
dependencies = [
 "zerocopy-derive",
]

[[package]]
name = "zerocopy-derive"
version = "0.7.35"
source = "registry+https://github.com/rust-lang/crates.io-index"
checksum = "fa4f8080344d4671fb4e831a13ad1e68092748387dfc4f55e356242fae12ce3e"
dependencies = [
 "proc-macro2",
 "quote",
 "syn",
]
[package]
name = "todo-dioxus"
version = "0.1.0"
authors = ["Patrick Elsen <pelsen@xfbs.net>"]
edition = "2021"

[dependencies]

dioxus = { version = "0.5", features = ["web"] }
dioxus-logger = "0.5.1"
[application]
name = "todo-dioxus"
default_platform = "web"
out_dir = "dist"
asset_dir = "assets"

[web.app]
title = "Todo App"

[web.watcher]
reload_html = true
watch_path = ["src", "assets"]

[web.resource]
style = ["style.css"]
script = []

[web.resource.dev]
script = []
# Development

Run the following command in the root of the project to start the Dioxus dev server:

```bash
dx serve --hot-reload
```

- Open the browser to http://localhost:8080
body {
  background: #209cee;
  font-family: -apple-system, BlinkMacSystemFont, "Segoe UI", Roboto, Oxygen-Sans, Ubuntu, Cantarell, "Helvetica Neue", sans-serif;
}

.app {
  height: 100vh;
  padding: 10px;
  padding-top: 20px;
  padding-bottom: 20px;
  max-width: 600px;
  margin-left: auto;
  margin-right: auto;
}

.app .heading {
  padding: 5px;
  padding-top: 10px;
  padding-bottom: 10px;
  text-align: center;
  font-size: 20px;
  font-weight: 600;
  border-radius: 7px 7px 0px 0px;

  background: #e8e8e8;

  border: 1px solid #d8d8d8;
  border-bottom: 1px solid #b4b4b4;

  background: linear-gradient(to bottom,  #f6f6f6 0%,#dadada 100%);
}

.app .todo-list {
  padding: 5px;
  background: #ffffff;

  /*border-top: 1px solid #b4b4b4;*/
  border-left: 1px solid #d8d8d8;
  border-right: 1px solid #d8d8d8;
}

.app .footer {
  padding: 5px;
  border-radius: 0px 0px 7px 7px;
  background: #ffffff;
  padding-bottom: 10px;

  border-left: 1px solid #d8d8d8;
  border-right: 1px solid #d8d8d8;
  border-bottom: 1px solid #d8d8d8;
}

.app .footer form * {
  box-sizing: border-box;
  width: 100%;
}

.todo-list .todo {
  align-items: center;
  background: #f0f0f0;
  border-radius: 3px;
  box-shadow: 1px 1px 1px rgba(0, 0, 0, 0.15);
  display: flex;
  font-size: 14px;
  justify-content: space-between;
  margin-bottom: 6px;
  padding: 3px 10px;
}

.todo-list .todo button {
  width: 20px;
  height: 20px;
  font-size: 10px;
  background: #f9f9f9;
  border-radius: 50%;
  margin: 0 4px 0 0;
  opacity: 20%;
  text-align: center;

  background: #e9e9e9;
  border: 1px solid #e0e0e0;
}

.todo-list .todo button:hover {
  opacity: 100%;
  transition: 100ms;
}

.todo-list .todo button.complete {
  background: #27C93F;
  border: 1px solid #1DAD2B;
  transition: 100ms;
}

.todo-list .todo button.remove {
  background: #FF6057;
  border: 1px solid #E14640;
  transition: 100ms;
}

.todo.completed {
  text-decoration: line-through;
}
use dioxus::prelude::*;

/// Represents a single Todo item.
#[derive(PartialEq, Clone)]
pub struct Todo {
    pub text: String,
    pub completed: bool,
}

impl Todo {
    /// Create a new todo item that is not completed.
    fn new<S: Into<String>>(text: S) -> Self {
        Self {
            text: text.into(),
            completed: false,
        }
    }

    fn complete(&mut self) {
        self.completed = !self.completed;
    }
}

/// Main application, contains title, todo list and entry form.
#[component]
pub fn App() -> Element {
    // stores the todo list. this signal is handed down to children for modification.
    let todos = use_signal(|| {
        vec![
            Todo::new("Buy milk"),
            Todo::new("Learn Rust"),
            Todo::new("Drink enough water"),
            Todo::new("Spend time with family"),
        ]
    });

    rsx! {
        div { class: "app",
            div { class: "heading",
                {"Todo List"}
            }
            div { class: "todo-list",
                for (i, _) in todos().into_iter().enumerate() {
                    TodoRow {
                        key: "{i}",
                        index: i,
                        todos: todos.clone(),
                    }
                }
            }
            div { class: "footer",
                TodoForm {
                    todos: todos.clone(),
                }
            }
        }
    }
}

/// Single Todo row, includes buttons for marking as complete and deletion.
#[component]
pub fn TodoRow(index: usize, todos: Signal<Vec<Todo>>) -> Element {
    // current todo
    let todo = todos()[index].clone();

    rsx! {
        div {
            class: "todo",
            class: if todo.completed { "completed" },
            { todo.text }
            div {
                button {
                    class: "complete",
                    onclick: move |_| {
                        let mut cur = todos().clone();
                        cur[index].complete();
                        todos.set(cur)
                    },
                },
                button {
                    class: "remove",
                    onclick: move |_| {
                        let mut cur = todos().clone();
                        cur.remove(index);
                        todos.set(cur);
                    },
                }
            }
        }
    }
}

/// Entry form to add new todo.
#[component]
pub fn TodoForm(todos: Signal<Vec<Todo>>) -> Element {
    let mut value = use_signal(String::new);
    rsx! {
        form {
            onsubmit: move |_| {
                let mut cur = todos().clone();
                cur.push(Todo::new(value()));
                todos.set(cur);
                value.set(String::new());
            },
            input {
                r#type: "text",
                class: "input",
                value: "{value}",
                oninput: move |event| value.set(event.value())
            }
        }
    }
}
use dioxus::prelude::*;
use dioxus_logger::tracing::{info, Level};
use todo_dioxus::App;

fn main() {
    dioxus_logger::init(Level::INFO).expect("failed to init logger");
    info!("starting app");
    launch(App);
}
You can see this application in action here. Note that this implementation is slightly different from the Yew and Leptos implementations, because here we pass the signal that contains the list of todo items directly down to the child components and have them change it, rather than using callbacks to update it.
Trunk
Trunk is is a build tool for Rust web frontends. It handles some of the nitty-gritty in getting a WebAssembly blog runnable in a browser. You can install it by running:
cargo install trunk --locked
If you have not done so already, you also need to enable compiling to WebAssembly. If you installed Rust using rustup, you can do this easily:
rustup target add wasm32-unknown-unknown
Some interesting points is that it has some integration with external tooling,
such as wasm-opt to optimize and slim down WebAssembly binaries, and Tailwind
CSS for generating CSS styles.
Setup
To get started with Trunk, you need to create an index.html file. This is used
by Trunk as a template, and it contains some metadata for Trunk that tells it
what assets you want to include in the build.
<!DOCTYPE html>
<html lang="en">
  <head>
    <meta charset="utf-8" />
    <title>Hello World</title>
    <link data-trunk rel="rust" data-wasm-opt="z" />
  </head>
  <body></body>
</html>
The data-wasm-opt property here tells Trunk to call wasm-opt over the resulting
WebAssembly output when doing a release build.
Assets
Most of the content of this does not matter. Trunk only cares about any tags
that have the data-trunk property. In this example, we have only one entry
that Trunk processes, which is the rel=rust one. This tells Trunk to link the
current crate into this site, and run wasm-opt on it to optimize the
WebAssembly.
You can include some CSS in the output of your site like this:
<link data-trunk rel="rust" data-wasm-opt="z" />
If you want to use Tailwind CSS, you can use this to tell Trunk to run it and include the generated CSS file in your site:
<link data-trunk rel="tailwind-css" href="src/tailwind.css" />
See the Trunk Assets documentation page for a full list of the types of assets that Trunk supports including in your application. It can run the SASS preprocessor, copy static assets such as images, inline content, copy files or directory,
Configuration
Trunk also has an additional configuration file that you can use to configure
how it works, Trunk.toml. In this file, you can configure some hooks, which
are run before, during or after the build for custom steps, set up proxying for
the Trunk development server, or change where and how your site is built.
Request Forwarding
A common pattern for developing is to use trunk serve to build and serve your
frontend, and to have it talk to your backend via API requests. To make it
easier to route the API requests to your backend, you can tell Trunk to forward
proxy requests matching a specific route to another service.
[[proxy]]
rewrite = "/api/v1/"
backend = "http://localhost:9000/"
Example: Trunk and Tailwind CSS
Example: Proxying API requests to backend
Reading
Are We Web Yet: Web Frameworks by Are We Web Yet
List of frontend web frameworks for Rust along with some statistics indicating popularity. Good for discovery of new and rising frameworks or to explore all the different ideas.
Rust Web Framework Comparison by Markus Kohlhase
Overview of different Rust frontend and backend frameworks. Unfortunately, it marks some frameworks that are still heavily used as outdated, so take that with a grain of salt.
Full-stack Rust: A complete tutorial with examples by Mario Zupan
Tutorial showing how to build a full-stack Rust web application using Yew, Tokio, Postgres, and Warp. Good tutorial to see how everything fits together, unfortunately it is a bit older and uses an outdated version of Yew that is pre-functional components. But it is still a good article to get a feeling for how a full-stack Rust application fits together.
Full Stack Rust with Leptos (archived) by Ben Wishowich
Rust and WebAssembly Book by Rust-Wasm Project
Book that explains how to use Rust to target WebAssembly. Has some good low-level information, such as how to debug and profile WebAssembly applications, keeping code size small, interoperation with JavaScript.
Shows how to setup a full-stack Rust web application with Yew and Axum from scratch.
Eze shows how to use Dioxus to implement a todo application. Uses an older version of Dioxus, the interface has since changed.
User Interface
While most development these days targets web or mobile, there are situations where a traditional local GUI applications is needed. This section explains some approaches that are popular in Rust.
In general, most Rust development targets places that the end user does not directly interact with: backend applications, servers, firmware. But there are cases where it makes sense to slap together a quick GUI for something, for prototyping or to be able to use the ecosystem of libraries that Rust offers.
Tauri
Tauri is a project that achieves something similar to Electron: it embeds a web view into an application, and allows you to use web technology to write your user interface. This can be combined with a Rust frontend application, or it can be a traditional JavaScript application. In addition, Tauri offers some ways to expose an API to the application.
Tauri is very lightweight and is a good choice for anything from quick prototyping to releasing production applications that work cross-platform.
- example: tauri with yew rs
GTK-rs
GTK is a library that spawned out of the GIMP image editor, and has since become the standard UI framework for the GNOME desktop environment, which is used by many Linux distributions. GTK works on most platforms and is conceptually quite simple.
The GTK-rs project aims to create wrappers around it to expose it’s functionality natively to Rust, making it possible to write portable GUI applications. They have succeeded in making it somewhat idiomatic, working around the quirks of GTK with decent documentation and procedural macros.
- example: gtk rs calculator
egui
Reading
Are We GUI Yet by Are We GUI Yet
A community-maintained directory tracking the state of GUI development in Rust. It catalogs frameworks by approach (native bindings, pure Rust, immediate mode, reactive) with download statistics, and aggregates news about the evolving ecosystem.
Game Development
Game Development often requires one to write code that performs relatively well, because even small latencies are noticeable to end-users. Game engines have to be able to track and update a relatively complex world, run physics simulations, run game logic, and render the world in 2D or 3D.
Are We Game Yet tracks the progress of the Rust ecosystem around game development. But as of writing, there are two game engines that have received some amonut of popularity.
Bevy
TODO
Fyrox
TODO
Embedded
Embedded development means writing firmware that runs bare-metal on microcontrollers. This is often needed when building electronics. Modern computers have operating systems that abstract away hardware details, but embedded systems typically run directly on the hardware. The goals for embedded programming are high reliability and predictability, sometimes with real-time constraints (meaning that the software has to react to events within a specific time frame, such as controlling a motor or responding to a sensor).
Embedded development works a bit differently compared to regular application development. Embedded microcontrollers are tiny, they have flash storage (for storing their firmware) and RAM that is on the order of kilobytes to megabytes, not large enough for a full operating system.
Overview
What embedded development looks like
Embedded microcontrollers often use simple 32-bit or 8-bit Instruction Set Architectures (ISA). Rust has good support for ARM-based ISAs like ARMv6 or ARMv7, and also RISC-V, but not for 8-bit ISAs or more exotic ones. Most embedded systems are ARM based these days, so that is fine.
Embedded chips have physical electrical pins. Typically, these can be configured to be used as General-Purpose Input/Output (GPIO) pins, or they can be configured as a peripheral, where one or more pins implement some protocol. Peripherals allow you to map some of the output pins to internal hardware that implements a certain protocol, and the hardware will implement part of the protocol. Common peripherals are:
- Pulse-Width Modulation (PWM) peripherals allow you to quickly toggle a digital pin on and off at a specific carrier frequency, and control how long it is turned on (the duty cycle). This allows you to approximate an analog output, and allows you to control some external devices that take an analog input, such as servo motors.
- Analog-Digital Converter (ADC) allows you to read analog voltages, for example to get a reading from a sensor that has an analog output.
- Univeral Asynchronous Receiver-Transmitter (UART) (also commonly just called serial) is a common protocol used to connect computers to an embedded system to read logs from it or control it.
- I²C (also called Two-Wire Interface, or TWI) is a simple interface that is used to connect to other chips or sensors over short distances.
- Serial Peripheral Interface (SPI) is a three-wire interface that is used to connect to other chips or sensors over short distances.
- Controller Area Network (CAN) Bus is commonly used for longer-distance communication, such as connecting multiple systems in an automotive or robotics system.
- Universal Serial Bus (USB) is commonly used to connect embedded devices to computers or phones
To configure these peripherals, most embedded chips use memory-mapped registers. These are special memory locations (addresses), where writing certain values configures the hardware to do specific things.
Finally, embedded chips often use interrupts. These can be configured and cause the chip to jump to a specific address. For example, timers are often implemented as interrupts, where you configure them to jump to a specific function when they fire, or peripherals use them to run some code when there is incoming data (or when they are ready to write more data).
Challenges in embedded development
What makes writing embedded software challenging is that you are often trying to do multiple things at once (communicate with other chips, sensors, receive control input). You may also have some real-time constraints, where you have to react to certain input events in a specific time-frame. But you are not able to use threads, there is only a single core, and you do not have a Memory-Control Unit (MCU) (also called Memory-Management Unit, or MMU) that you can use to prevent threads from inadvertently accessing or overwriting each other’s memory.
There are Real-Time Operating Systems (RTOS) that you can use, which provide scheduling and task management, or you have to manually implement some kind of multi-threading or state machine approach to handle concurrent operations.
Another challenge often encountered is the ability to see what the microcontroller is doing, often achieved using a debugger or by logging information to a serial port. The probe-rs project helps here by making it easy to flash a binary onto the microcontroller and debug it using a debugger.
Using Rust for embedded development
Embedded development is one of the areas where Rust really shines. The ability to use zero-cost abstractions to write idiomatic code, that still compiles down to tiny executables that run on underpowered microcontrollers makes for a pleasant development experience. The ecosystem’s ability to abstract hardware makes it possible to easily retarget firmware for different microcontrollers, something which is usually not as easy when writing in C.
Besides the obvious memory-safety and thread-safety benefits of using Rust, it has some facilities that you can use to express constraints of the hardware and allow the computer to check that you code is correct (for example the type and ownership system), and to write useful code to do multiple things at once without using threads (the async support). There are some frameworks that you can use to write firmware in Rust that can take care of:
- Peripherals: Provide abstractions for using and configuring the peripherals of the embedded microcontroller. You can use the type system to make sure that you are using peripherals correctly (such as limiting them to be used with the pins that they support, or ensuring that they are configured correctly when you use them).
- Scheduling: Provide abstractions to allow you to write tasks and schedule them, ensure that you do not have dead-locks. Some frameworks allow you to prioritize tasks, so that you can keep real-time constraints.
- Communicate: Provide low-level abstractions the tasks to communicate.
Using other Rust crates
If you build embedded firmware in Rust, you can use many crates from the Rust
ecosystem. However, you have to keep in mind that many of these crates are not
designed with embedded systems in mind, and may not be suitable for use in
embedded firmware. Specifically, on microcontrollers you typically do not have
an operating system, so you can only use crates that work with
no_std. Depending on how you setup your project, you may also not
have a memory allocator, meaning that you cannot use dynamic data structures
like Vec, String or HashMap. However, many popular Rust crates either
support no_std out-of-the-box, or have features that allow you to use them
without a memory allocator (either by disabling a default std feature, or
enabling a no_std feature).
Frameworks
In this section, we will present some popular frameworks in the Rust ecosystem for writing embedded firmware, and discuss briefly what their benefits (and potentially drawbacks) are.
If you want to use a framework that is easy to get started with and allows you to write expressive Rust code, you should consider using Embassy. If you know what you are doing and you just want access to the raw hardware, you should consider using Embedded HAL. If you want a framework that allows you to do multiple things at once but also give you hard guarantees about not deadlocking, you should look into using RTIC.
If you need more of an operating system, because you need stronger isolation between tasks, consider using Tock or Hubris, which are operating systems that provide a higher level of abstraction and isolation, at the expense of some flexibility and needing more resources.
Embedded HAL
Embedded HAL is the Rust project’s attempt at building useful abstractions over several microcontrollers, such that you can write code (drivers, firmware) that are generic over the underlying hardware.
Embedded HAL provides fundamental abstractions for hardware access through a set of traits that define standard interfaces for various peripherals. It forms the foundation upon which higher-level frameworks like Embassy are built. It is simple and works well across many platforms. It does not provide built-in async support, so if you want the microcontroller to do multiple things at the same time, you’ll need to handle scheduling and concurrency yourself. However, this also means it supports a wider variety of targets.

The way Embedded HAL works is quite neat: they use svd2rust to parse SVD
files, which describe the hardware registers and their functions, and generate
Rust code from them. This is called the Peripheral Access Crate (PAC). Then, a
safe abstraction layer is built on top of the PAC, called the Hardware
Abstraction Layer (HAL). The HAL provides a safe and easy-to-use interface for
interacting with the hardware. The HAL crate also implements traits from the
embedded-hal crate, this allows you to write code and drivers that are generic
over the underlying hardware.
Embassy
Embassy is one of those projects that makes writing embedded code feel like magic. It is a framework for building firmware for a variety of mostly ARM-based microcontrollers.
What makes Embassy special is that it supports async. The async programming model maps very well to embedded systems: there are often many simultaneous pieces of code waiting for various events to happen, for example button presses, timers firing, or data coming in from various ports.
If you were to write firmware manually, you would have the choice of manually programming timers, writing interrupt handlers and building a giant, complicated mess, or you would have the choice of using a real-time operating system which comes with its own headaches.
Embassy uses hand-written Hardware Abstraction Layers. This approach gives developers more control over the API design and allows for better optimizations. Embassy implements a layered architecture consisting of:
- A low-level register access layer
- A hardware abstraction layer (HAL) providing safe access to peripherals
- Higher-level device drivers and protocol implementations
- An async/await runtime specifically designed for resource-constrained embedded systems
The async runtime efficiently transforms interrupts into task wakeups, allowing you to write sequential-looking code that actually runs concurrently without the overhead of an RTOS.
Embassy lets you write readable and portable code and avoid all of the details on how to program the hardware in a way to do what you want. For example, a loop that toggles an LED connected to a pin every 150 milliseconds looks like this:
#![allow(unused)]
fn main() {
#[embassy_executor::task]
async fn blink(pin: AnyPin) {
    let mut led = Output::new(pin, Level::Low, OutputDrive::Standard);

    loop {
        led.set_high();
        Timer::after_millis(150).await;
        led.set_low();
        Timer::after_millis(150).await;
    }
}
}
What is nice about Embassy is that you don’t have to be a seasoned firmware developer to understand how this works, it reads like regular, blocking code. But behind the scenes, the executor programs a timer that the microcontroller has, and registers an interrupt handler that when it fires will resume the future. Embassy is great if you just want your code to work without worrying about the underlying hardware details.
RTIC: Real-Time Interrupt-driven Concurrency
RTIC is a framework for building concurrent applications on microcontrollers. Unlike Embassy which uses async/await for concurrency, RTIC is based on a different approach using interrupt priorities and message passing between tasks.
RTIC provides static priority-based scheduling, meaning tasks have fixed priorities assigned at compile time. It leverages Rust’s type system to ensure that shared resources are accessed safely without runtime overhead. The framework handles the scheduling and dispatching of tasks based on hardware interrupts, making it particularly well-suited for applications with hard real-time requirements.
One of RTIC’s strengths is its compile-time verification of resource sharing - the compiler can guarantee that there will be no data races between tasks accessing shared resources.
Tock
Tock is an operating system for microcontrollers that is written in Rust and focuses on running mutually untrusted applications. It’s a bit different from the other frameworks in this section, in that it is not just a framework but an operating system. It uses Rust’s type system to create a hardware abstraction layer that enforces access control policies at compile time.
Tock has a security-focused architecture that separates the kernel into two components: a small, trusted core kernel and a collection of less trusted capsules that implement specific functionality. Applications run in isolated sandboxes, preventing them from interfering with each other or with the kernel.
This design makes Tock particularly well-suited for scenarios where multiple applications from different sources need to run on the same hardware, such as IoT devices or sensor networks where different stakeholders may provide different parts of the software stack.
Hubris
Hubris is a microkernel operating system for embedded systems developed by Oxide Computer Company. Unlike more general-purpose embedded frameworks, Hubris is specifically designed with a focus on security, reliability, and formal verification.
Hubris uses a strict separation of components with explicit message passing for communication. This architecture helps prevent bugs in one component from affecting others. Each component runs in its own address space with restricted permissions, making the system more resilient against both accidental and malicious failures.
The system is designed to be statically analyzed and formally verified, providing strong guarantees about its behavior. It is developed by the Oxide Computer company, which uses it to write firmware for their products.
Reading
Rust Embedded Book by Rust-Embedded Project
The official guide to embedded Rust development. Covers setting up a development environment, writing your first no_std program, working with registers and peripherals, and common patterns for embedded development. Start here if you are new to embedded Rust.
Embassy Book by Embassy Project
Official documentation for the Embassy framework. Walks through setting up a project, writing async tasks, using HAL drivers for common peripherals (GPIO, UART, SPI, I2C), and deploying to supported microcontrollers.
Deploying Rust in Existing Firmware Codebases (archived) by Ivan Lozano and Dominik Maier
Google describes their approach to incrementally introducing Rust into
existing C/C++ firmware, focusing on new code and security-critical
components rather than full rewrites. Covers the practical challenges:
working with only core, finding no_std-compatible crates, configuring
custom LLVM targets, and maintaining backward compatibility through thin
wrapper shims. Demonstrates that Rust can match C/C++ performance in
bare-metal environments while eliminating memory safety vulnerabilities.
Async Rust vs RTOS Showdown (archived) by Dion Dokter
Compares Embassy’s async approach against an RTOS (FreeRTOS) for a simple firmware on an STM32F446 ARMv7 microcontroller. Measures binary size, RAM usage, and interrupt latency to help you decide between the two approaches.
Implementing async APIs for microcontroller peripherals (archived) by Justin Beaurivage
Explains how to implement async APIs on top of hardware abstraction layers for microcontroller peripherals, using the ATSAMD HAL as a concrete example. Useful if you want to understand how Embassy-style async drivers work under the hood.
Hubris Reference by Oxide Computer Company
Reference documentation for Hubris, Oxide’s microkernel OS for embedded systems. Covers the task model, IPC mechanism, build system, and how components are isolated from each other.
The Tock Book by Tock developers
Documentation for the Tock operating system. Covers the kernel architecture (trusted kernel vs untrusted capsules), how applications are sandboxed, and how to write both kernel capsules and userspace applications.
Configuration
Command-Line Interface
Rust is commonly used to write command-line applications. The command-line, especially on UNIX and Linux systems, is very powerful and a good interface to build tooling, services, and applications deployed on servers.
Command-line services usually have two requirements: they need to parse the command-line arguments, and they need to output some data. Depending on The kind of command-line application, the shape of the data that they output looks different. Command-line applications usually fall into one of a few categories:
- Tools perform a single action, such as
git commitorgit push. They usually output some result data or an error message. Optionally, they can usually also output the data in some machine-readable format, such as JSON or CSV. This allows their output to be piped into other tools for further processing. - Read-evaluate-print loops (REPLs) are interactive environments that allow
users to enter commands and receive immediate feedback. Examples include
python3,irborsqlite3. These are usually used for debugging or interactive development. - Services run in the background and provide a way to interact with them,
such as
sshorhttpd. They usually output a stream of logs. They are usually not started by the user, but rather by a system service (systemd), a container runtime (Podman) or by a script. - Applications are standalone programs that perform a specific task, such as
htoporvim. They usually have an interactive text-based interface and stay active until the user exits them.
Besides the differences in their purpose and output data format, command-line tools usually have a consistent interface for launching and interacting with them. This interface typically includes options for specifying input and output files, using environment variables to control behaviour, and returning a status code that indicates success or failure.
Parsing Command-Line Arguments
Command-line arguments are quite standardised. Tools often have subcommands, flags and positional arguments.
- Subcommands allow a single tool to have multiple commands, such as
git commitorgit push. You only need them if your tool needs to perform multiple actions (with different sets of flags and positional arguments). - Flags are used to modify the behavior of a command, such as
-vor--verbose. Some flags can take values, such as--log-level infoor-l info. It is also often possible to set defaults using environment variables. For example, specifyingLOG_LEVEL=infowill set the log level to info by default, but setting the flag will override it. - Positional arguments are used to specify the input or output of a command.
For example,
cat main.c.
Rust has a few crates that allow you to parse command-line arguments. The most popular ones are:
- Command-Line Argument Parser (CLAP)
- StructOpt
- Argh
One big difference between crates is whether they use a declarative approach, where you define the command-line interface by writing structs and have the crate derive the parsing logic from them. This is the approach taken by StructOpt and Argh. CLAP, on the other hand, uses an imperative approach, where you build the command-line interface by calling methods on a builder. The declarative approach is often more concise and easier to read, but the imperative approach gives you more control over the command-line interface.
If you are unsure which crate to use, the CLAP crate is the most popular crate for parsing command-line arguments. It allows you to define your parser both declaratively and imperatively, but the declarative approach is often easier to get started with.
CLAP
StructOpt
Argh
Input
If you build command-line interfaces that accept user input interactively,
Rustyline
Inquire
Interactive Interfaces
Many command-line tools just output text or data. This is something you can do
with the println! macro. If your tool outputs optional log information, you
can use the eprintln! macro, which outputs this on the standard error stream
(this allows it to be redirected).
Long-running services and daemons typically only output logs. In that case, you can use one of the crates from the logging ecosystem.
However, some utilities may also require interactive interfaces. There are Rust crates that you can use.
https://lib.rs/crates/ratatui
ratatui
Reading
https://rust-cli-recommendations.sunshowers.io/cli-parser.html
https://infobytes.guru/articles/rust-cli-clap-guide.html
https://www.naurt.com/blog-posts/naurt-introduction-to-command-line-arguments-in-rust
Interfacing
There are various reasons why you may want to interoperate with another language in a Rust project. Code is rarely written in a vacuum, but rather the code you write needs to interact with an existing system. Or you need to make use of a library writte nin another language. The reverse could also be true: maybe you did write something useful in Rust, and you want to make it usable for people in another language.
Reasons for interop
Sometimes, you want to be able to use a Rust library in other languages. This could be because you’ve written something that is performance-sensitive in Rust, and the application you want to embed it into is written in a higher-level, but simpler language. Or the Rust library you have written focusses on correctness. Some examples are:
rustlsis used by Curlpolarsis a popular data frame library that can be easily consumed in Python
Other times, you want to use some existing (typically native) library in your Rust project. You may want to do this because there is no Rust library to do what it does, or because it is faster/more complete than native Rust alternatives.
- SQLite is commonly used in Rust as
rusqlite - several compression libraries have Rust wrappers
Another reason you may need bindings is because your Rust code runs embedded within some runtime that uses a different native language.
- Rust can run in the browser as a WebAssembly program, and needs to interact with JavaScript to access browser APIs.
- You can build an Android application with Rust, but you need to bind to the JVM to access native Android APIs.
Whatever your reason is for interoperating with a different language in Rust, this chapter will give you the context you need to safely interact with foreign languages, and show you the tools you need.
Basics of language interop
In order for native code to call other native code, it generally needs two pieces of information: the address of the function to call, and how to pass arguments and receive return values. This knowledge is called the Application Binary Interface (ABI).
Rust does not have a stable ABI. But for interfacing with other language, this does not matter, it only matters if Rust interfaces with (other) Rust libraries through dynamic linking. When talking to other native code, generally the lowest common denominator is the C ABI.
Implementing interop with other native languages therefore typically involves squeezing types and function calls through some kind of C ABI. It means you need wrapper functions that use the C ABI, and you somehow need to tell the other language what they are called and how to find them. Similarly, to access code from another language, Rust needs to be told what types there are, what functions there are and where to find them. A lot of the tools in this section help automate this process so you don’t have to write and maintain these bindings by hand.
Another case is when you use languages that don’t run natively, but use an interpreter. In this case, your Rust types and functions need to be registered with the interpreter, so that it can call into them.
Interopability of Async code
If you want to call asynchronous functions across a language boundary, there is some more work to do. Asynchronous functions return futures, and in the case of Rust these need to be polled and need to have an active asynchronous runtime.
Sometimes, there are ways to glue a different language’s asynchronous runtime with Rust, and you can easily exchange futures and poll them across the language boundary. Other times, you may need to write wrapper types, or convert your async methods into synchronous ones, that spawn the work off into a background thread. Again, some glue frameworks can handle this for you, but it depends on the language that you are interacting with. Some languages just don’t have support for asynchronous programming, or their models are too different from Rust’s to be compatible.
Dangers of interoperating with other languages
Mixing Rust and other languages is often dangerous territory. The Rust language (and by that, the Rust compiler) can keep guarantees about your code, such as ensuring that you do not keep references around for longer than they are alive (through the lifetime system). When you send values across to another language, you need to take good care that the invariants that the Rust compiler enforces are also upheld on the other side.
You need to think about:
- Ownership: when you pass types through the language boundary, does the other language take ownership?
- Thread-safety: are you able to use types from multiple threads? Will the other language allow using your Rust types from multiple threads?
- Copying and Cloning: how can you clone or copy types from the other language? How will the other language copy or clone your Rust types?
- Error handing: what facilities does the other language have for expressing errors? For example, if the other language uses exceptions, how will you catch those and represent them as Rust errors when you call into its code?
- Memory management: does the other language do manual memory management? Does it have a garbage collector? How can you make sure that references to types that you receive are cleaned up?
- Mapping types: how can you map the other language’s types into native Rust types? For example, how can you map strings from the other language into Rust strings? Does the other language enforce that strings are UTF-8 encoded?
In some cases, the tool can handle a lot of this for you automatically, or even enforce that Rust constraints are properly expressed in the other language. But other times, you need to handle these yourself.
You also have to think about the execution model of the target language. Some languages run single-threaded, and you have to make sure that you don’t call into the language from a different thread.
Patterns for Rust interop
- the
-syspattern: allowing other crates to access the raw C api - using features to expose the api
- using a
build.rsscript
How this chapter is structured
In this chapter, we will walk through several tools that can be used to interoperate with different languages and Rust. Sometimes, this interoperability is two-sided: you can use it both to call from Rust into the other language, and to call from the other language into Rust.
First, we will walk through some tools that help with interfacing with multiple languages. In the sections of this chapter, we will talk though approaches for specific languages.
UniFFI
UniFFI is a Mozilla project that aims to make it easy to interface with other languages from Rust. It supports generating bindings for Kotlin, Swift, Python and WebAssembly. There is third-party support for generating bindings to JavaScript, Kotlin Multiplatform, Go, C#, Dart and Java, but these are not officially supported. It also has support for generating bindings for asynchronous code for languages that support it, for example Python and Kotlin.
It is used in production by Mozilla, making it an interesting project to use, because it means it comes with some amount of stability.
Interoptopus
Interoptopus is another tool for generating cross-language bindings. It supports C#, C and Python, but promises that it is easy to add support for more languages.
Diplomat
Diplomat is a tool for generating bindings for Rust for other languages. It supports C, C++, Dart, JavaScript/TypeScript, Kotlin and Python.
Language-Specific Interop
The other sections in this chapter discuss specific tools which can be used to interoperate with other languages. Depending on your use-case, these might be a better fit, because they are more tailor-made to the language that they are covering.
Reading
Rust Language Interop by Maximilian Goisser
Maximilian gives an overview of tools that allow you to interface Rust with various languages.
Nomicon by Rust Language
The Rustonomicon is a guide to unsafe Rust programming. It covers the meaning of safety and unsafety, unsafe primitives, techniques for creating safe abstractions from unsafe code, and advanced topics including FFI, subtyping, variance, and uninitialized memory. Essential reading for anyone writing unsafe code or FFI bindings.
Linking Rust crates (archived) by Felix S. Klock II
Felix explores how Rust crates are linked together, demonstrating the different
crate types (rlib, dylib, cdylib, staticlib) through practical examples using
rustc directly. He explains the tradeoffs between static and dynamic linking
and how compiler flags like -C prefer-dynamic affect the result.
Binding Rust to other languages safely and productively (archived) by Émile Grégoire
Émile describes an approach to generating language bindings from Rust using a single abstract API model. By defining a C-compatible interface once and generating bindings for each target language (Java, .NET, etc.), the technique reduces an O(N*M) problem to separate O(N) and O(M) problems and produces idiomatic APIs in each language.
https://viruta.org/rust-stable-abi.html
https://blaz.is/blog/post/we-dont-need-a-stable-abi/
https://doc.rust-lang.org/reference/abi.html
https://www.possiblerust.com/guide/inbound-outbound-ffi
C
The C language is a widely used, general-purpose programming language that is known for its efficiency and portability, but also for its lack of memory safety, which is the cause of many serious vulnerabilities. It is often used as a foundation for other programming languages and is a common target for interoperability. Many operating systems are implemented in it, which often makes it the lowest common denominator for interop with other ecosystems.
Interfacing with C code is commonly necessary in order to use C libraries. Many interpreters for programming languages, compression libraries, database connection libraries expose a C API that they expect you to use. The advantage of C is that is does not need a runtime, and many libraries are written in a way to have few dependencies to be portable, making it easy to embed C libraries in your Rust project. There is a large ecosystem of C libraries that can be used in Rust projects.
Going the other way, if you want your Rust libraries to be used by other projects that are not Rust-based, the easiest way to achieve this is often by exposing a C API that can be used by other languages.
Rust has built-in support for interfacing with C APIs using the extern "C"
keyword. Rust can interface with C APIs without runtime overhead. However, there
is also good tooling that can help you generate C bindings for Rust libraries,
and maintain them over time.
The C ABI is a widely supported standard across programming languages. Rust can interface with it without runtime overhead, thanks to its zero-cost abstraction principle.
When to use C interop
Interoperating with C libraries is a risk factor, because they are not guaranteed to be thread-safe, and may have undefined behavior in certain situations. If you can stick to only using native Rust libraries, you should do so. However, there are situations where you do not have a choice, and that is when doing interop is appropriate.
C interop is necessary in several scenarios:
- Using existing C libraries (compression algorithms, database drivers, etc.). In many cases, there are native Rust alternatives to popular C libraries that you should consider using instead, if they work for your use-case.
- Accessing operating system interfaces that expose C APIs, unless they have
already been wrapped in a safe Rust API, such as
libcor thewinapicrates. - Exposing Rust code to other languages through C as a common interface. You should check if some higher-level FFI tools work for your use-case, because they can help you preserve Rust’s safety guarantees in some cases.
- Integrating Rust components inside C-based projects
If you do decide to use C interop, you should make sure to have good unit-tests to ensure that your bindings are correct and safe. You should consider using tooling like Dynamic Analysis to check that your bindings do not violate memory safety or introduce undefined behavior.
Binding to C libraries
The Rust ecosystem follows a consistent pattern for C interop with a two-crate
structure. Usually, if you wrap a native C library named libfoo.so, you will
create two Rust crates: foo-sys, which exports the raw (unsafe) bindings for
the library, and foo, which provides a safe wrapper around those bindings. The
foo-sys crate is also called the
-sys package.

There are two reasons for doing this: it provides a clear separation between the
unsafe and safe interfaces. But more importantly, it allows other crates to
directly access the raw unsafe bindings if they need to. In Rust only a single
crate can link to a specific native library (in other words, you
cannot have two crates that independently link with libfoo.so). So having
separate crates for this allows other crates to link with and directly access
the unsafe bindings if they need to, bypassing the safe interface.
Examples
Examples: rusqlite/libsqlite3-sys, openssl/openssl-sys,
flate2/libz-sys
Exchanging Data between Rust and C
Data Types
When working with C interop, you have to keep in mind how C types map to Rust
types (and vice versa), and what the ownership, lifecycle and mutability
constraints are. For many C types, the std::ffi module and the libc crate
provide safe abstractions over the raw C types that allow them to be converted
into native Rust types.
| C Type | Rust Type | Notes |
|---|---|---|
int | i32, c_int | Integer, size is platform dependent |
char* | *const c_char, CStr | Raw pointer (unsafe) |
struct foo | #[repr(C)] struct | Field-by-field mapping |
void* | *mut c_void | Type-erased pointer |
T(func*)(...) | extern "C" fn(...) -> T | Function pointer |
char[N] | [c_char; N] | Fixed-size array |
size_t | usize/size_t | Platform-dependent size |
bool | bool/c_bool | C99 _Bool or custom |
It’s important to note that C strings (char *) don’t map directly to Rust’s
String/&str type. C strings are null-terminated char arrays, and are not
necessarily UTF-8 encoded. Rust provides utilities in the std::ffi module like
CString and CStr to safely convert between C strings and Rust strings.
Memory Management
Memory management is something you have to watch out for. When data crosses the boundary:
- Memory allocated in Rust and passed to C must either be ’static or kept alive for the duration of C’s usage
- Memory allocated in C and passed to Rust must be explicitly freed (typically by the side that allocated it)
- Ownership transfer must be clearly documented and handled correctly
Exporting C Libraries
If you export C bindings to your Rust library, you will typically do one of two things:
- Create a separate crate for the exported bindings. This is what
rustlsdoes. This has the advantage of decoupling the Rust library from the FFI bindings, and lets you remove tooling and configuration necessary for generating the C library from your main Rust library. - Create a feature flag in your library crate which enables the generation of C bindings.
To tell Cargo to export a C-compatible library, you need to specify the
crate-type field in your Cargo.toml file. Here, staticlib is used to
generate a static library (libfoo.a), and lib is used to generate a dynamic
library (libfoo.so).
[lib]
name = "foo"
crate-type = ["lib", "staticlib"]
For example, the rustls crate exports its C bindings in the
rustls-ffi crate.
bindgen
Bindgen generates Rust FFI bindings from C header files. It parses C headers and
produceThis process is typically managed through Cargo’s build script system,
with build.rs handling the generation of bindings and configuration of the
build environment.s matching Rust code with appropriate type mappings.
It does not create a safe wrapper around the raw FFI bindings, but it allows you to keep the raw bindings in sync with the C API by automatically generating them from the header, rather than having to manually write and maintain them.
How it works
Bindgen uses Clang to parse C/C++ headers and generates unsafe Rust bindings for
them. It will automatically map C primitive types to the appropriate Rust
equivalents, for example int to i32, char to c_char, or char * to
CStr. It will convert C structs to Rust structs with #[repr(C)] to preserve
memory layout. It will translate enums with proper discriminant values, and
unions with proper layout and alignment. It finally generates raw
unsafe extern "C" function declarations that you can call from (unsafe) Rust.
Bindgen is typically integrated into your project’s build.rs script. You can
configure it to only include specific types or functions (if you only want to
expose a subset of the API). You can apply custom attributes to generated types.
It can handle opaque types, and rename symbols for a better Rust integration
Tools for C integration
Several crates help with C library integration:
pkg-config: Finds system-installed librariescc: Compiles C sources with system compilercmake: Builds libraries that use the CMake build system
A common pattern in build.rs scripts is to try finding the library on the
system first, with a fallback feature to build from vendored sources.
Example: rusqlite
rusqlite demonstrates bindgen integration with SQLite:
- Uses
libsqlite3-sysfor raw bindings - Provides both system linking and bundled SQLite options
- Converts C error codes to Rust Result types
cbindgen
cbindgen generates C (or C++) header files from Rust code, allowing you to expose Rust functions to C. It creates the header files that describe your Rust API in terms C can understand.
To use cbindgen, you’ll need to:
- Mark functions with
#[no_mangle]andpub extern "C" - Use
#[repr(C)]for exported structs and enums - Configure cbindgen through a build.rs script
cbindgen can handle Rust-specific types like Option<T> by generating
appropriate C equivalents. For example, an Option<*mut T> might be represented
as a nullable pointer in C.
Example: tquic
tquic is a QUIC implementation that demonstrates how to expose Rust code to C:
- Uses cbindgen to generate C headers
- Shows memory management patterns across the FFI boundary
- Designs an API that feels natural to C users
Notable C Binding Libraries
Several well-established Rust libraries demonstrate effective C interoperability:
- rusqlite: Bindings to SQLite
- openssl-rs: Rust interface to OpenSSL
- sdl2-rs: SDL2 graphics/audio library bindings
- gtk-rs: GTK and other GLib-based libraries
- libc: Low-level bindings to platform C libraries
- winapi: Windows API bindings
cargo-c
cargo-c is a cargo subcommand that makes building C bindings easier. It provides a simple way to generate C headers and static libraries from Rust code. This tool automates the process of:
- Generating headers with cbindgen
- Building static and dynamic libraries
- Creating pkg-config files
- Installing the libraries and headers in the right location
It’s particularly useful for distributing Rust libraries that need to be consumed by C/C++ projects or other languages through their C FFI.
Reading
How to create a C binding to a Rust library by Gris Ge
The bindgen User Guide by Rust Project
The bindgen User Guide shows how to set up bindgen, and how to use it in a Rust project.
cbindgen User Guide by Mozilla
The cbindgen User Guide shows how to set up cbindgen, and how to use it in a Rust project.
Foreign Function Interface by Rust Project
In this chapter of the Rust Nomicon, Foreign Function Interfaces are explained. The chapter outlines how Rust can bind with other languages, such as C, and gives some examples.
Rust to C - FFI Guide by Quin Darcy
Quin shows how to call C code from Rust in this example repository. He has set up an example whereby some C library is called from Rust, and walks through how it works.
C++
https://google.github.io/autocxx/
https://cxx.rs/
https://github.com/pcwalton/cxx-async
Reading
How to Rewrite a C++ Codebase Successfully (archived) by Philippe Gaultier
Phillipe explains how he got to inherit a legacy C++ codebase that used in production, but is not in a good state. He explains his thinking process and what lead him to make the decision to do an incremental rewrite in Rust. The project in question is a library that is used in a lot of places, from mobile (Android and iOS) to embedded (ARM microcontrollers) to the backend.
In the process, he made use of some useful techniques such as fuzzing, and used various Rust FFI tooling to make the rewrite easier, as he was incrementally porting functionality from the legacy codebase to Rust.
He also explains how he got cross-compilation working for the different targets, resorting to using the Zig compiler to cross-compile for iOS.
Dart
https://pub.dev/packages/flutter_rust_bridge
Erlang
https://github.com/rusterlium/rustler
Haskell
https://engineering.iog.io/2023-01-26-hs-bindgen-introduction/
https://www.well-typed.com/blog/2023/03/purgatory/
JavaScript
https://github.com/rustwasm/wasm-bindgen
https://docs.rs/js-sys/latest/js_sys/
https://docs.rs/web-sys/latest/web_sys/
https://napi.rs/
Java
https://github.com/jni-rs/jni-rs
https://duchess-rs.github.io/duchess/
OCaml
https://github.com/tizoc/ocaml-interop
https://github.com/zshipko/ocaml-rs
Python
https://pyo3.rs/v0.25.1/
https://github.com/PyO3/maturin
Ruby
Swift
https://chinedufn.github.io/swift-bridge/
Checks
The Rust compiler catches a lot through its type system and borrow checker, but there are properties of a project that the compiler does not verify: formatting consistency, semver compliance, dependency security, spelling, and more. The Rust ecosystem has tooling to check each of these automatically, and this chapter covers the most useful ones.
Not all of these checks will be relevant to every project. For each one, you need to decide whether it runs in CI on every pull request, on a schedule, or only locally. Some checks (formatting, linting) are fast and cheap enough to gate every merge. Others (dependency auditing, feature powerset testing) are more expensive and may be better suited to scheduled runs. The summary table below gives recommendations for each tool.
Note that several of these checks go beyond Rust source code — they cover your
dependency graph, your Cargo.toml manifests, and your documentation.
Summary
Which checks matter depends on the project: a published library needs semver and
minimum version checks that a binary never will, and cargo-vet is overkill for
a personal project but essential for security-sensitive work. The table below
summarizes each tool and suggests when to run it, ordered by lifecycle stage.
| Goal | Tool | Cost | When |
|---|---|---|---|
| Formatting | rustfmt | Low | Commit |
| TOML Formatting | taplo | Low | Commit |
| Spelling | typos | Low | Commit |
| Linting | clippy | Medium | Merge |
| Unused Dependencies | cargo-machete | Low | Periodic |
| Auditing Dependencies | cargo-deny | Medium | Merge |
| Auditing Dependencies | cargo-vet | High | Merge |
| Outdated Dependencies | cargo-upgrades | Low | Periodic |
| Crate Features | cargo-hack | High | Merge |
| SemVer | cargo-semver-checks | Medium | Release |
| Minimum Versions | cargo-minimal-versions | Medium | Release |
| MSRV | cargo-msrv | Medium | Release |
Commit checks are fast enough to run locally as pre-commit hooks or format-on-save. Merge checks gate pull requests in CI. Release checks only matter when publishing a new version. Periodic checks run on a schedule (weekly, for example) to flag maintenance work without blocking day-to-day development.
Reading
Formatting
Consistent formatting removes an entire category of friction from collaboration.
Code reviews focus on substance rather than style, and contributors don’t need
to guess where to put braces or how far to indent. Rust has a standard
formatter, rustfmt, that ships with the toolchain and is used across nearly
all Rust projects. Because the community has converged on a single style, Rust
code looks the same whether it is an open-source library or an internal
codebase.
Rustfmt
Rustfmt parses your Rust source files, applies formatting rules, and writes the
result back. It usually comes preinstalled with Rust, or can be added with
rustup component add rustfmt. To format all code in a package:
cargo fmt
To check whether code is formatted without modifying it (useful in CI), pass
--check. This returns a nonzero exit code if any file needs formatting:
cargo fmt --check
Configuration
Rustfmt’s defaults are intentionally opinionated and used by the vast majority
of Rust projects. If you need to override specific rules (for example, to change
how imports are grouped), you can create a rustfmt.toml or .rustfmt.toml
file in the project root. See the configuration reference for
available options.
Some options are unstable and require a nightly toolchain:
cargo +nightly fmt
Examples
Here is one example of a project which has a rustfmt.toml to configure
rustfmt, and some CI steps which enforce the formatting in CI.
- src/
/target
stages:
  - check

formatting:
  stage: check
  image: rust
  script:
    - cargo +nightly fmt --check
# This file is automatically @generated by Cargo.
# It is not intended for manual editing.
version = 4

[[package]]
name = "check-formatting"
version = "0.1.0"
[package]
name = "check-formatting"
version = "0.1.0"
edition = "2021"

[dependencies]
imports_granularity = "Crate"
group_imports = "One"
edition = "2021"
fn main() {
    println!("Hello, world!");
}
Format on Save
Most editors can be configured to run rustfmt automatically when you save a
file, so formatting never falls out of sync. In Zed, add the following to your
settings.json:
{
  "format_on_save": "on"
}
In VS Code with the rust-analyzer extension, enable format on save in
settings.json:
{
  "editor.formatOnSave": true
}
Format before Commit
If you want to ensure formatting even when someone forgets to enable
format-on-save, you can add a Git pre-commit hook that runs cargo fmt --check
and rejects the commit if any file is not formatted. Tools like
lefthook or
pre-commit make it straightforward to manage these
hooks across a team. This is a lighter-weight alternative to catching formatting
issues in CI, since it provides feedback before the code is even pushed.
Format with Nix
If your project uses Nix, you can define a formatter app in your flake that runs
rustfmt (and any other formatters you need) with pinned versions. This lets
contributors run nix run .#fmt to format everything without installing tools
manually, and ensures that everyone uses the exact same formatter version
regardless of what is installed on their system.
Formatting TOML
Rust projects also contain TOML configuration files (Cargo.toml,
rustfmt.toml, deny.toml, etc.) that benefit from consistent formatting.
Taplo is a TOML formatter and validator that can sort keys, normalize
whitespace, and check for syntax errors. Like rustfmt, it supports a --check
flag for CI usage.
CI Examples
name: Format
on: [pull_request]

jobs:
  fmt:
    runs-on: ubuntu-latest
    steps:
      - uses: actions/checkout@v4
      - uses: dtolnay/rust-toolchain@nightly
        with:
          components: rustfmt
      - run: cargo +nightly fmt --check
Using nightly rustfmt in CI ensures that unstable configuration options are
applied. If you only use stable options, dtolnay/rust-toolchain@stable is
sufficient.
fmt:
  image: rust:latest
  script:
    - rustup component add rustfmt
    - cargo fmt --check
Reading
Configuring Rustfmt by Rustfmt Project
Full reference of all rustfmt configuration options: import grouping, brace
style, line width, comment formatting, and more. Most projects never need to
change the defaults, but this is where to look if you have a specific rule you
want to override. Keep in mind that non-standard configuration can surprise
contributors who expect the community defaults.
The Rust Style Guide by The Rust Foundation
The official style guide that rustfmt implements. Covers indentation (4
spaces), line width (100 characters), trailing commas, blank lines, and
formatting rules for items, expressions, types, and attributes. Since rustfmt
enforces these rules automatically, reading the guide is mainly useful for
understanding the reasoning behind specific formatting decisions.
Lints
In programming, linting refers to the process of performing static code
analysis on a software project to flag programming errors, bugs, stylistic
errors, and suspicious constructs. The term originates from an old UNIX tool
named lint, which was used to check C programs for common mistakes. Linting
goes beyond what the compiler catches: it can detect patterns that have cleaner
alternatives, flag code that is correct but slow, and enforce project-specific
rules like forbidding unsafe code.
Clippy
The standard linter for Rust is Clippy. It ships with the Rust
toolchain and is used across the ecosystem to enforce good practices, catch
common bugs, and flag performance issues. It usually comes preinstalled through
Rustup, or can be added with rustup component add clippy.
Clippy organizes its lints into groups such as correctness, style,
complexity, perf, and pedantic. The default groups are enabled out of the
box, but the full lint list can be examined to pick out
additional lints relevant to your project. Lints can be enabled or disabled
individually or by group, either in source code or in Cargo.toml.
Overriding Lints in Code
Source-level attributes let you override lint severity for a specific crate,
module, or item. For example, to forbid unsafe code in a crate:
#![allow(unused)]
#![deny(unsafe_code)]
fn main() {
}
Or to enable the pedantic lint group as warnings:
#![allow(unused)]
#![warn(clippy::pedantic)]
fn main() {
}
These attributes are useful when different crates in a workspace need different
lint policies — a low-level crate might allow unsafe, while application crates
forbid it.
Overriding Lints in Cargo.toml
Since Rust 1.74, lints can also be configured in Cargo.toml using the
[lints] table. This keeps lint configuration next to the rest of the crate
metadata rather than scattered across source files. In a workspace, you can
define shared lint policy in [workspace.lints] and inherit it per-crate with
lints.workspace = true.
[lints.clippy]
pedantic = "warn"
unwrap_used = "deny"
# In a workspace root Cargo.toml:
[workspace.lints.clippy]
pedantic = "warn"
unwrap_used = "deny"

# In a member's Cargo.toml:
[lints]
workspace = true
One thing to be aware of is that [lints] applies uniformly to all code in the
crate: library code, tests, benchmarks, and examples. There is currently no way
to scope lint configuration to only library code or only tests through
Cargo.toml. If you find that a lint like unwrap_used is useful in library
code but too noisy in tests (where panicking on failure is normal), you can use
#[allow(...)] attributes on the test modules or individual test functions to
relax it selectively.
Typos
Spelling errors in code, documentation, and error messages tend to slip through code review because reviewers are focused on semantics, not spelling. These mistakes accumulate into follow-up pull requests and sometimes make it into released documentation. A spell checker designed for code can catch them automatically.
typos-cli is a spell checker built specifically for source code.
It understands programming conventions (camelCase, snake_case, abbreviations)
and has a low false positive rate, making it practical to run on every pull
request even in large monorepos.
cargo install typos-cli
typos
If typos detects a spelling error, it outputs a nonzero exit code and a
diagnostic message explaining the error and suggesting a fix. False positives
can be suppressed by adding exceptions to a _typos.toml or typos.toml
configuration file in the project root.
SARIF
The Static Analysis Results Interchange Format (SARIF) is a standard JSON format for representing the output of static analysis tools. It is supported by GitHub: when you upload SARIF results as part of a GitHub Actions workflow, GitHub renders the diagnostics as annotations directly in pull request code review, inline with the relevant lines of code.
The sarif-rs project provides command-line converters that
transform the output of tools like Clippy and cargo-audit into SARIF. For
example, clippy-sarif pipes Clippy’s JSON output into a SARIF file that can be
uploaded with GitHub’s upload-sarif action. This is useful when you want lint
results to appear as code annotations rather than buried in CI logs.
CI Examples
Both Clippy and typos are fast enough to run on every pull request. Below are examples for GitHub Actions and GitLab CI.
name: Lints
on: [pull_request]

jobs:
  clippy:
    runs-on: ubuntu-latest
    steps:
      - uses: actions/checkout@v4
      - uses: dtolnay/rust-toolchain@stable
        with:
          components: clippy
      - run: cargo clippy --all-targets --all-features -- -D warnings

  typos:
    runs-on: ubuntu-latest
    steps:
      - uses: actions/checkout@v4
      - uses: crate-ci/typos@master
clippy:
  image: rust:latest
  script:
    - rustup component add clippy
    - cargo clippy --all-targets --all-features -- -D warnings

typos:
  image: rust:latest
  script:
    - cargo install typos-cli
    - typos
Reading
Chapter 20: Static Analysis by Software Engineering at Google
Chapter on static analysis from Google’s software engineering book. Covers the philosophy of static analysis at scale, focusing on keeping false positive rates low enough that developers trust and act on the results.
Rust Lints you may not know by Andrew Lilley Brinker
Walks through lesser-known Rust lints that can catch subtle issues. Good for discovering lints beyond the defaults that might be relevant to your project.
Semantic Versioning
Rust’s dependency ecosystem relies on Semantic Versioning (SemVer). When you publish a crate, your version number is a promise to downstream users: patch releases contain only bugfixes, minor releases add functionality without breaking existing code, and only major releases may introduce breaking changes. Cargo’s dependency resolver depends on these promises being accurate — it will happily upgrade to a new minor release without asking, trusting that nothing will break.
Getting this right manually is harder than it looks. Some breaking changes are obvious (removing a public function), but others are subtle: adding a new variant to a non-exhaustive enum, changing a type’s auto-trait implementations, or even adding a new public item can break downstream code that uses glob imports. An analysis of the 1,000 most-downloaded crates found that roughly 1 in 6 crates violated semver at least once, affecting about 1 in 31 releases. This is not a failure of discipline — it is a failure of tooling.
cargo-semver-checks
cargo-semver-checks automates semver verification by
comparing your current crate against its latest published version and
determining whether the changes constitute a patch, minor, or major update. If
the version number in your Cargo.toml does not match the detected change
level, it reports the violations with detailed explanations.
cargo install cargo-semver-checks
cargo semver-checks
Since it compares against the published version from a registry, it is primarily useful for crates that are published to crates.io or a private registry. Running it in CI prevents accidental semver violations from being published.
CI Examples
name: Semver
on: [pull_request]

jobs:
  semver:
    runs-on: ubuntu-latest
    steps:
      - uses: actions/checkout@v4
      - uses: dtolnay/rust-toolchain@stable
      - uses: taiki-e/install-action@v2
        with:
          tool: cargo-semver-checks
      - run: cargo semver-checks
semver:
  image: rust:latest
  script:
    - cargo install cargo-semver-checks
    - cargo semver-checks
Reading
Semantic Versioning 2.0.0 by Tom Preston-Werner
The specification that defines the rules of semantic versioning. Short and worth reading in full — the FAQ section addresses common edge cases like what to do before 1.0, how to handle deprecations, and how version precedence works.
Chapter 3.15: SemVer Compatibility by The Cargo Book
Rust-specific reference for what counts as a breaking change. Categorizes
changes as major, minor, or patch across API items, types, traits, generics,
and functions. Contains several surprising cases: adding a public item can
break code using glob imports, adding repr(align) prevents use in
repr(packed) types, and making an unsafe function safe is only a minor
change. Essential reading for library authors.
Semver violations are common, better tooling is the answer by Predrag Gruevski and Tomasz Nowak
Analyzes over 14,000 releases across the 1,000 most-downloaded Rust crates and
finds 3,062 verified semver violations — roughly 1 in 31 releases and more than
1 in 6 crates affected. Categorizes the violations (missing methods, added enum
variants, removed auto traits) and argues this rate reflects tooling gaps
rather than maintainer negligence, motivating cargo-semver-checks.
Dependency Minimum Versions
When you specify a dependency like serde = "1.0" in Cargo.toml, you are
declaring that any version from 1.0.0 up to (but not including) 2.0.0 should
work. In practice, Cargo always resolves to the latest version within that
range. This means your CI and local builds always test against the newest
compatible release, never the lower bound.
The problem is subtle: over time, your code may start relying on a function,
trait implementation, or bugfix that was only introduced in 1.0.44, but your
version bound still claims 1.0.0 is sufficient. A downstream user who happens
to resolve to an older version within your declared range will hit a compilation
error that you never saw. This is primarily a concern for library crates, where
you do not control which version of your dependencies your users end up with.
cargo-minimal-versions
cargo-minimal-versions automates testing against the
lowest versions your Cargo.toml allows. Under the hood, it uses Cargo’s
unstable -Z minimal-versions flag, but wraps the multi-step process (updating
the lockfile with minimal versions, then running the check) into a single
command. It also handles workspace complications that make the raw flag
difficult to use correctly.
It requires a nightly toolchain and cargo-hack (for proper
workspace handling):
cargo install cargo-minimal-versions
cargo minimal-versions check --workspace
For workspaces, the --ignore-private flag skips binaries and private crates
that are not published and therefore don’t need to worry about downstream
version resolution:
cargo minimal-versions check --workspace --ignore-private
If some transitive dependencies have incorrect lower bounds (a common problem in
the ecosystem), the --direct flag resolves only your direct dependencies to
their minimum versions while letting indirect dependencies resolve normally:
cargo minimal-versions check --workspace --direct
CI Examples
name: Minimum versions
on: [pull_request]

jobs:
  minimal-versions:
    runs-on: ubuntu-latest
    steps:
      - uses: actions/checkout@v4
      - uses: dtolnay/rust-toolchain@nightly
      - uses: taiki-e/install-action@v2
        with:
          tool: cargo-hack,cargo-minimal-versions
      - run: cargo minimal-versions check --workspace --ignore-private --direct
minimal-versions:
  image: rust:latest
  script:
    - rustup toolchain install nightly
    - cargo install cargo-hack cargo-minimal-versions
    - cargo minimal-versions check --workspace --ignore-private --direct
Reading
Chapter 3.1: Specifying Dependencies by The Cargo Book
Reference for dependency version syntax in Cargo.toml. Explains the
shorthand ("1.2" means >=1.2.0, <2.0.0), caret and tilde requirements,
wildcard versions, and how Cargo interprets version bounds. Necessary
background for understanding why minimum version testing matters.
Chapter 3.14: Dependency Resolution by The Cargo Book
Explains how Cargo’s resolver picks versions given the constraints from your
Cargo.toml and your dependencies’ constraints. Covers the default behavior
of resolving to the maximum compatible version, which is the root cause of the
minimum version problem this chapter addresses.
Chapter 3.18: Unstable Features — minimal-versions by The Cargo Book
Documents the unstable -Z minimal-versions and -Z direct-minimal-versions
flags. The former resolves all dependencies (including transitive) to their
minimum versions; the latter only resolves direct dependencies minimally while
letting transitive ones resolve normally. Both require a nightly toolchain.
cargo-minimal-versions wraps these flags into a more practical workflow.
Rust minimum versions: SemVer is a lie! by Daniel Wagner-Hall
Tests a 50,000-line project with 134 transitive dependencies against
-Z minimal-versions and finds widespread breakage: ancient crate versions
like log 0.1.0 no longer compile with modern Rust, yet many popular libraries
still declare them as acceptable lower bounds. Argues that the ecosystem needs
either enforcement at publish time or a different approach to version bounds.
The article is from 2019 but the underlying problem persists.
Unused Dependencies
Unused dependencies cost compile time and expand the dependency graph without providing any value. In large projects with many crates, they tend to accumulate as code is refactored and dependencies that were once needed become orphaned. Removing them reduces compile times, shrinks the set of dependencies that need auditing, and lowers the maintenance burden.
If you have dependencies that are only needed conditionally, use optional features or platform-specific dependencies to avoid pulling them in unnecessarily.
Two tools in the Rust ecosystem detect unused dependencies: cargo-machete and
cargo-udeps. They use fundamentally different detection strategies, which
affects both their speed and accuracy.
A related problem is unused features on dependencies. Enabling optional
features can pull in additional transitive dependencies and compile code paths
you never use. There is currently no automated tooling to detect features you
enable but don’t need, so this requires manual review. A common case is
depending on tokio with the full feature when only a few like fs, net,
and macros are actually required.
cargo-machete
cargo-machete detects unused dependencies by searching your
source files for references to each dependency’s crate name using simple text
matching. Because it never compiles your code, it is very fast — fast enough to
run on every pull request, even in large workspaces.
cargo install cargo-machete
cargo machete
The tradeoff is precision. Since cargo-machete works at the text level, it
cannot detect dependencies that are used only through procedural macros or build
scripts, because the generated code is not visible to a text search. These show
up as false positives. You can suppress them by adding the crate names to an
ignore list in Cargo.toml under [package.metadata.cargo-machete].
cargo-udeps
cargo-udeps takes the opposite approach: it compiles the crate
and analyzes the compiler’s output to determine which dependencies were actually
used during compilation. This makes it more accurate than cargo-machete, but
also significantly slower and it requires a nightly toolchain.
cargo +nightly udeps
One limitation is that cargo-udeps cannot detect usage from doc-tests, which
may produce false positives for dependencies only referenced in documentation
examples. These can be suppressed in Cargo.toml under
[package.metadata.cargo-udeps.ignore].
CI Examples
Unused dependencies affect compile time but not correctness, so these checks do not necessarily need to run on every pull request. Running them on a schedule (weekly, for example) or as a periodic maintenance task is a reasonable alternative.
name: Unused dependencies
on:
  schedule:
    - cron: "0 9 * * 1" # Every Monday at 9:00 UTC
  workflow_dispatch:

jobs:
  machete:
    runs-on: ubuntu-latest
    steps:
      - uses: actions/checkout@v4
      - uses: taiki-e/install-action@v2
        with:
          tool: cargo-machete
      - run: cargo machete
machete:
  image: rust:latest
  rules:
    - if: $CI_PIPELINE_SOURCE == "schedule"
  script:
    - cargo install cargo-machete
    - cargo machete
Reading
cargo machete: find unused dependencies quickly by Benjamin Bouvier
Explains the design of cargo-machete and why it uses text search rather than
compiler analysis. Benchmarks it against the Rust compiler repository (1.08
seconds) and discusses the false positive tradeoff: dependencies used through
macros or build scripts are invisible to text search, so they need to be listed
as known exceptions. Also compares the “transitively-used dependency” problem
in cargo-udeps, where workspace-level dependency sharing can mask truly unused
crates.
Finding unused dependencies with cargo-udeps by Amos Wenger
Walkthrough of using cargo-udeps on a real project, showing how it detected
an unused ulid crate. Covers the limitation that it cannot detect usage from
doc-tests and how to suppress false positives using
package.metadata.cargo-udeps.ignore in Cargo.toml.
Item 25: Manage your dependency graph by Effective Rust
Broader advice on managing Rust dependencies: how Cargo resolves
semver-incompatible versions, when to use version ranges versus pinning, and
using cargo tree --duplicates to spot redundancy. Also discusses the supply
chain risk of build scripts and procedural macros executing arbitrary code at
compile time.
Dependency Auditing
As a project’s dependency graph grows, so does its exposure to security vulnerabilities and licensing conflicts. Vulnerabilities in transitive dependencies are particularly dangerous because they are easy to miss — your project may not directly depend on the affected crate, yet still ship the buggy code. Licensing is a separate but related concern: Cargo makes it trivially easy to add dependencies, and each one brings its own license terms that may conflict with your project’s requirements.
The Rust ecosystem has strong tooling for automating these checks. The RustSec project maintains a database of security advisories against Rust crates, and several tools build on it. This chapter covers three of them, each operating at a different level of rigor.
cargo-audit
cargo-audit is part of the RustSec project. It checks your
crate’s dependencies against the RustSec advisory database by scanning the
Cargo lockfile, covering both direct and transitive dependencies.
cargo install cargo-audit
cargo audit
If any dependency has a known vulnerability, cargo-audit prints a detailed
advisory with the affected versions and suggested remediation (usually upgrading
to a patched version). It exits with a nonzero status, making it straightforward
to use as a CI gate.
cargo-deny
cargo-deny goes further than cargo-audit by acting as a
general-purpose linter for your dependency graph. It checks four categories,
each configurable independently:
- Advisories — the same RustSec database check that
cargo-auditprovides. - Licenses — enforces an allowlist or denylist of acceptable licenses across all dependencies.
- Bans — prevents specific crates from appearing in your dependency tree, or flags duplicate versions of the same crate.
- Sources — restricts which registries or Git repositories dependencies may come from.
Configuration lives in a deny.toml file. Running cargo deny init generates a
starter configuration with comments explaining each section.
cargo install cargo-deny
cargo deny init
cargo deny check
Each violation can be configured as an error or a warning, so you can incrementally adopt stricter policies without blocking all CI immediately.
cargo-vet
cargo-vet takes a fundamentally different approach from the
advisory-based tools. Rather than checking against a database of known
vulnerabilities, it enforces that every dependency has been explicitly audited
and certified to meet specific criteria (such as “safe-to-deploy” or
“safe-to-run”). Unaudited dependencies cause a build failure until someone
reviews them.
The key insight is that audits are shareable. Organizations can publish their audit records, and other teams can import them. Both Google and Mozilla publish their Rust crate audits, so you can bootstrap your audit set by importing theirs and only need to manually review crates they haven’t covered.
This is a higher-effort approach than cargo-audit or cargo-deny, but it
provides stronger guarantees: rather than reacting to known vulnerabilities, it
ensures that human eyes have reviewed every piece of third-party code before it
enters your project.
Setting Up
To start using cargo-vet, initialize it in your project:
cargo install cargo-vet
cargo vet init
This creates a supply-chain/ directory containing an audits.toml (where your
audit certifications live) and an imports.lock (for audits imported from other
organizations). Running cargo vet immediately after init will likely fail,
because your existing dependencies have not been audited yet. You have a few
options to get to a clean state:
- Import audits from organizations like Mozilla or Google using
cargo vet import. This covers many popular crates without you having to review them yourself. - Certify dependencies you have reviewed with
cargo vet certify, which records your audit inaudits.toml. - Exempt dependencies you trust but have not reviewed with
cargo vet suggest, which adds them to an exemptions list. This lets you adoptcargo-vetincrementally rather than auditing everything upfront.
Once cargo vet passes locally, commit the supply-chain/ directory. From that
point on, cargo vet in CI will fail only when a new or updated dependency
lacks an audit, prompting someone to review it before it can be merged.
CI Examples
cargo-audit and cargo-deny are well suited for running on every pull
request. cargo-vet is typically run the same way but requires more initial
setup to establish the audit baseline.
name: Audit
on: [pull_request]

jobs:
  deny:
    runs-on: ubuntu-latest
    steps:
      - uses: actions/checkout@v4
      - uses: taiki-e/install-action@v2
        with:
          tool: cargo-deny
      - run: cargo deny check
Since cargo-deny includes advisory checking, it subsumes cargo-audit. If you
only need advisory checks without license or ban policies, you can use
cargo-audit directly instead:
- uses: taiki-e/install-action@v2
  with:
    tool: cargo-audit
- run: cargo audit
deny:
  image: rust:latest
  script:
    - cargo install cargo-deny
    - cargo deny check
name: Vet
on: [pull_request]

jobs:
  vet:
    runs-on: ubuntu-latest
    steps:
      - uses: actions/checkout@v4
      - uses: dtolnay/rust-toolchain@stable
      - uses: taiki-e/install-action@v2
        with:
          tool: cargo-vet
      - run: cargo vet
Reading
Comparing Rust Supply Chain Safety Tools by Andre Bogus
Surveys five tools that address different layers of supply chain security:
cargo-audit (vulnerability scanning), cargo-deny (license and source
checking), cargo-outdated (version staleness), cargo-geiger (unsafe code
detection in dependencies), and cargo-crev (cryptographically-signed peer
reviews). The article emphasizes that these tools are complementary rather than
competing, and shows actual command output to illustrate what each tool reveals
in practice. Good starting point if you want to understand which tools to
combine.
Item 25: Manage your dependency graph by Effective Rust
Covers the practical side of managing Rust dependencies: how Cargo resolves
semver-incompatible versions (and the problems this causes with FFI), when to
use version ranges versus pinning, and when to commit Cargo.lock (applications
yes, libraries no). Introduces cargo tree for visualizing dependency graphs
with flags like --duplicates and --invert. Also discusses the supply chain
risk that build scripts and procedural macros can execute arbitrary code at
compile time, which motivates the auditing tools in this chapter.
Cargo Deny Book by Cargo Deny Project
Full reference for cargo-deny. Goes beyond running the tool into detailed
configuration for each check category: advisory database sources and severity
thresholds, license allowlists with SPDX expression matching, banning specific
crates or flagging duplicate versions, and restricting which registries or Git
sources dependencies may come from. Also covers diagnostic output
interpretation and CI integration via GitHub Actions.
Securing the Software Supply Chain (archived) by US-American Department of Defense
A guidance document from the US Department of Defense aimed at software
developers, covering the threat model of supply chain attacks and recommended
mitigations: secure development practices, dependency management, build
integrity, and artifact verification. Not Rust-specific, but provides the
broader security framework that motivates tools like cargo-vet and
cargo-deny.
Cargo Vet Book by Mozilla
Comprehensive guide to the cargo-vet workflow. Explains audit criteria
(safe-to-deploy, safe-to-run), how to perform and record audits, how to
conduct relative audits between similar versions to reduce review effort, how
to import audits from other organizations, and how trusted publishers work.
Also covers the algorithm cargo-vet uses to determine whether dependencies
meet your project’s requirements.
Vetting the Cargo by Jonathan Corbet
LWN article explaining why Mozilla built cargo-vet: Firefox grew to depend on
nearly 400 third-party crates, and the ease of pulling in dependencies from
crates.io increased the attack surface significantly. Covers how the shared
audit model works (projects import audits from organizations they trust rather
than duplicating review effort) and its current limitations, including the lack
of reputation systems to verify audit authenticity.
Outdated Dependencies
Besides fixing bugs, new versions of dependencies also usually come with new features and sometimes better performance. For that reason, it is usually advisable to not fall behind too far in terms of which version is being used.
There is some tooling in the Rust ecosystem which can check for outdated dependencies automatically. This can be used as a maintenance task or a periodic CI job.
If you are working on an open source project, you can also rely on the [deps.rs][] service to tell you if your dependencies are outdated. It provides a badge you can add to your README that shows whether your dependencies are up to date.
cargo-upgrades
cargo-upgrades is a Cargo subcommand to check if any of the
direct dependencies have newer versions available. It has a simpler
implementation than cargo-outdated and is typically a bit faster, because it
does not rely on using Cargo’s dependency resolution.
You can install it using cargo and run it against your project:
cargo install cargo-upgrades
cargo upgrades
You can add a periodic CI job that checks for outdated dependencies using
cargo-upgrades. This example runs weekly and opens an issue if any
dependencies have newer versions available:
name: Check outdated dependencies
on:
  schedule:
    - cron: "0 9 * * 1" # Every Monday at 9:00 UTC
  workflow_dispatch:

jobs:
  outdated:
    runs-on: ubuntu-latest
    steps:
      - uses: actions/checkout@v4
      - uses: dtolnay/rust-toolchain@stable
      - run: cargo install cargo-upgrades
      - run: cargo upgrades
cargo-outdated
cargo-outdated is a Cargo subcommand for displaying when
Rust dependencies are out of date. It works by creating a temporary Cargo
workspace and running cargo-update, and finally comparing the resolved crate
versions against the ones in the original crate. This makes it slower than
cargo-upgrades, but it can also detect transitive dependency updates.
You can install it using cargo, and run it against your project:
cargo install cargo-outdated
cargo outdated
Similar to the cargo-upgrades example, but using cargo-outdated to also
check transitive dependencies. The --exit-code 1 flag causes the job to fail
if any outdated dependencies are found.
name: Check outdated dependencies
on:
  schedule:
    - cron: "0 9 * * 1"
  workflow_dispatch:

jobs:
  outdated:
    runs-on: ubuntu-latest
    steps:
      - uses: actions/checkout@v4
      - uses: dtolnay/rust-toolchain@stable
      - run: cargo install cargo-outdated
      - run: cargo outdated --exit-code 1
Reading
Cleaning up and upgrading third-party crates by Amos Wenger
In this article, Amos shows how to clean up and upgrade crate dependencies. He
uses cargo-outdated to do this, but he mentions that it has an issue with
path dependencies in Cargo workspaces.
Cargo Manifest
Crate Features
Crate features let you gate functionality behind compile-time flags, reducing
build times and dependency footprint for users who don’t need everything. But
features introduce a combinatorial testing problem: code that compiles with all
features enabled can break when only a subset is active. These bugs are easy to
introduce (a refactored #[cfg] block, a missing feature gate on a new
function) and hard to catch without testing each combination.
The Problem
Consider a crate that provides multiple parsers behind feature flags. Each
parser is gated with #[cfg(feature = "...")], and there is a convenience
function that dispatches to the right parser based on the input:
#![allow(unused)]
fn main() {
#[cfg(any(feature = "json", feature = "yaml"))]
pub fn parse_auto(input: &str) -> Config {
    #[cfg(feature = "json")]
    if input.trim_start().starts_with('{') {
        return parse_json(input);
    }

    // Bug: this branch only compiles when "yaml" is enabled,
    // but the function is available with only "json" enabled.
    // With only "json", this function compiles but always panics.
    #[cfg(feature = "yaml")]
    {
        return parse_yaml(input);
    }

    #[cfg(not(feature = "yaml"))]
    panic!("no parser available for this format");
}
}
When both json and yaml are enabled, this works fine. But when only json
is enabled, parse_auto still compiles (because of the any(...) gate), yet
calling it with non-JSON input will panic because the yaml fallback branch is
compiled out. The test that covers parse_auto is gated behind
#[cfg(all(feature = "json", feature = "yaml"))], so it never runs with
individual features:
#![allow(unused)]
fn main() {
    #[cfg(all(feature = "json", feature = "yaml"))]
    #[test]
    fn test_parse_auto() {
        let json = r#"{"name":"test","value":"hello"}"#;
        let config = parse_auto(json);
        assert_eq!(config.name, "test");

        let yaml = "name: test\nvalue: hello";
        let config = parse_auto(yaml);
        assert_eq!(config.name, "test");
    }
}
This is a common pattern: tests are written against the “all features enabled”
configuration, and bugs in individual feature combinations go unnoticed until a
user hits them. Similar to using #ifdef statements in C and C++, using
#[cfg] blocks is inherently brittle. Using a crate such as cfg_if
can help make it more manageable, but it does not address the root issue: you
really need to test your code for all feature combinations.
cargo-hack
cargo-hack is a Cargo subcommand that lets you run a command
(such as cargo check or cargo test) for every possible feature or every
possible combination of features. This catches #[cfg]-related compilation
failures and test gaps that only appear with specific feature sets.
Installation
cargo install cargo-hack
Feature Sets
You need to tell cargo-hack which sets of features to test. The two main
options are --each-feature and --feature-powerset. To illustrate the
difference, consider a crate with features a, b, and c:
| Flag | Feature Sets |
|---|---|
--each-feature | (none); a; b; c |
--feature-powerset | (none); a; b; c; a,b; a,c; b,c; a,b,c |
The --each-feature flag tests each feature in isolation (plus no features at
all). This is fast and catches the most common issues: code that compiles with
all features but breaks when a single feature is enabled on its own.
The --feature-powerset flag tests every possible combination. This is thorough
but grows exponentially with the number of features. For a crate with n
features, it produces 2^n combinations. For crates with many features, you can
limit the depth with --depth:
# Test all combinations of up to 2 features at a time
cargo hack check --feature-powerset --depth 2
Commands
You also need to tell cargo-hack what command to run:
| Command | Description |
|---|---|
check | Runs cargo check for each of the selected feature sets |
test | Runs cargo test for each of the selected feature sets |
Using check verifies that every feature combination compiles. Using test
goes further and runs your test suite for each combination, catching runtime
issues that only manifest with specific feature sets. Checking is much faster
than testing, so a common strategy is to use check with --feature-powerset
and test with --each-feature.
Examples
Checking that all individual features compile:
cargo hack check --each-feature
Running tests for every feature combination:
cargo hack test --feature-powerset
For workspace projects, you can run cargo-hack across all members:
cargo hack check --each-feature --workspace
A practical CI configuration is to run cargo hack check --feature-powerset --depth 2 to catch compilation issues across combinations, combined with
cargo hack test --each-feature to verify tests pass for each feature in
isolation. This balances thoroughness with CI runtime.
cargo-features-manager
cargo-features-manager is a terminal UI tool that helps
you manage the features of your dependencies. It shows which features each of
your dependencies has and lets you toggle them interactively. This is useful for
auditing your dependency tree and disabling features you don’t need, which
reduces compile times and binary size.
CI Examples
name: Features
on: [pull_request]

jobs:
  feature-check:
    runs-on: ubuntu-latest
    steps:
      - uses: actions/checkout@v4
      - uses: dtolnay/rust-toolchain@stable
      - uses: taiki-e/install-action@v2
        with:
          tool: cargo-hack
      - run: cargo hack check --feature-powerset --depth 2
      - run: cargo hack test --each-feature
features:
  image: rust:latest
  script:
    - cargo install cargo-hack
    - cargo hack check --feature-powerset --depth 2
    - cargo hack test --each-feature
Reading
Tips for faster Rust compile times by Corrode
This article covers many strategies for reducing Rust compile times, including
a section on disabling unused features of your crate dependencies. The
cargo-features-manager tool is highlighted as a way to audit and trim
unnecessary features.
Minimum Supported Rust Version
In Build System: Cargo, we’ve explained that when you build library crates, you can specify a MSRV. This specifies the minimum version of the Rust toolchain you need to use your library. Setting this communicates to the users of your library what version of Rust they should be using at least.
If you set this, you might end up in a situation where this is no longer true: you’ve inadvertently started using Rust features that are not available in the MSRV version. Specifying a MSRV that is incorrect is arguably worse than not specifying one at all.
So, how can you use tooling to ensure that the MSRV that you specify matches the
reality of what your crate needs? Here is another Cargo plugin that comes to the
rescue: cargo-msrv allows us to determine our crate’s true MSRV.
Cargo MSRV to determine MSRV
cargo-msrv
cargo-hack --rust-version
Cargo Hack to test MSRV
Reading
TODO
Testing
Testing is the process of verifying that code is correct. It can be done manually, but automated testing is cheaper over the long run because the same checks run on every change without human effort. Some development paradigms, like Test-Driven Development, go further and use tests as the primary artifacts that drive design.
Why Tests are Needed
Thorough tests give you three things: confidence that features work correctly for both expected and unexpected inputs, protection against regressions when code changes, and, when documentation is lacking, a form of executable specification that shows how code is intended to be used.
This matters for development speed. With good test coverage, developers can implement new features or refactor code without worrying about silently breaking existing functionality. Without it, bugs surface only in production.
The most robust software tends to have the most extensive tests. SQLite, the most widely deployed database, is a good example: the source code is free and open-source, but the developers charge for access to their test suite. This reflects a practical insight — for a database that must guarantee data integrity across billions of deployments, the value lies not in the code itself but in the tests that make it safe to change. SQLite has 100% branch coverage and millions of test cases.
How Tests are Written
Tests are typically divided into unit tests and integration tests. Unit tests exercise small pieces of code in isolation, often with access to private internals, and each test verifies a single behavior. Integration tests exercise the code from the outside, without access to internals, and verify that components work together correctly. The aim is to have many fast unit tests for individual behaviors and a smaller set of integration tests that tie the system together. Writing tests early influences the system design toward code that is easy to test.
Rust adds a third category: documentation tests. Code examples in doc comments
are compiled and executed by cargo test, which ensures that documentation
stays in sync with the code. If an interface changes in a way that breaks a doc
example, the test suite catches it.
What this Chapter Covers
This chapter covers the testing approaches available in the Rust ecosystem, from built-in facilities to third-party tools. Each approach has different strengths and costs, and they complement each other rather than competing.
| Approach | What it catches | Speed | Run in CI | Run locally |
|---|---|---|---|---|
| Unit tests | Logic errors, regressions | Fast | Every commit | Every change |
| Integration tests | Interface mismatches, system behavior | Medium | Every commit | Before push |
| Doc tests | Outdated documentation examples | Fast | Every commit | Every change |
| Snapshot tests | Unintended output changes | Fast | Every commit | Every change |
| Property tests | Edge cases, invariant violations | Fast | Every commit | Every change |
| Fuzzing | Crashes, panics on untrusted input | Slow | Scheduled | Occasionally |
| Mutation testing | Gaps in test coverage | Slow | Scheduled/PR | Occasionally |
| Dynamic analysis | Undefined behavior, memory errors | Slow | Every commit | When writing unsafe |
A practical starting point for most projects is: unit tests and integration tests on every commit, property tests alongside unit tests for code that handles varied inputs, and snapshot tests for anything with complex output. Fuzzing and mutation testing are valuable but slow, so they work best as scheduled CI jobs or as targeted checks on changed files.
The common thread is that testing should be fast enough that developers actually run it. If your test suite takes too long, people will skip it locally and push untested code. Splitting tests into fast tests (unit, snapshot, property) that run on every change and slow tests (fuzzing, mutation, dynamic analysis) that run on a schedule is a good way to get broad coverage without slowing down development.
Reading
Item 30: Write more than unit tests by Effective Rust
This chapter advocates for a comprehensive testing strategy beyond unit tests, covering integration tests, doc tests, examples, benchmarks, and fuzz testing. It emphasizes that different test types serve distinct purposes: unit tests verify internals, while integration tests and examples validate the public contract.
How to organize Rust tests by Andre Bogus
In this article, Andre discusses how tests are best organized in a Rust project. He goes over the various facilities that Rust has for writing tests, from testing that code in the documentation compiles (doctests), to simple unit tests, to integration tests, and explains concepts such as snapshot-testing and fuzzing.
Describes the testing strategy for Sciagraph, a Python memory profiler built with Rust. Covers coverage marks (verifying specific code paths are hit), property-based testing with proptest, end-to-end tests in both debug and release modes, and panic injection testing. Also discusses choosing Rust for memory safety, wrapping unsafe APIs in safe interfaces, and environmental assertions at startup to catch configuration mismatches.
Testing Overview by Software Engineering at Google
Adam discusses the philosophy behind writing software tests. He explains that well-written tests are crucial to allow software to change. For tests to scale, they must be automated. Features that other components or teams rely on should have tests to ensure they work correctly. Testing is as much a cultural problem as it is a technical one, and changing the culture in an organization takes time.
Chapter 11: Writing automated tests by The Rust Book
This chapter of the Rust book explains Rust’s facilities for writing unit tests, and how they can be organized in a project.
How SQLite is tested by SQLite
SQLite is the world’s most deployed database. It is implemented as a C library that can be embedded into applications directly, and it powers anything from iPhones to web servers. This article outlines the approach that the SQLite team uses to ensure that it stays correct over time, with 100% branch test coverage and millions of test cases. The SQLite team considers testing so valuable that while the source code itself is free and open-source, the tests are only available commercially.
How to Test by Alex Kladov
This article outlines Alex’ philosophy when it comes to testing software. He explains some goals and strategies to make tests easier to maintain, to make it easier to add tests (reduce friction), make tests fast, using snapshot/expect style tests for ease of maintenance, and other strategies that make testing more effective and more pleasant.
Unit and Integration tests by Alex Kladov
In this article, Alex compares unit-testing and integration-testing, and concludes that their main difference is the amount of purity (I/O) and the extent of the code that they are testing. He argues that it makes sense to try to get tests to be as pure as possible.
Everything you need to know about testing in Rust by Joshua Mo
This article gives an overview of Cargo features for testing and libraries in the Rust ecosystem that can help in writing useful tests for software. It goes through multiple concepts, such as property testing, fuzzing and snapshot testing and gives examples.
Advanced Rust testing by rust-exercises.com
Hands-on course that goes beyond basic testing into testing interactions with
external systems like APIs and databases. Progresses through small lessons with
exercises, building up to a comprehensive testing strategy for complex
applications. Aimed at intermediate Rust developers who already know the
basics of #[test] and want to expand their toolkit.
Unit Tests
Unit tests are intended to test one small unit at a time. It might be a feature, it might be a specific input to an algorithm. Rust has native support for them with the built-in testing harness support.
Unit tests are similar to integration tests. In fact, they both look the same:
a function annotated with #[test]. But there is an important difference in
how they run. Unit tests are written inside your code base. Depending on where
they are placed, they have visibility into non-pub methods and functions,
allowing them to test internal state.
Integration tests on the other hand are compiled as if they were an external crate that happens to depend on your crate. They can only test what is publicly visible, not internal state of your structs.
In Rust, you can annotate any function with #[test] and it will be a (unit or
integration) test. Here is what a simple test case looks like:
#![allow(unused)]
fn main() {
#[test]
fn can_add() {
    assert_eq!(1 + 1, 2);
}
}
Running cargo test will run all of the tests present in a project.
Where to put unit tests
Usually, when you write unit tests in Rust you put them at the end of every
module, and you declare a tests module inline.
Here’s an example of what this might look like:
#![allow(unused)]
fn main() {
fn function_one() -> &'static str {
    "hello"
}

#[cfg(test)]
mod tests {
    use super::*;

    #[test]
    fn test_function_one() {
        assert_eq!(function_one(), "hello");
    }
}
}
This is, however, a question of style. It’s also perfectly okay to just intersperse tests with the code. Keeping the tests close to the code is important, because it means that they will have visibility into non-public methods and fields.
Enabling unit-test-only code
Sometimes you may want to enable additional code only when building and running
unit tests. When Cargo builds your unit tests, it enables the test cfg, which
you can use inside your code. For example, you can use it to enable additional
logging when building unit tests:
#![allow(unused)]
fn main() {
#[cfg(test)]
debug!("extra debug log");
}
But you can do more than this: you can add members to your structs that only exist during unit testing. For example, if you want visibility into internal states, this allows you to enable extra member methods.
Testing Panics
Sometimes you want to verify that code panics under certain conditions — for
example, that an out-of-bounds index triggers a panic rather than silently
returning garbage. The #[should_panic] attribute marks a test that is expected
to panic:
#![allow(unused)]
fn main() {
#[test]
#[should_panic(expected = "index out of bounds")]
fn out_of_bounds() {
    let v = vec![1, 2, 3];
    let _ = v[5];
}
}
The expected parameter is optional but recommended: it matches against the
panic message, so the test fails if the code panics for a different reason than
you intended.
Ignoring Tests
The #[ignore] attribute marks a test that should be skipped during normal
cargo test runs. This is useful for tests that are slow, require special
setup, or depend on external services:
#![allow(unused)]
fn main() {
#[test]
#[ignore]
fn slow_integration_test() {
    // takes minutes to run
}
}
Ignored tests can be run explicitly with cargo test -- --ignored, or you can
run all tests including ignored ones with cargo test -- --include-ignored.
Parameterized Tests with rstest
The rstest crate lets you write parameterized tests — running the
same test logic with multiple inputs without duplicating the test function:
#![allow(unused)]
fn main() {
use rstest::rstest;

#[rstest]
#[case(0, 0)]
#[case(1, 1)]
#[case(2, 1)]
#[case(3, 2)]
#[case(4, 3)]
fn fibonacci(#[case] input: u32, #[case] expected: u32) {
    assert_eq!(fib(input), expected);
}
}
Each #[case] generates a separate test, so failures point you directly to
which input combination failed. rstest also supports fixtures for shared setup
logic across tests.
Pretty Assertions
The pretty-assertions crate
(docs) helps you understand test failures by showing a
colored diff when two values don’t match, rather than just printing both values.
Testing async code
If you chose to use async code in your project, you might run into a situation where you need to write unit tests for asynchronous code. Usually, most of the unit tests don’t require it, because you will follow the blocking core, async shell paradigm.
If you do need to write async unit tests, then the Tokio library has some
functionality you can use for that. They have a #[tokio::test] macro that you
can use to annotate any unit test to turn it into an asynchronous unit test.
#![allow(unused)]
fn main() {
#[tokio::test]
async fn async_unit_test() {
    assert_eq!(test_something().await, 42);
}
}
Reading
Unit testing by Rust By Example
This chapter outlines features of Rust’s built-in support for unit tests. It shows advanced features, such as unit-testing panics, marking tests as ignored and running specific tests from the command-line.
Unit Testing by Software Engineering at Google
This chapter discusses how Google approaches unit testing. It argues for testing via public APIs rather than implementation details, testing state rather than interactions, and structuring tests around behaviors rather than methods. It also advocates for DAMP (Descriptive And Meaningful Phrases) over DRY in test code, accepting some duplication in exchange for clarity.
Integration Tests
- assert_fs
- assert_cmd
Reading
https://xxchan.me/cs/2023/02/17/optimize-rust-comptime-en.html#step-4-single-binary-integration-test
Larger Tests in Software Engineering at Google
Test Runners
Cargo ships with a built-in test runner invoked through cargo test. It
discovers functions annotated with #[test] (see Unit Tests),
runs integration tests from the tests/ directory, and executes code examples
in documentation (see Code Documentation). For
workspaces, cargo test --workspace runs all tests across all crates.
cargo test
The built-in runner covers the basics well. A few flags are worth knowing:
# enable all features for tests
cargo test --all-features

# don't capture stdout (useful to see standard output of tests)
cargo test -- --nocapture

# run tests sequentially
cargo test -- --test-threads=1

# skip all tests with names matching filter (use it to skip slow tests)
cargo test -- --skip 'slow_'
Note that some flags are directly for cargo-test, like --all-features,
whereas some flags are passed to the test binaries themselves (such as
--nocapture), which is why there is that stray double hyphen.
cargo-nextest
cargo-nextest is a drop-in replacement for cargo test that uses a
process-per-test execution model: each test runs in its own process rather than
sharing a process with other tests from the same binary. This provides better
isolation (a panic or segfault in one test can’t take down others) and enables
nextest to be up to 3x faster by scheduling test processes more
efficiently.
The actual speedup depends on your workload. For projects where tests are bottlenecked by external services, the difference may be modest. For large workspaces with many fast unit tests, the improvement can be significant.
Configuration
Nextest is configured through .config/nextest.toml at the workspace root.
Configuration is organized into profiles — named sets of options that you can
switch between. Every setting falls back to the default profile if not
specified.
A typical configuration covers several areas:
[profile.default]
# Stop running tests after the first failure.
fail-fast = true
# Retry failed tests up to 2 times (useful for flaky tests).
retries = 2
# Mark tests as slow if they take longer than 60 seconds.
slow-timeout = { period = "60s" }

[profile.ci]
# In CI, run all tests even if some fail.
fail-fast = false
# Produce JUnit XML for CI test reporting.
[profile.ci.junit]
path = "results.xml"
The retries option is particularly useful for dealing with flaky tests:
nextest re-runs failed tests and only reports them as failures if they fail on
every attempt. The slow-timeout option prints a warning when a test exceeds
the threshold, and can optionally terminate it if it exceeds a multiple of the
period.
To run with a specific profile:
cargo nextest run --profile ci
Filtering
Nextest has an expression language for selecting which tests to run, going
beyond cargo test’s name-based filtering. You can filter by test name, binary
name, package, or platform:
# Run only tests in the "core" package
cargo nextest run -E 'package(core)'

# Run tests whose name contains "parse" in any package
cargo nextest run -E 'test(parse)'

# Combine filters
cargo nextest run -E 'package(core) & test(parse)'
JUnit XML Output
Both GitHub Actions and GitLab CI can parse JUnit XML to display test results
directly in pull request or merge request UIs. When you configure a junit
section in a nextest profile (as shown above), nextest writes the report to the
specified path after each run.
Test Partitioning
For large test suites, nextest can split tests across multiple CI jobs. Each job runs a different slice:
# In a CI matrix with 3 jobs:
cargo nextest run --partition count:1/3  # job 1
cargo nextest run --partition count:2/3  # job 2
cargo nextest run --partition count:3/3  # job 3
This is useful when your test suite is slow enough that parallelizing across machines provides a meaningful speedup.
Serial Tests
By default, cargo test runs tests in parallel within each test binary. This is
usually what you want, but some tests cannot run concurrently — for example,
tests that share a database, bind to a fixed port, or modify global state.
To force all tests to run sequentially, limit the thread count:
cargo test -- --test-threads=1
If only some tests need serialization, the serial_test crate
lets you mark individual tests with #[serial] while allowing the rest to run
in parallel:
#![allow(unused)]
fn main() {
use serial_test::serial;

#[test]
#[serial]
fn test_that_uses_shared_database() {
    // this test will never run concurrently with other #[serial] tests
}
}
CI Examples
This workflow installs nextest, runs all tests with the ci profile, and
uploads the JUnit XML report. The dorny/test-reporter action parses the report
and displays individual test results as check annotations on the pull request,
so you can see which tests failed without opening the CI logs.
name: Test
on: [pull_request]

jobs:
  test:
    runs-on: ubuntu-latest
    steps:
      - uses: actions/checkout@v4
      - uses: dtolnay/rust-toolchain@stable
      - uses: taiki-e/install-action@v2
        with:
          tool: cargo-nextest
      - run: cargo nextest run --profile ci
      - uses: dorny/test-reporter@v1
        if: always()
        with:
          name: Tests
          path: results.xml
          reporter: java-junit
GitLab natively understands JUnit XML reports. When you declare the report as an artifact, GitLab displays test results in the merge request’s test tab, showing which tests were added, removed, or started failing.
test:
  image: rust:latest
  script:
    - cargo install cargo-nextest
    - cargo nextest run --profile ci
  artifacts:
    when: always
    reports:
      junit: results.xml
Reading
How (and why) nextest uses Tokio (archived) by Siddharth Agarwal
Explains why nextest uses Tokio internally despite not doing any networking. The async model turns out to map well to scheduling and managing test processes: waiting for tests to finish, handling timeouts, and reacting to signals are all naturally expressed as futures. A good look at the internals of how nextest achieves its speed.
cargo-nextest book by cargo-nextest
Full reference for nextest: installation, configuration, filtering which tests to run, retry policies, JUnit XML output for CI, and partitioning tests across multiple CI jobs for parallelism.
External Services
Most non-trivial applications depend on external services: databases, message queues, caches, APIs. Testing code that interacts with these services can be challenging. If your test suite requires a running PostgreSQL instance or a connection to a cloud API, developers can’t easily run it locally, which slows down their iteration loop and pushes bug discovery to CI.
Whenever possible, try to make it so that the full test suite can run locally without any manual setup. This chapter outlines several strategies for achieving that, roughly ordered from lightest to heaviest.
When interfacing with external systems in tests, you need to make sure that every test is isolated. Rust’s test harness runs tests in parallel by default, so every test needs its own clean environment. For databases, this typically means creating a fresh database or schema per test. For services, it means launching a separate instance or using non-overlapping namespaces.
Mocking
The simplest approach is to replace the external service with a mock that implements the same interface. This works well when the behavior you need from the service is straightforward and you are primarily testing your own logic, not the interaction with the service.
In Rust, this is typically done by defining a trait for the service interaction and providing both a real implementation and a mock:
#![allow(unused)]
fn main() {
trait UserStore {
    fn get_user(&self, id: u64) -> Result<User, Error>;
    fn create_user(&self, name: &str) -> Result<User, Error>;
}

struct PostgresUserStore { /* ... */ }
impl UserStore for PostgresUserStore { /* ... */ }

struct MockUserStore {
    users: std::sync::Mutex<Vec<User>>,
}
impl UserStore for MockUserStore { /* ... */ }
}
The mockall crate can generate mock implementations automatically using a procedural macro, which saves you from writing boilerplate. For HTTP services specifically, wiremock lets you set up a local HTTP server that returns canned responses.
The downside of mocking is that your tests only verify that your code interacts with the mock correctly, not that it works with the real service. Schema changes, subtle behavioral differences, and integration bugs will slip through. For this reason, mocks are best used for unit tests of business logic, not as a replacement for integration testing against real services.
Service as Dependency
If the service you depend on is also written in Rust and lives in the same workspace (or is available as a crate), you can add it as a dev-dependency and launch it directly in your tests. This gives you a real instance without any Docker or external infrastructure.
For example, if your project has an api crate and a client crate, the client
can depend on the API in its test configuration:
[dev-dependencies]
api = { path = "../api" }
Then each test can spin up a fresh server instance:
#![allow(unused)]
fn main() {
#[tokio::test]
async fn test_create_user() {
    // Launch the API on a random available port.
    let server = api::Server::start("127.0.0.1:0").await;
    let addr = server.local_addr();

    let client = Client::new(&format!("http://{addr}"));
    let user = client.create_user("alice").await.unwrap();
    assert_eq!(user.name, "alice");
}
}
This approach works well for microservice architectures where the services are all Rust crates in a single workspace. It doesn’t require Docker and tests start fast. The limitation is that it only works when you control the dependency and it can be embedded as a library.
Docker Compose
When your tests depend on services that can’t be embedded as a Rust dependency
(PostgreSQL, Redis, Kafka, etc.), Docker Compose is a straightforward way to
provide them. You write a docker-compose.yml that defines the services, and
developers run docker compose up -d before running the test suite.
This also works with Podman, which is a daemonless container engine
that can serve as a drop-in replacement for Docker. Podman supports both
docker-compose (through its Docker-compatible socket) and its own
podman-compose tool. If your team prefers rootless containers or wants to
avoid the Docker daemon, Podman is worth considering.
services:
  postgres:
    image: postgres:17
    environment:
      POSTGRES_PASSWORD: test
      POSTGRES_DB: test
    ports:
      - "5432:5432"
  redis:
    image: redis:7
    ports:
      - "6379:6379"
Your tests then connect to these services on localhost. To ensure isolation, each test should create its own database or use a unique key prefix:
#![allow(unused)]
fn main() {
async fn create_test_db(pool: &PgPool) -> String {
    let db_name = format!("test_{}", uuid::Uuid::new_v4().simple());
    sqlx::query(&format!("CREATE DATABASE \"{db_name}\""))
        .execute(pool)
        .await
        .unwrap();
    db_name
}
}
The advantage of Docker Compose is its simplicity: the file is declarative, developers understand it, and it works with any service that has a Docker image. The downside is that it’s a manual step (developers need to remember to start the containers), and services are shared across all tests rather than being isolated per-test.
Testcontainers
Testcontainers combines the real-service advantage of Docker Compose with per-test isolation. Instead of requiring developers to manually start containers, the testcontainers library launches them programmatically from within your tests. Each test (or test group) gets a fresh container that is automatically cleaned up when the test finishes.
The Rust implementation is the
testcontainers crate.
It provides built-in support for common services through companion crates like
testcontainers-modules:
#![allow(unused)]
fn main() {
use testcontainers::runners::AsyncRunner;
use testcontainers_modules::postgres::Postgres;

#[tokio::test]
async fn test_with_postgres() {
    let container = Postgres::default().start().await.unwrap();
    let port = container.get_host_port_ipv4(5432).await.unwrap();

    let connection_string =
        format!("postgres://postgres:postgres@127.0.0.1:{port}/postgres");

    // Use the connection string to set up your database pool
    // and run your tests against a real PostgreSQL instance.
}
}
Every test gets its own PostgreSQL instance running in a dedicated container. There is no shared state between tests, and no manual setup step for developers. The tradeoff is startup time: launching a container takes a few hundred milliseconds to a few seconds, which adds up if you have many tests. For this reason, testcontainers is best suited for integration tests rather than fast unit tests.
Choosing a Strategy
These strategies are not mutually exclusive. A common pattern is to use mocks for unit tests that exercise business logic, and testcontainers or Docker Compose for integration tests that verify the actual service interaction. The service-as-dependency approach is ideal when you control both sides and they’re in the same workspace.
The general principle is: use the lightest approach that gives you confidence in the behavior you’re testing. Mocks are fast but low-fidelity. Real services are high-fidelity but slower. Pick the right tool for each layer of your test suite.
Reading
Increase Test Fidelity By Avoiding Mocks by Google Testing Blog
In this post from Google’s Testing on the Toilet series, the preference to use real service instances over mocks is discussed, and the tradeoffs between test fidelity and test speed are outlined.
Rust Mock Shootout! by Alan Somers
A comparison of various mocking crates in Rust, covering their strengths, limitations, and the kinds of mocking patterns each one supports.
Rust Development with Testcontainers by Engin Diri
Engin discusses how the testcontainers crate can be used to spawn external dependencies in Docker containers for each unit test, with practical examples using PostgreSQL.
Snapshot Testing
Snapshot testing captures the output of some code and saves it as a reference file. On subsequent test runs, the output is compared against the saved snapshot, and any difference is flagged as a failure. The idea is simple: rather than writing expected values by hand, you let the framework record them for you and then verify that they don’t change unexpectedly.
Some people also refer to this as golden testing (the snapshot being the golden master). Transcript tests are a related concept that focus on testing only the external interface of a tool.
Snapshot testing is not a replacement for unit testing. It is a complementary technique that makes it easy to add test cases and maintain them when output changes. This is especially valuable for code whose output is large or complex enough that writing expected values by hand would be tedious and error-prone.
Snapshot testing vs unit testing
With traditional unit testing, you tend to compare the output of some process to some known result. This requires you to be able to specify what the desired output should be.
#![allow(unused)]
fn main() {
#[test]
fn test_to_json() {
    let input = MyType {
        name: "Name".to_string(),
        email: "name@example.com".to_string(),
    };

    // you have to write this by hand
    let expected = "{\"name\":\"Name\",\"email\":\"name@example.com\"}";

    assert_eq!(expected, input.to_json());
}
}
With snapshot testing, you assert the output of some process. Generally, you don’t specify what that output is (the snapshot testing framework will help you with that), all you care about is that it stays the same.
#![allow(unused)]
fn main() {
#[test]
fn test_to_json() {
    let input = MyType {
        name: "Name".to_string(),
        email: "name@example.com".to_string(),
    };

    // the framework records the output on first run
    // and compares against the saved snapshot on subsequent runs
    assert_snapshot!(input.to_json());
}
}
The snapshot testing framework will ensure that the output of input.to_json()
will stay the same. If it does change, usually the frameworks will show you a
diff so that you can find out what the change is. You can then choose if you
accept the change (it was intended) or not.
Use Cases
Snapshot testing works well for code that transforms data into a textual representation:
- Serialization formats: ensuring that a type always encodes to the same JSON, TOML, or YAML.
- Data transformations: capturing the output of a pipeline or compiler pass.
- UI component rendering: capturing the generated HTML output of frontend components, to make sure they don’t change.
- Command-line tools: recording the stdout/stderr of a CLI invocation for various inputs.
The test suite for Cargo uses snapshot testing, but with a twist: it checks not only the output (standard error and standard output), it also tests the before and after filesystem state. It does that using fixtures which have the start state, the command to run, the expected console output, and the expected filesystem state after the command is run.
How snapshot testing works
The first time this test runs, it records the output and saves it. On subsequent runs, it compares the current output to the saved snapshot. If the output changes (for example, because you reordered the JSON fields), the snapshot tool shows you a diff and lets you accept the new output rather than forcing you to copy-paste updated values into your test source.
Insta
Insta (docs, repo) is the most widely used snapshot testing framework in the Rust ecosystem. It ships with multiple serialization formats and a command-line tool for reviewing and accepting snapshot changes.
Macros
Insta provides several assertion macros that differ in how they serialize the value being snapshotted:
| Macro | Serialization |
|---|---|
assert_snapshot! | Uses the Display representation. |
assert_debug_snapshot! | Uses the Debug representation. |
assert_json_snapshot! | Uses JSON serialization. |
assert_yaml_snapshot! | Uses YAML serialization. |
assert_toml_snapshot! | Uses TOML serialization. |
assert_csv_snapshot! | Uses CSV serialization. |
assert_ron_snapshot! | Uses RON serialization. |
The serde-based macros (JSON, YAML, TOML, CSV, RON) require the snapshotted type
to implement Serialize.
Workflow
The typical insta workflow has three steps:
- Run tests:
cargo insta testruns your test suite and writes any new or changed snapshots to.snap.newfiles next to your code. - Review:
cargo insta reviewopens an interactive terminal UI that shows you each pending snapshot change as a diff. You can accept or reject each one individually. - Commit: accepted snapshots are promoted from
.snap.newto.snapfiles, which you commit alongside your code.
These can be combined into a single command with cargo insta test --review.
Snapshots are stored as .snap files in a snapshots/ directory next to your
test code by default.
Inline snapshots
Insta also supports inline snapshots, where the reference value
is stored directly in the test source code using a @"..." syntax —
cargo insta review updates the source file automatically when you accept a
change.
CI
In CI, you want tests to fail if any snapshot is out of date, without writing
new snapshot files. Setting the CI environment variable (which most CI
providers set automatically) enables this behavior. You can also explicitly
control it:
# fail if any snapshot doesn't match, don't write .snap.new files
INSTA_UPDATE=no cargo test
Testing Command-Line Tools
Insta has an optional extension called insta-cmd (repo) for snapshotting the output of external commands:
#![allow(unused)]
fn main() {
use std::process::Command;
use insta_cmd::assert_cmd_snapshot;

#[test]
fn test_command() {
    assert_cmd_snapshot!(Command::new("echo").arg("hello"));
}
}
Expect-Test
expect-test (repo) takes a different
approach: instead of storing snapshots in separate files, it stores them inline
in your test source code. When the output changes, running the tests with
UPDATE_EXPECT=1 rewrites the expected value in your source file directly.
#![allow(unused)]
fn main() {
use expect_test::expect;

#[test]
fn test_greeting() {
    let actual = greet("World");
    expect![[r#"Hello, World!"#]].assert_eq(&actual);
}
}
This makes expect-test a hybrid between unit testing and snapshot testing: the expected values live in the test code (like a unit test), but they are maintained automatically (like a snapshot test). Insta supports a similar workflow through its inline snapshots feature.
Runt
Runt (docs) is a tool for snapshot-testing command-line programs. It implements transcript tests: you write a file containing commands and their expected output, and runt verifies that running the commands still produces the same output. This is related to snapshot testing but focuses specifically on testing the external behavior of text-processing tools.
Reading
What if writing tests was a joyful experience? by James Somers
Describes how expect tests at Jane Street make testing feel like a REPL session: developers write minimal test code with blank expect blocks, the system fills in the actual output, and you accept the diff with a keybinding. Argues that by removing the friction of writing assertions, expect tests encourage more comprehensive testing because “by relieving you from having to dream up exactly what you want to assert, expect tests make it easier to implicitly assert more.”
Try Snapshot Testing for Compilers and Compiler-Like Things by Adrian Sampson
Argues that snapshot testing is ideal for programs that transform text into other text — compilers, linters, formatters, and similar tools. Introduces turnt, a minimal snapshot testing tool, and makes the case that prioritizing easy test creation over precise assertions is a worthwhile tradeoff when human review of output changes is cheap.
Building Industrial Strength Software without Unit Tests by Chris Penner
Introduces transcript tests: markdown files that document expected behavior through executable code blocks and their outputs, serving as both tests and user-facing documentation. The key insight is that testing the external interface (rather than internal implementation) means refactors don’t break tests unless observable behavior changes, removing a major psychological barrier to improving code.
Insta - Snapshot Testing for Rust by Bryant Luk
Walkthrough of using insta in a Rust project, highlighting how snapshot testing speeds up development because code changes don’t require manually fixing test cases — you review snapshot diffs instead. Demonstrates insta’s glob feature for running tests against multiple input files.
Using Insta for Rust snapshot testing by Agustinus Theodorus
Step-by-step tutorial showing how to set up insta, write snapshot tests, and
use cargo-insta to review and accept changes. Good starting point if you
want a hands-on introduction.
Property Testing
Property testing is a testing methodology that allows you to generalize your unit tests by running them with randomized inputs and testing properties of the resulting state, rather than coming up with individual test cases. This gives you confidence that your code is generally correct, rather than just correct for the specific inputs you are testing. It is often effective at finding edge cases you haven’t considered.

What property-testing frameworks typically do is:
- Generate arbitrary (random) test-cases for your tests, with constraints that you specify. Typically, this works by generating a random seed, and using that in combination with a pseudorandom number generator to randomly generate data structures that are used as input.
- Simplify failing inputs to create a small failing test-case, also called test case shrinking. This attempts to reduce the input test case to something smaller to eliminate parts of the input data that don’t matter, and to make it easier to reproduce and track down the bug.
- Record failing test-cases, so you can replay them. Usually this works by recording the initial seed, so that the same input can be generated again.
- Replay: When running tests, recorded failing seeds are replayed first (before generating more randomized inputs) to ensure that there are no regressions where previously-found bugs resurface.
There is some overlap between property testing and fuzzing. Both are testing strategies that rely on randomly generating input cases. Usually, the difference is that property testing focuses on testing a single component, whereas fuzzing tries to test a whole program. Additionally, fuzzing usually employs instrumentation, where it monitors at runtime which branches are taken and attempts to achieve full coverage. You can replicate some of that by measuring Test Coverage.
Usually, property tests run fast and can be part of your regular unit tests, while fuzzing tests are run for hours and are not part of your regular testing routine.
Overview
General Principle
When you write unit tests, you know the inputs and expected outputs. When you use property testing, your inputs will be randomized, so you don’t know ahead of time what they will be. What you do here is that you test properties of the output state.
In general, all property tests are structured the same way: it is a test function that is provided with some randomized inputs of a predefined shape, runs some action on the input, and then verifies the output.

If you are testing a stateful system, then the initial state of the system will be the input, and the resulting state will be the output.
For example: if you have an API, and you are testing the crate user functionality, then your initial API (and database) state will be the input. Then you will run the action (create user). The property that you will test for in the output state will be that the user exists.
Testing Against a Reference
Rather than manually testing properties, you can also write property tests to apply some operations onto both your implementation and a reference implementation. For example, if you are implementing a specific data structure, you can test it against another data structure (that might not be as optimized as yours, but you know is correct).
Action Strategy
One common pattern when doing property testing is letting the property testing framework come up with a sequence of actions, and performing those. This approach lets you test more complex interactions.
The way this works is that you create an enum that holds possible actions. These actions can be anything, for example if you are testing a data structure you might mimic the public interface of the data structure. If you are testing a REST API, this struct would mimic the API endpoints that you want to test.
#![allow(unused)]
fn main() {
pub enum Action {
    CreateUser(Uuid),
    DeleteUser(Uuid),
}
}
You allow the property testing framework to generate a list of these actions, and then you run them.
#![allow(unused)]
fn main() {
fn test_interaction(actions: Vec<Action>) {
    let service = Service::new();
    for action in actions {
        match action {
            Action::CreateUser(uuid) => {
                service.user_create(uuid);
                assert!(service.user_exists(uuid));
            },
            Action::DeleteUser(uuid) => {
                service.user_delete(uuid);
                assert!(!service.user_exists(uuid));
            },
        }
    }
}
}
You can extend this pattern by adding a proxy object that tracks expected state alongside the real system. After each action, you assert that the real system’s state matches the proxy’s. This is essentially the “testing against a reference” approach from above, but applied to state transitions rather than pure functions.
Frameworks
There are three main property-testing ecosystems in Rust: proptest,
quickcheck, and arbtest. They all follow the generate-shrink-record-replay
pattern described above but differ in API design, shrinking strategy, and how
test inputs are defined.
proptest
proptest is the most widely used
property-testing framework in Rust. It uses composable strategies to define
how inputs are generated, and it has a powerful shrinking algorithm that reduces
failing inputs to minimal examples. Failing seeds are recorded so they are
replayed on future runs.
Example
Imagine that you are trying to implement a novel sorting algorithm. You’ve read the paper, and you’ve tried your best to follow along and implement it in Rust. You came up with this implementation:
#![allow(unused)]
fn main() {
pub fn sort(mut input: Vec<u16>) -> Vec<u16> {
    let mut output = Vec::new();
    while let Some(value) = input.iter().min().copied() {
        input.retain(|v| v != &value);
        output.push(value);
    }
    output
}
}
Now, you want to test it. You can start by writing some simple unit tests for it, or maybe you already have as you were implementing your algorithm because you used test-driven development.
#![allow(unused)]
fn main() {
#[test]
fn test_sort() {
    assert_eq!(sort(vec![]), vec![]);
    assert_eq!(sort(vec![2, 1, 3]), vec![1, 2, 3]);
}
}
Running these works:
    Finished `test` profile [unoptimized + debuginfo] target(s) in 0.05s
     Running unittests src/lib.rs (target/debug/deps/property_testing-a56cb7ff70b4c3d9)

running 1 test
test test_sort ... ok

test result: ok. 1 passed; 0 failed; 0 ignored; 0 measured; 0 filtered out; finished in 0.00s
The issue now is that these working unit tests do not prove that your algorithm works in general. All they do is prove that your algorithm works for these specific inputs. What if there is a bug in your algorithm that is only triggered on an edge case? Hint: there is, and we will find it.
We can use property testing to test the algorithm for randomized inputs. While with unit testing, we test specific inputs and outputs, with property testing we run our algorithm on unknown (random) inputs, and verify that certain properties hold.
In this case, the function is supposed to sort an array of numbers. Sorting implies two properties:
- The output should be sorted. This means that for any pair of adjacent numbers, the first should be lower or equal than the second.
- The output should contain the same numbers as the input (but maybe in a different order).
From this, we can derive some property checking functions. For each of our two
properties (that the output is sorted, and that the output should contain the
same elements), we write a proptest. Notice how this works: a proptest is just a
Rust unit test that takes a Vec<u16>. Proptest takes care of generating this
for us. Also, we use prop_assert!(), this is not required but makes the
proptest framework play nicer.
#![allow(unused)]
fn main() {
use property_testing::sort;
use proptest::prelude::*;

proptest! {
    #[test]
    fn output_is_sorted(input: Vec<u16>) {
        let sorted = sort(input.clone());
        let is_sorted = sorted
            .iter()
            .zip(sorted.iter().skip(1))
            .all(|(left, right)| left <= right);
        assert!(is_sorted);
    }

    #[test]
    fn output_same_contents(input: Vec<u16>) {
        let mut sorted = sort(input.clone());
        for value in input {
            let index = sorted.iter().position(|element| *element == value).unwrap();
            sorted.remove(index);
        }
        assert!(sorted.is_empty());
    }
}
}
When you run this, you will see that it finds a failure. Because of a bug in the implementation of our sorting algorithm, it does not work for all inputs.
    Finished `test` profile [unoptimized + debuginfo] target(s) in 0.02s
     Running tests/tests.rs (target/debug/deps/tests-de3119d97d94d83f)

running 2 tests
test output_same_contents ... FAILED
test output_is_sorted ... ok

failures:

---- output_same_contents stdout ----
proptest: FileFailurePersistence::SourceParallel set, but failed to find lib.rs or main.rs

thread 'output_same_contents' panicked at tests/tests.rs:19:77:
called `Option::unwrap()` on a `None` value
note: run with `RUST_BACKTRACE=1` environment variable to display a backtrace

thread 'output_same_contents' panicked at tests/tests.rs:19:77:
called `Option::unwrap()` on a `None` value
...
called `Option::unwrap()` on a `None` value

thread 'output_same_contents' panicked at tests/tests.rs:4:1:
Test failed: called `Option::unwrap()` on a `None` value.
minimal failing input: input = [
    1152,
    1152,
]
	successes: 0
	local rejects: 0
	global rejects: 0


failures:
    output_same_contents

test result: FAILED. 1 passed; 1 failed; 0 ignored; 0 measured; 0 filtered out; finished in 0.02s

error: test failed, to rerun pass `--test tests`
Helpfully, proptest records this failure. Typically, it will save the failing
seeds into a file adjacent to the source file that contains the test. In our
case, it saves them into tests/tests.proptest-regressions.
# Seeds for failure cases proptest has generated in the past. It is
# automatically read and these particular cases re-run before any
# novel cases are generated.
#
# It is recommended to check this file in to source control so that
# everyone who runs the test benefits from these saved cases.
cc 21bd5d80c29fcb4cb0706faa6fd3cc313c3b0207afbb6853a34bf28cb67ef61e # shrinks to input = [1152, 1152]
Can we fix this? For sure. Looking at the test, we can deduce what the issue is. The problem seems to be that we remove all values from the input array, but we only add it to the output once. So when the input array contains duplicate values, the output will only contain a single one. We can fix this in the code by counting the occurrences, and adding that many to the output:
#![allow(unused)]
fn main() {
pub fn sort(mut input: Vec<u16>) -> Vec<u16> {
    let mut output = Vec::new();
    while let Some(value) = input.iter().min().copied() {
        let count = input.iter().filter(|v| *v == &value).count();
        input.retain(|v| v != &value);
        for _ in 0..count {
            output.push(value);
        }
    }
    output
}
}
Finally, we can run the property test again to verify that it works now.
    Finished `test` profile [unoptimized + debuginfo] target(s) in 0.02s
     Running tests/tests.rs (target/debug/deps/tests-b1cb1390a61a741f)

running 2 tests
test output_is_sorted ... ok
test output_same_contents ... ok

test result: ok. 2 passed; 0 failed; 0 ignored; 0 measured; 0 filtered out; finished in 0.02s
This example was maybe a bit simplistic, unit testing could have also caught this issue. But it shows the general principle of doing property testing: you identify general properties that your application should uphold after certain actions. It works well for stateless code that has an input and an output, like this. But you can also use it to test state transitions, as described in the Action Strategy section above.
Property testing is not guaranteed to find an issue, because it is randomized.
There are some things you can do to increase the chances that proptest can find
issues. For example, you can tweak how many iterations it performs. You can
also reduce the search space, for example by operating on Vec<u8> instead of
Vec<u64>.
But if proptest does catch an issue, it makes it easy to reproduce it, debug it and ensure that it does not occur again (regression).
test-strategy
The test-strategy crate
is a companion to proptest that provides three features:
- An attribute macro (
#[proptest]) that lets you write property tests as regular functions instead of using proptest’sproptest!macro. - Support for async property tests (with
tokioandasync-stdexecutors). - A derive macro for
Arbitrarythat makes it easy to generate custom types.
For example, writing a property test with proptest and the test-strategy
crate looks like this:
#![allow(unused)]
fn main() {
use test_strategy::proptest;
// regular test
#[proptest]
fn test_parser(input: String) {
let _ = parse(&input);
}
// async proptest (uses tokio executor)
#[proptest(async = "tokio")]
async fn test_async_parser(input: String) {
let _ = parse(&input).await;
}
}The advantage in using test-strategy is the pleasant syntax, and the fact that
it handles async code easily.
The derive macro for Arbitrary makes it easy to generate random test inputs
for your custom structs.
#![allow(unused)]
fn main() {
use test_strategy::{proptest, Arbitrary};
#[derive(Arbitrary)]
pub struct User {
name: String,
age: u16,
}
#[proptest]
fn test_user(user: User) {
// ...
}
}quickcheck
quickcheck is the other
established property-testing crate in Rust, named after the original Haskell
QuickCheck package. It
predates proptest and has a simpler API: you implement the Arbitrary trait for
your types and write test functions that return bool. QuickCheck handles
shrinking automatically.
The main difference from proptest is in how inputs are generated. Proptest uses
composable strategies that are separate from the types being tested, while
quickcheck ties generation to the type itself through Arbitrary. This makes
proptest more flexible for complex input shapes, but quickcheck simpler for
straightforward cases.
arbtest
arbtest is a minimalist property-testing
library that builds on the
arbitrary crate. Where proptest
has its own strategy system and quickcheck has its own Arbitrary trait,
arbtest reuses the Arbitrary trait from the arbitrary crate — the same
trait used by fuzzing tools like cargo-fuzz. This means types you’ve already
made fuzzable are immediately usable in property tests, and vice versa.
The API is intentionally tiny:
#![allow(unused)]
fn main() {
use arbtest::arbtest;
arbtest(|u| {
let input: Vec<u8> = u.arbitrary()?;
let sorted = sort(&input);
assert!(sorted.windows(2).all(|w| w[0] <= w[1]));
Ok(())
});
}Reading
Proptest Book by Proptest Project
The official book of the proptest crate. This is a valuable read if you want to understand how it works and how you can customize it, for example by implementing custom strategies for generating test inputs.
Complete Guide to Testing Code in Rust: Property testing by Jayson Lennon
Jayson gives an overview of property testing in Rust as part of a broader testing guide, covering how to use the proptest crate to generate randomized inputs and test properties of your code.
Property-testing async code in Rust to build reliable distributed systems by Antonio Scandurra
In this presentation, Antonio explains how he used property testing to test the Zed editor for correctness. Being a concurrent, futures-based application, it is important that the code is correct. By testing random permutations of the futures execution ordering, he was able to find bugs in edge cases that would otherwise have been very difficult to discover or reproduce.
An Introduction to Property-Based Testing in Rust (archived) by Luca Palmieri
An excerpt from his book, Zero to Production in Rust, Luca does a deep-dive
into property testing in Rust. He shows how to test a web backend using its
REST API using both the proptest crate and the quickcheck crate.
Property-Based Testing in Rust with Arbitrary (archived) by Serhii Potapov
Serhii shows how to use the arbitrary crate and the arbtest crate to
implement property-testing in Rust.
Bridging fuzzing and property testing (archived) by Yoshua Wuyts
Yoshua notices that fuzzing and property testing are fundamentally similar, in
that they generate random test-cases for programs. He mentions the arbitrary
crate, which is used for fuzzing in Rust. He explains how to use this same
crate to generate random test-cases for property testing, and explains his
crate to do this, called heckcheck. He also mentions that there is another
crate for doing this, called proptest-arbitrary-interop. The advantage of
using these crates is that they unify the library ecosystem used for fuzzing
with that used for property testing.
Property-based testing in Rust with Proptest (archived) by Zach Mitchell
Zack shows how to use the proptest crate to write property tests. He gives
an example of writing a parser using the pest crate, shows how to implement
custom strategies for generating arbitrary test cases, and uses them to
test his parser.
Fuzzing and Property Testing by Ted Kaminski
Compares fuzzing and property testing as complementary techniques rather than competing ones. Argues that property testing has a design advantage through co-design (iteratively refining code, invariants, and tests together), while fuzzing excels at security testing by avoiding human assumptions about which inputs matter. Also notes that with modern instrumentation, the gap between the two is narrowing.
Demonstrates property-based testing with two concrete examples: validating a
sorting algorithm produces sorted output, and roundtrip-testing a parser
(stringify(parse(x)) == x). Shows how proptest uncovered real bugs in the
author’s profanity detection library that would have been difficult to find
with example-based tests.
Fuzzing
Fuzzing is an approach to testing that generates random inputs for your code and uses instrumentation to monitor which branches are being triggered, with the goal of triggering all branches inside the code. In doing so, it can test your code very thoroughly and often discover edge cases that you might not have thought of when writing unit tests.
The general approach looks something like this: a fuzzer generates a randomized input, feeds it to your program, and monitors the result. If the program crashes or triggers some kind of invalid behaviour, the fuzzer records the failing input. The fuzzer uses code coverage instrumentation to track which branches are taken, and uses this feedback to guide future inputs towards unexplored paths. When a crash is found, the fuzzer attempts to reduce the input to the smallest possible reproducer.
Fuzzing is usually an effective technique for testing parsers. Fuzzing implementations are usually able to use valid, working inputs as a starting point and randomly mutate them to try to find inputs that either crash the program, or lead to some kind of invalid behaviour.
Fuzzing is a popular technique for testing parsers written in memory-unsafe languages. It focusses on trying to reach all branches and testing for invalid behaviour (stack overflows, read or write out of bounds). For this reason, it is often combined with sanitizers. There is even some infrastructure for continuously running fuzzing against popular open-source libraries, done by Google’s [OSS-Fuzz][ossfuzz] project.
Because Rust is a memory-safe language, fuzzing is generally less important. Some places where you might want to use it are:
- If your code makes a lot of use of
unsafeand raw pointer access, - If you are trying to test the soundness of a program that interacts with memory-unsafe languages (for example, bindings for a C or C++ library).
Otherwise, it might make more sense for you to look into doing Property testing, which focusses more on testing individual components, and is more focussed on correctness rather than memory safety.
Fuzzing is a very good strategy when your code parses untrusted data. It allows you to have confidence that for any possible input, your program does not misbehave. The downside of fuzzing is that usually, it can only detect crashes. When possible, it is better to test individual pieces of code using property testing.
cargo-fuzz
cargo-fuzz is the most common way to fuzz Rust code. It is a Cargo subcommand that integrates with libFuzzer, the coverage-guided fuzzer built into LLVM. Because the Rust compiler uses LLVM as its backend, libFuzzer can instrument Rust code directly, making the integration seamless.
You can install it from crates.io:
cargo install cargo-fuzz
Initializing a fuzz project creates a fuzz/ directory inside your crate with
its own Cargo.toml and a fuzz_targets/ directory for your fuzz targets:
cargo fuzz init
Each fuzz target is a small program that receives arbitrary bytes from the fuzzer and passes them to the code you want to test. For example, if you have a config file parser:
#![allow(unused)]
fn main() {
pub fn parse_config(input: &str) -> Vec<(&str, &str)> {
let mut result = Vec::new();
for line in input.lines() {
if line.is_empty() {
continue;
}
let parts: Vec<&str> = line.split('=').collect();
if parts.len() != 2 {
panic!("invalid config line: {}", line);
}
result.push((parts[0], parts[1]));
}
result
}
}You can write a fuzz target that feeds arbitrary strings into it:
#![allow(unused)]
#![no_main]
fn main() {
use libfuzzer_sys::fuzz_target;
use fuzzing_example::parse_config;
fuzz_target!(|data: &str| {
// We don't care about the result, we just want to make
// sure the parser does not panic on any input.
let _ = parse_config(data);
});
}The fuzz_target! macro defines the entry point for the fuzzer. The closure
receives data generated by libFuzzer, and you pass it to whatever function you
want to test. In this case, the fuzzer will quickly discover inputs that cause
the parser to panic, for example a line containing multiple = characters like
a=b=c.
You run the fuzzer with:
cargo fuzz run fuzz_parse_config
The fuzzer will run indefinitely, printing status updates as it explores new
code paths. When it finds a crash, it writes the failing input to
fuzz/artifacts/fuzz_parse_config/ and prints the path. You can then reproduce
the crash with:
cargo fuzz run fuzz_parse_config fuzz/artifacts/fuzz_parse_config/<artifact>
cargo-fuzz requires a nightly Rust compiler because it relies on LLVM’s
sanitizer instrumentation, which is not yet stabilized. You can use it with
cargo +nightly fuzz run ... or by setting your project to use nightly via
a rust-toolchain.toml file.
Structured Fuzzing with Arbitrary
By default, the fuzzer provides raw bytes (&[u8] or &str). For more complex
inputs, you can derive the Arbitrary trait from the arbitrary
crate, which lets the fuzzer generate structured data directly. This is useful
when your code expects a specific input type rather than raw bytes.
#![allow(unused)]
fn main() {
use libfuzzer_sys::arbitrary::Arbitrary;
#[derive(Arbitrary, Debug)]
struct Config {
timeout: u32,
retries: u8,
verbose: bool,
}
fuzz_target!(|config: Config| {
// test with structured input
apply_config(&config);
});
}This approach tends to be more effective than raw byte fuzzing for code that doesn’t directly parse bytes, because the fuzzer doesn’t waste time generating inputs that fail to deserialize.
Corpus Management
The fuzzer maintains a corpus of interesting inputs: ones that triggered new code paths. Over time, this corpus grows and helps the fuzzer explore deeper into your code. You can seed the corpus with known valid inputs to give it a head start:
mkdir -p fuzz/corpus/fuzz_parse_config
echo "key=value" > fuzz/corpus/fuzz_parse_config/seed1.txt
cargo fuzz run fuzz_parse_config
You can also minimize the corpus periodically to remove redundant entries:
cargo fuzz cmin fuzz_parse_config
afl.rs
afl.rs is a Rust wrapper around American Fuzzy Lop (AFL), one of the original coverage-guided fuzzers. AFL takes a different approach than libFuzzer: it works by forking your program for each test case rather than calling a function in a loop. This makes it somewhat slower per iteration, but it can catch issues that cause the entire process to hang or enter infinite loops, which libFuzzer cannot easily detect.
AFL also comes with a set of companion tools for corpus management and crash triage. It has a distinctive terminal UI that displays real-time statistics about the fuzzing campaign, including execution speed, code coverage, and crash counts.
In general, cargo-fuzz (libFuzzer) is the more common choice in the Rust ecosystem and is easier to set up. afl.rs is worth considering if you need its specific capabilities, such as hang detection, or if you want to run both fuzzers in parallel for better coverage.
When to use Fuzzing
Fuzzing is most valuable when your code handles untrusted or complex input. Good candidates for fuzzing include:
- Parsers for file formats, network protocols, or configuration files
- Serialization and deserialization code
- Compression and decompression libraries
- Cryptographic implementations
- Any code with significant
unsafeblocks
For pure Rust code without unsafe, fuzzing still catches panics (unwrap
failures, index out of bounds, arithmetic overflow in debug mode) and logic bugs
that manifest as crashes. If you are more interested in testing correctness
properties rather than crash-freedom, property testing is often
a better fit.
Reading
Rust-Fuzz Book by Rust Fuzz Book
This book explains what fuzz testing is, and how it can be implemented in Rust
using afl.rs and cargo-fuzz.
How to fuzz Rust code continuously by Yevgeny Pats
Yevgeny explains why you should fuzz your Rust code, and shows you how to do it in GitLab. GitLab has some features that make running fuzzing inside GitLab CI quite convenient.
Fuzzing Solana by Addison Crump
Addison shows how Rust can be used to fuzz the Solana eBPF JIT compiler, and outlines the security vulnerabilities found using this approach.
What is my fuzzer doing? by Tweede Golf
This article explores how to understand and interpret what a fuzzer is doing during a campaign, including how to read coverage data and identify areas where the fuzzer is getting stuck.
Effective Fuzzing: a dav1d case study by Google Project Zero
A detailed case study on fuzzing the dav1d AV1 decoder. Demonstrates the practical impact of fuzzing on a real-world, performance-critical codec and the kinds of bugs it uncovers.
Coverage-guided fuzzing: extending instrumentation by Include Security
Explains how coverage-guided fuzzing works under the hood, and how extending the instrumentation beyond basic block coverage can improve fuzzing effectiveness.
Mutation Testing
Mutation testing is an approach to testing that works differently from property testing and fuzzing. Instead of randomly generating inputs, it works by randomly mutating your code and running the existing tests against each mutation. The goal is to find mutations that do not break any tests: this usually means that a section of code is not covered by tests, or that the tests are not specific enough to catch the change.
On a high level, mutation testing frameworks try to inject bugs into your code and see if your existing tests catch them.
In some ways, you could say that mutation tests are testing your tests. If you have good tests, then changing anything about your code should result in at least one failing test. If that is not the case, then your tests do not cover all properties (or branches, or edge cases) of your code.
cargo-mutants
cargo-mutants is the main mutation testing tool for Rust. It
works by applying mutations to your source code, running cargo test (or
cargo nextest) for each mutation, and reporting which mutations were caught by
your tests and which were not.
Installation
cargo install cargo-mutants
Running
Run it in your project directory:
cargo mutants
cargo-mutants will automatically find functions in your code, apply mutations to them one at a time, and run your tests after each mutation. The output looks something like this:
Found 38 mutants to test
ok Unmutated baseline in 1.2s build + 0.3s test
14 mutants tested in 0:08: 2 missed, 9 caught, 3 unviable
Interpreting Results
Each mutation falls into one of four categories:
- Caught: A test failed after the mutation was applied. This is good: it means your tests are specific enough to detect this kind of change.
- Missed: All tests still passed after the mutation. This suggests that the mutated code is either untested or that the tests don’t check for the behavior that changed.
- Unviable: The mutation caused a compilation error. This is neutral: it means the type system already prevents this kind of bug, which is one of Rust’s strengths.
- Timeout: The mutation caused the test suite to hang (for example, by
turning a loop condition into
true). These are treated as caught, since a hang is detectable.
The missed mutations are the interesting ones. They point to places where your
tests could be stronger. cargo-mutants writes detailed results to mutants.out/
in your project directory, including the exact mutation applied and which file
and function it was in.
Types of Mutations
cargo-mutants applies several kinds of mutations:
Return value replacement is the most common: it replaces function bodies
with default values that match the return type. For example, a function
returning bool will be replaced with one that always returns true (and then
false), a function returning i32 will return 0 and 1, and a function
returning String will return an empty string. This tests whether your code
actually checks return values.
Binary operator replacement swaps operators in expressions: == becomes
!=, && becomes ||, + becomes -, and so on. This tests whether your
conditional logic and arithmetic are actually verified by tests.
Unary operator deletion removes negation (-x becomes x, !b becomes
b), testing whether sign and boolean inversion matter to your tests.
cargo-mutants also supports match arm deletion and struct field deletion, though these are applied less frequently.
Skipping Functions
Some functions are not worth mutating: logging helpers, debug formatting, or code that is intentionally untested. You can skip them with an attribute:
#![allow(unused)]
fn main() {
#[mutants::skip]
fn debug_log(msg: &str) {
eprintln!("[DEBUG] {msg}");
}
}This attribute has no effect on normal compilation and is only recognized by cargo-mutants.
Using in CI
Mutation testing is slow compared to running your test suite once, because it
runs the full suite for every mutation. For large projects, running it on every
commit is impractical. A common approach is to run it on a schedule (for
example, weekly) or only on changed files using the --in-diff flag:
git diff main | cargo mutants --in-diff -
This limits mutation testing to functions that were modified in the current branch, which is fast enough for PR checks.
Reading
Mutation Testing in Rust by Nicolas Fränkel
Nicolas explains how to use cargo-mutants by setting up an example project and running it. In the process, he discovers a missed mutation, creates a pull request to fix it, and shows how mutation testing can reveal gaps in test coverage that other approaches miss.
Dynamic Analysis
The Rust programming language does not prevent you from writing invalid code, it
just makes it a lot harder. The default state is that code is subject to the
borrow checker, which ensures memory safety. However, sometimes you need to
write code that bypasses these safety guarantees and places the burden of
ensuring correctness on you: unsafe code.
A typical Rust program contains minimal unsafe code. Most crates avoid it, and
when they do use it, it tends to be in small, contained sections. Rust doesn’t
eliminate the ability to shoot yourself in the foot; it just forces you to be
intentional about it. In languages like C or C++, effectively all code is
implicitly unsafe, without the clear boundaries Rust provides.
Sometimes, you would like to check if the unsafe code you have written is in
fact valid. This can be challenging because what you’re trying to catch is
undefined behavior. For example, reading one byte past an array’s bounds
wouldn’t necessarily cause your program to crash; you might simply read garbage
data.
One solution is to use dynamic analysis, where your program runs in a special environment (instrumented or emulated) and a higher-level tool validates every action your program takes. If your program triggers any undefined behavior, you receive an error and a description of what went wrong:
- Read uninitialized memory
- Read past memory allocation/stack
- Write past memory allocation/stack
- Free memory that is already freed (double free)
- Forget to free memory (memory leak)
These tools can be enabled when running unit tests to monitor your code’s behavior and provide diagnostic errors when it performs invalid operations. Triggering undefined behavior is dangerous because your program may break when switching compilers or when running on different hardware. For example, x86 CPUs permit unaligned memory reads, but other platforms might not, so code that relies on this behavior will fail on those platforms.
Due to Rust’s built-in safety guarantees, most Rust code doesn’t contain significant amounts of undefined behavior, making these tools less frequently needed than in languages like C or C++.
There is one tool particularly well-suited for detecting invalid operations in Rust code: Miri.
Miri
Miri is a tool that lets you find undefined behaviour in Rust programs. It works as an interpreter for Rust’s mid-level intermediate representation (MIR), which the compiler uses internally. Similar to Valgrind, Miri works by interpreting code rather than executing it directly. The advantage of Miri over Valgrind is that MIR retains rich semantic information, resulting in more precise diagnostic messages. However, like Valgrind, it significantly slows down your program’s execution.
You can install and use Miri with the following commands:
rustup +nightly component add miri
cargo +nightly miri test
Miri can detect numerous issues such as:
- Invalid memory accesses
- Use of uninitialized memory
- Data races
- Violations of Rust’s stacked borrows model
- Leaking of memory marked as
MayLeak
Miri is particularly valuable for testing unsafe code, as it can catch subtle
issues that might not manifest in normal testing environments. It is also useful
for testing code that interfaces with external libraries through FFI, as this is
a common source of unsafety.
Miri has some limitations that are worth knowing about. For example, Miri runs as a single-threaded interpreter (it simulates threads sequentially, like a multi-threaded OS on a single-core CPU), so it cannot detect bugs that depend on specific thread interleavings — but it can and does detect data races. SIMD support is limited, with only a subset of intrinsics implemented. Miri also cannot access platform-specific APIs, FFI, or networking.
cargo-careful
cargo-careful, by the same author
as Miri (Ralf Jung), is a lighter-weight tool that adds extra runtime checks to
your code without the overhead of a full interpreter. It works by enabling
additional debug assertions in the standard library and your code, catching
issues like uninitialized memory usage, misaligned memory accesses, and integer
overflow.
cargo install cargo-careful
cargo +nightly careful test
The key advantage over Miri is speed: cargo-careful runs your tests at near
normal speed, making it practical to include in regular test runs or CI. The
tradeoff is that it catches fewer issues — it cannot detect aliasing violations
or data races the way Miri can. Think of it as a middle ground between normal
testing and a full Miri run.
Valgrind
Valgrind lets you run your program in an emulated way, where all memory access is monitored. It has a relatively faithful emulation of the x86 architecture, it even incorporates features such as a model of how CPU caches work so you can check how good the memory locality of your program is.
Due to the emulation, there is some overhead. It can also report how many instructions your program took to run, which is more useful for microbenchmarks than time, because it is stable between machines (but not architectures).
There is a cargo-valgrind tool that you can use to run your Rust unit tests with valgrind. It will parse the output of valgrind and output them in a human-readable format.
LLVM Sanitizers
LLVM sanitizers (AddressSanitizer, ThreadSanitizer, UndefinedBehaviorSanitizer, LeakSanitizer) are compile-time instrumentation tools. Unlike Valgrind, which emulates execution, sanitizers insert checks directly into your binary during compilation. This gives them access to richer metadata (type information, allocation context) and lets them detect certain issues that Valgrind cannot, at the cost of requiring a recompilation with the appropriate flags.
All sanitizers currently require a nightly toolchain because they use the
unstable -Z sanitizer flag.
Address Sanitizer (ASan)
AddressSanitizer is designed to detect memory errors such as:
- Use-after-free
- Heap/stack/global buffer overflow
- Stack-use-after-return
- Double-free, invalid free
You can use ASan with Rust by passing the sanitizer flag:
RUSTFLAGS="-Z sanitizer=address" cargo +nightly test
ASan typically introduces a 2-3x runtime overhead but runs significantly faster than Valgrind while providing comparable detection capabilities.
Memory Sanitizer (MSan)
MemorySanitizer detects uses of uninitialized memory, which can cause subtle bugs that are hard to track down. Unlike ASan, MSan focuses specifically on detecting reads from uninitialized memory.
RUSTFLAGS="-Z sanitizer=memory" cargo +nightly test
MSan is particularly valuable for code that manually manages memory or interfaces with C libraries where memory initialization might be incomplete.
Undefined Behaviour Sanitizer (UBSan)
UndefinedBehaviorSanitizer detects various types of undefined behavior at runtime, including:
- Integer overflow
- Invalid bit shifts
- Misaligned pointers
- Null pointer dereferences
- Unreachable code execution
RUSTFLAGS="-Z sanitizer=undefined" cargo +nightly test
UBSan has relatively low performance overhead (typically 20-50%) and can detect issues that other sanitizers might miss.
Thread Sanitizer (TSan)
ThreadSanitizer detects data races in multithreaded code. This is particularly
valuable in Rust when using unsafe to implement concurrent data structures or
when interfacing with external threading libraries.
RUSTFLAGS="-Z sanitizer=thread" cargo +nightly test
TSan has higher overhead (5-15x) but excels at identifying race conditions that might occur only sporadically during normal testing.
Reading
Data-driven performance optimization with Rust and Miri (archived) by Keaton Brandt
Keaton shows you how you can use Miri to get detailed profiling information from Rust programs, visualize them in Chrome developer tools and use this information to optimize your program’s execution time.
Unsafe Rust and Miri by Ralf Jung
In this talk, Ralf explains key concepts around writing unsafe code, such as what “undefined behaviour” and “unsoundness” mean, and explains how to write unsafe code in a systematic way that reduces the chance of getting it wrong.
C++ Safety, in context (archived) by Herb Sutter
In this article, Herb Sutter discusses the safety issues C++ has. While this is not directly relevant to Rust, he does make a good point about the fact that there is good tooling to catch a lot of issues (sanitizers, for example) and that they should be more widely used, even by projects that use languages that are safer by design, such as Rust. While some consider C++ to be defective, with the right tooling a majority of issues can be caught.
The Soundness Pledge (archived) by Ralph Levien
Ralph talks about the use of unsafe in Rust. Many developers consider using
it to be bad style, but he argues that it is not unsafe that is a problem, it
is unsound code that is a problem. As a community, we should strive to
eliminate unsound code. This includes using tools like Miri to ensure
soundness.
Rust and Valgrind by Nicholas Nethercote
Nicholas explains why you should use Valgrind with Rust, and what kinds of issues it can detect.
Measure
Everybody talks about being data-driven, but few software projects actually are. There might be a set of properties of your software that you care about. For example, some of these properties might be correctness (measured by the ability of the test suite to test all edge cases your software may run into), performance (measured by the execution time of a set of operations that is representative for what your software might do in the real world). Any properties that are critical to the project should be continuously measured, and these (aggregated) measurements made available to engineers to help them shape the direction and implementation of the project.

If you have a Rust software project, you should ask yourself the question: are there any important properties that this software must uphold? Based on your responses to this question, you should think about how you can measure these properties, and ensure that they are continuously monitored. Some of the properties might be implicit and difficult to identify. For example, if you are running a web application, you want users to have a good experience. Part of that could be that your application should be snappy, but it is difficult to quantify that. If there are fewer users on your site, is it because it is slower? Or is the design worse than it was? One part of being data-driven is identifying what data is critical.
Software constantly changes, and just because you have come up with a data structure that performed well on the workload today, does not mean that it will still be the best data structure for the job tomorrow. Coming up with metrics and continuously monitoring them allows you to notice regressions before they hit production.
Here are some examples for properties that you might want to measure over time, and why they might be critical to a project. Every project is different, and not all properties might be of equal importance. Setting up and maintaining measurement pipelines takes time, so you should choose the properties you optimize for wisely.
| Properties | Use-case |
|---|---|
| Binary size | You are deploying a WebAssembly-powered website, which needs to be fetched by the browser on every first request. You want to ensure that the website loads quickly, so you want to measure the binary size. |
| Memory usage | You are writing a firmware for a microcontroller which has limited amount of memory. You want to measure the dynamic memory usage to ensure that it stays within the allowed limit. |
| Correctness | Your project includes a bespoke lock-free data structure to handle data for many concurrent requests, and you want to make sure that it is correct for all possible use-cases. |
| Performance | Your application includes some custom data processing code that is mission-critical. You want to measure the performance of them over time to ensure that there are no regressions as it is being developed. |
But measuring them is only one half of the equation. The other half is: how do you collect, aggregate this information and make it available to your engineers to shape the decision process? There are some tools that can help with this, for example:
| Tool | Purpose |
|---|---|
| Bencher | Aggregates benchmark results, allowing you to see how performance changes over time. |
| GitLab | GitLab has the ability to visualize code coverage and test results measured in CI jobs in merge requests, allowing developers to assess how well new code is covered by tests. |
This chapter focuses on showing you how you can measure properties of your codebase continuously, and what options you have for aggregating this information and use it in decision-making processes. Naturally, this chapter can’t cover every single metric you might care about, but it can give you an appreciation for how you can approach this.
Reading
Performance Culture (archived) by Joe Duffy
Joe argues that performant software is not an accident, but rather a product of a performance culture. He explains what this culture looks like: that the properties that the project wants to uphold (eg performance) have management buy-in and are not afterthoughts, they are constantly measured so that engineers can make data-driven decisions when implementing new features in code reviews.
Systems Performance: Enterprise and the Cloud, 2nd Edition by Brendan Gregg
In this book, Brendan goes into depths of how to analyze the performance of systems, specifically in the context of cloud-deployed software. Linux has powerful capabilities of hooking into application execution at runtime, instrumenting it with eBPF code to measure not only how the application is performing, but also giving the ability to understand why it is performing the way it is. This book is a must-read for anyone who deeply cares about performance, wants to measure and debug it.
Be good-argument-driven, not data-driven by Richard Marmorstein
Richard talks about using data to influence development of software. He explains that while data is useful, at the end it should be used to back up arguments, not an end in itself. There are cases where data could be interpreted wrong, and you should be sceptical of poor arguments made by incorrectly-interpreted data.
Test Coverage
Test coverage measures which parts of your code are executed during tests. A coverage report highlights lines, branches, or functions that no test exercises, pointing you toward gaps in your test suite. Coverage is not a guarantee of correctness: a line can be covered without its edge cases being tested. However, low coverage is a reliable signal that something is undertested.
Focusing on coverage early helps guide architecture toward code that is easy to test in isolation. Library crates with well-defined APIs should aim for high coverage, ideally approaching 100%. This is one of the reasons why splitting a project into smaller, focused library crates is valuable: a pure library with no I/O is straightforward to test thoroughly, while a binary crate that wires everything together will inevitably have harder-to-reach code paths.
Mutation testing complements coverage by checking whether your tests actually detect changes to the code. It makes small modifications (flipping operators, replacing return values) and verifies that at least one test fails for each mutation.
cargo-llvm-cov
cargo-llvm-cov is the recommended tool for measuring code
coverage in Rust. It uses LLVM’s source-based instrumentation, which tracks
coverage at the region level (not just lines), giving more accurate results than
approaches based on debug info or binary instrumentation.
cargo install cargo-llvm-cov
cargo llvm-cov
To generate an HTML report you can browse locally:
cargo llvm-cov --html --open
Output Formats
cargo-llvm-cov supports several output formats, which matters for CI
integration. Different services and platforms expect different formats:
# LCOV — used by Codecov, Coveralls, and VS Code Coverage Gutters
cargo llvm-cov --lcov --output-path lcov.info
# Cobertura XML — natively supported by GitLab CI for inline MR annotations
cargo llvm-cov --cobertura --output-path coverage.xml
# Codecov's custom format
cargo llvm-cov --codecov --output-path codecov.json
GitLab CI can read the cobertura format and show test coverage changes inline in diffs, an example for this is in the Examples section.
Enforcing a Minimum
In CI, you can fail the build if coverage drops below a threshold:
cargo llvm-cov --fail-under-lines 80
If you have a project that has low test coverage, you can measure the coverage you have, and add a CI job that ensures that the coverage does not decrease, and adjust it any time the coverage increases. That way, you encourage new code to come with tests.
There are other flags, for example --fail-uncovered-lines that let you set an
absolute amount of uncovered lines rather than a percentage.
Excluding Code
Some code is not worth measuring: test helpers, generated code, or functions
that are impossible to test without mocking the operating system. You can
exclude individual functions using the #[coverage(off)] attribute. Since this
attribute is currently unstable, cargo-llvm-cov provides a cfg flag that lets
you write it conditionally:
#![allow(unused)]
fn main() {
#[cfg_attr(coverage_nightly, coverage(off))]
fn not_worth_covering() {
// ...
}
}You can also exclude entire files by pattern:
cargo llvm-cov --ignore-filename-regex "tests/|generated/"
Combining Multiple Runs
If you need to collect coverage across different feature sets or test suites, you can run tests separately and merge the results:
cargo llvm-cov clean --workspace
cargo llvm-cov --no-report --features a
cargo llvm-cov --no-report --features b
cargo llvm-cov report --lcov --output-path lcov.info
If you need to run the binaries manually, you can do it like this:
# setup environment
eval "$(cargo llvm-cov show-env --sh)"
cargo llvm-cov clean --workspace
# run regular cargo commands and run your binaries (will be instrumented
# due to the environment values set by show-env)
cargo build
./target/debug/your-binary --some --flags
# write coverage report (you can run this multiple times if you need it
# in different formats)
cargo llvm-cov report
This latter approach is sometimes necessary if some of your tests require
specific setup or root privileges.
cargo-tarpaulin
cargo-tarpaulin is an older coverage tool designed specifically
for Rust. It uses a different instrumentation approach based on ptrace, which
means it works without LLVM’s instrumentation flags but only supports Linux
x86_64 (no macOS or Windows). It can generate reports in HTML, XML, JSON, and
LCOV formats.
cargo install cargo-tarpaulin
cargo tarpaulin --out html
Tarpaulin was the standard coverage tool before cargo-llvm-cov existed and is
still widely used, but for new projects cargo-llvm-cov is generally the better
choice due to broader platform support and more accurate source mapping.
grcov
grcov is a coverage report generator developed by Mozilla. Rather
than running tests itself, it processes raw coverage data that you collect
separately. This makes it useful for aggregating coverage from multiple test
runs or environments into a single report.
A typical workflow involves setting environment variables to enable LLVM’s
instrumentation, running tests, and then processing the resulting .profraw
files:
# Run tests with coverage instrumentation
CARGO_INCREMENTAL=0 \
RUSTFLAGS='-Cinstrument-coverage' \
LLVM_PROFILE_FILE='cargo-test-%p-%m.profraw' \
cargo test
# Generate an HTML report from the profiling data
grcov . \
--binary-path ./target/debug/ \
-s . \
-t html \
--branch \
--ignore-not-existing \
-o ./target/debug/coverage/
CARGO_INCREMENTAL=0 disables incremental compilation (which can produce
inconsistent coverage data), RUSTFLAGS='-Cinstrument-coverage' enables LLVM’s
instrumentation, and LLVM_PROFILE_FILE controls where the raw profiling data
is written. The grcov command then reads the .profraw files and cross-
references them with the debug info in the compiled binaries to produce a
report.
For most projects, cargo-llvm-cov is simpler because it handles all of this
internally. grcov is mainly useful when you need to aggregate coverage from
multiple separate test invocations or when you need more control over the
profiling pipeline.
CI Examples
This workflow generates test coverage and uploads it to Codecov, a service that tracks coverage over time, shows coverage diffs on pull requests, and can enforce minimum coverage thresholds. Codecov is free for open-source projects and integrates with GitHub, GitLab, and Bitbucket.
name: Coverage
on: [pull_request]
jobs:
coverage:
runs-on: ubuntu-latest
steps:
- uses: actions/checkout@v4
- uses: dtolnay/rust-toolchain@stable
- uses: taiki-e/install-action@v2
with:
tool: cargo-llvm-cov
- run: cargo llvm-cov --lcov --output-path lcov.info
- uses: codecov/codecov-action@v4
with:
files: lcov.info
GitLab can display coverage annotations inline in merge requests if you upload a Cobertura XML report. This allows GitLab to display changes in test coverage inline in merge requests, which is useful feedback for developers and during code review.
coverage:
image: rust:latest
script:
- cargo install cargo-llvm-cov
- cargo llvm-cov --cobertura --output-path coverage.xml
artifacts:
reports:
coverage_report:
coverage_format: cobertura
path: coverage.xml
Reading
Instrumentation-based Code Coverage by The rustc Book
Low-level reference for rustc’s -Cinstrument-coverage flag. Explains how
LLVM’s source-based coverage works, how profiling data is collected into
.profraw files, and how to use llvm-profdata and llvm-cov to generate
reports. This is what cargo-llvm-cov wraps — read this if you need to
understand or customize the underlying pipeline.
How to do code coverage in Rust (archived) by Dotan J. Nahum
Practical guide to setting up a “coverage trinity”: local HTML reports, IDE
integration using VS Code’s Coverage Gutters extension pointed at an LCOV file,
and CI automation with GitHub Actions uploading to Codecov. Covers both the
grcov workflow and modern source-based coverage, with working CI configs.
Performance
Rust often attracts people that care about performance. Performance is rarely the end goal: instead, higher performance means higher efficiency. In an era of cloud computing, this translates to lower costs per request.
Performance optimizations are a large subject, and this book will not go into depth when it comes to it. There are other books that do a better job of summarizing what can be done to optimize applications, such as the Rust Performance Book. But this book does make a point that performance is something that should be tested and tracked over time, that is the only way to ensure that a project is heading in the right direction and not regressing.
The way you can do that in Rust is by writing benchmarks. In fact, Cargo comes with built-in support for doing so. While the Cargo build-in benchmarking harness is still unstable, there are some crates that allow you to easily build benchmarks for both blocking and async code, and track their performance over time.
Writing benchmarks makes it easy to experiement with different options of implementing a feature, because it makes it easy to compare the performance differences between various approaches. Another application is tracking the performance of your code over time, by running benchmarks on every commit or periodically by a platform such as Bencher or the Continuous Benchmark GitHub Action.
Performance is often a tradeoff. While Rust has some zero-cost abstrations that allow you to write simple code that is still fast, there are many situations where you have to make a choice between a simpler implementation or some tech debt, and doing it properly, resulting in more development time or more complex code. The only way to make these decisions properly is to have data for them. How much runtime performance are you trading by keeping your simple implementation? How much performance are you gaining by having a more complex implementation? Projects should make these decisions based on measurements, and not guesses.
Criterion
Typically, the way that you write these is using the criterion crate[^1]. This lets you test both synchronous and asynchronous code, and it provides some support for statistical analysis of the benchmark results. The Rust standard library also has some benchmarking support, but this is currently a nightly-only feature.
Examples
TODO:
- simple benchmarking with criterion
- async benchmarking with criterion
- benchmarking published to bencher
Valgrind
- idea: repeatable measurements (on same architecture).
Flamegraph
Debugging Performance
So, what do you do if you notice that your Rust code is not performing well? There are some common issues you might run into:
- Build mode: Are you building your code in release mode (eg.
cargo build --release)? It makes a large difference for Rust projects. - Optimization level: Have you changed the optimization level, for example to optimize for size rather than speed? This can also make a large difference.
- Link-time optimization: Have you tried enabling
ltoin your compilation profile? - Build target: Are you building for musl libc instead of glibc (eg.
--target x86_64-unknown-linux-musl)? Musl tends to produce slower code. - Allocator: Is your application allocation-heavy? Then try using
jemallocator, it might give you a performance boost. - Data structures: Have you tried using different data structures? For
example, the hashbrown crate
has a
HashMapimplementation that is significantly faster than the standard library.
If these didn’t fix your performance issues, the next step to do is to find out why your performance isn’t good. When it comes to improving performance, the best thing to do is to be guided by data rather than intuition. There are many microoptimizations you can do in your code that lead to negligible benefits. Letting yourself be guided by data allows you to focus on the most important optimizations, this is known as Amdahl’s law.
Visualizing Performance
To get an understanding of where you are losing performance, you want to get some insight into which code in your program is responsible for the majority of the runtime. Doing this guides you to where you should focus your attention towards when trying optimization approaches.
cargo-flamegraph is a Cargo subcommand that lets you visualize what code in your project is taking up the majority of the runtime.
Reading
Criterion.rs Book by Brook Heisler
The Criterion Book explains how to get started using Criterion, and what features it has.
Benchmark It! (archived) by Ryan James Spencer
Ryan argues in this blog post that you should benchmark code. He said that users can feel performance and you should care about it. He explains how to get started doing performance benchmarkis in Rust using criterion.
Continuous Benchmarking by Bencher
This blog post from Bencher explains the concept of continuous benchmarking. It also talks about some myths surrounding benchmarking, for example benchmarking in CI.
Continuous benchmarking for rustls by Adolfo Ochagavía
Adolfo explains in this blog post how he was able to implement continuous
benchmarking for the [rustls][] library, and how he was able to leverage this
to find performance regressions easily. He explains that using cachegrind was
instrumental, because it is able to count CPU instructions and easily diff them
per function for different benchmark runs, which allows for tracking down which
function introduced a regression.
Criterion Flamegraphs by Andi Zimmerer
Making slow Rust code fast (archived) by Patrick Freed
Guidelines on Benchmarking and Rust (archived) by Nick Babcock
Benchmarking Rust code using Criterion-rs by Ashwin Sundar
Windtunnel CI
https://lib.rs/crates/iai-callgrind
https://github.com/bheisler/iai
Rust Heap Profiling with Jemalloc (archived) by Marc-Andre Giroux
Marc-Andre explains in this article how to use jemallocator’s built-in support
for emitting heap dumps, and how to analyze them with jeprof. He explains how to
control the profiling behaviour from inside Rust, and gives an anecdote about Facebook
using this in production for many services with little overhead.
Exploring the Rust compiler benchmark suite (archived) by Jakub Beránek
https://blog.anp.lol/rust/2016/07/24/profiling-rust-perf-flamegraph/
Benchmarking in The Rust Performance Book
Achieving warp speed with Rust
Memory Usage
Generally, Rust programs have three kinds of memory:
- Static memory: Allocated at program startup, fixed size. Used for global statics.
- Stack: Allocated at program startup, fixed size. Used to store local variables in function calls.
- Heap: Allocated dynamically during program execution.
It is not too difficult to estimate static memory and stack memory, because you
can measure the sizes of the types stored in them, for example using
std::mem::size_of(). However, how do you measure memory that is
allocated dynamically? You might want to do this because you want to evaluate
different data structures, or you want to evaluate the impact on memory usage a
code change has.
To do this, you can use some tools that measure externally. For example, Valgrind and its Dynamic Heap Analysis Tool let you capture all allocations, and later examine them to see where they came from, and which code accessed the memory.
Another strategy is to measure internally. This relies on the fact that Rust
allows you to override the global memory allocator that is used by implementing
std::alloc::GlobalAlloc. By implementing this trait and
setting it as the #[global_allocator], you can intercept allocation and
deallocation requests.
There are some libraries that have helpers to let you do this. This section discusses how they work and how they can help you.
DHAT
dhat-rs tries to achieve the same functionality as Valgrind’s DHAT.
Examples
Tracing Allocator
tracking-allocator is a replacement allocator that allows you to implement tracing hooks to count memory usage. It does not perform the actual allocation, this is deferred to the system allocator. But it does allow you to measure the peak memory usage of code sections.
Examples
Reading
Heap Allocations by The Rust Performance Books
In this chapter, strategies for profiling and optimizing heap memory usage is discussed.
Allocator Designs (archived) by Philipp Oppermann
Philipp explains different designs of allocators, and shows you how you can implement them in Rust. This is good background knowledge to have if you want to learn more about how allocators work and how they track and manage allocations. It can also be useful if you want fine-grained control over how memory is allocated, for example if you want to use an arena-style allocator for a specific data structure.
Building
For most Rust projects, cargo build --release is all you need. Cargo handles
dependency resolution, compilation order, and linking. But as a project grows,
build concerns that were invisible on a small codebase start to matter: compile
times creep up, release binaries are larger than expected, CI spends minutes
rebuilding unchanged dependencies, and you need to ship binaries for platforms
you don’t develop on.
This chapter covers the knobs you can turn and the tools you can use once the defaults are no longer enough. The topics fall roughly into two categories.
The first is build output: controlling what the compiler produces. Cargo profiles let you tune the tradeoff between binary size, runtime performance, and compile time. Binary Size covers stripping, optimization levels, and monomorphization. Performance covers LTO, codegen units, target features, PGO, and allocators. These two chapters are complementary — the same profile options appear in both, but with different goals.
The second is build process: making compilation itself faster or more capable. Codegen covers alternative compiler backends like Cranelift that trade runtime performance for faster debug builds. Caching covers sccache for sharing compilation results across builds and machines. Linking covers faster linkers like mold and lld that can cut link times dramatically. Cross-Compiling covers building for targets other than your development machine, including Docker-based and Nix-based approaches.
cargo-wizard is a useful starting
point if you want to quickly apply preset profile configurations for faster
builds, smaller binaries, or better runtime performance without manually tuning
each option.
Reading
Tips For Faster Rust Compile Times (archived) by Matthias Endler
Comprehensive list of techniques for reducing Rust compile times, covering the
full range: updating the toolchain, enabling the parallel compiler frontend,
removing unused dependencies, diagnosing slow crates with cargo build --timings, splitting large crates, workspace-level optimizations, and
compilation caching. A good starting point if you want to survey all available
options before diving into the specific chapters below.
Fast Rust Builds (archived) by Alex Kladov
Alex frames Rust’s compile time problem honestly — the language has prioritized execution speed and programmer productivity over compilation speed — and then gives practical advice for working within that constraint. Covers CI pipeline structure (separate check/test/lint jobs), pruning dependencies, avoiding procedural macros where possible, and code patterns that compile faster.
Stupidly effective ways to optimize Rust compile time (archived) by Tianxiao Shen
Practical tips from optimizing compilation for a real-world Rust project, covering dependency management, workspace organization, and compiler flags. Focuses on changes that are easy to apply and have outsized impact.
What part of Rust compilation is the bottleneck? (archived) by Jakub Beránek
Profiles the Rust compiler across the 100 most popular crates to measure where time is actually spent. The answer depends on context: the LLVM backend dominates binary builds, while the frontend (type checking, borrow checking) dominates library builds. For incremental debug builds, the linker is the main bottleneck — which is why the Linking chapter matters for development iteration speed.
Binary Size
When you compile Rust code, you have some control over the compiler as to what it prioritizes when building your executables. Everything is a tradeoff, so when you prioritize one aspect, you might see a regression in another aspect. Common priorities are:
- Speed: You want your executables to run as fast as possible. This might lead to an increase in code size, because the compiler will use techniques like inlining or loop unrolling to achieve this.
- Binary size: You want your executables to be as small as possible, for example because you are targeting a resource-constrained platform like embedded microcontrollers with limited flash memory sizes, or you want to be able to easily distribute your binary. This might lead to a negative impact on performance.
Compilation Profiles
In general, the way you exercise control over this is by creating profiles. Every profile comes with a set of parameters that let you tweak how the compiler performs. Typically, when you make debug builds, your main priority is fast compilation times, so you are happy to sacrifice some runtime speed.
A profile definition looks like this:
[profile.release]
strip = true
opt-level = 3
Runtime Speed
Optimizing for runtime speed is covered in detail in the
Performance chapter. In short, the main levers are: enabling
link-time optimizations (lto = "full"), reducing codegen units
(codegen-units = 1) so the optimizer can see more code at once, enabling
target-specific CPU features (like AVX2), and using profile-guided optimization
(PGO) to let the compiler make better decisions based on real workload data.
These optimizations tend to increase binary size and compile time. If you need both speed and small binaries, you will need to find a balance that works for your use case.
Binary Size
There are some low-hanging fruits that can be configured to drastically reduce binary size in Rust projects. Note that some of these have a cost, in that they lead to longer compile times (for release builds). There are also some structural decisions that can lead to smaller binary sizes.
Configuration
The simplest way to reduce binary size is to set some options in the Cargo profile:
[profile.release]
# Automatically strip symbols from the binary.
strip = true
# Optimize for size rather than speed.
opt-level = "z"
# Enable link-time optimization so the linker can remove unused code.
lto = true
# Use a single codegen unit so the optimizer can see all code at once.
codegen-units = 1
Each of these has a different effect. Stripping removes symbol names and debug
information from the final binary, which doesn’t affect functionality at all but
can significantly reduce size. The opt-level = "z" flag tells the compiler to
prioritize size over speed in its optimization passes. Link-time optimization
allows the linker to perform whole-program analysis, removing dead code that
wouldn’t be caught when crates are compiled individually. Reducing codegen units
to 1 gives the optimizer a broader view of the code, which helps with both dead
code elimination and inlining decisions.
The opt-level = "z" and opt-level = "s" options both optimize for size. The
difference is that "z" is more aggressive: it will disable loop vectorization
and make other tradeoffs that "s" won’t. In practice, "z" produces smaller
binaries but may be noticeably slower for compute-heavy workloads. Start with
"s" and switch to "z" if you need to squeeze out more.
Dependencies
Sometimes, the binary size is caused by some dependencies that you are using. To
analyze this, cargo-bloat can be used, which measures the
resulting binary and lists the amount that each dependency contributes to the
final binary size. In some cases, this can allow you to investigate if the
dependency could be replaced with a lighter one, or if there are any features
that could be disabled.
You can install and run it like this:
cargo install cargo-bloat
cargo bloat --release -n 10
This will show you the 10 largest functions in your binary, along with which
crate they come from. You can also use --crates to get a per-crate breakdown:
cargo bloat --release --crates
This is often more actionable: if a single dependency accounts for a large fraction of your binary, you can investigate whether you actually need all of its features, or whether a lighter alternative exists.
Monomorphization
Rust generics are compiled through monomorphization: every time you use a generic function or type with a concrete type parameter, the compiler generates a specialized copy of the code for that specific type. This is what makes Rust generics zero-cost at runtime, but it comes at a cost in binary size.
For example, consider a function like this:
#![allow(unused)]
fn main() {
fn process<T: Display>(items: &[T]) {
for item in items {
println!("{item}");
}
}
}If your code calls process::<String>(), process::<i32>(), and
process::<PathBuf>(), the compiler will generate three separate copies of the
function body. For small functions this is negligible, but for large generic
functions called with many different types, the duplicated code can add up.
One common strategy to reduce this is to factor out the type-independent parts of a generic function into a non-generic inner function. This is sometimes called the “outline” pattern:
#![allow(unused)]
fn main() {
fn process<T: Display>(items: &[T]) {
// Only the formatting is generic
let strings: Vec<String> = items.iter().map(|i| i.to_string()).collect();
process_inner(&strings);
}
fn process_inner(items: &[String]) {
for item in items {
println!("{item}");
}
}
}Now only the thin conversion wrapper gets monomorphized for each type, while the
bulk of the work lives in a single copy of process_inner.
This pattern is common enough that the momo crate automates it with a
procedural macro. It works for function parameters that use the Into, AsRef,
or AsMut traits. Instead of manually writing a wrapper and an inner function,
you annotate your function and momo generates the split for you:
#![allow(unused)]
fn main() {
use momo::momo;
#[momo]
fn read_file(path: impl Into<PathBuf>) -> std::io::Result<String> {
// This body is only compiled once, with a concrete PathBuf.
// momo generates a generic wrapper that calls .into() and
// forwards to this inner function.
std::fs::read_to_string(path)
}
}This is particularly useful for public API functions that accept
impl Into<String> or impl AsRef<Path>, which are convenient for callers but
would otherwise generate a separate copy for every call site that passes a
different type.
Trait objects
Another approach is to use trait objects (dyn Trait) instead of generics in
places where the performance cost of dynamic dispatch is acceptable. Instead of
generating a specialized copy for each type, a trait object uses a vtable for
method dispatch at runtime, meaning only one copy of the code exists in the
binary:
#![allow(unused)]
fn main() {
fn process(items: &[&dyn Display]) {
for item in items {
println!("{item}");
}
}
}This trades a small amount of runtime performance (one pointer indirection per method call) for a reduction in binary size. For hot loops this may not be worthwhile, but for code that isn’t performance-critical (logging, configuration, error formatting) it’s a reasonable tradeoff.
The standard library itself uses this technique internally. For example,
std::fmt uses trait objects to avoid monomorphizing the formatting machinery
for every type that implements Display.
Reading
Min Sized Rust (archived) by John T. Hagen
This is a comprehensive guide to producing minimally sized binaries in Rust. It starts with some low-hanging fruits and ends at building the standard library from source to be able to do link-time optimization on it.
Thoughts on Rust bloat (archived) by Raph Levien
Article discussing binary bloat in Rust and strategies that might help.
Build Configuration by The Rust Performance Book
Comprehensive guide covering build configuration options for optimizing Rust performance, including compiler flags, profile settings, and build-time optimization techniques.
Type Sizes by The Rust Performance Book
Explains how type sizes affect performance and memory usage in Rust, covering techniques for measuring and optimizing data structure layouts to reduce binary size and improve cache efficiency.
Performance
Rust’s default compilation settings are designed to balance compile speed and
runtime performance. For development builds (cargo build), Cargo prioritizes
fast compilation so you can iterate quickly. For release builds
(cargo build --release), it enables optimizations that produce faster binaries
at the cost of longer compile times. But the default release profile is still
fairly conservative, and there are several options you can tune to get more
performance out of your code.
Cargo has several built-in profiles (dev, release, test, bench), but the
two you interact with most are dev and release. The dev profile is used by
default, and release is used when you pass the --release flag. You can
override the settings of any built-in profile, and you can also define your own
custom profiles. The default release profile looks like this:
[profile.release]
opt-level = 3
debug = false
split-debuginfo = '...' # Platform-specific.
strip = "none"
debug-assertions = false
overflow-checks = false
lto = false
panic = 'unwind'
incremental = false
codegen-units = 16
rpath = false
Most of the performance-relevant options here are opt-level, lto,
codegen-units, and panic. The sections below explain the most impactful
changes you can make.
Codegen Units
By default, the release profile splits each crate into 16 codegen units that are compiled in parallel. This speeds up compilation, but it limits the optimizer’s ability to perform cross-function optimizations like inlining, because each codegen unit is optimized independently.
Setting codegen-units = 1 forces the compiler to process each crate as a
single unit, giving the optimizer a complete view of all the code. This
typically produces faster binaries at the cost of longer compile times.
[profile.release]
codegen-units = 1
Link-Time Optimization
When you enable Link-Time Optimization (LTO), you ask the compiler to run extra optimization passes not when building the individual crates, but when linking your crates together into a binary. At this point, the compiler can see exactly which code is actually getting called and which is not.
LTO allows the compiler to eliminate dead code and inline functions across crate boundaries, which can improve both binary size and runtime speed. There are two variants:
lto = "full"merges all codegen units from all crates into a single module and optimizes it as a whole. This produces the best results but is the slowest to compile.lto = "thin"performs LTO on a per-module basis using summaries of each module rather than merging everything together. It captures most of the benefit of full LTO with significantly less compile time overhead. This is a good default if full LTO makes your build too slow.
[profile.release]
lto = "full"
Combining codegen-units = 1 with lto = "full" gives the optimizer the
broadest possible view of your code. This is the most impactful configuration
change you can make for runtime performance, and it is what most projects should
use for production builds.
Target Features
When you compile your Cargo crate, it will generate code for some specific
platform. Typically, you will generate code for the x86_64-unknown-linux-gnu
target. That first part of the triple, x86_64 (commonly called amd64) is the
architecture (type of processor) that your code will run on.
Modern AMD64 processors have an array of extensions that can speed up certain operations, such as hardware support for AES through AES-NI, or support for SIMD with AVX2. In order for your program to remain compatible with many processors, Cargo will, by default, not make use of these added instructions, unless you tell it to.
You can enable these extra instructions (called target features) by adding
them to your Cargo configuration at .cargo/config.toml within your repository.
[target.x86_64-unknown-linux-gnu]
rustflags = ["-C target-feature=+avx2"]
If you know that your binary will only run on the machine it’s being compiled on (for example, a server you control), you can tell the compiler to use whatever features the current CPU supports:
[target.x86_64-unknown-linux-gnu]
rustflags = ["-C target-cpu=native"]
Be careful with target-cpu=native in CI or cross-compilation setups. The
compiler will emit instructions specific to whichever CPU the build machine
has. If you build on a machine with AVX-512 and deploy to one without it,
your binary will crash with an illegal instruction error.
Note that these flags only affect which instructions Cargo will natively emit. Some crates also detect CPU features at runtime and switch to whichever implementation works best on your chipset, regardless of what target features you compile with.
In theory, when you enable target features, the compiler is able to use them to produce faster code. This process is called automatic vectorization. In practise, this might not make much of a difference. Either you have number crunching code, and you really care about the memory layout, and use SIMD calls to precisely speed it up, or you have mixed code with memory layouts that poorly vectorize. That is why generally, you don’t need to worry about enabling target CPU features, and if you do, you already know about it.
Profile-Guided Optimization
Profile-Guided Optimization (PGO) is an approach to give the compiler better context for optimizing your program, by first compiling it with instrumentation, running representative workloads (with the instrumentation tracking which branches are taken, and which functions are commonly used), and then re-compiling your program with this information.
If the compiler knows which branches are commonly taken, and which functions are commonly used, it is sometimes able to emit code that runs faster. Typical improvements range from 5% to 20% depending on the workload.
The process has four steps:
-
Build with instrumentation enabled:
RUSTFLAGS="-Cprofile-generate=/tmp/pgo-data" \ cargo build --release -
Run the instrumented binary with a representative workload. This generates
.profrawfiles in the directory you specified. -
Merge the raw profiling data into a single file using LLVM’s profdata tool:
llvm-profdata merge -o /tmp/pgo-data/merged.profdata \ /tmp/pgo-data/*.profraw -
Rebuild using the merged profiling data:
RUSTFLAGS="-Cprofile-use=/tmp/pgo-data/merged.profdata" \ cargo build --release
The cargo-pgo tool simplifies this workflow by managing the
instrumentation, profiling, merging, and rebuild steps for you.
These kinds of optimizations are commonly applied for large GUI applications, for example the Chromium and Firefox browsers use them. For them it makes sense, if a build takes multiple hours because they need to generate this profdata, but they deploy their software out to billions of devices, and it makes their browsers run 3% faster, that is worth it. For your garden-variety backend Rust project, you likely don’t need it.
Post-Link Optimization
Post-link optimization tools optimize binaries after they have been fully compiled and linked. The most notable tool in this space is BOLT, developed by Meta. BOLT works similarly to PGO: you first run your binary with a profiling tool to collect data about which code paths are hot, and then BOLT reorganizes the binary’s layout to improve instruction cache locality.
The key advantage of BOLT over PGO is that it operates on the final binary, so
it can optimize across all code including the standard library and C
dependencies that the Rust compiler never sees. BOLT can be combined with PGO
for additional gains. The cargo-pgo tool supports both PGO and BOLT workflows.
Allocators
In programs that perform a lot of heap allocations, the allocator can become a
bottleneck. The default allocator in Rust is the system allocator (typically
glibc’s malloc on Linux), which is a general-purpose allocator designed for
correctness and broad compatibility. Specialized allocators can improve
performance for specific workloads.
Two popular alternative allocators in the Rust ecosystem are
jemalloc and mimalloc.
jemalloc, originally developed for FreeBSD, is designed for multi-threaded
applications. It uses thread-local caches to reduce contention and has better
fragmentation behavior for long-running services. You can use it in Rust through
the tikv-jemallocator crate:
[dependencies]
tikv-jemallocator = "0.6"
#![allow(unused)]
fn main() {
use tikv_jemallocator::Jemalloc;
#[global_allocator]
static GLOBAL: Jemalloc = Jemalloc;
}mimalloc, developed by Microsoft Research, is a compact general-purpose allocator that focuses on performance and low memory overhead. It tends to perform particularly well in workloads with many small allocations:
[dependencies]
mimalloc = "0.1"
#![allow(unused)]
fn main() {
use mimalloc::MiMalloc;
#[global_allocator]
static GLOBAL: MiMalloc = MiMalloc;
}Switching the allocator is a simple change, but the performance impact varies significantly depending on your workload. It is worth benchmarking your specific application with different allocators before committing to one. For server workloads with high allocation rates and multiple threads, jemalloc or mimalloc often provide measurable improvements. For single-threaded or low-allocation workloads, the system allocator is usually fine.
Reading
Profiles by The Cargo Book
Official documentation for Cargo profiles, explaining how to configure build settings for different compilation modes including debug, release, and custom profiles.
Optimizing Rust programs with PGO and BOLT using cargo-pgo by Jakub Beránek
Jakub demonstrates how to combine Profile-Guided Optimization (PGO) with BOLT post-link optimization to achieve significant performance improvements in Rust programs.
Profile-guided Optimization by The rustc book
Official documentation explaining how to use Profile-Guided Optimization (PGO) with rustc to optimize program performance based on runtime profiling data.
Exploring PGO for the Rust compiler by Rust Team
Blog post discussing the Rust team’s exploration of using Profile-Guided Optimization to improve the performance of the Rust compiler itself.
cargo-pgo by Jakub Beránek
A Cargo subcommand for easier use of Profile-Guided Optimization (PGO) and post-link optimization (BOLT) with Rust programs.
BOLT by LLVM Project
Binary Optimization and Layout Tool (BOLT), a post-link optimizer developed by Meta that can improve performance by optimizing application layout based on profiling data.
Optimized build by rustc dev guide
Guide explaining how to build optimized versions of the Rust compiler itself, including using PGO and other optimization techniques.
Codegen Backend
Rust uses LLVM as its default code generation backend. LLVM produces highly optimized binaries and supports a wide range of targets, but it is designed to produce fast binaries, not to produce binaries fast. For release builds this is the right tradeoff. For development, where you care about iteration speed more than runtime performance, LLVM’s thoroughness becomes a cost.
The Rust compiler supports alternative codegen backends that make a different tradeoff: faster compilation at the expense of less optimized output. For development builds — where most of what you run is unit tests — this can meaningfully improve the edit-compile-test cycle.
Cranelift
Cranelift is a compiler backend originally developed for the Wasmtime WebAssembly runtime. The Rust compiler team has adopted it as an alternative codegen backend. Because Cranelift focuses on generating code quickly rather than optimizing it aggressively, it compiles faster than LLVM at the cost of producing slower binaries.
To use Cranelift, install the preview component on a nightly toolchain:
rustup component add rustc-codegen-cranelift-preview --toolchain nightly
Then build with it:
CARGO_PROFILE_DEV_CODEGEN_BACKEND=cranelift cargo +nightly build -Zcodegen-backend
Cranelift currently requires a nightly toolchain. The speedup depends on the project, but as a rough benchmark:
| Crate | LLVM | Cranelift | Speedup |
|---|---|---|---|
| ripgrep | 7.50s | 5.72s | ~24% |
The benefit is most noticeable for larger projects where LLVM’s optimization passes dominate compile time. For small crates, the difference may be negligible because most time is spent in the frontend (parsing, type checking, borrow checking) rather than code generation.
Reading
Cranelift code generation comes to Rust (archived) by Daroc Alden
Covers the history of Cranelift (built for Wasmtime, adopted by the Rust compiler team), how it differs from LLVM architecturally (single-pass vs multi-pass optimization), and what it means for Rust developers. Explains that Cranelift is not a replacement for LLVM — it targets development builds where compilation speed matters more than runtime performance.
Caching
Caching build artifacts is a large quality of life improvement: typically, dependencies do not change too much, and not all of the crates in your project change all the time either. With a good build cache, compiling the project after small changes can become very fast.
Rust already has a local build cache in the target folder, but this is only
useful for local development. In CI, the project is usually built from a clean
checkout every time. A shared cache allows your team and CI to reuse compilation
results across builds and machines.
If you are using a Build System, you may get this for free: Bazel, Buck2 and Nix all support caching compilations.
sccache
sccache is a compiler caching tool developed by Mozilla (originally
for Firefox builds). It wraps the compiler and stores the output of compilation
in a shared cache. When the same source file is compiled again with the same
flags, sccache returns the cached result instead of recompiling.
It supports multiple storage backends:
- Local disk
- Cloud storage (S3, GCS, Azure Blob Storage)
- Redis
- Memcached
You install it and tell Cargo to use it as a wrapper around rustc:
cargo install sccache
export RUSTC_WRAPPER=sccache
cargo build
You can also set this permanently in your .cargo/config.toml:
[build]
rustc-wrapper = "sccache"
After a build, you can check the cache statistics with sccache --show-stats to
see hit rates and how much time was saved.
This example uses sccache with a cloud storage bucket in GitHub Actions. The Mozilla sccache action handles setup and teardown:
name: Build
on: [push]
jobs:
build:
runs-on: ubuntu-latest
steps:
- uses: actions/checkout@v4
- uses: dtolnay/rust-toolchain@stable
- uses: mozilla-actions/sccache-action@v0.0.7
- run: cargo build --release
env:
RUSTC_WRAPPER: sccache
SCCACHE_GHA_ENABLED: "true"
The SCCACHE_GHA_ENABLED flag tells sccache to use GitHub Actions’ built-in
cache as the storage backend, which requires no additional infrastructure.
For local development, sccache is most useful when you frequently switch between branches or work on multiple projects that share dependencies. The local disk backend requires no setup beyond installing sccache and setting the wrapper.
Reading
sccache by Mozilla
sccache is a ccache-like tool that provides shared compilation caching with various storage backends including cloud storage buckets, Redis, and memcached. Originally developed by Mozilla for Firefox builds, it supports Rust, C, and C++ compilation.
Linking
Linking is often the bottleneck in Rust compile times, especially during
development. After the compiler has translated each crate into object files, the
linker combines them into a single executable. For a large project with hundreds
of dependencies, there is a lot of data to process. Debug builds make this
worse: Rust emits extensive debug information by default, and a typical backend
service can produce debug binaries of 200 MB or more. Most of that volume passes
through the linker, which on many systems defaults to GNU ld — a capable but
single-threaded linker that was not designed for this scale.
There are three approaches to reducing link times: reducing the amount of data the linker has to process, using a faster linker, and using a parallel linker.
Reducing Debug Information
By default, debug builds include full debug information so that tools like gdb
and lldb can provide useful stack traces and variable inspection. This debug
information is the largest contributor to binary size in dev builds and adds
significant work for the linker.
You can reduce this overhead by splitting debug information into a separate file rather than embedding it in the binary, or by reducing the debug info level:
[profile.dev]
# Split debug info into a separate file (reduces linker work)
split-debuginfo = "packed"
[profile.dev]
# Reduce debug info to line tables only (faster linking, less useful debugger)
debug = "line-tables-only"
For release builds, stripping debug information entirely is covered in Binary Size.
rust-lld
Starting with Rust 1.90, the Rust toolchain ships with and uses rust-lld (a
bundled copy of LLVM’s LLD linker) by default on x86_64-unknown-linux-gnu. LLD
is significantly faster than GNU ld because it is designed for parallel
processing and has a more efficient architecture for handling large inputs.
Benchmarks from the Rust team show that LLD provides roughly 7x faster linking on incremental rebuilds, translating to around a 40% reduction in end-to-end compilation time for projects like ripgrep. For most developers on Linux x86_64, this improvement happens automatically with no configuration needed.
mold
mold is a linker designed from scratch for parallelism. On Linux, it
is typically the fastest linker available, outperforming even LLD for large
projects. Its macOS counterpart is sold.
The tradeoff is that mold must be installed separately and does not support all platforms. But if you are on Linux and link times are a bottleneck, mold is worth trying.
To use mold, install it through your system package manager (e.g.
apt install mold on Debian/Ubuntu) and configure Cargo to use it:
[target.x86_64-unknown-linux-gnu]
linker = "clang"
rustflags = ["-C", "link-arg=-fuse-ld=mold"]
Alternatively, you can use mold’s wrapper mode, which intercepts linker invocations without changing your Cargo configuration:
mold -run cargo build
Reading
Resolving Rust Symbols by Shriram Balaji
Walks through the entire Rust compilation pipeline from lexing through LLVM
code generation, then focuses on what the linker actually does: combining
object files, resolving symbols, and producing executables. Covers ELF object
file structure, symbol tables (strong vs weak symbols), name mangling (how
Global becomes __ZN11foo6Global17ha2a12041c4e557c5E), and how to manually
compile Rust files into static libraries and link them. Read this if you want
to understand what the linker is doing under the hood.
5.1 Faster Linking by Luca Palmieri
Section from Luca’s “Zero to Production” series showing how to configure
alternative linkers for Rust on different platforms. Predates the rust-lld
default but the configuration approach is still useful for opting into mold
or for platforms where LLD is not yet the default. Note: the article mentions
zld for macOS, which has since been deprecated in favor of Apple’s improved
lld.
Slightly faster linking for Rust by R. Tyler Croy
Short practical post showing a 70% reduction in link times (from ~10s to ~3s)
by switching from GNU ld to lld with a two-line .cargo/config change.
Good illustration of the kind of improvement alternative linkers provide.
Enabling rust-lld on Linux by Rust Team
Announcement from the Rust team about enabling rust-lld (a bundled copy of
LLVM’s LLD) by default on nightly for Linux targets. Explains the motivation:
LLD is faster than GNU ld, and bundling it means Rust controls the linker
version, avoiding compatibility issues with system linkers. This was the
precursor to the stable rollout in Rust 1.90.
Announces the stable rollout of rust-lld as the default linker on
x86_64-unknown-linux-gnu in Rust 1.90. Reports 7x faster linking on
incremental rebuilds and a 40% reduction in end-to-end compilation time for
projects like ripgrep. Explains how to opt out if compatibility issues arise
and the plan to expand to other Linux targets.
Tips For Faster Rust Compile Times (archived) by Matthias Endler
Comprehensive list of techniques for reducing Rust compile times, covering the
full range: updating the toolchain, enabling the parallel compiler frontend,
removing unused dependencies, diagnosing slow crates with cargo build --timings, splitting large crates, workspace-level optimizations, and
compilation caching. A good starting point if you want to survey all available
options before diving into the specific chapters below.
Cross-Compiling
Cross-compilation is the process of compiling code on one platform to produce
executables for a different platform. Rust identifies platforms using target
triples like x86_64-unknown-linux-gnu or aarch64-apple-darwin. The
compiler maintains a list of supported targets organized
into tiers based on the level of support each receives.

Common reasons to cross-compile include building for a platform variant (like
x86_64-unknown-linux-musl for statically linked binaries), targeting platforms
that cannot host a compiler (WebAssembly, embedded microcontrollers), and
producing builds for multiple architectures from a single CI fleet without
maintaining separate builder machines for each platform.
Because Rust uses LLVM as its compilation backend, it has good cross-compilation support out of the box — LLVM’s modular architecture makes it straightforward to generate code for many different targets.
Simple Cross-Compilation
The simplest case requires two steps: adding the target’s standard library to your toolchain, and telling Cargo to build for that target.
rustup target add aarch64-unknown-linux-gnu
cargo build --target aarch64-unknown-linux-gnu
Cargo places the resulting binaries in target/<triple>/debug/ (or release/)
rather than the default target/debug/ directory. You can also set a default
target in .cargo/config.toml so you don’t need to pass --target every time:
[build]
target = "aarch64-unknown-linux-gnu"
When It Gets Complicated
For pure Rust crates with no native dependencies, the simple approach often just works. But three issues commonly arise:
- Linking errors: Rust can compile your code for the requested target, but
your system linker may not be able to handle non-native object files. This
typically manifests as
error: linking with 'cc' failedwith the linker complaining about file in wrong format. - Native dependencies: If your crate links against C libraries (like OpenSSL), you need those libraries compiled for the target platform, not your host platform.
- Running tests: You cannot execute cross-compiled binaries natively, so running unit tests requires an emulator or a remote machine.
The rest of this chapter covers several approaches to solving these problems,
from manual Debian multiarch setup to fully automated tools like cross.
Debian Multiarch
On Debian and its derivatives (Ubuntu, etc.), you can get cross-compilation working by installing the target’s GCC toolchain and any native libraries your code needs in the target architecture. Linux also supports userspace emulation through QEMU, which lets you run cross-compiled binaries as if they were native — useful for running unit tests.
The process has four steps:
- Install a GCC cross-compiler for the target (e.g.
gcc-aarch64-linux-gnu). - Add the target as a dpkg architecture and install native dependencies in that
architecture (e.g.
libssl-dev:arm64). - Set environment variables to tell Cargo which linker to use and where
pkg-configcan find the target’s libraries. - Optionally, install
qemu-user-binfmtto enable transparent emulation of non-native binaries via binfmt_misc.
Example
To cross-compile for ARM64 on a Debian-based system:
# install the cross-compiler and target libraries
sudo dpkg --add-architecture arm64
sudo apt update
sudo apt install gcc-aarch64-linux-gnu libssl-dev:arm64
# add the Rust target
rustup target add aarch64-unknown-linux-gnu
# tell Cargo which linker to use
export CARGO_TARGET_AARCH64_UNKNOWN_LINUX_GNU_LINKER=aarch64-linux-gnu-gcc
# tell pkg-config where to find arm64 libraries
export PKG_CONFIG_LIBDIR=/usr/lib/aarch64-linux-gnu/pkgconfig
export PKG_CONFIG_ALLOW_CROSS=true
# build
cargo build --target aarch64-unknown-linux-gnu
To also run the resulting binary (for example, to execute unit tests), install QEMU userspace emulation:
sudo apt install qemu-user-binfmt
cargo test --target aarch64-unknown-linux-gnu
Docker
Docker is a natural fit for cross-compilation in CI: you build an image containing the correct toolchain, cross-compiler, and native libraries, and use it as the CI job’s container. This avoids installing cross-compilation dependencies on the host and makes the setup reproducible.
To enable running cross-compiled binaries inside Docker (for tests), register QEMU’s userspace emulators on the host:
docker run --rm --privileged multiarch/qemu-user-static --reset -p yes
This uses the
multiarch/qemu-user-static
image to install binfmt handlers. The registration persists until reboot.
Example: Dockerfile for cross-compiling for ARM64
FROM rust
# install rustfmt and clippy
RUN rustup component add rustfmt
RUN rustup component add clippy
# install build-essential, pkg-config, cmake
RUN apt update && \
apt install -y build-essential pkg-config cmake && \
rm -rf /var/lib/apt/lists/*
# install arm64 cross-compiler
RUN dpkg --add-architecture arm64 && \
apt update && \
apt install -y \
gcc-aarch64-linux-gnu \
g++-aarch64-linux-gnu \
libssl-dev:arm64 && \
rm -rf /var/lib/apt/lists/*
# add arm64 target for rust
RUN rustup target add aarch64-unknown-linux-gnu
# tell rust to use this linker
ENV CARGO_TARGET_AARCH64_UNKNOWN_LINUX_GNU_LINKER=/usr/bin/aarch64-linux-gnu-gcc
# set pkg-config libdir to allow it to find arm64 libraries
ENV PKG_CONFIG_LIBDIR=/usr/lib/aarch64-linux-gnu/pkgconfig
ENV PKG_CONFIG_ALLOW_CROSS=true
Example: Dockerfile for cross-compiling for ARM32
FROM rust
# install rustfmt and clippy
RUN rustup component add rustfmt
RUN rustup component add clippy
# install build-essential, pkg-config, cmake
RUN apt update && \
apt install -y build-essential pkg-config cmake && \
rm -rf /var/lib/apt/lists/*
# install arm32 cross-compiler
RUN dpkg --add-architecture armhf && \
apt update && \
apt install -y \
gcc-arm-linux-gnueabihf \
g++-arm-linux-gnueabihf \
libssl-dev:armhf && \
rm -rf /var/lib/apt/lists/*
# add arm32 target for rust
RUN rustup target add arm-unknown-linux-gnueabihf
# tell rust to use this linker
ENV CARGO_TARGET_ARM_UNKNOWN_LINUX_GNUEABIHF_LINKER=/usr/bin/arm-linux-gnueabihf-gcc
# set pkg-config libdir to allow it to find armhf libraries
ENV PKG_CONFIG_LIBDIR=/usr/lib/arm-linux-gnueabihf/pkgconfig
ENV PKG_CONFIG_ALLOW_CROSS=true
Example: Dockerfile for cross-compiling for RISC-V
FROM rust
# install rustfmt and clippy
RUN rustup component add rustfmt
RUN rustup component add clippy
# install build-essential, pkg-config, cmake
RUN apt update && \
apt install -y build-essential pkg-config cmake && \
rm -rf /var/lib/apt/lists/*
# install riscv64 cross-compiler
RUN apt update && \
apt install -y debian-ports-archive-keyring && \
dpkg --add-architecture riscv64 && \
echo "deb [arch=riscv64] http://deb.debian.org/debian-ports sid main" >> /etc/apt/sources.list && \
apt update && \
apt install -y \
gcc-riscv64-linux-gnu \
g++-riscv64-linux-gnu && \
rm -rf /var/lib/apt/lists/*
# add riscv64 target for rust
RUN rustup target add riscv64gc-unknown-linux-gnu
# tell rust to use this linker
ENV CARGO_TARGET_RISCV64GC_UNKNOWN_LINUX_GNU_LINKER=/usr/bin/riscv64-linux-gnu-gcc
# set pkg-config libdir to allow it to find riscv64 libraries
ENV PKG_CONFIG_LIBDIR=/usr/lib/riscv64-linux-gnu/pkgconfig
ENV PKG_CONFIG_ALLOW_CROSS=true
cargo-zigbuild
cargo-zigbuild uses Zig’s bundled C compiler and linker as
the cross-compilation toolchain. Zig ships with pre-built sysroots for many
targets, so you don’t need to install separate GCC cross-compilers or manage
multiarch packages. This makes it particularly easy to cross-compile for Linux
targets with different glibc versions or for musl.
cargo install cargo-zigbuild
cargo zigbuild --target aarch64-unknown-linux-gnu
The main advantage is simplicity: where the Debian approach requires installing
architecture-specific packages and setting environment variables,
cargo-zigbuild handles the linker and sysroot automatically. The limitation is
that it only helps with the C toolchain — if your project has complex native
dependencies (like OpenSSL with custom build scripts), you may still need a more
complete cross-compilation environment.
cross
cross is a drop-in replacement for Cargo that runs compilation inside
Docker containers with the correct toolchains and libraries preinstalled. It
supports both cross-compilation and cross-testing (via QEMU emulation inside the
container), and targets a wide range of platforms out of the box.
cargo install cross
cross build --target aarch64-unknown-linux-gnu
cross test --target aarch64-unknown-linux-gnu
Because cross runs everything inside a container, you don’t need to install
any cross-compilation toolchains on your host system. The tradeoff is that
Docker must be available, and the container images can be large. For CI
environments where Docker is already available, cross is often the easiest
path to multi-platform builds.
Nix
Nix has built-in cross-compilation support through its pkgsCross
infrastructure. When you import nixpkgs with a crossSystem different from the
localSystem, Nix automatically provides the correct toolchain, sysroot, and
spliced dependencies — packages are compiled for the right platform based on
whether they are build-time tools (nativeBuildInputs) or runtime dependencies
(buildInputs). This distinction is what makes Nix cross-compilation work
without manual environment variable juggling.
For Rust projects using crane, the approach is to import
nixpkgs with the cross system set, override crane’s toolchain, and use
pkgs.callPackage so that Nix can splice dependencies correctly (build-time
tools like pkg-config run on the host, while libraries like OpenSSL are
compiled for the target). Crane’s documentation has a
worked example of this
approach.
Reading
Cross-compilation by The rustup book
Official introduction to cross-compilation with rustup: how to add targets, what gets installed (pre-built standard library), and the basics of building for a non-native target. Start here if you are new to cross-compilation in Rust.
Configuration: [target] section by The Cargo Book
Reference for the [target.<triple>] section in .cargo/config.toml. Covers
how to set the linker, rustflags, and runner per target — the configuration
that makes cross-compilation work when you need a non-default linker or want to
run tests through an emulator.
Platform Support by The rustc book
Complete list of targets supported by the Rust toolchain, organized into three tiers: Tier 1 (guaranteed to build and pass tests), Tier 2 (guaranteed to build), and Tier 3 (community-maintained). Lists the required tools for each target and notes any limitations.
Guide to cross-compilation in Rust (archived) by Greg Stoll
Practical walkthrough of cross-compiling from Linux to Windows using the
cross tool. Demonstrates the full workflow including platform detection with
cfg attributes and shows how cross handles the Docker container setup
transparently.
Zig makes Rust cross-compilation just work (archived) by Max Hollmann
Demonstrates wrapping Zig’s compiler as the C compiler and linker for Rust cross-compilation. Zig ships with pre-built sysroots for many targets, so no separate GCC toolchain is needed. Shows the shell-script wrapper approach and discusses limitations with Zig’s self-hosted linker on certain targets (like aarch64 macOS) that were still under development at the time of writing.
LLVM by The Architecture of Open Source Applications (Volume 1)
Explains the architecture of LLVM: how it decouples the compiler frontend, optimizer, and backend using a common intermediate representation (LLVM IR), and how this modularity makes it straightforward to add new targets. Useful background for understanding why Rust’s cross-compilation support is as broad as it is.
Documentation
Writing software is as much communicating to other humans as it is communicating with the machine we expect it to run in.
In part, documentation solves the \( O(n^2) \) communication complexity issue: if you have three developers which each own some part of the project, then you can afford to have them communicate with each other to understand how things work and skip the work of documenting it properly. However, this does not scale to large teams: if you have 100 developers that each own some components, and they all need to talk to each other to understand each other’s work (and no documentation), then your developers will spend more time asking how things work than getting things done (or, worse, reimplement things because it is easier than figuring out how the original thing was supposed to work).
In other words, in a commercial project, having great documentation saves you a lot of cost in the long run. It makes the difference whether you need a year-long onboarding programme for new hires until they hit their productivity peak, because they don’t know how things work and there is no central place to find out, or whether they can hit the ground running and achieve baseline productivity within weeks or a month.
In the context of an open-source project, documentation saves you cost as well, but in a different way. Projects that have good documentation tend to be more discoverable, and the developers need to spend less time giving users support or explaining how to do things. That is the power of words: you write them just once, but they can be read many (millions, thousands) of times.
In some way, we can look at the Rust project for an example of exceptional documentation. The Rust community has put a lot of effort into making sure that there is ample documentation, which helps people get started, get things done and it even makes it easier for people to contribute to the project. The Rust project has many kinds of documentation:
- The Rust Book documents the language itself, helping people get up to speed.
- Standard library documentation documents the standard library
- docs.rs hosts documentation for all crates which are published on crates.io
- Books for various parts of the Rust toolchain (rustc, cargo, clippy)
- Books for various use-cases (embedded, webassembly, command-line applications)
- Books from some popular framework crates (Criterion, Tokio, Serde)
With this breadth of documentation, people new to the Rust language can quickly get to high-quality explanations for whatever it is they are trying to do. Having a service publish documentation for crates also has another effect: it forces crate authors to put good documentation into their crates, because a lack of such is immediately visible. This alone has a strong positive effect on the crate ecosystem.
When you write documentation, the most important question you have to ask is: who are you writing documentation for? What are they trying to do? If you know who you are writing documentation for, it tells you what style you have to write it in, what knowledge you can expect, and into what depth you can go.
Generally, you will have two target audiences:
- End-users: they want to evaluate if your project is fit to solve the problem they are trying to solve, and find out how they can use it.
- Developers: they are trying to understand how your project works, because they want to contribute, or maybe they want to fix an issue with it.
The definition of what your end users are depends on what kind of project you are working on. If you are writing a library, then your end-user will be other developers who consume this library. If you are writing an application, then your end-users will be people who install and use the application.
End-user Documentation
End-users are less interested in the internals (how things work) and more interested in how they can use your project to solve a particular problem. They want to be able to quickly find out if your project is useful to them, and how they can use it. Once they have decided to use your project, they will want an easy way to find out what changed between releases (in terms of features or APIs).
End-user documentation should contain:
- Explanation of what problems your project solves, and what limitations it might have
- Instruction of how to install your application (or compile your library)
- Instruction of how to configure your application (or library)
- Examples or guides on how to use it for specific use-cases
- Changelog of additions, deprecations or removals of features or APIs between releases
- Code-level documentation (if it is a library)
This documentation typically lives in a README file and/or a web book hosted by the project.
Developer Documentation
Developers are programmers that want to understand how your project works. Typically, this is because they are working on it, they want to implement a feature, they want to improve it, or they want to fix a bug with it. They need to be able to easily clone and compile it locally, run unit tests to see if their changes broke anything, run benchmarks to check if their changes introduced a regression. They need to be able to submit a patch (merge request) with their changes. Some developers (maintainers) also need to be able to release new versions of the code.
Developer documentation should contain:
- Instructions on how to fetch the code (git clone)
- Architecture of the project (diagram)
- Explanation of why the architecture is the way it is
- High-level explanation of how the code works
- Instructions on how to compile the library
- Instructions on how to run tests: unit tests, integration tests, benchmarks, fuzzing tests
- Style guide for code, commits, documentation
- Documentation of processes (how to submit a patch, how to cut a release)
- Code-level documentation (APIs, data structures, invariants)
What this Chapter Covers
The rest of this chapter covers the tools and formats available for writing documentation in Rust projects: README files and repository metadata, code-level documentation with rustdoc, standalone books with mdBook, diagramming tools, and architecture decision records.
Reading
Documentation (archived) by Software Engineering at Google
Tom explains why documentation is needed for software projects to scale, because they communicate important information about how things work and why they work the way they do. They save valuable engineering time by giving engineers access to the information they need quickly, without needing to look into the code. He explains what good documentation looks like, and what Google does to keep it accurate and of high quality.
Trees, maps and theorems by Jean-luc Doumont
Trees, maps, and theorems explains how to get messages across optimally in written documents, oral presentations, graphical displays, and more.
Also see Effective written documents, a summary of how to write effective written documents, including documentation, by the same author.
Rust Documentation Ecosystem Review (archived) by Gio Genre De Asis
A thorough evaluation of documentation quality across ~25 popular Rust crates
using the Diátaxis framework (tutorials, how-to guides, reference,
explanation). Scores each crate on comprehensiveness, discoverability,
approachability, and design philosophy. The jiff crate stands out for its
_documentation module pattern and design rationale docs; ratatui for its
iterative tutorials and website. A valuable read for understanding what
separates adequate documentation from genuinely helpful documentation.
Repository
The purpose of a README is for people to get a very brief introduction to what your project does. For open-source projects it is essential, when people decide if your crate solves the issue they are trying to solve. It does not need to be a comprehensive documentation document, rather a very dense summary that contains some vital pieces of information of what your crate does, how it compares to other crates that achieve similar goals, and what limitations it has.
There are some common patterns that make for useful README files, and this chapter will attempt to illustrate them.
Badges
Badges are little images that you can embed into your README that show up-to-date information on your Rust project. These are useful because they do not need need to be updated manually.
Generally, you can put them in your README like this:
# Project Name
[](https://crates.io/crates/imstr)
[](https://docs.rs/imstr)
Common badges for Rust crates
These badges pull information on crates published on crates.io. By definition, these will not pull data from source control, but rather from whatever is published. They render information such as the most recent version, status of automatically built documentation, download counts, and health checks for dependencies.
Crate:
|
Badge
| Markdown |
|---|---|
| |
| |
| |
| |
| |
| |
|
Generating a readme file from crate-level documentation
The Readme section shows some tools that you can use to generate a README file from crate-level documentation.
Diagrams
There are some useful tools that can be used to draw such diagrams:
- TODO: show how to include in rustdoc/mdbook
draw.io
draw.io is a web-application that lets you draw diagrams. All of the diagrams in this book are made with it.
Examples
Excalidraw
PlantUML
Mermaid
-
https://brycemecum.com/2023/03/31/til-mermaid-tracing/
Reading
Code Documentation
Rust has first-class support for code documentation through rustdoc, which parses documentation comments in your source code and generates searchable, cross-linked HTML. For published crates, docs.rs builds and hosts this documentation automatically. The result is that most Rust libraries have browsable API documentation available without any extra effort from the author — and with some effort, that documentation can be genuinely good.
Doc Comments
Rustdoc recognizes two kinds of documentation comments. Outer doc comments
(///) document the item that follows them — a function, struct, enum, trait,
or module. Inner doc comments (//!) document the item that contains them,
which in practice means the crate root (lib.rs or main.rs) or a module file.
#![allow(unused)]
fn main() {
//! This crate provides utilities for parsing configuration files.
//!
//! It supports TOML, JSON, and YAML formats, with automatic
//! type-safe deserialization using serde.
/// Parse a configuration file at the given path.
///
/// Returns an error if the file does not exist or contains
/// invalid syntax for the detected format.
pub fn parse_config(path: &std::path::Path) -> Result<Config, Error> {
// ...
todo!()
}
}Doc comments support Markdown: headings, lists, links, emphasis, and fenced code blocks. Rustdoc adds some extensions on top of standard Markdown, most notably intra-doc links and doc tests (both covered below).
Intra-Doc Links
Rustdoc can resolve links to other items in your crate (or its dependencies) using Rust path syntax inside square brackets. This is more robust than linking to a URL, because the compiler checks that the target exists and will warn if it breaks.
#![allow(unused)]
fn main() {
/// Parses the configuration and returns a [`Config`] struct.
///
/// For format-specific options, see [`Config::format`].
/// For error handling, see the [`Error`] type.
pub fn parse_config(path: &std::path::Path) -> Result<Config, Error> {
// ...
todo!()
}
}These links resolve to the correct page in the generated documentation. You can link to types, functions, methods, modules, traits, and even specific trait implementations. The full syntax is documented in the rustdoc book.
If you want to ensure that your intra-doc links are not broken, Clippy
has a lint for it:
doc_broken_link.
Doc Tests
Code blocks in doc comments are compiled and run as tests by cargo test. This
means your examples are checked by the compiler — they cannot silently fall out
of date when you change the API. A doc test that fails to compile or panics at
runtime will fail the test suite.
#![allow(unused)]
fn main() {
/// Add two numbers together.
///
/// ```
/// assert_eq!(my_crate::add(2, 3), 5);
/// ```
pub fn add(a: i32, b: i32) -> i32 {
a + b
}
}Lines prefixed with # are compiled but hidden from the rendered documentation.
This is useful for boilerplate like imports, error handling, or setup code that
would distract from the example:
/// Connect to the database and run a query.
///
/// ```
/// # use my_crate::Database;
/// # fn main() -> Result<(), Box<dyn std::error::Error>> {
/// let db = Database::connect("localhost:5432")?;
/// let rows = db.query("SELECT 1")?;
/// assert_eq!(rows.len(), 1);
/// # Ok(())
/// # }
/// ```
pub fn connect(addr: &str) -> Result<Database, Error> {
// ...
todo!()
}You can annotate code blocks to change how they are handled. should_panic
marks a test that is expected to panic. no_run compiles the code but does not
execute it, which is useful for examples that require network access or specific
hardware. ignore skips compilation entirely — use it sparingly, since it
defeats the purpose of doc tests. compile_fail asserts that the code does
not compile, which is useful for documenting what a type system prevents.
Sections
Rustdoc recognizes certain conventional headings in doc comments and gives them special treatment in the rendered output. The most important ones:
# Examples— rendered prominently and expected by convention on public API items. Clippy’smissing_doc_code_exampleslint (currently nightly-only) checks for this.# Panics— documents the conditions under which a function panics.# Errors— documents the error variants a function can return.# Safety— required onunsafefunctions to document the invariants the caller must uphold.
These headings appear in a consistent location in the generated documentation, making it easy for readers to find the information they need.
If you want to enforce these, Clippy has lints for them:
missing_errors_doc,
missing_panics_doc and
missing_safety_doc.
Writing Good Documentation
Having documentation is not the same as having good documentation. The most
common failure in Rust crate documentation is restating what the reader can
already see: a doc comment on struct Config that says “The Config struct” adds
nothing. Good documentation describes behavior: what a function does, under
what conditions it fails, what invariants a type maintains, and how it relates
to other parts of the API.
A few patterns that consistently produce better documentation:
Describe behavior, not names. Instead of “Parses the input”, explain what format is expected, what happens with invalid input, and what the caller gets back. The reader can see the function name — they came to the docs to learn what the name doesn’t tell them.
Link to related items. When a method returns a type, link to that type. When
two methods are complementary (like lock and try_lock), cross-reference
them. Intra-doc links make this easy and the compiler keeps them from going
stale. The standard library is a good model: the docs for Option link
extensively between map, and_then, unwrap_or_else, and related methods,
helping users find the right combinator.
Show realistic examples. An # Examples section with
assert_eq!(add(2, 3), 5) demonstrates that the function works, but it does not
help a reader who needs to understand how to use it in context. The best
examples show a small but realistic scenario: setting up the inputs, calling the
function, and handling the result. Hidden lines (#) keep the boilerplate out
of the way without removing it from compilation.
Document failure modes. If a function returns Result, the # Errors
section should list the conditions that produce each error variant. If a
function panics, the # Panics section should state when. These sections are
not just conventions — Clippy’s missing_errors_doc and missing_panics_doc
lints (in the pedantic group) can check for them.
Explain design choices. Most crates document what they do but not why. A
brief explanation of why an API is shaped a certain way — why there are two
duration types, why a particular trait does not implement Copy, why the
builder pattern was chosen over a constructor with many arguments — helps users
form a mental model that makes the rest of the API predictable. This kind of
explanation can live in the crate-level docs, in a dedicated module (see below),
or in a design document linked from the repository.
Crate-Level Documentation
Crate-level documentation (the text that appears on the crate’s front page on
docs.rs) is written with inner doc comments (//!) at the top of lib.rs or
main.rs. This is the first thing a potential user sees, and it should answer
three questions: what does this crate do, when should you use it, and how do you
get started? A good crate root includes a brief overview, a usage example, and
links to the most important types and modules.
For longer documentation, writing Markdown directly in a Rust source file can be awkward. An alternative is to write the documentation in a separate Markdown file and include it:
#![allow(unused)]
#![doc = include_str!("../README.md")]
fn main() {
}This pulls the contents of README.md into the crate-level documentation at
compile time. It keeps your README and your crate documentation in sync — you
write the overview once and it appears both on GitHub and on docs.rs.
The _documentation Module Pattern
The jiff crate demonstrates a pattern for making
longer-form documentation discoverable through docs.rs. It creates a
_documentation module (the leading underscore sorts it to the top of the
module list) that includes separate Markdown files as submodules:
#![allow(unused)]
fn main() {
pub mod _documentation {
#[doc = include_str!("../COMPARE.md")]
pub mod comparison {}
#[doc = include_str!("../DESIGN.md")]
pub mod design {}
}
}Each empty submodule renders as a page on docs.rs with the full content of the included Markdown file. This makes design rationale, comparison guides, and migration documentation part of the API docs rather than files buried in the repository. The Markdown files remain the single source of truth — they are readable on GitHub and rendered on docs.rs without duplication.
This pattern is worth considering for any crate where users benefit from understanding the design philosophy or the differences between your crate and alternatives. The snafu and clap crates use a similar approach for their user guides and troubleshooting documentation.
The _documentation module pattern has the advantage of requiring no separate
hosting — everything lives on docs.rs alongside the API reference. The tradeoff
is that docs.rs renders plain Markdown without custom navigation, styling, or
search. For larger projects that need tutorials, guides, or structured
walkthroughs, a standalone mdBook hosted as a project website is
often a better fit.
Feature-Gated Documentation
If your crate has optional features, you can annotate items so that docs.rs shows which feature is required to use them:
#![allow(unused)]
fn main() {
#[doc(cfg(feature = "json"))]
pub fn parse_json(input: &str) -> Result<Config, Error> {
// ...
todo!()
}
}On docs.rs, this renders a badge next to the item indicating the required
feature. To build documentation for all features locally, pass --all-features
to cargo doc. docs.rs reads a [package.metadata.docs.rs] section in your
Cargo.toml to determine which features to enable when building:
[package.metadata.docs.rs]
all-features = true
Scraped Examples
Rustdoc can automatically find uses of your public API items in the examples/
directory and display them inline in the generated documentation. This means
that if you have an example binary that calls parse_config, the docs page for
parse_config will show that usage in context, without you writing a separate
# Examples section. To enable this when building docs locally:
cargo doc --scrape-examples
docs.rs enables scraped examples automatically for published crates that have an
examples/ directory. This is a good reason to write well-structured example
programs even beyond their value as standalone demos — they feed directly into
your API documentation. The Bevy game engine uses this
extensively: its hundreds of examples appear inline throughout the API docs,
giving users real-world usage patterns for every major type.
Generating Documentation
Run cargo doc to build documentation for your crate and its dependencies. Add
--open to open it in a browser, and --no-deps to skip dependencies if you
only want your own crate’s docs:
cargo doc --open --no-deps
To catch broken links and other documentation issues during development, build with warnings turned into errors:
RUSTDOCFLAGS="-D warnings" cargo doc --no-deps
This is worth running in CI. The GitHub Actions and GitLab CI chapters include examples of documentation jobs that use this flag. For publishing documentation to a hosted location, see the GitHub Pages and GitLab Pages sections in those chapters.
Enforcing Documentation
For libraries, enforcing that all public API items have documentation prevents
gaps from accumulating over time. The missing_docs lint checks for public
items without doc comments. Setting it to deny makes missing documentation a
compile error:
#![allow(unused)]
#![deny(missing_docs)]
fn main() {
}This is a strong stance — it means no public function, struct, enum variant, or
trait method can be added without documentation. For projects that are still
evolving rapidly, warn is a softer alternative that surfaces the gaps without
blocking compilation. For established libraries, deny is the better default:
it is much easier to maintain documentation coverage than to backfill it later.
To also catch broken intra-doc links, enable the corresponding lint:
#![allow(unused)]
#![deny(rustdoc::broken_intra_doc_links)]
fn main() {
}Combined with RUSTDOCFLAGS="-D warnings" in CI, this ensures that
documentation links stay valid as the codebase evolves.
Clippy has a number of lints that can be useful for enforcing documentation
style, see
Clippy Lints for
more context. Many of these are turned on when using the clippy::pedantic lint
level.
Reading
The Rustdoc Book by The Rust Project
The official reference for rustdoc. Covers doc comment syntax, doc tests,
intra-doc links, the #[doc] attribute, and configuration options. The
chapter on doc tests is particularly useful for understanding the annotation
syntax (should_panic, no_run, compile_fail, hidden lines with #).
Rust API Guidelines: Documentation by The Rust Project
Guidelines for documenting Rust libraries, including conventions for crate-level
docs, the # Examples, # Errors, # Panics, and # Safety sections, and
what makes documentation effective for downstream users. Part of the broader
API Guidelines that cover naming, interoperability, and type safety.
Making Great Docs with Rustdoc (archived) by Tangram Vision
Practical advice on writing effective rustdoc documentation, from structuring
crate-level docs to writing good examples. Covers the include_str! pattern,
doc tests, and strategies for keeping documentation accurate as the codebase
changes.
Rust Documentation Ecosystem Review (archived) by Gio Genre De Asis
A thorough evaluation of documentation quality across ~25 popular Rust crates
using the Diátaxis framework (tutorials, how-to guides, reference,
explanation). Scores each crate on comprehensiveness, discoverability,
approachability, and design philosophy. The jiff crate stands out for its
_documentation module pattern and design rationale docs; ratatui for its
iterative tutorials and website. A valuable read for understanding what
separates adequate documentation from genuinely helpful documentation.
Book
While having code-level documentation is useful for some cases, another important aspect is having high-level documentation which explains:
- System architecture
- Crate architecture
- How to launch and use things
Not explicitly documenting these somewhere leads to having projects where this important context lives in a few people’s brains. It can block others in the team from making changes by not knowing how things fit together.
mdBook
In the Rust community, the mdBook tool has become the standard way to write this kind of documentation. It consumes the documentation in the form of Markdown and renders it nicely into a HTML book.
Ideally, inside every project you will want to have some kind of book/ folder
containing this high-level documentation. You can even have multiple books or
sections, targeted at different audiences.
You can install mdbook like this:
cargo install mdbook
You can then initialize a new project like this:
mdbook init
Finally, you can build or serve your project locally like this:
mdbook build
mdbook serve
Examples
- https://docs.rust-embedded.org/book/
- todo: find more examples
- todo: explain how to use it
- pattern: change src/ to docs/ and put output in target/docs
Usage
Reading
mdBook Book by rust-lang
This is the official book of the mdBook project. It explains all the various features that mdBook has, and how to use them.
mdBook: Third-Party Plugins by mdBook
A list of third-party plugins for mdBook, contains various preprocessors and backends.
Architecture
Perhaps the most important property of software is the architecture. While the implementation of functions can easily be changed or optimized, rearchitecting software, especially collections of systems, is typically a slow and expensive endeavour.
Software architecture is important for developers to understand. When joining a new team or project, the very first thing to figure out is how the system works on a high level. For developers familiar with the software, it is easy to note down the high-level architecture, but for people unfamiliar with the code base it is a slow and error-prone process to wade through the code and try to understand how everything fits together, how components communicate and how data travels through each component.
If you do not have time to properly document software, the least you should do is document the high-level architecture.
Publishing
- Markdown
- mdBook
Diagrams
It tends to be easier to show architecture rather than to explain it.
There are some useful tools that can be used to draw such diagrams:
draw.io
Excalidraw
PlantUML
Mermaid
Documenting Changes
Another important aspect to software architecture is documenting design decisions. This helps answer why the architecture is chosen the way it is. Having a process around this also helps collaboration, by giving team members the opportunity to give feedback on proposed design decisions, to find the best (or sometimes the least worst) way to achieve an intended outcome.
Reading
Architectural Decision Record by Joel Parker Henderson
Architecture decision record (ADR) examples for software planning, IT leadership, and template documentation.
ARCHITECTURE.md (archived) by Alex Kladov
Alex argues in this article for adding a file named ARCHITECTURE.md into
software repositories to document the architecture of the code base. He argues
that writing good documentation is hard, and it is not often done. But some
someone starting to work in an unfamiliar codebase, such a document with a
bird’s-eye view of the layout of the project is invaluable.
More Software Projects need Defenses of Design (archived) by Hillel Wayne
Hillel argues that many software projects have some design decisions that might look strange to an outsider. Many of these design decisions are for backwards compatibility, performance, inspiration by similar projects or other reasons that are not immediately obvious. For that reason, projects should have a document defending their design, giving important context and rationale as to why the decisions were made.
Software Architecture is Overrated, Clear and Simple Design is Underrated (archived) by Gergely Orosz
Gergely explains how software is architected in modern tech companies. He explains the effectiveness of diagrams in communicating architecture choices, without the need for formal processes such as UML diagrams. He argues having an informal, collaborative process to come up with architecture is better than having decisions be made by a software architect, because it makes it easier to challenge ideas, and that the most important aspect of good architecture is simplicity.
Architecture diagrams should be code (archived) by Brian McKenna
Brian explains that different people have different views of the architecture of a complex system, often influenced by which part of the system they work on. He argues that architecture diagrams can also quickly go out of sync with reality, as the system evolves. He argues for writing architecture diagrams as code, using the C4 model and PlantUML, or in his case a Haskell program which produces PlantUML output. That way, these diagrams can be kept in version control and updated as part of development.
Effective Design Docs (archived) by Roman Kashitsyn
Design Docs by Eraser
A curated library of our favorite 1000+ design doc examples and templates from 40+ leading engineering organizations and open source projects.
Design
Reading
https://ntietz.com/blog/reasons-to-write-design-docs/
https://dzone.com/articles/how-to-write-rfcs-for-open-source-projects
https://opensource.com/article/17/9/6-lessons-rfcs
https://rust-lang.github.io/rfcs/
https://philcalcado.com/2018/11/19/a_structured_rfc_process.html
https://adr.github.io/
https://cloud.google.com/architecture/architecture-decision-records
https://github.com/joelparkerhenderson/architecture-decision-record
https://docs.aws.amazon.com/prescriptive-guidance/latest/architectural-decision-records/adr-process.html
https://learn.microsoft.com/en-us/azure/well-architected/architect-role/architecture-decision-record
Examples
There are some things that I consider to be part of documentation even though technically, they are not documentation. These are unit tests and examples.
Reading
Add examples to your Rust libraries (archived) by Karol Kuczmarski
Karol explains the need for working examples when using an unfamiliar
library, and how Rust supports this out-of-the-box with its support for
examples. Karol explains that Rust treats examples as documentation, and builds
them when you run cargo test. Karol argues that all Rust projects should come
with good examples, because they make using the code easier and help people get
started.
Releasing
Releasing means publishing artifacts that others can use: source code to a package registry, compiled binaries as downloadable assets, system packages for distribution through a package manager, or container images for deployment. A release also communicates what changed, through version numbers and a changelog, so that users and downstream maintainers can decide when and how to upgrade.
Communication
Every release needs to answer two questions: what version is this, and what
changed? Versioning covers semantic versioning, how Cargo
interprets version ranges, and conventions around pre-1.0 crates and
prereleases. Changelog covers the Keep A Changelog format and
tools like git-cliff that generate changelogs from commit history. Together,
version numbers and changelogs give downstream users enough information to
decide whether an upgrade is safe and worth the effort.
Distribution
What you publish depends on what you’re building. A library publishes to a
crate registry, either crates.io or a private registry for internal
code. An application has more options: container images for
server deployments, system packages like .deb files for
end-user installation, or compiled binaries attached to a GitHub or GitLab
release. Most projects use one or two of these; few need all of them.
Automation
The Rust ecosystem has two main tools for automating the full release workflow.
cargo-release runs locally: it bumps the version
in Cargo.toml, generates changelog entries, creates a git tag, and publishes
to crates.io in a single command. It handles workspace releases where multiple
crates need coordinated version bumps. release-plz
takes a CI-first approach: it runs in your pipeline and opens a release PR
containing the version bump and updated changelog. Merging the PR triggers
publication automatically. Both tools integrate with
git-cliff for changelog generation and
cargo-semver-checks for verifying that version bumps
match the actual API changes. The CI chapter covers how to
wire these into your pipeline.
Changelog
When you release a new version, users and downstream developers need to know what changed. Semantic versioning tells them the kind of change (breaking, feature, or fix), but a changelog documents what specifically changed and why it matters. For libraries, this means new API surface, deprecations, and migration instructions. For applications, this means user-visible features, bugfixes, and behavioral changes.
Changelogs typically live in a CHANGELOG.md file in the repository root,
updated during development or just before release. Some projects also use
GitHub/GitLab releases to write notes when tagging a version, or generate one
from the other automatically.
Format
A common format is specified by Keep A Changelog, which organizes changes by version and category (Added, Changed, Deprecated, Removed, Fixed, Security):
## [1.2.0] - 2024-01-15
### Added
- New `parse_config` function for reading configuration files
### Fixed
- Fixed panic when handling empty input in `process_data`
The version header often links to a diff or tag. For breaking changes, be explicit about what changed and how to migrate. Many Rust projects also note MSRV changes in their changelogs, since bumping the minimum supported Rust version affects when users can upgrade.
For real-world examples, see the changelogs of rand, hashbrown, and bitflags.
git-cliff
git-cliff is a changelog generator that creates structured
changelogs from your Git commit history. It works best when your project follows
Conventional Commits (commit messages
like feat: add config parser or fix: handle empty input), but its
regex-powered parser can be configured to work with other commit message styles.
cargo install git-cliff
git-cliff --init # generate a cliff.toml configuration
git-cliff # generate changelog from commit history
git-cliff outputs in the Keep A Changelog format by default and can be
configured to group commits by type, filter out certain categories, and link to
issues or pull requests. It is used internally by both cargo-release and
release-plz.
cargo-release
cargo-release automates the full release workflow for Rust
crates: bumping the version in Cargo.toml, updating the changelog (using
git-cliff), creating a git tag, and publishing to crates.io. It handles
workspace releases where multiple crates need coordinated version bumps.
cargo install cargo-release
cargo release patch # bump patch version, update changelog, tag, publish
See the changelog FAQ for details on how it manages changelog entries.
release-plz
release-plz takes a CI-first approach to
releasing. Rather than running release commands locally, it runs in your CI
pipeline and opens a release PR that contains the version bump, updated
changelog, and any other metadata changes. When you merge the PR, it
automatically creates git tags, publishes to crates.io, and creates
GitHub/GitLab releases.
release-plz uses git-cliff for changelog generation and
cargo-semver-checks to detect whether a change is
breaking, ensuring the version bump matches the actual API change. This makes it
a good fit for projects that want fully automated releases gated by code review.
Reading
Keep A Changelog (archived) by Olivier Lacan
The specification that defines how changelogs should be structured: one section per version, categorized by type of change (Added, Changed, Fixed, etc.), with the most recent version first. Short and worth reading — the FAQ section addresses common questions like whether changelogs should be auto-generated (the author argues no, but the Rust ecosystem tooling makes auto-generation practical).
Conventional Commits by Conventional Commits Project
A specification for writing commit messages that tools like git-cliff and
release-plz can parse automatically. Commits are prefixed with a type
(feat:, fix:, chore:) and optionally a scope. Breaking changes are
marked with ! or a BREAKING CHANGE: footer. Adopting this convention is
not required for changelog generation, but it makes the output much better.
Versioning
Rust comes with built-in support for Semantic Versioning, and you should use it unless you have a strong reason not to.
Semantic versioning encodes information into the version string. A version looks
like 1.2.3, where the three numbers are called major, minor, and patch:
- Patch (1.2.3 → 1.2.4): bugfixes only, no interface changes. Always safe to apply.
- Minor (1.2.3 → 1.3.0): new functionality that does not break existing users.
- Major (1.2.3 → 2.0.0): backwards-incompatible changes.
Pre-1.0 Versions
Crates with a 0.x.y version are treated differently by Cargo. Before 1.0, the
semver rules are shifted: a minor bump (0.1.0 → 0.2.0) is treated as a
breaking change, and a patch bump (0.1.0 → 0.1.1) can include new features.
This means "0.2" in a Cargo.toml dependency is interpreted as
>=0.2.0, <0.3.0, not >=0.2.0, <1.0.0.
This convention exists because pre-1.0 crates are expected to have unstable APIs. Many crates in the Rust ecosystem stay at 0.x for a long time, so this is worth understanding.
How Cargo Interprets Versions
Cargo uses version requirements, not exact versions, when specifying
dependencies. The shorthand "1.2" is syntactic sugar for >=1.2.0, <2.0.0.
This means Cargo will always resolve to the latest compatible version within
that range.
[dependencies]
serde = "1.0" # >=1.0.0, <2.0.0
uuid = "0.8" # >=0.8.0, <0.9.0
rand = "=0.8.5" # exactly 0.8.5
The caret (^), tilde (~), and wildcard (*) operators provide finer
control. The Cargo Book’s Specifying Dependencies chapter
covers all of these in detail.
Prereleases
If you want to make a prerelease of an upcoming version — for example to let
users test it before the final release — you can add a hyphen suffix. For
example, 1.3.0-rc.1 is a release candidate for version 1.3.0. Cargo will not
resolve to prereleases unless explicitly requested, so existing users are not
affected.
Build Metadata
Semver also supports a + suffix for build metadata: 1.3.0+build.42. The
metadata after the + is ignored for version precedence — 1.3.0+build.42 and
1.3.0+build.43 are considered the same version. This is used to attach
information about the build environment (commit hash, build date, CI job ID)
without affecting version resolution.
Cargo currently ignores build metadata entirely, so it has no effect on
dependency resolution. It can still be useful for tracking which exact build
produced a binary, for example by embedding 1.3.0+abc1234 where abc1234 is
the git commit hash.
This metadata is commonly used for two purposes:
- If your crate is a Rust interface to an existing library (for example, a C
library), you can use the metadata to denote which version of the library it
wraps. For example, if your crate wraps
libxyzversion 1.5, you could release it as1.16.0+libxyz1.5. The crate is versioned independently (because you might update it to improve bindings or abstractions), but you still communicate the version of the underlying library. - If your crate implements a specification, for example XML version 1.2, you can
release it as
2.15.2+xml1.2to communicate which version of the spec your crate implements.
Enforcing Correct Versioning
Getting semver right manually is difficult, especially for subtle breaking
changes (see the Semantic Versioning chapter for
examples). The cargo-semver-checks tool can automate
this by comparing your crate against the published version and detecting whether
the changes are patch, minor, or major.
Crate Registries
The standard way to distribute Rust crates is through a registry.
Crates.io is the public registry used by the Rust community. It is
free, integrates with docs.rs for automatic documentation hosting, and is
where the vast majority of open-source Rust libraries are published. Publishing
a library there makes it available to anyone via cargo add, and binary crates
can be installed with cargo install.
Publishing to crates.io
To publish, you need a GitHub account to log in to crates.io and generate an API token. Authenticate with Cargo and publish:
cargo login <api-token>
cargo publish
Your crate must include certain metadata in Cargo.toml (name, version,
license, description) before it can be published. See Publishing on
crates.io for the full requirements.
If you publish a version by mistake, you can yank it. Yanking prevents new projects from depending on that version, but does not delete it — existing projects that already depend on it continue to work. This avoids the kind of breakage seen in the left-pad incident, where deleting a package from NPM broke a large part of the JavaScript ecosystem.
cargo yank --version 1.2.3
Private Registries
In a commercial setting, you may have internal crates that you want to share within your organization but not publish publicly. While Cargo supports git dependencies, a private registry is preferable because it enables semantic versioning and version resolution — features that do not work with git dependencies. RFC 2141 specifies how alternative registries work with Cargo.
Several private registry options exist:
- Shipyard is a hosted private registry service. It replicates the crates.io experience for private crates, with authentication and access control.
- Kellnr is a self-hosted private registry that you can run on your own infrastructure.
- JFrog Artifactory supports Cargo registries as part of its broader artifact management platform, alongside npm, Maven, Docker, and other package formats.
To configure Cargo to use an alternative registry, add it to your
.cargo/config.toml:
[registries.my-registry]
index = "sparse+https://my-registry.example.com/index/"
Then publish to it or depend on crates from it:
cargo publish --registry my-registry
[dependencies]
my-internal-crate = { version = "1.0", registry = "my-registry" }
Reading
Chapter 14.2: Publishing to Crates.io by The Rust Book
Walks through the full process of publishing a crate: adding metadata to
Cargo.toml, writing documentation, choosing a license, and running
cargo publish. Also covers managing crate owners and yanking versions.
Using the Shipyard private crate registry with Docker (archived) by Amos Wenger
Practical walkthrough of setting up a private crate registry with Shipyard, including configuring Cargo authentication, publishing crates from both local development and CI, and using the registry inside Docker builds where credential handling requires extra care.
Registries by The Cargo Book
Reference for how Cargo interacts with registries: the registry protocol, authentication, configuring alternative registries, and publishing. Covers both the older git-based index protocol and the newer sparse protocol that crates.io uses by default since Rust 1.70.
Containers
Deploying Rust services as containers is common, given the tooling around container orchestration, monitoring, and scaling. The two main container runtimes are Docker and Podman. Podman is a daemonless, rootless alternative to Docker that uses the same image format and can run the same Dockerfiles (called Containerfiles in Podman’s terminology). Everything in this chapter applies to both.
The challenge with containerized builds is that they are hermetic by default:
each build starts from scratch without access to Cargo’s target directory or
any previous build cache. For a Rust project with hundreds of dependencies, this
means rebuilding everything from source on every change, which can be very slow.
There are several approaches to making container builds faster for Rust projects.
Layer Caching
Container builds work in layers, and layers are cached based on whether their inputs have changed. The key insight for Rust is that your dependencies change far less often than your source code. If you can build dependencies in a separate layer from your application code, that layer gets cached and reused on most builds.
A common technique is to copy only Cargo.toml and Cargo.lock first, build
dependencies, and then copy your source code and build the final binary:
FROM rust AS builder
# copy manifests and build dependencies only
WORKDIR /app
COPY Cargo.toml Cargo.lock ./
RUN mkdir src && echo "fn main() {}" > src/main.rs
RUN cargo build --release
RUN rm -rf src
# now copy real source and rebuild (only your code recompiles)
COPY src ./src
RUN cargo build --release
FROM debian:bookworm-slim
COPY --from=builder /app/target/release/my-app /usr/local/bin/
CMD ["my-app"]
This works but is fragile: the dummy main.rs trick can break if you have
multiple binaries, build scripts, or workspace members. cargo-chef (below)
automates this pattern more reliably.
cargo-chef
cargo-chef is a Cargo subcommand designed to make Docker layer
caching work well with Rust. It analyzes your project and generates a “recipe”
file that captures your dependency graph without your source code. The build is
then split into three stages:
- Prepare: generate the recipe from your source tree.
- Cook: build all dependencies using only the recipe (this layer is cached).
- Build: copy your source code and build the final binary.
FROM rust AS chef
RUN cargo install cargo-chef
WORKDIR /app
FROM chef AS planner
COPY . .
RUN cargo chef prepare --recipe-path recipe.json
FROM chef AS builder
COPY --from=planner /app/recipe.json recipe.json
RUN cargo chef cook --release --recipe-path recipe.json
COPY . .
RUN cargo build --release
FROM debian:bookworm-slim
COPY --from=builder /app/target/release/my-app /usr/local/bin/
CMD ["my-app"]
The cook step only re-runs when your dependencies change (the recipe changes). Source code changes skip straight to the final build step, which only recompiles your code. This works correctly with workspaces, build scripts, and complex project layouts.
Podman
Podman can build the same Dockerfiles/Containerfiles and
produces OCI-compatible images. If you use Podman, the commands are the same —
just replace docker with podman:
podman build -t my-app .
podman run my-app
Podman runs without a daemon and supports rootless containers by default, which makes it a good fit for CI environments where running a Docker daemon requires elevated privileges. On systems where Docker is not available (some enterprise Linux distributions ship Podman instead), the same Containerfiles work without modification.
Multi-Stage Builds
The examples above already use multi-stage builds (multiple FROM statements),
which is the standard approach for producing small container images from Rust.
The builder stage compiles your code with the full Rust toolchain, and the final
stage copies only the compiled binary into a minimal base image. This keeps the
final image small: a Rust binary on debian:bookworm-slim or alpine is
typically under 50 MB.
For even smaller images, you can build a statically linked binary using the
x86_64-unknown-linux-musl target and use scratch or distroless as the
base:
FROM rust AS builder
RUN rustup target add x86_64-unknown-linux-musl
WORKDIR /app
COPY . .
RUN cargo build --release --target x86_64-unknown-linux-musl
FROM scratch
COPY --from=builder /app/target/x86_64-unknown-linux-musl/release/my-app /
CMD ["/my-app"]
Reading
Shipping Rust in Docker by Luca Palmieri
Luca, the author of cargo-chef, explains the problem with Docker layer
caching for Rust projects and walks through the solution. Covers the dummy
build trick, why it breaks for complex projects, and how cargo-chef solves
it with the prepare/cook/build workflow.
Packaging
Once you have a compiled binary, you can distribute it as a tarball or a standalone download, but system packages are a better experience for users. A package bundles your binary with metadata (version, description, dependencies) and any additional files it needs (man pages, configuration files, systemd units), and integrates with the system’s package manager for installation, upgrades, and removal. This chapter covers the Linux-focused packaging tools available for Rust projects and briefly touches on macOS with Homebrew.
Debian Packages
cargo-deb builds .deb packages directly from a Cargo project.
It reads your Cargo.toml metadata and figures out which binaries the project
produces. Additional Debian-specific metadata goes under
[package.metadata.deb]:
[package.metadata.deb]
maintainer = "Alice Example <alice@example.com>"
depends = "$auto"
section = "utility"
priority = "optional"
assets = [
["target/release/my-tool", "usr/bin/", "755"],
["README.md", "usr/share/doc/my-tool/README", "644"],
]
The $auto value for depends tells cargo-deb to use dpkg-shlibdeps to
detect shared library dependencies automatically. The assets array maps build
outputs and project files to their installation paths in the package.
Once configured, building a package is a single command:
cargo install cargo-deb
cargo deb
cargo-deb also supports systemd service integration for
daemons, build variants for different configurations, and cross-compilation for
other architectures. If you want to support automatic updates, you can host
your own APT repository.
RPM Packages
cargo-generate-rpm builds .rpm packages for Red Hat,
Fedora, openSUSE, and other RPM-based distributions. It generates RPM files
directly using the rpm crate rather than requiring rpmbuild to be installed.
Configuration goes under [package.metadata.generate-rpm] in Cargo.toml, with
an assets array similar to cargo-deb:
cargo install cargo-generate-rpm
cargo build --release
cargo generate-rpm
The generated package lands in target/generate-rpm/. The tool supports setting
dependencies, pre/post-install scripts, and PGP signing.
Flatpak
Flatpak is a sandboxed packaging format for desktop
Linux applications. There is no Cargo plugin for Flatpak; instead, you write a
Flatpak manifest and build with flatpak-builder. Since Flatpak builds are
sandboxed and cannot fetch crates from the network during build, you need to
vendor dependencies ahead of time. The
flatpak-cargo-generator script reads your
Cargo.lock and generates the manifest sources needed to include all
dependencies offline. Flatpak packaging is most relevant for GUI applications
using frameworks like GTK (via gtk-rs) or
egui.
AppImage
cargo-appimage bundles a Rust binary into an
AppImage, a self-contained executable that runs on most
Linux distributions without installation. Configuration goes under
[package.metadata.appimage] in Cargo.toml, where you can specify an icon,
desktop entry, and additional assets. It can optionally embed shared libraries
into the bundle so the AppImage works on systems that lack them:
cargo install cargo-appimage
cargo appimage
AppImage is a good fit for distributing desktop applications to end users who may not want to add a repository or install a package manager.
Homebrew
Homebrew is the most common package manager on macOS. There
is no Cargo plugin for it; instead, you write a Ruby formula that tells Homebrew
how to build and install your project. For a Rust project, the formula typically
declares Rust as a build dependency and runs cargo install during the build
phase. Alternatively, you can host pre-built binaries on GitHub Releases and
have the formula download them directly, which is faster for users. Either way,
you publish the formula through a Homebrew tap (a Git repository) that users add
with brew tap.
Reading
Distribution - Command Line Applications in Rust by Rust CLI Working Group
The official Rust CLI book’s chapter on distribution. Covers cargo-install, pre-built binaries with CI, and packaging for various platforms. Brief but a good starting point with links to platform-specific guides.
Continuous Integration
Continuous Integration (CI) is a simple idea: run code automatically whenever your code changes. When a developer opens a merge request, a machine somewhere checks out the code, runs tests, checks formatting, runs lints, and reports back whether everything passed. When the merge request is accepted, the same or additional checks run again on the merged result.
The value of CI is that it removes reliance on individual developers remembering to run every check before committing. A project with multiple contributors, each with different local setups, cannot rely on hope as a correctness strategy. If you care about a property of your codebase (that it compiles, that it passes tests, that it has no spelling errors in its documentation) then you should encode that property as an automated check and enforce it in CI. The saying goes: If you liked it, then you should have put a test on it.
CI and Continuous Deployment (CD) are commonly talked about together. CD is about automatically deploying code to production or staging environments after it passes CI. We will not discuss CD.

All modern development platforms come with a CI system: GitHub has GitHub Actions, GitLab has GitLab CI. There are also standalone CI systems like Jenkins, Buildkite, and CircleCI. Unless you have specific requirements, use whatever your development platform provides, it will be the best integrated and the easiest to set up. Some CI systems have ways of feeding information from the jobs back to developers. For example, after running the unit tests, changes in which tests pass might be reported inline in a merge request, or changes in test coverage might be shown.
The following subchapters cover GitHub Actions and GitLab CI specifically, but the concepts in this chapter apply to any CI system, and many of the examples can be adapted to other systems easily.
What to Run
The checks and tools covered throughout this book can be organized into two tiers based on how frequently they should run. In an ideal world, you should be able to run every check on every commit, but practically you want to strike a balance between getting feedback quickly when merge requests are created, and correctness. So a good tradeoff is to run the most important checks on every merge request, and running more expensive checks on a schedule.
Fast tier (every merge request). These checks should be fast (under 10 minutes total) and run on every merge request. They catch the most common issues and give contributors quick feedback:
- Formatting:
cargo fmt --checkverifies that code matches the project’s style. This is the cheapest check and should run first. - Lints:
cargo clippy --all-targets -- -D warningscatches common mistakes and non-idiomatic code. - Typos:
typos-clichecks for spelling mistakes in code, comments, and documentation. - Tests:
cargo test(orcargo nextest runif you use cargo-nextest for faster parallel execution). - Documentation:
cargo doc --no-depsensures that documentation builds without errors. Broken doc links and malformed examples are caught here.
Thorough tier (on merge or on schedule). These checks are too slow or too noisy for every merge request, but they catch important issues that the fast tier misses:
- Dependency auditing:
cargo auditorcargo deny checkflags known vulnerabilities. Running on a schedule catches new advisories published after a dependency was added. - Semver checks:
cargo semver-checksverifies that your public API changes match your version bump. - Feature powerset:
cargo hack check --feature-powersetensures that all feature flag combinations compile. This is combinatorially expensive and typically runs on merge to the main branch. - MSRV verification: test against your declared minimum supported Rust version to make sure you have not accidentally used a newer API.
- Outdated dependencies:
cargo outdatedorcargo upgradeson a weekly schedule, so dependency drift does not pile up unnoticed. - Fuzzing: even short fuzzing runs (a few minutes) on a schedule can catch bugs that deterministic tests miss.
- Mutation testing:
cargo mutants --in-diffon merge to the main branch verifies that your test suite actually catches regressions. - Test coverage: generate coverage reports and upload them to a service like Codecov or Coveralls.
- External service tests: integration tests that depend on databases or other services via Docker Compose or testcontainers are often too slow or too complex for every merge request.
Linear History
CI systems typically test only the latest commit in a merge request. If the
merge request contains multiple commits and some of the intermediate commits are
broken, those broken commits end up on the main branch even though CI reported
success. This matters for workflows like git bisect, where you need every
commit on main to be in a working state.
There are two common solutions. The first is to configure your platform to squash commits on merge, so that all the commits from a merge request are collapsed into a single commit — and that single commit is the one that CI tested. The second is to enforce a linear history by requiring that merge requests are rebased onto the main branch before merging, with no merge commits allowed.
For projects with high merge throughput, even rebasing is not enough: if two merge requests both pass CI independently but conflict when merged together, the second one can break main. Merge trains solve this by queuing up merge requests and testing each one on top of the result of the previous. GitLab supports merge trains natively. GitHub does not have a built-in equivalent, though Bors and Mergify provide similar functionality.
Publishing Artifacts
CI does not just produce pass/fail results. Many CI systems can also host static content generated during a CI run. This is useful for publishing things like:
- API documentation generated by
cargo doc, allowing users to browse the public API of your crates without building docs locally. For crates published to crates.io, docs.rs does this automatically, but for internal crates or workspaces, hosting your own is the only option. - Coverage reports generated by
cargo-llvm-covin HTML format, giving developers a browsable view of which lines and functions still lack test coverage. - Book documentation generated by
mdBook, providing public-facing guides and reference documentation that live alongside the code and are rebuilt automatically on every change. - Nightly binaries built from the latest commit on the main branch, allowing testers and early adopters to try new features without waiting for an official release.
Both GitLab and GitHub offer a Pages feature for hosting static content directly
from CI. GitLab Pages is particularly straightforward: any job named pages
that produces a public/ artifact will be deployed automatically. GitHub Pages
requires a bit more configuration through dedicated actions. The platform
subchapters cover the specifics.
Releases
CI is a natural place to automate the release process. When you push a Git tag
(like v1.0.0), a CI pipeline can build release binaries for multiple
platforms, publish the crate to crates.io, create a
release on your development platform with downloadable assets, generate a
changelog, and build
packages for distribution (.deb, .rpm,
tarballs). The Releasing chapter covers the tools involved; the platform
subchapters show how to wire them into CI pipelines.
Both GitLab and GitHub also include a built-in Docker container registry, allowing CI pipelines to build and publish container images as part of the release process.
Reproducibility
A CI pipeline has many inputs beyond your source code: the Rust toolchain version, dependency versions, runner images, and auxiliary tool binaries. Any of these can change between runs without your code changing, which means the same commit can produce different results on different days.
Depending on your development style, this may or may not matter to you. If you need to support old versions of your software, for example, you probably want to make sure that CI on a year-old branch does not start failing because your code no longer passes new Clippy lints or because a tool you install changed its output format. If reproducibility is something you care about, you need to think about pinning your environment as much as you can, from the Rust compiler version to the tooling you use and the CI configuration you run.
Pinning the Toolchain
The rust-toolchain.toml file, committed to the repository root, declares which
Rust toolchain the project uses:
[toolchain]
channel = "1.82.0"
components = ["rustfmt", "clippy"]
Both rustup and most CI toolchain installers respect this file automatically,
so the same toolchain version is used in CI and on every developer’s machine.
This is more reliable than hardcoding the version in CI configuration, because
the CI config and the developer’s local toolchain can drift apart. With
rust-toolchain.toml, there is a single source of truth.
Pinning Dependencies
Cargo resolves dependency versions at build time unless told not to. If a
dependency publishes a new patch version between two CI runs, the second run may
compile different code than the first. The --locked flag prevents this:
cargo test --locked
With --locked, Cargo refuses to build if the Cargo.lock file does not match
the current dependency resolution. This ensures CI uses exactly the versions the
developer tested locally. It also catches a common mistake: updating a
dependency in Cargo.toml but forgetting to commit the updated Cargo.lock.
Pinning Tool Versions
When installing Cargo subcommands, pin the version. An unpinned
cargo install cargo-audit will install whatever the latest release is at the
time the job runs, which can introduce new warnings or behavior changes that
have nothing to do with your code:
# Unpinned — may change between runs:
cargo install cargo-audit
# Pinned — deterministic:
cargo install cargo-audit@0.21.0
Nix
For projects that already use Nix, running CI inside a
Nix development shell pins the Rust toolchain, all system dependencies, and all
auxiliary tools to exact versions via the flake lockfile. This achieves all of
the above in one step. The tradeoff is adoption cost: Nix has a steep learning
curve, and adding it solely for CI reproducibility is rarely worth it. But for
projects that already have a flake.nix, using it in CI is a natural extension.
It also means developers can run the same checks locally and be confident that
the outcome matches CI. The platform subchapters cover how to set up Nix in
GitHub Actions and
GitLab CI.
Each CI platform also has its own reproducibility concerns (action versions in GitHub, Docker image tags in GitLab, runner images), which are covered in the respective subchapters.
Security
CI jobs often need access to secrets: registry tokens for publishing crates, deployment credentials, API keys for external services. If your repository accepts contributions from external developers, those developers’ merge requests will trigger CI runs. Depending on how your CI is configured, those runs may have access to your secrets.
This is a real attack vector. An attacker can submit a merge request that modifies CI configuration or test code to exfiltrate secrets to an external server. The specifics of how to mitigate this differ by platform — protected variables, environment scoping, restricted triggers — and are covered in the GitHub Actions and GitLab CI chapters. The important thing is to be aware that CI pipelines are an attack surface and to think carefully about which jobs need which secrets and who can trigger them.
Reading
Continuous Integration by Martin Fowler
In this article, Martin summarizes continuous integration practices. In his own words:
Continuous Integration is a software development practice where each member of a team merges their changes into a codebase together with their colleagues changes at least daily. Each of these integrations is verified by an automated build (including test) to detect integration errors as quickly as possible. Teams find that this approach reduces the risk of delivery delays, reduces the effort of integration, and enables practices that foster a healthy codebase for rapid enhancement with new features.
Continuous Integration by Software Engineering at Google
A chapter on Google’s approach to continuous integration. The chapter argues that the cost of a bug grows the later it is caught, so CI should shift detection as early as possible. To do this effectively, split your tests: fast, hermetic tests run on every merge request, while slow or non-deterministic tests run post-submit. The system only works if developers trust it, which means investing in test reliability. Flaky or non-hermetic tests erode that trust, and developers quickly learn to ignore CI results that regularly fail for reasons unrelated to their changes. A case study illustrates the impact: moving end-to-end tests from nightly to post-submit within two hours cut the set of suspect changes per failure by 12x.
GitHub Actions
GitHub Actions is the CI/CD platform built into GitHub. It launched in 2019 and
has since become a popular CI system for open-source Rust projects, largely
because it is free for public repositories and deeply integrated with pull
requests and issue tracking. Workflows are defined as YAML files in the
.github/workflows/ directory of your repository, and they run in response to
events like pushes, pull request updates, or cron schedules.
This chapter focuses on the practical side: how GitHub Actions works, how to set up effective CI for a Rust project, and how to avoid common pitfalls. Because this is the point in the book where all the individual tools come together, this chapter cross-references the checks, testing, building, and releasing chapters extensively.
Mental Model
A workflow is a YAML file in .github/workflows/. Each workflow is
triggered by one or more events and contains one or more jobs. Each job
runs on a fresh virtual machine (called a runner), and GitHub provides
hosted runners for Linux (Ubuntu), macOS, and Windows. Jobs run in parallel by
default, but you can create dependencies between them using the needs: keyword
so that a job is skipped if an earlier job fails.
Each job consists of a sequence of steps. A step is either a shell command
(run:) or an invocation of an action (uses:). Actions are reusable units
of CI logic published as GitHub repositories. For example, actions/checkout@v4
checks out your repository, and dtolnay/rust-toolchain@stable installs a Rust
toolchain.
Because each job starts from a clean VM, nothing persists between jobs unless you explicitly pass data through artifacts or caches. The upside is full isolation; the downside is that you pay the cost of setup (toolchain installation, dependency download, compilation) on every run unless you configure caching.
The most common triggers are push and pull_request (for checking code on
every change), schedule (for running expensive checks periodically using cron
syntax), and workflow_dispatch (which adds a manual “Run workflow” button in
the GitHub UI). You can scope triggers to specific branches or file paths, and
use if: conditions to skip individual jobs or steps based on context. Larger
projects often split workflows across multiple YAML files (one for CI checks,
one for scheduled audits, one for releases), and organizations with many Rust
repositories can share workflow logic across repos using reusable workflows via
the workflow_call trigger. The
GitHub Actions documentation covers all of
these features in detail.
name: CI
on: [push, pull_request]
jobs:
test:
runs-on: ubuntu-latest
steps:
- uses: actions/checkout@v4
- uses: dtolnay/rust-toolchain@stable
- run: cargo test
This minimal workflow checks out the code, installs Rust, and runs cargo test
on every push and pull request.
Patterns
The following is a collection of patterns commonly used when writing GitHub Actions workflows for Rust projects. Most of what GitHub Actions offers is not Rust-specific and is well-documented elsewhere, so this section focuses on the parts where Rust’s compile times, toolchain ecosystem, or cargo conventions require special attention.
Toolchain Installation
The standard approach is dtolnay/rust-toolchain, which installs a specific
Rust toolchain and is faster and more cacheable than calling rustup directly:
- uses: dtolnay/rust-toolchain@stable
You can also pin to a specific version, install nightly, or add components:
- uses: dtolnay/rust-toolchain@stable
with:
toolchain: 1.78.0
components: clippy, rustfmt
For projects that need to test across multiple Rust versions (stable, beta, nightly, and their MSRV), this pairs well with the matrix strategy covered below.
To install additional Cargo subcommands like cargo-nextest, cargo-hack, or
cargo-audit, the taiki-e/install-action provides pre-built binaries for many
common tools, which is significantly faster than building them from source with
cargo install:
- uses: taiki-e/install-action@v2
with:
tool: cargo-nextest,cargo-hack
Caching
Rust projects are notorious for slow CI builds because the compilation step
dominates. A fresh cargo build of a moderately-sized project can take 10-20
minutes. Caching the build artifacts between runs is essential.
The Swatinem/rust-cache action is the standard solution. It caches
~/.cargo/registry, ~/.cargo/git, and the target/ directory, with automatic
cache key generation based on your Cargo.lock, toolchain version, and job
name:
- uses: Swatinem/rust-cache@v2
This single line typically cuts subsequent build times by 50-80%. You can also configure it to cache additional directories or share caches between jobs.
For larger projects, consider sccache as a compilation
cache that operates at the object-file level. The
mozilla-actions/sccache-action makes this easy to set up and can share cached
artifacts across different workflow runs and even across different CI jobs.
One thing to watch out for is stale caches. When dependencies change or the Rust compiler is updated, cached build artifacts can become invalid and cause mysterious compilation failures that do not reproduce locally. If a CI run fails in a way you cannot explain, try deleting the cache via the GitHub Actions UI or API before spending time debugging.
Concurrency Control
Because Rust CI runs are dominated by compilation, they tend to be long. When
you force-push to a PR branch, GitHub starts a new workflow run while the
previous one is still compiling. For a language with fast builds this is barely
noticeable, but for Rust you can easily end up with 20+ minutes of runner time
wasted on a run whose results you no longer care about. The concurrency: key
solves this by automatically cancelling in-progress runs:
concurrency:
group: ${{ github.workflow }}-${{ github.ref }}
cancel-in-progress: ${{ github.ref != 'refs/heads/main' }}
This cancels duplicate runs on PR branches but never cancels runs on main
(where you want every push to complete).
Matrix Strategy
A matrix lets you run the same job across multiple configurations. This is how you test across Rust versions, operating systems, or feature flag combinations:
jobs:
test:
strategy:
matrix:
os: [ubuntu-latest, macos-latest, windows-latest]
rust: [stable, beta, nightly]
runs-on: ${{ matrix.os }}
steps:
- uses: actions/checkout@v4
- uses: dtolnay/rust-toolchain@master
with:
toolchain: ${{ matrix.rust }}
- uses: Swatinem/rust-cache@v2
- run: cargo test
This generates 9 jobs (3 operating systems times 3 toolchains). You can use
include: to add specific combinations (like testing your
MSRV on Ubuntu only) and exclude: to skip combinations
that are not relevant.
For projects that claim cross-platform support, testing on Windows is important. Windows does some unusual things regarding path separators, line endings, filesystem case sensitivity, and symlink behavior. These issues do not surface on Linux-only CI. For more on this topic, see the Cross-Compiling chapter.
Rust-Specific Environment Variables
A few environment variables are worth setting globally for CI jobs:
env:
CARGO_INCREMENTAL: 0
RUSTFLAGS: "-D warnings"
CARGO_TERM_COLOR: always
CARGO_INCREMENTAL=0 disables incremental compilation. Incremental
compilation speeds up rebuilds on a developer’s machine by caching intermediate
artifacts, but in CI every build starts from a clean state (or a cache that may
be stale), so incremental compilation just wastes disk space and can
occasionally cause spurious failures.
RUSTFLAGS="-D warnings" promotes all warnings to errors. This ensures that
CI fails on warnings without requiring developers to set #![deny(warnings)] in
their code, which would also affect downstream users of the crate. Setting it as
an environment variable keeps the strictness scoped to CI.
CARGO_TERM_COLOR=always forces colored output. GitHub Actions renders ANSI
colors in its log viewer, and colored compiler output is significantly easier to
read.
Note that RUSTFLAGS only affects rustc. For cargo doc, you need to set
RUSTDOCFLAGS="-D warnings" separately to turn documentation warnings (broken
intra-doc links, missing code examples, etc.) into errors. This is typically set
on the doc job rather than globally, since not every job runs rustdoc.
What to Run
The What to Run section in the CI overview chapter covers which checks to run and how to organize them into a fast tier (every pull request) and a thorough tier (on merge or on schedule). The example workflow at the end of this chapter demonstrates how to implement both tiers in GitHub Actions.
Release Workflows
CI is not just about checks. Many Rust projects use GitHub Actions to build release binaries and publish crates. A common pattern is a workflow triggered by Git tags:
on:
push:
tags: ["v*"]
This workflow can use a matrix with cross (see
Cross-Compiling) to build binaries for multiple
platforms, upload them as GitHub release assets, and optionally publish the
crate to crates.io. The
Changelog chapter covers how to automate changelog
generation as part of this process.
For publishing to crates.io, the traditional approach is to store a
CARGO_REGISTRY_TOKEN as a repository secret. A newer and more secure
alternative is
trusted publishing,
which uses GitHub’s OpenID Connect (OIDC) tokens to authenticate directly with
crates.io without any stored secrets. You configure crates.io to trust publishes
from a specific repository and workflow, and GitHub provides a short-lived token
at runtime. This eliminates the risk of a leaked or stale API token and removes
the need to rotate secrets.
GitHub Pages
GitHub Pages can host static content generated by your CI workflows, similar to GitLab Pages. This is useful for publishing API documentation, coverage reports, and book documentation.
By default, GitHub Pages publishes to a domain based on your username and
repository name. For example, if your repository is at
github.com/yourname/reponame, the pages will be at
yourname.github.io/reponame/. You can configure a custom domain in Settings >
Pages.
GitHub Pages requires a dedicated deployment workflow using the
actions/upload-pages-artifact and actions/deploy-pages actions. You also
need to configure the repository to deploy from GitHub Actions (Settings >
Pages > Source > GitHub Actions).
name: Pages
on:
push:
branches: [main]
permissions:
pages: write
id-token: write
jobs:
build:
runs-on: ubuntu-latest
steps:
- uses: actions/checkout@v4
- uses: dtolnay/rust-toolchain@stable
- uses: taiki-e/install-action@v2
with:
tool: mdbook
# Build rustdoc and mdBook, then assemble into a single directory.
- run: cargo doc --no-deps --all-features
- run: mdbook build
- run: mkdir site && mv book site/book && mv target/doc site/code
# Replace your_crate_name with your crate name (hyphens become
# underscores in rustdoc output).
- run:
echo '<meta http-equiv="refresh" content="0;url=book/">' >
site/index.html
- uses: actions/upload-pages-artifact@v3
with:
path: site
deploy:
needs: build
runs-on: ubuntu-latest
environment:
name: github-pages
url: ${{ steps.deployment.outputs.page_url }}
steps:
- id: deployment
uses: actions/deploy-pages@v4
You can add more things to publish (coverage reports, nightly binaries) by adding them to the build job.
Common Actions
Several community-maintained actions are commonly used in Rust CI workflows:
| Action | Description |
|---|---|
dtolnay/rust-toolchain | Installs and configures Rust toolchains. Replaces the unmaintained actions-rs/toolchain. |
Swatinem/rust-cache | Caches Cargo registry, git checkouts, and build artifacts. |
taiki-e/install-action | Installs pre-built binaries of common Cargo subcommands (nextest, hack, audit, and more) without compiling from source. |
mozilla-actions/sccache-action | Sets up sccache for shared compilation caching. |
EmbarkStudios/cargo-deny-action | Runs cargo-deny to check licenses, advisories, and banned dependencies. |
actions-rust-lang/audit | Runs cargo audit to check for known vulnerabilities. Replaces the unmaintained actions-rs/audit-check. |
bencherdev/bencher | Tracks benchmark results over time, useful for detecting performance regressions. |
crate-ci/typos | Checks for spelling mistakes in source code, comments, and documentation. |
crate-ci/committed | Checks that commit messages follow conventional commit formatting. |
Note that the actions-rs family of actions (toolchain, cargo, audit-check,
clippy-check) is unmaintained. If you encounter them in existing workflows,
consider migrating to the alternatives listed above.
Reproducibility
The Reproducibility section in the CI overview
covers the platform-agnostic techniques: pinning the Rust toolchain with
rust-toolchain.toml, pinning dependencies with --locked, pinning tool
versions, and using Nix. This section covers the GitHub-specific concerns.
Pinning Actions
GitHub Actions references like actions/checkout@v4 point to a mutable Git tag.
A maintainer can push new code under an existing tag at any time, which is both
a security risk (covered in the Security section below) and a reproducibility
problem: an action update can change CI behavior without any change to your
code. Pinning to a full commit SHA eliminates this:
- uses: actions/checkout@b4ffde65f46336ab88eb53be808477a3936bae11 # v4.1.1
Tools like Dependabot and Renovate can keep SHA pins up to date automatically, giving you both pinning and freshness.
Pinning Tool Versions
When using taiki-e/install-action, you can pin tool versions explicitly:
- uses: taiki-e/install-action@v2
with:
tool: cargo-nextest@0.9.81,cargo-hack@0.6.33
Without version pins, each CI run installs whatever the latest release is, which can introduce new warnings or behavior changes unrelated to your code.
Pinning Runner Images
GitHub’s ubuntu-latest label is convenient, but it periodically moves to a
newer Ubuntu release. When it does, system libraries, default compiler versions,
and other host dependencies change. For most Rust projects this is harmless, but
if your build depends on system packages (OpenSSL, SQLite, protoc), the version
jump can break things. Pinning to a specific image avoids this:
runs-on: ubuntu-24.04 # instead of ubuntu-latest
The same applies to Docker base images. Using rust:latest in a Dockerfile
means the Rust version can change at any time. Pin to a specific version
instead: rust:1.82.0.
Nix as a Reproducibility Layer
For projects that already use Nix, running CI inside a Nix development shell achieves all of the above in one step. The Nix flake lockfile pins the Rust toolchain, all system dependencies, and all auxiliary tools to exact versions. A workflow using Nix looks like this:
jobs:
test:
runs-on: ubuntu-latest
steps:
- uses: actions/checkout@v4
- uses: DeterminateSystems/nix-installer-action@main
- uses: DeterminateSystems/magic-nix-cache-action@main
- run: nix develop --command cargo test
The DeterminateSystems/nix-installer-action installs Nix on the runner, and
magic-nix-cache-action transparently caches Nix store paths using GitHub
Actions’ built-in cache, so Nix does not rebuild everything from source on each
run. No external accounts or secrets are needed. For projects that need to share
a binary cache across multiple repositories or CI systems,
Cachix is a hosted Nix binary cache service that
integrates with GitHub Actions via cachix/cachix-action. With either approach,
the only mutable input is the runner image itself, and even that has minimal
impact because Nix provides its own toolchain and libraries.
The tradeoff is adoption cost. Nix has a steep learning curve, and adding it to
a project solely for CI reproducibility is rarely worth it. But for projects
that already have a flake.nix, using it in CI is a natural extension that
eliminates most of the pinning concerns described above.
The advantage of using Nix in CI is that it extends the reproducibility to local development environments. You can run the CI checks locally and be confident that the outcome is the same as in the CI environment.
Security
CI workflows often have access to secrets: registry tokens for publishing crates, deployment credentials, API keys. This makes them an attractive attack surface.
The most common vector is action supply-chain attacks. Because action
references like actions/checkout@v4 resolve to a mutable Git tag, a
compromised or malicious action maintainer can push new code under an existing
tag. Every workflow using that tag will then execute the attacker’s code on its
next run, with access to whatever secrets the job has. This has happened in
practice. The mitigation is SHA pinning, as described in the Reproducibility
section above. For workflows that handle secrets, SHA pinning is not optional.
The second vector is pull_request_target. Unlike pull_request, this
event runs in the context of the base branch, which means it has access to
repository secrets. If the workflow checks out and executes the PR’s code, an
attacker can submit a malicious pull request that exfiltrates those secrets. The
safe pattern is to use pull_request_target only for steps that do not run
untrusted code (like labeling or commenting), and never to check out
github.event.pull_request.head.ref in a workflow that has access to secrets.
A third concern is overly broad secret scopes. GitHub allows scoping secrets to specific environments and requiring approval for deployments. Use these features to limit which jobs can access which secrets, rather than making all secrets available to all workflows.
Example
The following workflow puts together the patterns from this chapter into a
realistic CI setup. It demonstrates the fast-tier checks on every PR, a
thorough-tier audit on merge to main, cross-platform testing, and several
practical patterns explained in inline comments.
name: CI
on:
push:
branches: [main]
pull_request:
branches: [main]
# Cancel in-progress runs on the same branch. Never cancel runs on main,
# where every push should complete.
concurrency:
group: ${{ github.workflow }}-${{ github.ref }}
cancel-in-progress: ${{ github.ref != 'refs/heads/main' }}
env:
CARGO_INCREMENTAL: 0
RUSTFLAGS: "-D warnings"
CARGO_TERM_COLOR: always
jobs:
# Formatting is the cheapest check. Other jobs depend on it via `needs:`
# so that if formatting fails, everything else is skipped immediately.
format:
runs-on: ubuntu-latest
steps:
- uses: actions/checkout@v4
# Nightly is used because some rustfmt options (like
# imports_granularity) are only available on nightly.
- uses: dtolnay/rust-toolchain@nightly
with:
components: rustfmt
- run: cargo fmt --check
lint:
runs-on: ubuntu-latest
needs: format
steps:
- uses: actions/checkout@v4
- uses: dtolnay/rust-toolchain@stable
with:
components: clippy
- uses: Swatinem/rust-cache@v2
- run: cargo clippy --all-targets -- -D warnings
test:
needs: format
strategy:
matrix:
os: [ubuntu-latest, macos-latest, windows-latest]
runs-on: ${{ matrix.os }}
steps:
- uses: actions/checkout@v4
- uses: dtolnay/rust-toolchain@stable
- uses: Swatinem/rust-cache@v2
# --locked ensures CI uses exactly the dependency versions in
# Cargo.lock, catching forgotten lock file updates.
- run: cargo test --all-features --locked
doc:
runs-on: ubuntu-latest
needs: format
steps:
- uses: actions/checkout@v4
- uses: dtolnay/rust-toolchain@stable
- uses: Swatinem/rust-cache@v2
- run: cargo doc --no-deps --all-features --locked
env:
RUSTDOCFLAGS: "-D warnings"
# The audit job only runs on pushes to main, not on PRs. Advisory
# databases change independently of your code, so you don't want PR
# builds failing for reasons outside the contributor's control.
audit:
runs-on: ubuntu-latest
if: github.event_name == 'push' && github.ref == 'refs/heads/main'
steps:
- uses: actions/checkout@v4
- uses: dtolnay/rust-toolchain@stable
- uses: taiki-e/install-action@v2
with:
tool: cargo-audit
- run: cargo audit
Reading
GitHub Actions QuickStart by GitHub
Shows you how to get started with GitHub Actions.
GitHub Actions Feels Bad by Amos Wenger
The history and design of GitHub Actions, and why they are perhaps not designed in an ideal way.
Continuous Integration by The Cargo Book
The official Cargo documentation on setting up CI, with examples for both GitHub Actions and GitLab CI.
Cross-Compiling Rust Projects in GitHub Actions by Dave Rolsky
A practical walkthrough of setting up cross-compilation in GitHub Actions, covering toolchain setup, target installation, and common pitfalls.
GitLab CI
GitLab is an open-source software development platform with a built-in
CI/CD system called GitLab CI. Unlike GitHub Actions, which is configured
through a directory of workflow files, GitLab CI uses a single .gitlab-ci.yml
file at the repository root. The other major difference is that GitLab CI is
built around Docker: by default, every job runs inside a Docker container, which
means your CI environment is defined by the Docker image you choose rather than
by actions that install tools onto a VM.
This chapter covers the Rust-specific aspects of GitLab CI. For general GitLab CI features, the GitLab CI documentation is comprehensive.
Mental Model
A pipeline is a set of jobs triggered by an event (a push, a merge request,
a schedule, a manual trigger, or an API call). Pipelines are organized into
stages that run sequentially. Within a stage, all jobs run in parallel. A
typical pipeline might have stages like format, check, test, and deploy,
where all jobs in check must pass before any job in test starts.
Each job runs in a fresh Docker container specified by the image: keyword.
A job executes a list of shell commands defined in script:, and can produce
artifacts that downstream jobs consume or that users can download from the
GitLab UI. Jobs can also start background services (like a PostgreSQL
database) by specifying additional Docker images.

For pipelines where the strict stage ordering is too rigid, GitLab supports
DAG pipelines using the needs: keyword, which allows a job to run as soon
as its specific dependencies finish, regardless of which stage it belongs to.
This is similar to GitHub Actions’ needs: keyword and is useful for running
independent jobs as early as possible.
GitLab CI has a few other features worth knowing about. The rules: keyword
(which replaces the older only:/except:) controls when a job runs based on
branch names, file changes, variables, or other conditions. The include:
keyword lets you split configuration across multiple files or import shared
configuration from other repositories, similar to GitHub’s reusable workflows.
Runners are the machines that execute jobs. GitLab.com provides shared runners, but self-hosted runners are common in GitLab setups, especially for projects that need persistent caches, specialized hardware, or network access to internal services. Runner executors determine how jobs are isolated: Docker (the most common), Kubernetes, shell, or virtual machines via QEMU (useful for testing on platforms like FreeBSD or Windows).
Patterns
The following patterns are specific to using GitLab CI with Rust projects. For which checks to run and how to organize them into tiers, see the What to Run section in the CI overview.
Docker Images
In GitLab CI, the Docker image you choose for a job determines your Rust toolchain. The official Rust images on Docker Hub are the standard choice:
test:
image: rust:1.82.0
script:
- cargo test
Pin the image to a specific Rust version rather than using rust:latest, which
can change at any time. For jobs that need nightly (such as formatting with
unstable rustfmt options), use rustlang/rust:nightly or a dated nightly image.
The official images come in several variants. rust:1.82.0-slim omits
development tools and documentation for a smaller image, and
rust:1.82.0-alpine uses Alpine Linux for an even smaller footprint (though
Alpine’s musl libc can cause issues with crates that assume glibc).
For projects that need additional tools beyond what the official images provide,
you can build a custom Docker image with your Rust toolchain and tools
pre-installed, push it to GitLab’s built-in container registry, and use it as
the base image for your jobs. This avoids spending time on cargo install or
rustup component add in every pipeline run. The downside is maintenance: you
need to rebuild the image when Rust updates, tag versions properly, and keep it
in sync with your project’s requirements. For small projects, installing tools
in the before_script is simpler even if it is slower.
Caching
GitLab CI has built-in caching that works well for Rust projects. The key
directories to cache are target/ (build artifacts) and the Cargo home
directories (~/.cargo/registry and ~/.cargo/git):
variables:
CARGO_HOME: ${CI_PROJECT_DIR}/.cargo
test:
image: rust:1.82.0
cache:
key: ${CI_COMMIT_REF_SLUG}
paths:
- .cargo/registry
- .cargo/git
- target/
script:
- cargo test
Setting CARGO_HOME to a directory inside the project is necessary because
GitLab CI can only cache paths relative to the project directory. The cache key
determines when the cache is shared or invalidated. Using $CI_COMMIT_REF_SLUG
means each branch gets its own cache, which prevents branches from polluting
each other’s build artifacts. For more aggressive caching, you can use a hash of
Cargo.lock as the key so that the cache is invalidated whenever dependencies
change.
For pipelines with many jobs, cache policies help avoid contention. A job with
policy: pull only reads from the cache and never writes to it, while
policy: push only writes. This is useful when you have one job that builds
everything and writes the cache, and several downstream jobs that only need to
read it.
As with any build cache, stale artifacts can cause mysterious failures. If a CI run fails in a way that does not reproduce locally, clearing the cache is a good first debugging step.
For larger projects, sccache can provide compilation
caching at the object-file level, which is more fine-grained than caching the
entire target/ directory.
Services
GitLab CI has first-class support for running background services alongside your jobs. This is particularly useful for integration tests that need a database or other external service:
test:integration:
image: rust:1.82.0
services:
- postgres:16
variables:
POSTGRES_DB: test
POSTGRES_USER: runner
POSTGRES_PASSWORD: password
DATABASE_URL: "postgres://runner:password@postgres/test"
script:
- cargo test --features integration
The service is accessible by its image name as a hostname (postgres in this
case). This is simpler than the equivalent setup in GitHub Actions, where you
would need Docker Compose or testcontainers to achieve the same thing.
Environment Variables
The same Rust-specific environment variables that are useful in GitHub Actions
apply here, set via the variables: keyword:
variables:
CARGO_INCREMENTAL: "0"
RUSTFLAGS: "-D warnings"
CARGO_TERM_COLOR: always
CARGO_INCREMENTAL=0 disables incremental compilation (wasteful in CI),
RUSTFLAGS="-D warnings" promotes warnings to errors, and
CARGO_TERM_COLOR=always enables colored compiler output. For jobs that run
cargo doc, set RUSTDOCFLAGS: "-D warnings" separately, since RUSTFLAGS
does not affect rustdoc. See the
GitHub Actions chapter for a
detailed explanation of each variable.
Unit Test Integration
GitLab can display test results directly in merge requests, showing which tests
passed, failed, or were newly added without needing to dig through CI logs. To
enable this, configure your test job to produce a JUnit XML report and upload it
as an artifact. cargo-nextest can produce JUnit output directly, and for
standard cargo test you can use cargo2junit to convert the output:
test:
image: rust:1.82.0
script:
- cargo nextest run --profile ci
artifacts:
reports:
junit: target/nextest/ci/junit.xml
GitLab will then show the test results in the merge request’s test report tab.
Coverage Integration
GitLab can also display line-by-line coverage diffs directly in merge requests,
so developers can see exactly which new lines are covered and which are not.
cargo-llvm-cov can output Cobertura XML, which is the format GitLab expects:
coverage:
image: rust:1.82.0
script:
- cargo llvm-cov --cobertura --output-path cobertura.xml
artifacts:
reports:
coverage_report:
coverage_format: cobertura
path: cobertura.xml
Release Pipelines
Release pipelines are typically triggered by Git tags. For publishing to
crates.io, store your CARGO_REGISTRY_TOKEN as a protected CI/CD variable
(restricted to protected tags) so that only tag pipelines can access it. Note
that crates.io’s trusted publishing (OIDC) is currently GitHub-only, so GitLab
requires the traditional API token approach.
publish:
image: rust:1.82.0
rules:
- if: $CI_COMMIT_TAG =~ /^v/
script:
- cargo publish
For creating GitLab releases with downloadable binaries, you can use the
release: keyword in combination with a build job that cross-compiles for
multiple platforms using cross. The
Changelog chapter covers how to automate changelog
generation as part of this process.
GitLab Pages
GitLab Pages is a straightforward way to host static content generated by your
CI pipeline. Any job named pages that produces an artifact in a public/
directory will be deployed to your project’s Pages URL automatically. This is
useful for hosting API documentation,
coverage reports,
book documentation, and nightly binaries.
By default, the artifacts published by GitLab Pages will be on a GitLab provided
domain. For example, if your repository is at gitlab.com/yourname/reponame,
then they would be published to yourname.gitlab.io/reponame/. However, you can
add custom domains in Settings -> Deploy -> Pages, so that you can point for
example docs.reponame.com to it (or whatever domain or subdomain you want).
Here’s an example that builds both rustdoc code documentation and a mdbook-powered documentation:
stages:
- build
- deploy
# build code documentation with rustdoc
docs:
stage: build
image: rust:1.82.0
script:
- cargo doc --no-deps --all-features
artifacts:
paths:
- target/doc
expire_in: 1 week
# build documentation book with mdbook
book:
stage: build
image: alpine:latest
before_script:
- apk install mdbook
script:
- mdbook build
artifacts:
paths:
- book
expire_in: 1 week
# deploy to pages (replace your_crate_name with the name of the crate you
# want to show docs for by default)
pages:
stage: deploy
image: alpine:latest
rules:
- if: $CI_COMMIT_BRANCH == $CI_DEFAULT_BRANCH
cache: []
script:
- mv book public
- mv target/doc public/code
- echo '<meta http-equiv="refresh" content="0;url=code/your_crate_name/">' >
public/index.html
artifacts:
paths:
- public
The build jobs run in parallel and produce artifacts that the pages job
collects. You can add more things to publish (coverage reports, nightly
binaries) by adding more build jobs and extracting their artifacts into
public/.
Reproducibility
The Reproducibility section in the CI overview
covers the platform-agnostic techniques: pinning the Rust toolchain with
rust-toolchain.toml, pinning dependencies with --locked, pinning tool
versions, and using Nix. This section covers the GitLab-specific concerns.
Pinning Docker Images
In GitLab CI, the Docker image is the primary input to control. Always use a
specific version tag (rust:1.82.0) rather than rust:latest. This applies
both to the image: keyword in your jobs and to any custom base images you
build. If you use a custom image from your GitLab container registry, tag it
with a version or commit hash so you can trace exactly which image a pipeline
used.
Pinning Included Configuration
If you use include: to import configuration from other repositories, pin it to
a specific ref rather than a branch name:
include:
- project: "my-group/shared-ci"
ref: "v1.2.0"
file: "/rust.yml"
Without a pinned ref, an update to the shared configuration can change your pipeline behavior without any change to your own repository.
Nix
For projects that use Nix, you can use the nixos/nix
Docker image and run commands inside nix develop:
test:
image: nixos/nix:latest
variables:
# Flakes are not enabled by default in the nixos/nix image.
NIX_CONFIG: "experimental-features = nix-command flakes"
script:
- nix develop --command cargo test
This pins the toolchain and all tools via the Nix flake lockfile.
The main challenge with Nix in GitLab CI is caching. GitLab can only cache paths
relative to the project directory, but the Nix store lives at /nix/store.
There are several ways to deal with this. The simplest is to use a Nix binary
cache like Cachix or the self-hosted
Attic so that derivations are fetched
from the cache rather than rebuilt from source. For self-hosted runners, a more
effective approach is to mount the host’s Nix store into the container, so all
jobs share the same store and never rebuild what another job already built. You
can also build custom Docker images with your project’s dependencies
pre-populated using Nix’s dockerTools, then push them to the GitLab container
registry with skopeo.
Security
GitLab CI has a different security model than GitHub Actions. There is no third-party actions ecosystem, so supply-chain risk from actions is not a concern. The main threats come from Docker images, secrets management, and runner configuration.
Protected variables ensure that sensitive values (like
CARGO_REGISTRY_TOKEN) are only available in pipelines running on protected
branches or protected tags. This prevents a contributor from accessing your
publishing token by submitting a merge request that prints environment
variables.
Runner security is important for projects that accept external contributions. If your self-hosted runner is shared across projects, a malicious merge request could access the runner’s local filesystem, network, or cached data from other projects. GitLab allows you to restrict which projects can use a runner and to disable pipeline execution for merge requests from forks.
CI_JOB_TOKEN is an automatically generated token that provides scoped
access to the GitLab API from within a CI job. It can be used to access the
container registry, pull from other projects, or trigger downstream pipelines
without storing additional secrets.
Example
The following .gitlab-ci.yml puts together the patterns from this chapter.
Inline comments explain the choices made.
# Set these globally so every job inherits them.
variables:
CARGO_HOME: ${CI_PROJECT_DIR}/.cargo
CARGO_INCREMENTAL: "0"
RUSTFLAGS: "-D warnings"
CARGO_TERM_COLOR: always
# Cache Cargo artifacts. Jobs inherit this by default.
# The cache key is per-branch so branches don't pollute each other.
default:
cache:
key: ${CI_COMMIT_REF_SLUG}
paths:
- .cargo/registry
- .cargo/git
- target/
stages:
- format
- check
- test
- deploy
# Formatting is the cheapest check and runs first. Uses nightly because
# some rustfmt options (like imports_granularity) require it.
format:
stage: format
image: rustlang/rust:nightly
# Formatting doesn't need the build cache.
cache: []
script:
- rustup component add rustfmt
- cargo fmt --check
lint:
stage: check
image: rust:1.82.0
script:
- rustup component add clippy
- cargo clippy --all-targets -- -D warnings
test:
stage: test
image: rust:1.82.0
script:
- cargo test --all-features --locked
# Build documentation and fail on warnings. The --no-deps flag skips
# building docs for dependencies, which can be very large and are
# already available on docs.rs.
doc:
stage: check
image: rust:1.82.0
variables:
RUSTDOCFLAGS: "-D warnings"
script:
- cargo doc --no-deps --all-features --locked
artifacts:
paths:
- target/doc
expire_in: 1 week
# Audit runs only on the default branch or on a schedule. Advisory
# databases change independently of your code, so merge request
# pipelines should not fail for reasons outside the contributor's
# control. To set up a weekly schedule, go to Build > Pipeline
# schedules in the GitLab UI.
audit:
stage: check
image: rust:1.82.0
rules:
- if: $CI_PIPELINE_SOURCE == "schedule"
- if: $CI_COMMIT_BRANCH == $CI_DEFAULT_BRANCH
script:
- cargo install cargo-audit
- cargo audit
# Feature powerset check is expensive (combinatorial) and only runs
# on a schedule. Catches feature flag combinations that fail to compile.
features:
stage: check
image: rust:1.82.0
rules:
- if: $CI_PIPELINE_SOURCE == "schedule"
script:
- cargo install cargo-hack
- cargo hack check --feature-powerset
# Generate an HTML coverage report.
coverage:
stage: test
image: rust:1.82.0
before_script:
- rustup component add llvm-tools-preview
- cargo install cargo-llvm-cov
script:
- cargo llvm-cov --html
artifacts:
paths:
- target/llvm-cov/html
expire_in: 1 week
# Assemble outputs from other jobs and deploy to GitLab Pages.
# Uses a minimal Alpine image since this job only copies files.
pages:
stage: deploy
image: alpine:latest
needs: [doc, coverage]
rules:
- if: $CI_COMMIT_BRANCH == $CI_DEFAULT_BRANCH
# No compilation happens here, so skip the Cargo cache.
cache: []
script:
- mv target/doc public
- echo '<meta http-equiv="refresh" content="0;url=your_crate_name/">' >
public/index.html
- mv target/llvm-cov/html public/coverage
artifacts:
paths:
- public
The $CI_PIPELINE_SOURCE == "schedule" rule ensures that these jobs only run
when triggered by a pipeline schedule, which you configure in the GitLab UI
under Build > Pipeline schedules. A weekly schedule is typical for auditing and
feature powerset checks.
Reading
Get started with GitLab CI/CD by GitLab
The official GitLab CI documentation, covering pipeline configuration, runners, variables, caching, artifacts, and all other features in detail.
Deploying Rust with Docker and Kubernetes by FP Complete
A walkthrough of deploying a Rust application with Docker and Kubernetes using GitLab CI, covering multi-stage Docker builds and CI pipeline configuration.
(New) Adventures in CI by Emmanuele Bassi
A blog post about how the GNOME project uses GitLab CI to generate coverage reports for every commit, with practical examples of integrating coverage tooling into a GitLab pipeline.
Nix and GitLab CI by Cobalt
Covers three approaches to integrating Nix with GitLab CI runners: mounting the
host Nix store into containers for shared caching, using a plain Docker executor
with no shared state, and S3-backed caching. Addresses the core problem that
GitLab cannot cache /nix/store directly, with solutions including custom
container images built with dockerTools and pushed via skopeo, and
self-hosted binary caches using Attic. Also covers packaging CI scripts as Nix
derivations with writeShellApplication for local reproducibility.
Tools
The preceding chapters cover tools tied to specific workflows: formatting and linting in Checks, test runners in Testing, profiling in Measure, and so on. This chapter collects general-purpose development tools that are useful across workflows but don’t belong to any single one.
Code Search covers ripgrep and ast-grep for navigating large
codebases. Task Runners compares just, cargo-make, and the
xtask pattern for automating project-specific commands.
Readme Generation covers tools that keep your README.md in
sync with your crate documentation. Watch Files covers cargo-watch
and bacon for re-running commands on file changes. Expand Macros
covers cargo-expand for inspecting what procedural and declarative macros
generate. Debugging covers debugger integration with rust-gdb
and rust-lldb.
Reading
Joshua showcases and explains some tools for Rust developers that can increase your productivity, and gives examples for how they can be used.
Awesome Rust Tools by @unpluggedcoder
This is a list of awesome tools written in Rust. It showcases tools in various categories, from general-purpose command-line tools to tools specifically for Rust development, maintenance or navigation.
Cargo plugins by lib.rs
This is a list of useful plugins for Cargo, sorted by their popularity (as measured by the download count from the Rust crates registry).
Code Search
Searching across a codebase is one of the most common tasks when navigating unfamiliar code or tracking down all uses of a function, type, or dependency. There are two approaches: text-based search (fast, works everywhere) and structural search (syntax-aware, understands code structure).
ripgrep
ripgrep is a command-line tool for
searching code bases using regular expressions. It is very fast, making
use of Rust’s powerful regex crate. It understands git
repositories and respects .gitignore files, making it particularly suitable
for searching software projects.
If you use Visual Studio Code, you are already using ripgrep. VS Code uses ripgrep internally to implement its search functionality.
You can install it with Cargo:
cargo install ripgrep
Running this will install the rg binary, which you can use to search code
projects. You can then use it to search for patterns.
$ rg uuid::
database/src/main.rs
8:use uuid::Uuid;
protocol/src/types.rs
10:use uuid::Uuid;
common/src/entities.rs
12:use uuid::Uuid;
ast-grep
ast-grep (command: sg) is a structural search
tool. Where ripgrep matches text with regular expressions, ast-grep parses code
into an abstract syntax tree (AST) and matches against tree patterns. This makes
it syntax-aware: it can distinguish between a function call and a variable name
that happens to have the same text, and it ignores whitespace and formatting
differences that would break a regex.
You can install it with Cargo:
cargo install ast-grep
ast-grep uses patterns that look like the code you are searching for, with
metavariables (prefixed with $) standing in for parts you don’t care about.
For example, to find all places where .unwrap() is called on anything:
$ sg -p '$A.unwrap()' -l rust
src/config.rs
15: let file = std::fs::read_to_string(path).unwrap();
src/main.rs
42: let port = env::var("PORT").unwrap();
You can also use it for codemod-style replacements. For example, to replace all
unwrap() calls with expect():
sg -p '$A.unwrap()' -r '$A.expect("todo: handle error")' -l rust
ast-grep supports Rust and 20+ other languages out of the box through tree-sitter parsers. Beyond one-off searches, it can also be used as a linter by defining custom rules in YAML configuration files, and it has a language server for editor integration.
Reading
ripgrep is faster than {grep, ag, git grep, ucg, pt, sift} (archived) by Andrew Gallant
Andrew, the author of ripgrep, introduces the tool in this article, explains how it works and compares it to some common similar tools used by developers, showing how it performs better and how it excels at dealing with Unicode, something other tools struggle with.
Task Runners
Every project accumulates commands that developers need to run repeatedly: building releases, starting databases for tests, generating documentation, checking for unused dependencies. A task runner gives these commands names and makes them discoverable, so developers don’t have to remember (or look up) the exact invocations.
Many open-source projects use Makefiles for this, but
Makefiles were designed for build dependency tracking, not running tasks. They
require workarounds like .PHONY targets and have surprising behavior around
quoting and shell compatibility. The tools in this section are purpose-built for
task running.
Some IDEs can parse task runner definitions and offer a graphical interface for invoking them. Build systems like Bazel and Buck2 have their own task infrastructure and don’t benefit as much from these tools.
Just
Just is a simple task runner with a syntax similar to Makefiles, but simpler and with some extensions to allow passing arguments to tasks and to use comments for self-documenting tasks.
To get started, you can install it using Cargo:
cargo install just
To use it, all you need to do is create a Justfile in your project, which
contains all of the tasks. A sample justfile might look like this:
# release this version
release:
just test
cargo publish
# run unit and integration tests, starts database before tests
test:
docker start database
cargo test
docker stop database
With this definition, you can run the tasks like this:
just release
just test
You can also list all available tasks:
$ just --list
Available recipes:
release # release this version
test # run unit and integration tests, starts database before tests
A common pattern is setting up just so that it shows the available commands
when run with no arguments. You can do that like this:
# List available recipes
default:
@just --list
Just has support for tasks taking arguments, integrations with various IDEs, some built-in functions, support for variables and much more. The Just Programmer’s Manual describes all of the features it has to offer.
cargo-make
cargo-make is a Rust task runner
and build tool. It lets you define tasks in a Makefile.toml. It supports task
dependencies and has some built-in features that are useful in Rust projects,
such as the ability to install crates.
You can install it using Cargo:
cargo install cargo-make
Once installed, you can create a Makefile.toml in your repository to define
the tasks you want it to do.
# generate coverage, will install cargo-llvm-cov if it doesn't exist
[tasks.coverage]
install_crate = "cargo-llvm-cov"
command = "cargo"
args = ["llvm-cov", "--html"]
With this definition, running the coverage task will ensure that
cargo-llvm-cov is installed, and run it to produce a HTML coverage report.
cargo make coverage
Tasks can also have dependencies on other tasks, and these dependencies can be set conditionally, such as per-platform, allowing you to write platform-specific or environment-specific implementations for tasks.
cargo-xtask
cargo-xtask is less of a tool and
more of a pattern. You add a xtask crate to your workspace that contains your
automation scripts written in Rust, and a Cargo alias that runs it:
# .cargo/config.toml
[alias]
xtask = "run --package xtask --"
The advantage is that your task definitions are type-checked Rust code with
access to all the crates in your ecosystem (file manipulation, HTTP requests,
argument parsing). The disadvantage is more boilerplate than a Justfile for
simple tasks. The cargo-xtask pattern works best for projects that already
have complex build logic or where tasks need to interact with Rust APIs
directly.
Reading
Just use just (archived) by Tonio Gela
Tonio explains what Just is, and how you can use it. He demonstrates the features it has with some examples.
Automating your Rust workflows with cargo-make (archived) by Sagie Gur-Ari
Sagie, the author of cargo-make, explains how you can use it to automate your Rust workflows and gives some examples.
Make your own make (archived) by Alex Kladov
Alex explains the idea of using Rust itself for the automation of steps in
this article. This idea is what cargo-xtask implements.
Readme
Open-source Rust projects have several places for documentation. Often they have
a README file that contains some general overview of wwhat the crate does, as
well as some crate-level documentation in the main.rs or lib.rs file. In
many cases the content for these two is similar, or even the same.
For ease of maintenance, it can be beneficial to keep the two in sync.
Cargo Readme
cargo-readme is a tool that allows you
to generate a README file from the crate-level documentation strings of your
Rust crate.
You can install it using Cargo:
cargo install cargo-readme
Cargo Rdme
Watch Files
A short feedback loop between writing code and seeing whether it compiles or passes tests is important for productive development. Your development environment can give you immediate feedback on syntax errors, but for running tests or rebuilding an application on every change, a file watcher is useful.
If you build web frontends in Rust using Trunk, file watching is built in: Trunk’s serve mode rebuilds and reloads your browser automatically on every change.
cargo-watch
cargo-watch is a tool you can use
to watch your Rust projects and execute commands whenever a file changes.
You can install it using Cargo:
cargo install cargo-watch
By default, it will run cargo check when a change is detected:
# run `cargo check` whenever files change
cargo watch
You can customize it to run any command you like. Using the -x flag, you can
tell it to run any other Cargo subcommand. You can also directly give it a
command to run.
cargo watch -x test
cargo watch -- just test
It also supports command chaining, where you specify multiple Cargo subcommands to run. When doing so, it will run each of them in the order you specify them, when they are successful.
cargo watch -x check -x test -x run
The repository and help text explain more commands that you can use, such as specifying which files to watch.
Reading
Chapter 1: Setup - Toolchains, IDEs, CI by Luca Palmieri
In this chapter of his book, Luca explains how to setup a real-life Rust
project. He explains that using cargo watch can reduce the perceived
compilation time, because it triggers immediately after you change and
save a file.
Cargo Issue #9339: Add Cargo watch by Patrick Hintermayer
In this issue on the Cargo repository, there is some discussion going on to incorporate file watching functionality natively into Cargo.
Expand Macros
On a high level, a macro is some code that generates code. In languages such as C or C++, they are expanded by the preprocessor in a step just before compilation happens. They are commonly used to reduce code repetition, avoid boilerplate code.
Instead of relying on a preprocessor, the Rust compiler has built-in support for macros. It supports two kinds of macros: declarative macros and procedural macros. Declarative macros work as a kind of pattern-match-and-replace on tokens. They are fast and functional, but are limited in terms of what they can do. Procedural macros work by compiling a separate Rust program, which is fed the arguments of the macro and outputs Rust code that it is replaced with. They are more powerful, can do potentially non-deterministic things, but have higher overhead.
Declarative macros can be used to implement Domain-Specific Languages within
Rust. For example, the json! macro allows you to write JSON within
Rust, or the html! macro allows you
to write HTML within Rust. Procedural derive macros are often used to allow you
to derive traits for your types automatically. Commonly used examples are the
Serialize and Deserialize derive macros from the
serde crate. Procedural
attribute macros such as
rocket::get are used to
provide metadata for routing requests in the Rocket web backend framework.
Using macros, where appropriate, is good style because it allows you to reduce boilerplate code. At times, they can feel quite magic. However, there are downsides to relying on them heavily as well:
- When you use procedural macros, a separate Rust application needs to be built and run for the compilation, slowing down your compilations.
- Formatting often does not work within macro invocations. Some projects work around this by providing their own formatting tools that are able to do this, for example leptosfmt.
- Macros can be difficult to understand. Because macros are expanded at compile-time, it can be difficult to inspect or debug them, because you cannot see what code the macro expands to.
This section looks at how you can work around (3), by showing you how you can inspect what your code looks like after macro expansion.
cargo-expand
cargo-expand is a Cargo plugin that
allows you to view your code after macro expansion. In addition to performing
macro expansion, it will also run rustfmt over the result (because the code
that macros expands to is often machine-generated and therefore unformatted) and
syntax-highlights the result.
You can install it simply using Cargo:
cargo install cargo-expand
To run it, simply run it as a Cargo subcommand within a Rust crate:
cargo expand
It has some command-line options that you can use to control the output options, for example turning off the syntax highlighting or selecting a different theme that plays nicer with your terminal color scheme.
Example: Inspecting your own macro
If you want to create a Vec<T>, Rust has a built-in macro for doing so:
vec![]. However, the same is not true for creating maps, such as
BTreeMap<T>. You can work around this by creating your own macro:
#![allow(unused)]
fn main() {
macro_rules! btreemap {
( $($x:expr => $y:expr),* $(,)? ) => ({
let mut temp_map = ::std::collections::BTreeMap::new();
$(
temp_map.insert($x, $y);
)*
temp_map
});
}
}But how do you verify that this macro works correctly? Besides writing unit tests for it, you can write a small test program that uses this macro, for example:
fn main() {
let mapping = btreemap!{
"joesmith" => "joe.smith@example.com",
"djb" => "djb@example.com",
"elon" => "musk@example.com"
};
}Finally, you can run cargo expand on this test program to verify that it is
expanding to the right thing.
#![feature(prelude_import)]
#[prelude_import]
use std::prelude::rust_2024::*;
#[macro_use]
extern crate std;
fn main() {
let mapping = {
let mut temp_map = ::std::collections::BTreeMap::new();
temp_map.insert("joesmith", "joe.smith@example.com");
temp_map.insert("djb", "djb@example.com");
temp_map.insert("elon", "musk@example.com");
temp_map
};
}Example: Inspecting the json! macro
The json! macro from serde_json allows you to write JSON inline in
Rust, and get a JSON Value back. It supports all of JSON syntax, and allows
you to interpolate Rust values inside it as well.
use serde_json::json;
use uuid::Uuid;
fn main() {
let id = Uuid::new_v4();
let person = json!({
"name": "Jeff",
"age": 24,
"interests": ["guns", "trucks", "bbq"],
"nationality": "us",
"state": "tx",
"id": id.to_string()
});
}To see what this code actually does, calling cargo expand on it yields the
following:
#![feature(prelude_import)]
#[prelude_import]
use std::prelude::rust_2024::*;
#[macro_use]
extern crate std;
use serde_json::json;
use uuid::Uuid;
fn main() {
let id = Uuid::new_v4();
let person = ::serde_json::Value::Object({
let mut object = ::serde_json::Map::new();
let _ = object.insert(("name").into(), ::serde_json::to_value(&"Jeff").unwrap());
let _ = object.insert(("age").into(), ::serde_json::to_value(&24).unwrap());
let _ = object
.insert(
("interests").into(),
::serde_json::Value::Array(
<[_]>::into_vec(
::alloc::boxed::box_new([
::serde_json::to_value(&"guns").unwrap(),
::serde_json::to_value(&"trucks").unwrap(),
::serde_json::to_value(&"bbq").unwrap(),
]),
),
),
);
let _ = object
.insert(("nationality").into(), ::serde_json::to_value(&"us").unwrap());
let _ = object.insert(("state").into(), ::serde_json::to_value(&"tx").unwrap());
let _ = object
.insert(("id").into(), ::serde_json::to_value(&id.to_string()).unwrap());
object
});
}This shows that under the hood, the macro expands to manual creations of a map, filling it with values.
Example: Inspecting the Serialize procedural macro
The Serialize procedural macro auto-generates an implementation for the
Serialize trait that the serde crate uses to be able to serialize your
struct to arbitrary data formats. If you have some struct which uses this derive
macro:
#![allow(unused)]
fn main() {
use serde::Serialize;
use uuid::Uuid;
#[derive(Serialize)]
pub struct Person {
name: String,
id: Uuid,
age: u16,
}
}You may want to know what the expanded code looks like. Again, running
cargo expand can show you this.
#![feature(prelude_import)]
#[prelude_import]
use std::prelude::rust_2024::*;
#[macro_use]
extern crate std;
use serde::Serialize;
use uuid::Uuid;
pub struct Person {
name: String,
id: Uuid,
age: u16,
}
#[doc(hidden)]
#[allow(
non_upper_case_globals,
unused_attributes,
unused_qualifications,
clippy::absolute_paths,
)]
const _: () = {
#[allow(unused_extern_crates, clippy::useless_attribute)]
extern crate serde as _serde;
#[automatically_derived]
impl _serde::Serialize for Person {
fn serialize<__S>(
&self,
__serializer: __S,
) -> _serde::__private::Result<__S::Ok, __S::Error>
where
__S: _serde::Serializer,
{
let mut __serde_state = _serde::Serializer::serialize_struct(
__serializer,
"Person",
false as usize + 1 + 1 + 1,
)?;
_serde::ser::SerializeStruct::serialize_field(
&mut __serde_state,
"name",
&self.name,
)?;
_serde::ser::SerializeStruct::serialize_field(
&mut __serde_state,
"id",
&self.id,
)?;
_serde::ser::SerializeStruct::serialize_field(
&mut __serde_state,
"age",
&self.age,
)?;
_serde::ser::SerializeStruct::end(__serde_state)
}
}
};Reading
Chapter 19.5: Macros by The Rust Book
Section in The Rust Book introducing and explaining macros. It explains the difference declarative and procedural macros, and the different types of procedural macros (attribute macros, derive macros, function-like macros) and how they are implemented.
Rust Macros and inspection with cargo expand by Adam Szpilewicz
Walkthrough of using cargo-expand to understand what macros generate,
including declarative macros and derive macros. Shows the workflow of writing
a macro, expanding it, and verifying the output matches expectations.
Debugging
Rust’s type system and ownership model prevent entire classes of bugs at compile time, which means you reach for a debugger less often than in C or C++. But when you do need one — stepping through unfamiliar code, inspecting a crash dump, or tracking down a logic error that tests haven’t caught — the tooling is there. This chapter covers binary debuggers, editor integration, record-and-replay debugging, and async-specific diagnostics with Tokio Console.
Binary Debuggers
Rust ships with rust-gdb and rust-lldb, thin wrappers around GDB and
LLDB that add Rust-aware pretty-printers for standard library types.
Without these wrappers, inspecting a Vec<String> or HashMap in a debugger
shows raw pointer arithmetic and struct internals; with them, you see the
logical contents. Apart from the pretty-printers, they are identical to the
underlying tools.
rust-gdb
GDB is the GNU debugger, available on Linux and most Unix-like systems. To debug
a Rust binary, build in debug mode (the default for cargo build) and launch it
under rust-gdb:
cargo build
rust-gdb target/debug/my-app
From the GDB prompt, the core commands are break to set a breakpoint (by
function name or file:line), run to start the program, next and step to
advance by line or into function calls, print to inspect variables, and
backtrace to see the call stack. GDB also supports conditional breakpoints and
watchpoints (break when a memory location changes).
For post-mortem debugging, you can load a core dump with
rust-gdb target/debug/my-app core and inspect the program state at the time of
the crash.
rust-lldb
LLDB is the debugger from the LLVM project, and the default on macOS (where it ships with Xcode). The workflow is similar:
cargo build
rust-lldb target/debug/my-app
The commands differ slightly from GDB — breakpoint set instead of break,
thread backtrace instead of backtrace — but the concepts are the same. LLDB
tends to have better support for macOS-specific features like debugging
universal binaries and Mach-O executables.
Debug Information
Both debuggers rely on debug information embedded in the binary. Rust includes
full debug info in the dev profile by default (debuginfo = 2). Release
builds strip it, so if you need to debug an optimized build, set debug = true
in [profile.release] in your Cargo.toml. Be aware that optimizations can
make stepping through code less predictable, as the compiler may reorder or
inline functions.
A common pattern for shipping optimized and stripped binaries, but retaining the ability to run debuggers against them, is to split the debug information and keep it, so that when you do have to run a debugger you can download and use it, but you don’t have to ship binaries with debug info. Rust has an option for this as well:
[profile.release]
strip = "split"
Editor Integration
VS Code and Zed both provide graphical debugger interfaces that use GDB or LLDB under the hood. These give you the same capabilities — breakpoints, variable inspection, call stacks — through a visual interface rather than a command line.
In VS Code, debugging is available through the CodeLLDB
extension, which supports launch configurations in .vscode/launch.json for
different targets and arguments. Zed has a built-in debugger
that works with both GDB and LLDB. Both editors support setting breakpoints by
clicking in the gutter, stepping through code, and inspecting variables inline.
Record-and-Replay Debugging
rr is a record-and-replay debugger that captures the entire execution of
a program and lets you replay it deterministically. During replay, you can step
forward and backward through the execution, set breakpoints, and inspect state
at any point. This is particularly valuable for non-deterministic bugs (race
conditions, bugs that only reproduce intermittently) because once you record a
failing run, you can replay it as many times as needed.
rr works with Rust out of the box. Record a test run and replay it:
rr record target/debug/my-app
rr replay # opens a GDB session with reverse-stepping
During replay, GDB’s reverse-next and reverse-step commands let you step
backward through execution — something that is not possible with a normal
debugger. The main limitation is that rr only works on Linux and requires
hardware performance counters, so it does not work inside most virtual machines.
Tokio Console
Tokio Console is a diagnostics tool for async Rust programs,
similar to top but for async tasks. It connects to a running application and
shows a live view of all spawned tasks: their state (idle, running, scheduled),
poll durations, waker counts, and warnings about potential issues like tasks
that poll for too long.
It works through two components: the console-subscriber crate, which
instruments your Tokio runtime as a tracing subscriber layer, and the
tokio-console CLI, which connects to the application over gRPC.
To set it up, add the subscriber to your application:
[dependencies]
console-subscriber = "0.4"
tokio = { version = "1", features = ["full", "tracing"] }
fn main() {
console_subscriber::init();
// ... rest of your application
}Then build with the tokio_unstable cfg flag and run the console:
RUSTFLAGS="--cfg tokio_unstable" cargo run
tokio-console # connects to localhost:6669
Tokio Console is most useful for diagnosing performance problems in async applications: tasks that are slow to poll, tasks that are never woken, or contention patterns that are hard to see from logs alone. For more background on its design, see the reading section below.
Embedded Debugging
Debugging embedded Rust typically involves a hardware debug probe (such as a
J-Link or ST-Link) that connects to the microcontroller’s debug interface. The
probe-rs project provides a Rust-native toolchain for this: it
supports flashing firmware, setting breakpoints, and inspecting memory over SWD
or JTAG. It integrates with VS Code through the probe-rs
extension and can also be used from the command line. The
Embedded chapter covers embedded development in more
detail.
Reading
Debugging Rust Applications with GDB by Esteban Borai
Walkthrough of debugging a Rust program with GDB, from setting breakpoints and inspecting variables to navigating the call stack. Covers the basics well and includes screenshots of each step.
Debugging Rust with rust-lldb by Bob Matcuk
Covers the equivalent workflow using LLDB instead of GDB: launching rust-lldb, setting breakpoints, stepping through code, and inspecting variables. Useful if you are on macOS or prefer LLDB’s interface.
Debugging Support in rustc by Rust Compiler Team
Documents how the Rust compiler generates debug information, including DWARF support, platform-specific handling, and how type layouts are communicated to debuggers. Reference material for understanding what rust-gdb and rust-lldb actually see.
Using Rust with rr by Tyler Neely
Guide to using rr for record-and-replay debugging with Rust. Covers recording test runs, setting breakpoints and watchpoints during replay, and Rust-specific tips like configuring GDB with a pretty-printer for standard library types.
Road to TurboWish Part 3: Design by Felix S. Klock II
Felix describes the design of a tool for debugging asynchronous applications, exploring how to surface task-level information to developers. This design work informed what eventually became Tokio Console.
Examples
In this chapter, we will look at some example Rust projects and walk through how they are laid out and what tooling they use.
Conclusion
Rust is an exciting programming language. The language is unique in that it shifts responsibility for certain correctness principles, such as memory safety, from the developers and maintainers to the compiler. In the long term, it is cheaper and more scalable to have this correctness validated by a machine than by a programmer.
The same principle applies to the tooling which the Rust ecosystem has come up with. The tools discussed in this book allow one to shift responsibility of certain project-level correctness principles from the developers and maintainers of Rust projects to machines. These principles include correct versioning, correct code, comprehensively tested code, correct use of features, and many more.
In my opinion, software development can only be sustainable and scale if we can automate the boring parts. I hope that this book does a good job of teaching you just how to do that, in the context of working on Rust software projects.
Contributing
If you want to give something back to the Rust community, consider getting involved:
- Helping with the Rust compiler, the RFC process, or joining a working group.
- Contributing to the crate ecosystem: features, bug fixes, or improving documentation.
- Sharing what you learn through blog posts, guides, or tutorials.
Creative Commons Attribution-NonCommercial-ShareAlike 4.0 International
This license applies to the book content, that is to say the text, diagrams and code examples. Other parts, including the fonts used by this book, the articles referenced and archived, are covered by their respective licenses.
Creative Commons Corporation (“Creative Commons”) is not a law firm and does not provide legal services or legal advice. Distribution of Creative Commons public licenses does not create a lawyer-client or other relationship. Creative Commons makes its licenses and related information available on an “as-is” basis. Creative Commons gives no warranties regarding its licenses, any material licensed under their terms and conditions, or any related information. Creative Commons disclaims all liability for damages resulting from their use to the fullest extent possible.
Using Creative Commons Public Licenses
Creative Commons public licenses provide a standard set of terms and conditions that creators and other rights holders may use to share original works of authorship and other material subject to copyright and certain other rights specified in the public license below. The following considerations are for informational purposes only, are not exhaustive, and do not form part of our licenses.
-
Considerations for licensors: Our public licenses are intended for use by those authorized to give the public permission to use material in ways otherwise restricted by copyright and certain other rights. Our licenses are irrevocable. Licensors should read and understand the terms and conditions of the license they choose before applying it. Licensors should also secure all rights necessary before applying our licenses so that the public can reuse the material as expected. Licensors should clearly mark any material not subject to the license. This includes other CC-licensed material, or material used under an exception or limitation to copyright. More considerations for licensors.
-
Considerations for the public: By using one of our public licenses, a licensor grants the public permission to use the licensed material under specified terms and conditions. If the licensor’s permission is not necessary for any reason–for example, because of any applicable exception or limitation to copyright–then that use is not regulated by the license. Our licenses grant only permissions under copyright and certain other rights that a licensor has authority to grant. Use of the licensed material may still be restricted for other reasons, including because others have copyright or other rights in the material. A licensor may make special requests, such as asking that all changes be marked or described. Although not required by our licenses, you are encouraged to respect those requests where reasonable. More considerations for the public.
Creative Commons Attribution-NonCommercial-ShareAlike 4.0 International Public License
By exercising the Licensed Rights (defined below), You accept and agree to be bound by the terms and conditions of this Creative Commons Attribution-NonCommercial-ShareAlike 4.0 International Public License (“Public License”). To the extent this Public License may be interpreted as a contract, You are granted the Licensed Rights in consideration of Your acceptance of these terms and conditions, and the Licensor grants You such rights in consideration of benefits the Licensor receives from making the Licensed Material available under these terms and conditions.
Section 1 – Definitions.
a. Adapted Material means material subject to Copyright and Similar Rights that is derived from or based upon the Licensed Material and in which the Licensed Material is translated, altered, arranged, transformed, or otherwise modified in a manner requiring permission under the Copyright and Similar Rights held by the Licensor. For purposes of this Public License, where the Licensed Material is a musical work, performance, or sound recording, Adapted Material is always produced where the Licensed Material is synched in timed relation with a moving image.
b. Adapter’s License means the license You apply to Your Copyright and Similar Rights in Your contributions to Adapted Material in accordance with the terms and conditions of this Public License.
c. BY-NC-SA Compatible License means a license listed at creativecommons.org/compatiblelicenses, approved by Creative Commons as essentially the equivalent of this Public License.
d. Copyright and Similar Rights means copyright and/or similar rights closely related to copyright including, without limitation, performance, broadcast, sound recording, and Sui Generis Database Rights, without regard to how the rights are labeled or categorized. For purposes of this Public License, the rights specified in Section 2(b)(1)-(2) are not Copyright and Similar Rights.
e. Effective Technological Measures means those measures that, in the absence of proper authority, may not be circumvented under laws fulfilling obligations under Article 11 of the WIPO Copyright Treaty adopted on December 20, 1996, and/or similar international agreements.
f. Exceptions and Limitations means fair use, fair dealing, and/or any other exception or limitation to Copyright and Similar Rights that applies to Your use of the Licensed Material.
g. License Elements means the license attributes listed in the name of a Creative Commons Public License. The License Elements of this Public License are Attribution, NonCommercial, and ShareAlike.
h. Licensed Material means the artistic or literary work, database, or other material to which the Licensor applied this Public License.
i. Licensed Rights means the rights granted to You subject to the terms and conditions of this Public License, which are limited to all Copyright and Similar Rights that apply to Your use of the Licensed Material and that the Licensor has authority to license.
j. Licensor means the individual(s) or entity(ies) granting rights under this Public License.
k. NonCommercial means not primarily intended for or directed towards commercial advantage or monetary compensation. For purposes of this Public License, the exchange of the Licensed Material for other material subject to Copyright and Similar Rights by digital file-sharing or similar means is NonCommercial provided there is no payment of monetary compensation in connection with the exchange.
l. Share means to provide material to the public by any means or process that requires permission under the Licensed Rights, such as reproduction, public display, public performance, distribution, dissemination, communication, or importation, and to make material available to the public including in ways that members of the public may access the material from a place and at a time individually chosen by them.
m. Sui Generis Database Rights means rights other than copyright resulting from Directive 96/9/EC of the European Parliament and of the Council of 11 March 1996 on the legal protection of databases, as amended and/or succeeded, as well as other essentially equivalent rights anywhere in the world.
n. You means the individual or entity exercising the Licensed Rights under this Public License. Your has a corresponding meaning.
Section 2 – Scope.
a. License grant.
-
Subject to the terms and conditions of this Public License, the Licensor hereby grants You a worldwide, royalty-free, non-sublicensable, non-exclusive, irrevocable license to exercise the Licensed Rights in the Licensed Material to:
A. reproduce and Share the Licensed Material, in whole or in part, for NonCommercial purposes only; and
B. produce, reproduce, and Share Adapted Material for NonCommercial purposes only.
-
Exceptions and Limitations. For the avoidance of doubt, where Exceptions and Limitations apply to Your use, this Public License does not apply, and You do not need to comply with its terms and conditions.
-
Term. The term of this Public License is specified in Section 6(a).
-
Media and formats; technical modifications allowed. The Licensor authorizes You to exercise the Licensed Rights in all media and formats whether now known or hereafter created, and to make technical modifications necessary to do so. The Licensor waives and/or agrees not to assert any right or authority to forbid You from making technical modifications necessary to exercise the Licensed Rights, including technical modifications necessary to circumvent Effective Technological Measures. For purposes of this Public License, simply making modifications authorized by this Section 2(a)(4) never produces Adapted Material.
-
Downstream recipients.
A. Offer from the Licensor – Licensed Material. Every recipient of the Licensed Material automatically receives an offer from the Licensor to exercise the Licensed Rights under the terms and conditions of this Public License.
B. Additional offer from the Licensor – Adapted Material. Every recipient of Adapted Material from You automatically receives an offer from the Licensor to exercise the Licensed Rights in the Adapted Material under the conditions of the Adapter’s License You apply.
C. No downstream restrictions. You may not offer or impose any additional or different terms or conditions on, or apply any Effective Technological Measures to, the Licensed Material if doing so restricts exercise of the Licensed Rights by any recipient of the Licensed Material.
-
No endorsement. Nothing in this Public License constitutes or may be construed as permission to assert or imply that You are, or that Your use of the Licensed Material is, connected with, or sponsored, endorsed, or granted official status by, the Licensor or others designated to receive attribution as provided in Section 3(a)(1)(A)(i).
b. Other rights.
-
Moral rights, such as the right of integrity, are not licensed under this Public License, nor are publicity, privacy, and/or other similar personality rights; however, to the extent possible, the Licensor waives and/or agrees not to assert any such rights held by the Licensor to the limited extent necessary to allow You to exercise the Licensed Rights, but not otherwise.
-
Patent and trademark rights are not licensed under this Public License.
-
To the extent possible, the Licensor waives any right to collect royalties from You for the exercise of the Licensed Rights, whether directly or through a collecting society under any voluntary or waivable statutory or compulsory licensing scheme. In all other cases the Licensor expressly reserves any right to collect such royalties, including when the Licensed Material is used other than for NonCommercial purposes.
Section 3 – License Conditions.
Your exercise of the Licensed Rights is expressly made subject to the following conditions.
a. Attribution.
-
If You Share the Licensed Material (including in modified form), You must:
A. retain the following if it is supplied by the Licensor with the Licensed Material:
i. identification of the creator(s) of the Licensed Material and any others designated to receive attribution, in any reasonable manner requested by the Licensor (including by pseudonym if designated);
ii. a copyright notice;
iii. a notice that refers to this Public License;
iv. a notice that refers to the disclaimer of warranties;
v. a URI or hyperlink to the Licensed Material to the extent reasonably practicable;
B. indicate if You modified the Licensed Material and retain an indication of any previous modifications; and
C. indicate the Licensed Material is licensed under this Public License, and include the text of, or the URI or hyperlink to, this Public License.
-
You may satisfy the conditions in Section 3(a)(1) in any reasonable manner based on the medium, means, and context in which You Share the Licensed Material. For example, it may be reasonable to satisfy the conditions by providing a URI or hyperlink to a resource that includes the required information.
-
If requested by the Licensor, You must remove any of the information required by Section 3(a)(1)(A) to the extent reasonably practicable.
b. ShareAlike.
In addition to the conditions in Section 3(a), if You Share Adapted Material You produce, the following conditions also apply.
-
The Adapter’s License You apply must be a Creative Commons license with the same License Elements, this version or later, or a BY-NC-SA Compatible License.
-
You must include the text of, or the URI or hyperlink to, the Adapter’s License You apply. You may satisfy this condition in any reasonable manner based on the medium, means, and context in which You Share Adapted Material.
-
You may not offer or impose any additional or different terms or conditions on, or apply any Effective Technological Measures to, Adapted Material that restrict exercise of the rights granted under the Adapter’s License You apply.
Section 4 – Sui Generis Database Rights.
Where the Licensed Rights include Sui Generis Database Rights that apply to Your use of the Licensed Material:
a. for the avoidance of doubt, Section 2(a)(1) grants You the right to extract, reuse, reproduce, and Share all or a substantial portion of the contents of the database for NonCommercial purposes only;
b. if You include all or a substantial portion of the database contents in a database in which You have Sui Generis Database Rights, then the database in which You have Sui Generis Database Rights (but not its individual contents) is Adapted Material, including for purposes of Section 3(b); and
c. You must comply with the conditions in Section 3(a) if You Share all or a substantial portion of the contents of the database.
For the avoidance of doubt, this Section 4 supplements and does not replace Your obligations under this Public License where the Licensed Rights include other Copyright and Similar Rights.
Section 5 – Disclaimer of Warranties and Limitation of Liability.
a. Unless otherwise separately undertaken by the Licensor, to the extent possible, the Licensor offers the Licensed Material as-is and as-available, and makes no representations or warranties of any kind concerning the Licensed Material, whether express, implied, statutory, or other. This includes, without limitation, warranties of title, merchantability, fitness for a particular purpose, non-infringement, absence of latent or other defects, accuracy, or the presence or absence of errors, whether or not known or discoverable. Where disclaimers of warranties are not allowed in full or in part, this disclaimer may not apply to You.
b. To the extent possible, in no event will the Licensor be liable to You on any legal theory (including, without limitation, negligence) or otherwise for any direct, special, indirect, incidental, consequential, punitive, exemplary, or other losses, costs, expenses, or damages arising out of this Public License or use of the Licensed Material, even if the Licensor has been advised of the possibility of such losses, costs, expenses, or damages. Where a limitation of liability is not allowed in full or in part, this limitation may not apply to You.
c. The disclaimer of warranties and limitation of liability provided above shall be interpreted in a manner that, to the extent possible, most closely approximates an absolute disclaimer and waiver of all liability.
Section 6 – Term and Termination.
a. This Public License applies for the term of the Copyright and Similar Rights licensed here. However, if You fail to comply with this Public License, then Your rights under this Public License terminate automatically.
b. Where Your right to use the Licensed Material has terminated under Section 6(a), it reinstates:
-
automatically as of the date the violation is cured, provided it is cured within 30 days of Your discovery of the violation; or
-
upon express reinstatement by the Licensor.
For the avoidance of doubt, this Section 6(b) does not affect any right the Licensor may have to seek remedies for Your violations of this Public License.
c. For the avoidance of doubt, the Licensor may also offer the Licensed Material under separate terms or conditions or stop distributing the Licensed Material at any time; however, doing so will not terminate this Public License.
d. Sections 1, 5, 6, 7, and 8 survive termination of this Public License.
Section 7 – Other Terms and Conditions.
a. The Licensor shall not be bound by any additional or different terms or conditions communicated by You unless expressly agreed.
b. Any arrangements, understandings, or agreements regarding the Licensed Material not stated herein are separate from and independent of the terms and conditions of this Public License.
Section 8 – Interpretation.
a. For the avoidance of doubt, this Public License does not, and shall not be interpreted to, reduce, limit, restrict, or impose conditions on any use of the Licensed Material that could lawfully be made without permission under this Public License.
b. To the extent possible, if any provision of this Public License is deemed unenforceable, it shall be automatically reformed to the minimum extent necessary to make it enforceable. If the provision cannot be reformed, it shall be severed from this Public License without affecting the enforceability of the remaining terms and conditions.
c. No term or condition of this Public License will be waived and no failure to comply consented to unless expressly agreed to by the Licensor.
d. Nothing in this Public License constitutes or may be interpreted as a limitation upon, or waiver of, any privileges and immunities that apply to the Licensor or You, including from the legal processes of any jurisdiction or authority.
Creative Commons is not a party to its public licenses. Notwithstanding, Creative Commons may elect to apply one of its public licenses to material it publishes and in those instances will be considered the “Licensor.” Except for the limited purpose of indicating that material is shared under a Creative Commons public license or as otherwise permitted by the Creative Commons policies published at creativecommons.org/policies, Creative Commons does not authorize the use of the trademark “Creative Commons” or any other trademark or logo of Creative Commons without its prior written consent including, without limitation, in connection with any unauthorized modifications to any of its public licenses or any other arrangements, understandings, or agreements concerning use of licensed material. For the avoidance of doubt, this paragraph does not form part of the public licenses.
Creative Commons may be contacted at creativecommons.org
Privacy
This book is statically hosted by GitLab Pages, therefore their privacy policy applies.
To get some insight into how many people use the book, and which pages they visit, this book uses privacy-perserving analytics provided by Plausible. They use servers located in the EU, are GRPD-compliant and collects only anonymized information (no persistent tracking, no cookies). Because I believe in data transparency, I am making this data available here.
By using this website, you agree to these data policies. If you do not like them, feel free to use an adblocker (such as uBlock Origin, which will block Plausible. You may also print and use a PDF version of this book, or clone the repository and build and view the book locally.